This site is supported by our readers. We may earn a commission, at no cost to you, if you purchase through links.
Each stitch serves a specific purpose—think of them as tools in your sewing toolkit. Start with proper needle threading and maintain consistent tension; it’s the difference between amateur work and professional results.
Your fabric choice matters too: cotton forgives mistakes while silk demands perfection. These foundational stitches appear in everything from garment construction to delicate embroidery, making them invaluable skills that’ll serve you across countless projects.
Table Of Contents
Key Takeaways
- Master four foundational stitches first – running stitch, backstitch, ladder stitch, and buttonhole stitch – since they’ll handle most sewing projects and repairs you’ll encounter.
- Choose your tools strategically by matching needle size to fabric weight, using quality thread that complements your material, and conditioning thread with beeswax to prevent tangling and breakage.
- Control your tension and stitch consistency throughout each project – uneven pressure creates puckered fabric while maintaining steady rhythm produces professional-looking results.
- Press your finished seams properly with appropriate iron temperature for your fabric type, since this final step transforms amateur hand-sewn work into polished, professional-quality pieces.
Hand Sewing Basics
You’ll start your hand sewing journey with four essential stitches that form the foundation of all needlework.
These basic techniques – running stitch, even backstitch, ladder stitch, and buttonhole stitch – will handle most mending tasks and prepare you for advanced projects, utilizing the foundation of all needlework.
Running Stitch Tutorial
The running stitch serves as sewing’s building block—simple forward stitches that’ll carry you through countless projects.
Master the running stitch—your gateway to countless hand-sewn projects and sewing success.
Master this fundamental technique by controlling your stitch length and maintaining steady sewing speed for professional results.
- Thread your needle with 30 inches of thread, choosing thread color that matches your fabric choice
- Create even spacing by keeping stitches 1/8 to 1/4 inch apart for consistent appearance
- Maintain tension control by pulling thread snug but not tight to prevent fabric puckering
- Work right to left (or left to right if left-handed) in smooth, rhythmic motions
- Secure your work with small backstitches at start and finish points
This hand stitch guides beginners through basic hand sewing while building confidence for advanced sewing tutorials and complex sewing stitches.
Even Backstitch Guide
Mastering the even backstitch transforms your hand sewing from basic to professional-grade strength.
This powerhouse stitch creates continuous lines that rival machine stitching, making it perfect for reinforcing seams and construction work.
You’ll thread your needle, then work backward to create overlapping stitches.
| Backstitch Variations | Stitch Length | Best Fabric Choice |
|---|---|---|
| Even backstitch | 1/8 inch uniform | Medium-weight cottons |
| Half backstitch | 1/16 inch forward | Delicate silks, chiffons |
| Pick stitch | 1-2 threads back | Tailoring, wool suiting |
Start by bringing your needle up through the fabric, then insert it one stitch length behind your starting point.
Bring the needle up one stitch length ahead of your starting point.
Continue this rhythm: back one, forward two.
Tension control keeps your stitches flat against the fabric without puckering.
These sewing tips guarantee your hand stitch guides produce consistently strong seams that won’t fail under stress.
Ladder Stitch Technique
The ladder stitch creates an invisible seam closure that’s perfect for fabric mending and edge finishing.
You’ll hand sew by alternating tiny stitches between two fabric edges, creating a ladder-like pattern.
This blind stitch technique provides excellent stitch camouflage for invisible hems.
Keep your hand stitching small and even for the best results in your sewing techniques.
Buttonhole Stitch Method
The buttonhole stitch creates sturdy, reinforced edges that won’t fray with use.
You’ll work from left to right, inserting your needle from the fabric’s front side. Pull the thread under the needle’s point before drawing it through—this forms the signature knot that strengthens each stitch.
Keep your stitches close together for maximum durability. This hand sewing technique excels at reinforcing edges and fabric binding applications.
Essential Hand Stitches
You’ll master four essential decorative and functional stitches that form the foundation of hand embroidery and finishing work.
These techniques will give you the skills to create beautiful edging, prevent fraying, and add decorative elements to any sewing project.
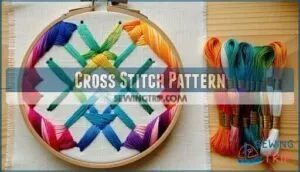
Cross Stitch Pattern
Cross stitch creates decorative X-shaped embroidery stitches on gridded fabric like Aida cloth.
You’ll work from pattern charts where each square represents one stitch. Choose your fabric selection based on stitch count – 14-count works well for beginners.
Thread types include stranded cotton floss, typically using two strands. Pattern design determines color choice and embroidery designs complexity for your hand stitching project.
To master cross stitch, understanding cross stitch basics is essential for a strong foundation, and it’s crucial to have a good grasp of cross stitch and embroidery designs to complete your project successfully, which involves hand stitching.
Chain Stitch Tutorial
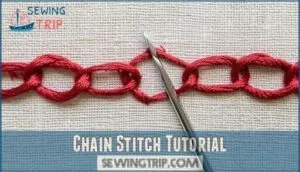
Chain stitch creates continuous loops that flow like cursive writing across your fabric.
Start by bringing your needle up through the fabric, then insert it back down at the same spot while keeping your thread loose.
Pull the needle up a stitch length away, catching the loop underneath, and maintain consistent thread tension for even results.
This versatile hand sewing technique works beautifully on most fabric choices for decorative outlining.
Overcast Stitch Guide
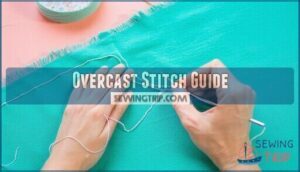
Overcast stitch creates a barrier against fraying edges on raw fabric. You’ll wrap thread diagonally over the fabric edge, securing each pass before moving forward.
This hand sewing technique provides essential fray prevention and seam reinforcement. Understanding the seam finishing techniques is vital for mastering the overcast stitch.
- Position your needle at a 45-degree angle through the fabric edge
- Maintain consistent stitch tension while wrapping thread over the raw edge
- Space stitches evenly for uniform fabric stabilization and edge finishing
Blanket Stitch Technique
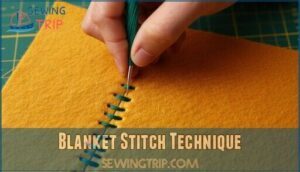
Blanket stitch creates sturdy fabric edging with decorative appeal.
You’ll work from left to right, bringing the needle up through the fabric edge. Insert it straight down about 1/4 inch away, keeping the thread under the needle before pulling through.
This hand sewing technique offers excellent seam reinforcement while adding visual interest. Practice consistent spacing for professional results in your embellishment techniques and edge finishing projects.
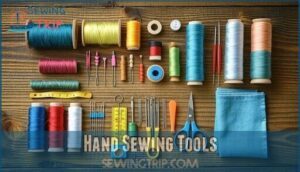
Hand Sewing Tools
You’ll need the right tools to make hand sewing successful and enjoyable. The key is choosing quality needles, thread, and accessories that match your fabric and project requirements.
Needle Selection Guide
Choose your needle based on fabric weight and stitch type.
Sharps work for general hand sewing across most fabrics.
Betweens suit quilting with their short length for precise stitches.
Use ballpoint needles for knits to prevent snags.
Leather needles have triangular points for tough materials.
Match needle size to thread thickness—finer needles for delicate work, larger for heavy fabrics.
For best results, consider the needle size guide when selecting the right needle for your project.
Thread Choice Tips
Your thread selection directly impacts your finished project’s appearance and durability. Match thread colors to fabric, choosing darker shades when exact matches aren’t available. Consider fiber compatibility for best results.
Here are key thread selection factors:
- Thread Colors: Match fabric or go one shade darker for invisible stitches
- Fiber Types: Use cotton for natural fabrics, polyester for synthetics and stretch materials
- Yarn Weights: Select thread weight appropriate to fabric thickness and needle size
- Dye Lots: Buy extra thread from same dye lot to avoid color variations
- Thread Brands: Quality brands like Gutermann and Coats reduce breakage and tangling
Cotton and polyester dominate hand sewing projects. Cotton works beautifully with natural fabrics, while polyester’s strength suits synthetic materials. Embroidery floss offers decorative options with its six-strand construction. A needle threader helps when working with multiple sewing threads.
Understanding thread selection basics is essential for achieving professional-looking results in various sewing projects.
Thimble Usage Benefits
Most thimbles protect your pushing finger from needle injuries while improving stitch accuracy during hand sewing.
You’ll maintain better hand comfort and sewing efficiency when using sewing needles for extended periods. The metal or leather barrier prevents soreness and lets you apply consistent pressure.
This finger protection becomes essential when working detailed hand stitches requiring precision control. Understanding proper thimble materials, such as those found in sewing thimbles sewing supplies, can enhance your overall sewing experience with better hand comfort.
Beeswax Thread Conditioner
Protection is everything when you’re hand stitching.
Beeswax Thread Protection strengthens sewing threads and prevents fraying during hand sewing.
Run your thread through the wax before threading sewing needles.
Wax Benefits include Stitch Smoothing and Tangle Reduction.
Your hand stitching becomes effortless as the thread conditioner creates a protective barrier.
Fray Prevention saves time and frustration during detailed projects.
Using a beeswax thread conditioner is essential for achieving professional results.
Advanced Hand Stitches
You’ve mastered the basics, now it’s time to tackle the stitches that separate beginners from skilled sewers.
These advanced techniques will give you the precision and control needed for professional-looking garments and repairs.
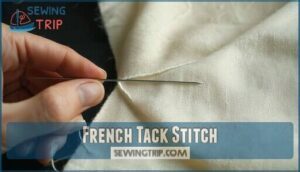
French Tack Stitch
French tack hand-stitching creates the perfect connection between lining and outer fabric layers.
You’ll love this invisible tack technique for its flexibility—it moves with the garment while keeping everything aligned.
Start your French tack by anchoring thread in the lining, then create loose connecting stitches between layers.
This tacking technique prevents bunching while allowing natural drape in your hand sew projects.
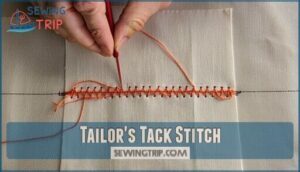
Tailor’s Tack Stitch
Pattern marking becomes precise when you master the tailors tack stitch. This hand sew technique transfers markings from patterns to fabric layers perfectly. You’ll create loose loops that mark key points without damaging delicate materials.
Essential Tailors Tack Steps:
- Double thread preparation – Use contrasting thread color for clear fabric marking visibility and easy tack removal later
- Loop formation technique – Create 1/2 inch loops through pattern holes, maintaining consistent thread control for stitch accuracy
- Layer separation method – Cut loops between fabric pieces, leaving thread tails as permanent markers for precise stitch variation placement
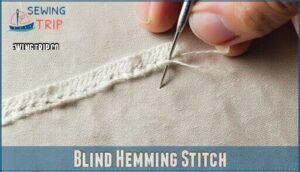
Blind Hemming Stitch
Blind hemming stitch creates invisible hems by catching just a few threads of the main fabric.
You’ll work from right to left, taking tiny bites through the garment while keeping most stitching in the hem fold.
This hand stitching technique works best on medium-weight fabric types with proper hem depth.
Secure threads carefully and maintain consistent stitch spacing for professional invisible stitches.
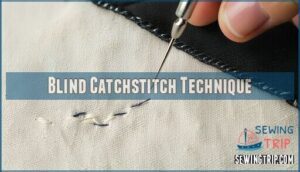
Blind Catchstitch Technique
Master this crisscross hemming technique for invisible stitches on front-facing fabrics.
You’ll alternate diagonal stitches between fabric facing and garment, creating a zigzag pattern.
This blind catchstitch secures hems without showing on the right side, perfect for hemming technique when you need invisible hand stitching that won’t pucker.
The crisscross motion distributes tension evenly across your hemming stitches for professional hand sewing results.
Hand Sewing Applications
Now you’ll master hand stitching beyond basic techniques and apply your skills to real projects.
These applications transform simple stitches into professional results for garments, decorative work, quilts, and upholstery repairs, utilizing real projects.
Garment Construction Tips
Hand sewing transforms garment construction into precise, controlled craftsmanship. You’ll achieve professional results when combining traditional sewing techniques with proper fabric cutting and pattern making fundamentals.
- Seam Finishing: Use overcast stitches to prevent fraying on raw edges
- Fabric Cutting: Cut pieces with sharp scissors following grainlines exactly
- Garment Fitting: Pin-baste seams before permanent stitching for adjustments
- Sewing Notions: Keep basic supplies organized – needles, thread, measuring tools
- Pattern Making: Transfer markings accurately using tailor’s tacks for precision
Hand stitching gives you complete control over garment fitting and seam placement that machines can’t match.
Embroidery Techniques
Every embroidery project starts with good fabric prep and the right embroidery threads.
Use an embroidery hoop for tension, then try basic stitch patterns like running stitch, backstitch, or chain stitch.
Needle techniques matter—choose a sharp needle for detail, and explore stitch variations for texture, which allows for hand embroidery to let you control every detail.
Follow clear stitch tutorials and experiment confidently.
Quilting Methods
Quilting transforms fabric scraps into heirloom treasures through time-honored hand stitching techniques.
You’ll master essential methods that create stunning quilt patterns while building lasting skills.
Essential quilting methods include:
- Running stitch – Creates even rows for basic quilting lines
- Rocking stitch – Produces multiple stitches per needle motion
- Stab stitch – Perfect for thick batting layers
- Echo quilting – Follows block construction outlines beautifully
- Cross-hatch patterns – Add geometric texture across fabric selection
Choose quilting threads that complement your design while ensuring proper binding techniques secure finished edges.
Understanding hand quilting essentials is vital for achieving professional-looking results.
Upholstery Stitching Guide
Upholstery projects demand heavy duty materials and specialized hand sewing techniques for lasting results.
You’ll need an upholstery needle to pierce thick fabrics and upholstery threads for stitch reinforcement. Focus on fabric repair using blind hem stitch for invisible seams and fabric binding for clean edges.
| Stitch Type | Best Application |
|---|---|
| Running Stitch | Basic seam construction |
| Backstitch | Heavy fabric joining |
| Ladder Stitch | Invisible fabric repair |
| Buttonhole Stitch | Edge reinforcement |
These hand stitches guarantee sewing for durability in furniture projects.
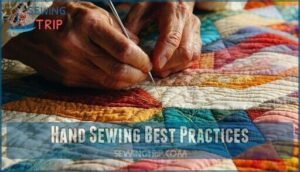
Hand Sewing Best Practices
You’ll achieve professional-looking hand-sewn projects by mastering four essential practices that separate beginners from experienced sewers.
These techniques prevent common problems like puckered seams, broken threads, and uneven stitching that can ruin your hard work, by ensuring complete concepts are applied correctly.
Maintaining Even Tension
Perfect thread control makes the difference between professional-looking hand sewing and amateur attempts.
You’ll keep fabric flat by maintaining consistent pull pressure throughout each stitch. Your even backstitch and half back stitch require steady rhythm.
Thread tension tips for seam consistency:
- Pull gently – yanking creates puckered fabric that screams "homemade"
- Check stitch length – uneven spacing ruins your fabric stretch recovery
- Practice rhythm – consistent motion prevents blind hem stitch disasters
Preventing Thread Breakage
Thread breakage ruins hand sewing projects, but you can prevent it easily.
Choose high-quality thread and match your needle size to thread thickness for smooth stitching. Keep stitch length consistent and maintain gentle tension control throughout your work.
Secure knots properly at start and finish. Condition thread with beeswax to reduce friction and improve sewing durability and precision.
Using Embroidery Hoops
When working with delicate fabrics or intricate hand stitches, embroidery hoops become your best friend for maintaining proper fabric tension. Choose hoop sizes that accommodate your project without excessive stretching.
Wooden hoop materials offer superior grip compared to plastic alternatives. Position your fabric carefully before securing, ensuring even tension across the surface.
Tighten gradually to prevent distortion. After completing your needlework, gently remove the hoop and smooth any creases with your fingers or a cool iron.
For design precision, consider iron-on Frixion pens. This step ensures that your work is both visually appealing and professionally finished with minimal effort.
Pressing Seams for Finish
Your hand stitches deserve the finishing touch that transforms amateur work into professional results.
Pressing seams with proper Iron Temperature and Pressing Techniques creates Fabric Flattening that enhances Seam Appearance dramatically. This essential step elevates your blind hem and vertical hem stitch work to achieve a Professional Finish.
- Set iron to fabric-appropriate temperature – cotton needs high heat, synthetics require low settings
- Press seams flat first – flatten the stitching line before opening or pressing to one side
- Use pressing cloth on delicate fabrics – prevents shine and protects from direct heat damage
- Press, don’t iron – lift and lower the iron instead of sliding to avoid stretching
- Allow cooling time – let pressed seams cool completely before handling for permanent results
Frequently Asked Questions (FAQs)
What hand stitches do you need to learn to sew?
Start with running stitch—it’s your foundation for basic seams and repairs.
Master backstitch for strength, ladder stitch for invisible mending, and buttonhole stitch for durability.
These four essential stitches handle most sewing needs.
What is the most basic stitch in hand sewing?
Running stitch is the most basic hand stitch you’ll master first.
It’s simply weaving your needle in and out of fabric with small, even stitches.
Perfect for basting, mending, and basic seaming work.
What is decorative hand stitching?
Decorative hand stitching transforms plain fabric into artful designs using embellishments like cross-stitch, chain stitch, and blanket stitch.
You’ll create patterns, textures, and visual interest that personalizes your projects beyond basic construction, utilizing techniques like cross-stitch to add unique touches.
How do you use a hand stitch?
Ready to master stitching like a seasoned seamsmith? Thread your needle with 30 inches, knot the end, and pierce fabric from underneath.
Pull thread through, maintaining even tension, then repeat in consistent intervals for your chosen stitch pattern.
Which hand sewing stitches should you master?
You’ll want to master running stitch for basic seams, backstitch for strong repairs, ladder stitch for invisible mending, and buttonhole stitch for secure edges and closures.
What is a hand stitch?
Like threads weaving through fabric’s soul, a hand stitch connects pieces using needle and thread pulled by your fingers. You’ll create loops, crosses, or straight lines manually without machines.
What are the 10 basic stitches?
You’ll master these ten essential hand stitches: running stitch, backstitch, ladder stitch, buttonhole stitch, overcast stitch, blanket stitch, chain stitch, cross-stitch, whip stitch, and catch stitch for any project.
What is the strongest stitch pattern by hand?
The even backstitch stands as your strongest hand-sewing ally. It creates continuous, overlapping stitches that mimic machine strength, making it perfect for reinforcing seams and heavy-duty repairs.
How do you fix skipped stitches while hand sewing?
Like threading a needle with shaky hands, skipped stitches frustrate even patient sewers.
Check your needle’s sharpness and match it to your fabric weight.
Use proper thread tension—not too tight, not too loose.
Keep consistent stitch spacing and pressure.
What causes thread to tangle during hand stitching?
Thread tangles when you pull too much through fabric, use thread that’s too long, or don’t secure knots properly.
Keep thread under 30 inches, maintain steady tension, and use beeswax to prevent twisting.
Conclusion
Sarah spent hours perfecting a vintage dress hem by hand, but her uneven stitches made it look homemade rather than heirloom-quality.
You’ve now mastered these hand stitch guides that would’ve saved her countless frustration. From running stitches to French tacks, you possess techniques that separate amateur sewers from skilled craftspeople.
Practice these methods regularly, and you’ll create beautiful, durable pieces that stand the test of time. Your newfound skills will transform every sewing project, making each one a potential masterpiece.
- https://diyprojects.com/sewing-hacks/
- https://www.fatquartershop.com/cross-stitch/cross-stitch-cloth
- https://hannahhandmakes.com/blogs/blog/the-top-6-things-needed-for-cross-stitch/
- https://www.reddit.com/r/CrossStitch/comments/t5sfvf/chat_how_do_i_start_learning_cross_stitch/
- https://www.thecrossstitchguild.com/cross-stitch-basics/cross-stitch-basics.aspx

