This site is supported by our readers. We may earn a commission, at no cost to you, if you purchase through links.
 Ever wondered how to tame those pesky frayed edges on your sewing projects?
Meet the overcast stitch, your new secret weapon!
This versatile technique is like a bodyguard for your fabric edges, preventing fraying and giving your work a polished, professional look.
Whether you’re using a sewing machine or going old-school with hand-stitching, the overcast stitch has got you covered.
It’s perfect for everything from delicate silks to rugged denim, and it’s a lifesaver if you don’t have a fancy serger.
Ready to level up your sewing game?
Stick around, because we’re about to unravel the mysteries of this game-changing stitch and show you how to wield it like a pro.
Table Of Contents
Key Takeaways
- You’ll love the overcast stitch for taming fabric edges—it prevents fraying and gives your projects a polished look, like having a mini-serger right at your fingertips.
- No need for a fancy serger. This versatile stitch works wonders on both delicate silks and rugged denim, making your clothes look professionally finished while keeping those pesky loose threads at bay.
- Discover options galore—your sewing machine might have a variety of overcast stitches, while hand-sewing gives you a cozy, homemade touch. Play around with different stitches to suit your fabric’s personality.
- Overcast stitches are more than just edge finishers; they’re time-savers. Perfect for combining seam stitching with neat edge finishes, letting you create stretchy, durable seams for knits or add a decorative flair to your latest craft project learn more about hand serging techniques.
Definition and Purpose of Overcast Stitch
You’ve probably seen those neat, tidy edges on professionally-made garments and wondered how to achieve them.
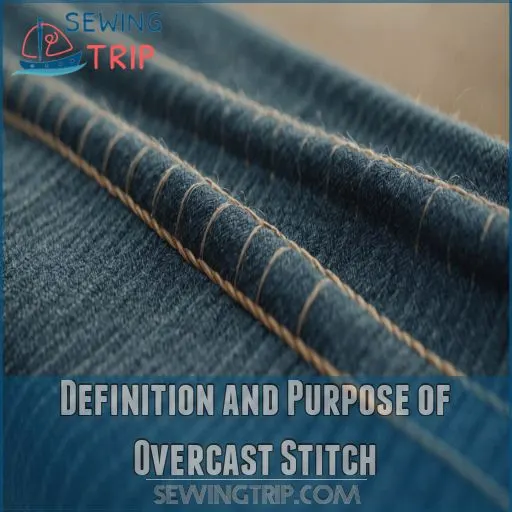
Enter the overcast stitch – your secret weapon for creating polished seams and preventing fabric fraying, whether you’re using a sewing machine or stitching by hand.
Versatile Edge-finishing Technique
You’ve got a secret weapon in your sewing arsenal: the overcast stitch.
It’s like a Swiss Army knife for fabric edges!
Whether you’re working with delicate silks or sturdy denim, this versatile technique has got you covered.
Use it to neaten seam allowances, create professional-looking finishes, or even as a serger alternative.
With an overcast stitch in your toolkit, you’ll be conquering fabric edges like a pro in no time.
Prevents Fabric Fraying
One of the primary purposes of an overcast stitch is to prevent fabric fraying.
It’s like giving your fabric edges a protective shield!
When you use this versatile technique, you’re basically sealing the raw edges of your material, keeping those pesky loose threads at bay.
Whether you’re working with delicate silks or sturdy cottons, an overcast stitch can be your secret weapon against unraveling edges.
Alternative to Serger for Seam Finishing
Don’t have a serger? No problem! The overcast stitch is your trusty sidekick for seam finishing. It’s like having a mini-serger right on your regular sewing machine.
With this versatile stitch, you’ll create professional-looking seams that rival those made by expensive sergers.
Whether you’re working with wovens or knits, the overcast stitch has got your back, keeping those edges neat and fray-free.
Neatens Seam Allowances and Project Edges
The overcast stitch is your fabric’s best friend for taming unruly edges.
It’s like giving your seam allowances and project edges a neat haircut, preventing fraying and creating a polished look.
Whether you’re working with delicate silks or sturdy denims, this versatile stitch adapts to various fabric weights.
For knit fabrics, it’s particularly handy, keeping those stretchy edges in check without compromising flexibility.
Professional-looking Finish for Various Fabrics
Beyond neatening edges, overcast stitches give your projects a polished, pro-level finish on various fabrics. You’ll love how this versatile technique transforms your creations:
- Elevates homemade garments to boutique-quality pieces
- Turns simple pillowcases into luxurious, hotel-worthy linens
- Makes your DIY curtains look like they cost a fortune
Overcast stitches are your secret weapon for achieving that coveted "store-bought" look. It’s like giving your fabric a stylish haircut!
Whether you’re working with delicate silks or sturdy denims, overcast stitches are your secret weapon for achieving that coveted "store-bought" look. It’s like giving your fabric a stylish haircut!
Types of Overcast Stitches
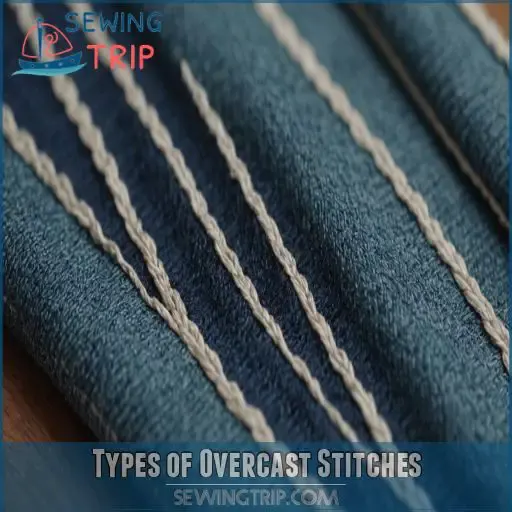
You might be surprised to learn that there’s more than one type of overcast stitch.
Whether you’re using a machine or sewing by hand, there’s an overcast stitch for every fabric and project you can imagine.
Machine-sewn Overcast Stitch Options
You’ve got the basics down, now let’s explore your sewing machine’s secret powers!
Most machines offer a smorgasbord of overcast stitch options.
From lightweight fabrics to heavy-duty materials, there’s a perfect stitch for every project.
Adjust the stitch width and density to suit your fabric, and don’t forget to play with tension settings.
Your machine might even have specialized feet to make overcasting a breeze!
Hand-sewn Overcast Stitch Techniques
Needle and thread at the ready? Let’s get started with hand-sewn overcast stitch techniques! You’ll love how versatile this stitch is.
Start by folding your fabric edge twice, then bring your needle from back to front. Cast over the fold at a slight angle, spacing stitches about 1/4 inch apart.
For an invisible finish, use matching thread. It’s like giving your fabric a cozy hug!
Stitches for Non-stretch Fabrics
For non-stretch fabrics, you’ve got a variety of overcast stitches at your disposal.
The key is matching the stitch to your fabric’s weight.
For lightweight cottons, a narrow stitch width works wonders.
Medium-weight fabrics? Go for a slightly wider stitch.
Don’t forget to adjust your thread tension and seam allowance accordingly.
After stitching, give those edges a good press for a polished finish.
Stitches for Stretch and Knit Fabrics
Stretch fabrics can be a handful, but fear not, check out this guide on hand-sewing stretch fabrics! Your sewing machine likely has a few tricks up its sleeve for handling these bouncy beauties.
Specialized overcast stitches for stretch and knit fabrics are designed to move with the material, preventing dreaded seam popping.
They’re like a yoga instructor for your fabric – flexible, supportive, and keeping everything in place.
No serger? No problem! These stitches have got you covered.
Overcast Binding Stitch for Bookbinding
You might think overcast stitches are just for fabric, but they’ve got a secret life in bookbinding too!
The overcast binding stitch is a real workhorse, stitching signatures together with a continuous over-under pattern.
It’s not for the faint of heart, though – this technique takes time and elbow grease.
But the result? A durable binding that’s perfect for flat or slightly curved spines.
Talk about a stitch in time!
How to Perform an Overcast Stitch
You’re about to learn the secret to flawless fabric edges and seams.
Whether you’re using a sewing machine or stitching by hand, mastering the overcast stitch is your ticket to professional-looking projects that’ll make your friends wonder if you’ve hired a tailor.
Selecting Appropriate Stitch and Thread
Now that you’ve got the lay of the land with overcast stitches, let’s zero in on picking the right stitch and thread.
It’s like choosing the perfect dance partner – you need a good match!
Consider your fabric type first. Light fabrics call for finer threads, while heavier materials need sturdier options.
Don’t forget to match your thread color to your fabric for that seamless look.
Preparing Fabric Edges
With your stitch and thread picked out, it’s time to prep those fabric edges.
Think of it as giving your fabric a quick haircut before its big debut.
Trim any frayed bits and make sure your raw edges are clean and even.
For delicate fabrics, consider a light pressing to tame any unruly fibers.
Using an Overcasting Foot on Sewing Machines
The overcasting foot is your secret weapon for flawless seams.
Snap it onto your machine and watch the magic happen.
This nifty attachment comes in various types, each designed for specific fabrics.
Adjust the foot to match your fabric’s thickness, and you’re golden.
Remember to clean it regularly for smooth sailing.
With practice, you’ll be whipping up professional-looking edges in no time.
Step-by-step Guide for Hand-sewn Overcast Stitch
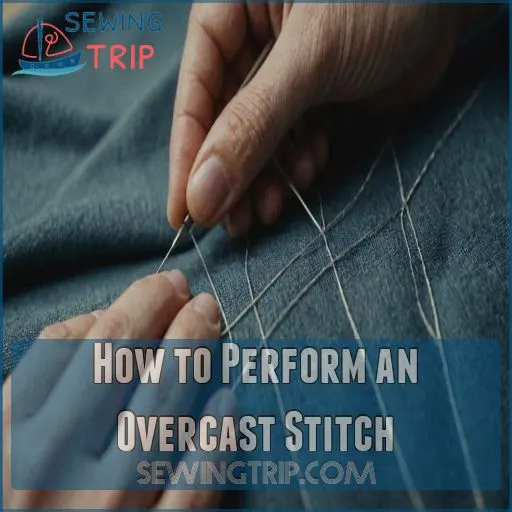
Ready to master the hand-sewn overcast stitch? Here’s your quick guide: Start by folding your fabric edge twice, tucking in those pesky raw edges. Thread your needle and bring it from back to front through the fold.
Now, here’s the fun part – take your needle over the folded hem and into it, casting at a slight angle. Keep stitching, spacing about 1/4 inch apart.
Voila! You’re overcasting like a pro.
Techniques for Different Fabric Types
Now that you’ve mastered hand-sewn overcast stitches, let’s tailor your technique to different fabrics.
For knits, use a stretchy overcast stitch to maintain elasticity.
Delicate fabrics call for a gentle touch and finer thread.
When tackling heavy fabrics, opt for a wider stitch and stronger thread.
Stretch fabrics love a zigzag overcast, while woven fabrics thrive with a standard overcast.
Benefits and Applications of Overcast Stitch
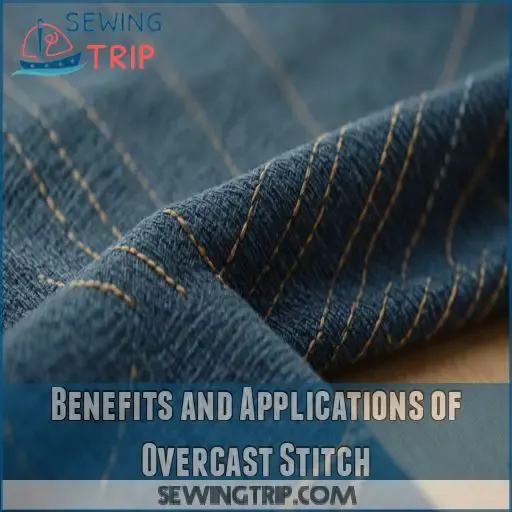
You might think the overcast stitch is just for finishing edges, but it’s so much more than that.
From creating stretchy seams to adding decorative flair, this versatile technique is your secret weapon for taking your sewing projects to the next level.
Seam Finishing and Edge Neatening
You’ve mastered the overcast stitch – it’s time to put it to work!
This versatile technique is your go-to for tidying up those pesky seam allowances and keeping fraying at bay.
Whether you’re working with delicate silks or sturdy denim, the overcast stitch has got your back.
It’s like giving your fabric edges a neat little haircut, leaving them polished and ready to face the world.
Creating Stretchy Seams for Knit Fabrics
When working with knit fabrics, you need seams that can stretch without popping. Enter the overcast stitch, your new best friend for creating stretchy seams. This versatile technique works wonders on various knit fabric types, ensuring your garments move with you.
Here’s why the overcast stitch is perfect for knits:
- Mimics the flexibility of an overlock stitch
- Prevents dreaded seam popping
- Adapts to different knit fabric weights
- Creates a clean, professional finish
- Eliminates the need for a separate serger
Combining Seam Stitching and Edge Finishing
Imagine this: a sewing technique that’s like hitting two birds with one stone.
That’s what you get with overcast stitching for seams and edges.
You’ll save time and effort by stitching and finishing in one go.
It’s perfect for stretch fabrics and knits, giving you a professional finish without a serger.
Plus, you’ll love how neat your seam allowances look – it’s like magic for your sewing projects!
Decorative Edging for Various Projects
Beyond seams and edges, the overcast stitch can add a decorative flair to your projects. It’s like giving your creations a stylish haircut! This versatile stitch offers endless possibilities for embellishment.
Here are some fun ways to use overcast stitches decoratively:
- Colorful trim on quilt borders
- Contrasting edging on pillowcases
- Unique hem finishes on skirts or pants
- Eye-catching appliqué outlines
- Textured embellishments on tote bags
Let your creativity run wild and experiment with different thread colors and stitch variations!
Bookbinding Applications
While overcast stitches shine in fabric projects, they’re also a bookbinder’s best friend.
You’ll find this versatile technique in overcast stitch binding, a durable method that keeps your book’s spine intact.
It’s like giving your book a sturdy backbone!
Using linen tapes and a continuous over-under stitch, you’ll create a tight, professional finish that’s perfect for flat or slightly curved spines.
Ready to level up your bookbinding game?
Overcast Stitch Vs. Other Finishing Techniques
You might be wondering how the overcast stitch stacks up against other finishing techniques.
Let’s compare this versatile stitch to some popular alternatives and see why it’s often the go-to choice for perfect seams and edges.
Comparison With Serger/overlock Stitches
You’ve seen the benefits of overcast stitches, but how do they stack up against serger/overlock stitches? Let’s break it down:
- Stitch types: Overcast is more versatile, while sergers are specialized
- Cost comparison: Your regular sewing machine vs. a pricey serger
- Stitch quality: Both create professional finishes
- Ease of use: Sergers can be intimidating at first
Don’t fret if you’re serger-less! Overcast stitches are your trusty sidekick for most fabric types and projects.
Differences From Blanket Stitch
The blanket stitch and overcast stitch might seem like twins, but they’re more like distant cousins. Let’s unravel their differences:
| Feature | Overcast Stitch | Blanket Stitch |
|---|---|---|
| Purpose | Edge finishing | Decorative edge |
| Appearance | Diagonal lines | L-shaped loops |
| Stitches/inch | 6-8 | 4-6 |
| Fabric type | All types | Thicker fabrics |
While both can be done by hand or machine, the overcast stitch is your go-to for a clean, professional finish on various fabrics.
Advantages Over Zigzag Stitch
Many sewers swear by the overcast stitch as their go-to edge finisher.
Unlike the zigzag, it creates a neater, more professional look on your fabric’s edge.
You’ll find it’s more durable and less likely to unravel, especially on delicate fabrics.
Plus, it’s a versatile stitch that works wonders on both stretchy and woven materials.
Ready to up your sewing game? Give the overcast stitch a whirl!
Contrast With French Seams
While both create polished finishes, overcast stitches and French seams serve different purposes.
You’ll find overcast stitches perfect for quick edge finishing, while French seams excel at encasing raw edges completely.
Wondering which to choose? Consider your fabric type and project needs.
Overcast stitches work wonders on various materials, but French seams shine on delicate fabrics.
Overcast Stitch Vs. Bias Binding
French seams are great, but what about bias binding? Let’s compare it to our trusty overcast stitch.
When choosing between these two, consider:
- Fabric weight
- Project type
- Desired appearance
Bias binding adds a decorative touch and works wonders for curved edges. It’s like giving your project a fancy frame!
However, overcasting is often quicker and easier to master. Plus, it’s your go-to for those tricky stretchy fabrics.
Which one will be your secret weapon?
Tools and Materials for Overcast Stitching
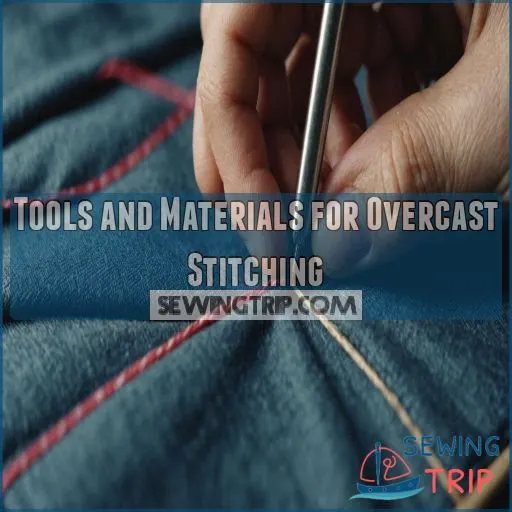
To master the overcast stitch, you’ll need the right tools and materials in your sewing arsenal.
Whether you’re using a machine or stitching by hand, we’ll guide you through the essential equipment and supplies that’ll help you achieve flawless seams and edges.
Overcasting Foot for Sewing Machines
Now, let’s talk about your sewing machine’s secret sidekick: the overcasting foot.
This nifty attachment is like a GPS for your fabric’s edge, guiding it smoothly through the stitching process.
You’ll find various types to suit different fabrics and machines.
Remember to adjust it properly for the best results, and keep it clean for smooth sailing.
Don’t have one? No worries – we’ve got alternatives up our sleeve!
Needles and Thread Selection
Choosing the right needle and thread for overcasting is like finding your sewing soulmate.
You’ll want to match your thread weight and type to your fabric, ensuring a harmonious blend.
Don’t forget to pick a needle size that plays nicely with both!
Adjusting your stitch tension is key – too tight, and you’ll pucker; too loose, and you’ll fray.
It’s all about finding that Goldilocks zone for perfect seams.
Fabric Considerations and Preparation
For fabric prep, you’re the boss! Consider your fabric’s weight and texture before diving in. Light fabrics might need extra TLC, while heavier ones can take a bit more rough-and-tumble.
Don’t forget to pre-wash to avoid any shrinkage surprises.
Treat those raw edges with care, and remember: matching thread is your best friend for a pro finish. Your seam allowance is the foundation of a perfect overcast stitch!
Hand-sewing Tools for Overcast Stitch
- Sharp needles (your magical wands)
- Strong thread (the invisible force field)
- Handy thimble (your finger’s knight in shining armor)
Don’t forget scissors for snipping and a seam ripper for those "oops" moments.
With these tools at your fingertips, you’ll be stitching like a pro in no time!
Specialized Equipment for Overcast Binding
For overcast binding, you’ll need some specialized tools in your arsenal.
Grab an awl to punch those perfect sewing stations, and don’t forget the trusty linen tape – it’s the backbone of your book!
A sewing station template is your secret weapon for consistency, while a book press and stitching frame are your dynamic duo for keeping everything in line.
With these tools, you’ll be binding like a pro in no time!
Frequently Asked Questions (FAQs)
How do you do an overcast stitch?
To do an overcast stitch, you’ll want to align your fabric edge with the overcasting foot guide.
Select the right stitch for your fabric type, then sew along the edge.
It’s like giving your fabric a neat little hug!
Is overcast stitch the same as overlock?
Picture a tailor’s workshop buzzing with activity.
You’ll notice overcast and overlock stitches aren’t twins, but close cousins.
While both finish edges, overlock’s the fancy one with its own machine, creating that pro-looking serged edge you’ve admired.
Is an overcast stitch the same as a blanket stitch?
No, they’re not the same.
Overcast stitch seals edges to prevent fraying, while a blanket stitch decorates edges with a more visible loop.
You’ll often use them for different purposes.
What is the meaning of overcast stitch?
The overcast stitch is like a trusty sidekick – it’s got your back for neatening up fabric edges and preventing those pesky frays from crashing the party.
It’s a real sewing superstar!
Can overcast stitches be used on delicate fabrics?
Absolutely, you can use overcast stitches on delicate fabrics!
Just be gentle and choose a finer stitch setting.
It’ll work like a charm, preventing fraying while giving your project that neat, professional touch.
Sew confidently!
How do I troubleshoot uneven overcast stitches?
Ever wonder why your overcast stitches resemble a roller coaster?
Check your tension settings, needle size, and thread compatibility.
Make sure your fabric is properly fed and adjust the stitch width for consistency.
Who knew stitching had so many twists?
Are overcast stitches reversible for two-sided projects?
Overcast stitches aren’t typically reversible. It’s like trying to unscramble an egg! They’re meant to seal edges neatly, so on two-sided projects, they won’t look the same on the reverse.
Consider stitches designed for two-sided appeal.
Can overcast stitches replace traditional hemming techniques?
You bet overcast stitches can replace traditional hemming! They give a clean, professional finish without the bulk.
Just be sure to choose the right stitch for your fabric type.
It’s a total game-changer for your sewing projects.
What are common mistakes when using overcast stitches?
Don’t skip the right foot—literally. Using an incorrect presser foot or stitch for your fabric leads to frayed edges or puckering.
Also, not aligning the fabric edge with your guide leaves you, well, off-kilter.
Conclusion
Did you know nearly 60% of fabric waste can be avoided just by using the right stitch?
With the overcast stitch, say goodbye to frayed edges and hello to polished seams.
Whether you’re tackling tough denim or delicate silk, this versatile technique makes your projects look professional without needing a serger.
So next time someone asks, "What is an overcast stitch?" you’ll know it’s your trusty secret weapon for flawless seams and edges.
Happy sewing!

