This site is supported by our readers. We may earn a commission, at no cost to you, if you purchase through links.

Start by prewashing your fabric to prevent future shrinkage.
Grab a sharp chenille needle, heavyweight polyester thread, and some serious creativity. Learn basic stitches like the running and back stitch – they’re your secret weapons for repair and embellishment. Pro tip: increase your stitch length to 3.5-4 mm when working with thick denim layers.
Whether you’re patching, embroidering, or completely reinventing your garment, these techniques will have you stitching like a pro. Curious about taking your denim game to the next level?
Table Of Contents
- Key Takeaways
- Choosing The Right Denim Fabric
- Preparing for Hand Stitching Techniques
- Hand Stitching Techniques for Denim
- Embellishing Denim With Embroidery
- Working With Thick Seams and Heavy Denim
- Finishing and Correcting Hand Stitching
- Common Challenges and Solutions
- Advanced Hand Stitching Techniques
- Tips and Tricks for Hand Stitching Denim
- Frequently Asked Questions (FAQs)
- Conclusion
Key Takeaways
- Prewash your denim to prevent shrinkage, improve workability, and stop color bleeding.
- Use a sharp chenille needle, heavyweight polyester thread, and master basic stitches like the running and backstitch for strong, clean results.
- Tackle thick seams by increasing stitch length to 3.5-4 mm, using a hump-jumper, and maintaining consistent tension.
- Add personality to your denim with creative embroidery patterns, split stitches, and contrasting thread for bold, decorative designs.
Choosing The Right Denim Fabric
When you’re ready to transform those old jeans, choosing the right denim fabric can make or break your hand stitching project.
Grab a pair of well-worn jeans or a second-hand denim piece that’s soft, sturdy, and ready to be your creative canvas.
Importance of Prewashing Denim
Denim-washing mavens know the secret: prewashing prevents wardrobe disasters.
When you toss your fabric in the washer, you’ll dodge shrinkage nightmares and stop color bleeding in its tracks.
This key step softens the fabric, improves workability, and makes certain your hand-stitching project looks pro from the start.
Choosing the right denim fabric, including considering fabric weight and stretch, is also vital for a successful project. Your future jeans will thank you.
Selecting Old or Second-Hand Denim
Denim hand sewing enthusiasts find joy in discovering unique, pre-loved pieces. Your vintage denim sourcing adventure begins with keen eyes and a discerning touch.
By selecting sturdy jeans with minor rips as a good starting point for denim bag crafting, you can create something truly unique.
- Hunt for unique color variations that tell a story
- Embrace fabric flaws as character-building opportunities
- Celebrate cost savings through creative upcycling
Inspect each piece carefully, feeling the fabric’s history and potential for visible mending transformation.
Checking if Fabric is Sanforized
After scoring that perfect second-hand denim, you’ll want to know if it’s sanforized—the secret sauce preventing unexpected shrinkage. Sanforized fabric means pre-shrunk magic, saving you from jean-size heartbreak.
| Test Method | Sanforized | Unsanforized |
|---|---|---|
| Prewash Shrinkage | 1-2% | 5-10% |
| Fabric Feel | Stable | More Rigid |
| Recommended Action | Minor Prewash | Extensive Prewash |
| Sewing Prep | Easy | Careful Planning |
| Predictability | High | Low |
Here’s a quick guide to spot the difference:
Want fabric that plays nice with your hand-sewing skills? Check that label!
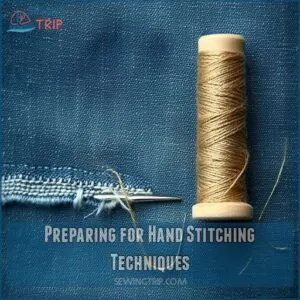
Preparing for Hand Stitching Techniques
Get ready to transform your old denim with nothing more than a needle, thread, and a bit of creativity.
You’ll want to gather your tools, choose the right materials, and set up a workspace that’ll make your hand-stitching adventure both fun and successful.
Essential Tools and Materials
Grab five essential tools and you’ll be ready to transform those old jeans into a masterpiece of hand-crafted art. Your denim adventure starts with the right gear in hand:
- Sharp scissors or rotary cutter for precision cutting
- Tracing paper or printer paper for design transfer
- Straight pins to hold fabric pieces in place
Selecting The Right Thread and Needles
Now that you’ve got your workspace ready, let’s talk thread and needles—the unsung heroes of hand stitching denim.
Choose heavyweight polyester or cotton-covered polyester thread for durability.
Grab a sharp, long chenille needle with a large eye.
Pro tip: Test your thread’s strength by giving it a gentle tug. Your needle should glide through denim like a hot knife through butter.
Setting Up The Workspace
Your thread and needles are primed, so let’s craft the perfect hand-stitching sanctuary. Creating an organized workspace isn’t just about tidiness—it’s your creative command center for denim transformation.
- Clear a spacious, well-lit area near natural light
- Arrange tools within arm’s reach on a sturdy surface
- Use a comfortable chair with good back support
- Keep your embroidery threads sorted and easily accessible
Hand Stitching Techniques for Denim
Ready to breathe new life into your worn-out denim with just a needle and thread?
Master the art of hand stitching,
and you’ll transform those old jeans into personalized, one-of-a-kind masterpieces that tell your unique style story.
Basic Stitches for Denim
Mastering basic stitches for denim starts with understanding your tools and technique.
Chenille needles work wonders for beginners, offering strength and precision when puncturing thick fabric. Choose a sharp, long needle with a large eye to navigate denim’s tough terrain.
Different stitch variations allow you to create durable, eye-catching repairs that breathe new life into your favorite jeans.
Running Stitch for Simple Designs
After nailing basic stitches, the running stitch becomes your trusty companion for simple denim designs.
Picture it as a rhythmic dance across fabric, creating clean, understated lines that breathe life into your project.
Grab a sharp needle and choose a sturdy polyester thread.
Start by weaving in and out of the denim, keeping your stitches even and consistent.
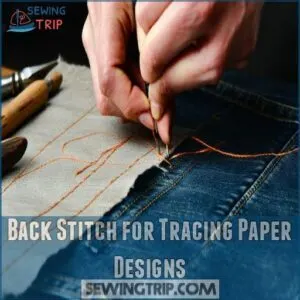
Back Stitch for Tracing Paper Designs
Because tracing paper designs are a game-changer for denim embroidery, you’ll love the back stitch technique.
Lay your tracing paper carefully over the denim, securing it with pins.
Punch through the design with a needle, creating tiny holes as your guide.
Stitch slowly, following these perforations to transfer intricate patterns onto your fabric with precision and style.
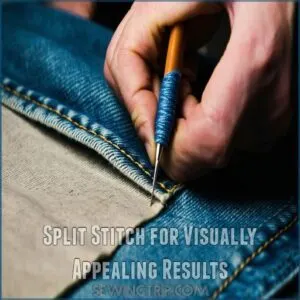
Split Stitch for Visually Appealing Results
When you’ve mastered the back stitch, the split stitch brings another layer of visual magic to your denim. This technique creates a gorgeous textured line that looks like a braided rope, perfect for adding personality to your jeans.
To achieve professional-looking results, using the right needle and thread selection can make a significant difference in your stitching.
By spacing your stitches consistently and choosing contrasting thread colors, you’ll transform simple repairs into eye-catching decorative denim stitches that tell your unique style story.
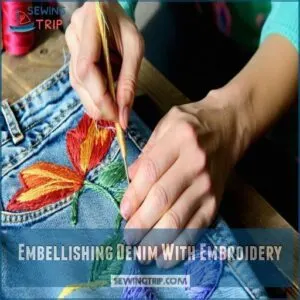
Embellishing Denim With Embroidery
Ready to breathe new life into your old denim?
With just a few embroidery threads and some creative stitching,
you’ll transform those tired jeans into a personalized fashion statement that’ll make heads turn.
Choosing The Right Embroidery Thread
After mastering basic hand stitching techniques, you’ll want to select the perfect embroidery thread for your denim project.
Polyester threads reign supreme for durability, offering 100+ color options that’ll make your design pop.
Check thread weight carefully—thicker threads create bold statements, while finer threads allow intricate details that’ll transform your old jeans into wearable art.
When shopping for the ideal thread, explore online stores offering a wide range of denim embroidery threads.
Selecting a Design or Pattern
From vintage patches to modern geometric shapes, your design inspiration for denim embroidery is limitless.
Start by browsing Pinterest or sketchbooks for eye-catching patterns.
Consider your personal style and the garment’s character. Floral designs work magic on jacket backs, while minimalist geometric patterns rock jean pockets. Scale your chosen embroidery design to complement the fabric’s texture and your unique aesthetic.
Transferring The Design to Denim
Picked out a killer design? Now, let’s get it onto your denim!
Tracing paper is your best friend here. Slip it under your chosen pattern, then trace with a sharp pencil or fabric marker.
For precision, use a light box or tape your design to a bright window.
Freehand drawing works too if you’re feeling bold.
Working With Thick Seams and Heavy Denim
Ever wrestled with thick denim seams that feel like you’re sewing through a leather jacket?
You’ll master those tricky layers with a few smart techniques.
hand-stitching game and make even the heaviest jeans feel like a breeze to work with.
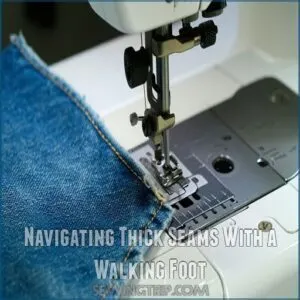
Navigating Thick Seams With a Walking Foot
After mastering embroidery, you’ll want to tackle those bulky denim seams like a pro.
A walking foot becomes your secret weapon for even feeding thick layers through your sewing machine.
It keeps feed dogs working smoothly, preventing fabric shift and maintaining stitch tension. This tool is a game-changer for reinforcing denim seams, making hand stitch denim repair a breeze.
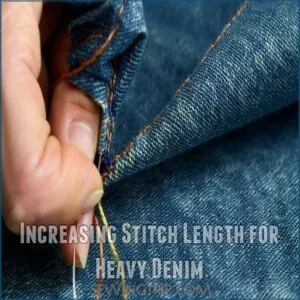
Increasing Stitch Length for Heavy Denim
When wrestling with heavy denim, cranking up your stitch length is like giving your fabric some breathing room.
Aim for 3.5-4 mm stitches to prevent bunching and keep your seams smooth.
This longer stitch helps distribute fabric tension, making hand sewing denim easier and preventing those pesky fabric puckers that can ruin your hard work.
For the best results, use flat-felled seams to increase the strength and durability of your seams.
Using a Hump-Jumper or Height Compensation Tool
Thick denim seams can be a sewing nightmare, but a hump-jumper is your secret weapon for smooth sailing. This handy tool helps you navigate bulky layers like a pro, ensuring even fabric feed and preventing machine hiccups.
Here’s how to master it:
- Position the hump-jumper behind the presser foot
- Slide it under thick seam intersections
- Maintain consistent stitch quality across challenging fabric areas
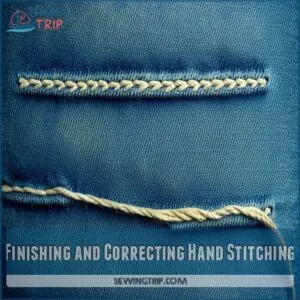
Finishing and Correcting Hand Stitching
You’ve just hand-stitched your denim masterpiece,
but now it’s time to make it look polished and professional.
Learn how to secure your stitches with clever knots, trim those pesky threads, and give your work a crisp finish that’ll make your DIY project look store-bought.
Securing Stitches With Knots
After wrestling with hefty denim seams, securing your stitches becomes an art form.
Learn to master knot types that lock your hand-sewn magic in place.
Whether you’re patching a favorite pair or reinforcing a worn spot, the right knot placement guarantees durable denim repair.
Aim for hidden, tight knots that blend seamlessly into your stitching, making your repair work look professional.
Trimming Excess Threads
Once those knots are secure, it’s time to tidy up your denim masterpiece with precise thread trimming.
Keeping your hand stitching clean and professional means mastering the art of thread management. Proper thread tensioning is key to a secure tie-off, learn how to tie off a sewing.
Here’s how to snip those loose ends like a pro:
- Use sharp, pointed scissors for clean cuts
- Trim threads close to the fabric surface
- Cut at a slight angle to prevent fraying
- Remove thread waste immediately to maintain a neat workspace
Ironing Stitches for a Flat Finish
Got those threads trimmed?
Now grab your iron and transform those hand-stitched denim edges. Set your iron to medium heat for denim’s sturdy fabric.
Press gently, moving in smooth motions to flatten seams without stretching. Use a clean press cloth to protect delicate embroidery.
Steam works wonders for stubborn wrinkles, giving your hand-stitched repairs that crisp, professional finish.
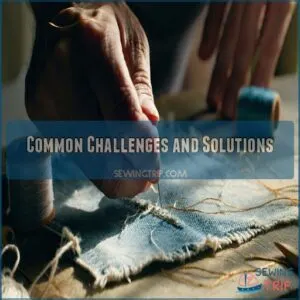
Common Challenges and Solutions
Hand stitching denim isn’t just a craft—it’s an adventure filled with potential snags and surprises.
that’ll test your patience and creativity.
Don’t worry, though; with a few smart techniques and some practice, you’ll transform those tricky challenges into opportunities for unique, personalized denim magic.
Preventing Unraveling and Fraying
After carefully securing your previous stitches, you’ll want to shield your denim from unraveling like a fraying lifeline.
Grab those pinking shears or bust out a zigzag stitch to lock fabric edges tight.
Basting stitches work wonders for preventing loose threads.
For hardcore protection, serge those seams or dab fabric glue along raw edges – your denim repair game just leveled up.
Fixing Errors and Mistakes
When a stitch goes rogue on your denim project, don’t panic!
Unpicking seams requires a sharp seam ripper and a delicate touch. Remove threads carefully to avoid damaging the fabric.
For tricky repairs, try hand sewing techniques like carefully placed patches or strategic stitch removal.
Concealing flaws becomes an art form with practice and patience in your denim mending tutorial.
Repurposing Old Denim Items
Made a mistake while hand sewing your denim? No worries!
Those worn-out jeans are begging for a second life. Upcycling denim opens a world of creativity:
- Transform ratty jeans into stylish denim tote bags
- Create cozy quilts from patchwork jean pieces
- Craft unique jean jackets with visible mending techniques
- Design trendy upcycled shorts from old pants
- Develop artistic denim patching for personalized style
Your creativity turns mistakes into masterpieces!
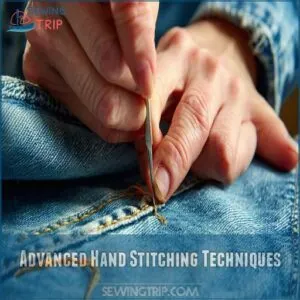
Advanced Hand Stitching Techniques
Ready to elevate your denim hand stitching from basic to brilliant?
You’ll master professional-level techniques.
These techniques transform old jeans into custom masterpieces.
Using nothing more than a sharp needle, quality thread, and your newfound advanced skills.
Using a Presser Foot With an Edge Guide
If you’ve battled uneven topstitching, a presser foot with an edge guide is your secret weapon.
These handy attachments help you nail parallel lines on denim with laser-like precision.
Simply align the guide against a seam or previous stitch, and watch your denim project transform.
Consistent spacing becomes a breeze, making your sewing look professional and polished.
Creating a Reusable Zipper Topstitching Template
After pinpointing your front fly’s perfect curve, craft a zipper topstitching template using tracing paper or clear plastic.
Measure carefully, marking critical alignment points for precision, and taking care to be precise in your measurements.
Cut the template carefully onto cardstock, creating a durable guide that’ll transform your denim repair stitching from amateur to pro-level hand sewing techniques.
For a professional finish, consider using a hump jumper or a similar tool to manage seam variations, as recommended for sewing thick denim layers.
Experimenting With Different Stitch Types
Once you’ve mastered your zipper topstitching template, it’s time to play with stitch variations that’ll make your denim pop. Tap into your creativity and transform those old jeans into wearable art.
To get started, explore traditional sashiko denim stitches and their unique applications in mending and embellishing.
- Try sashiko-inspired running stitches for visible mending
- Experiment with decorative hand embroidery stitches
- Explore stitch density effects on different denim areas
- Mix unique stitch combinations for personalized repairs
- Play with strategic stitch placement to highlight design
sashiko denim stitches and stitch variations will help you transform your old jeans into wearable art.
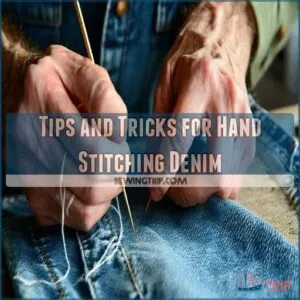
Tips and Tricks for Hand Stitching Denim
With denim in hand, your sewing journey takes flight through mastery of hand stitching techniques.
- Choose needles carefully – a sharp, long needle with a large eye makes denim stitching smoother
- Experiment with different embroidery threads to add personality to your denim projects
- Practice tension control to create clean, even stitches that withstand wear
- Mastering techniques like the backstitch for hand sewing will help you navigate thick seams and tricky fabric textures.
Troubleshooting becomes second nature as you learn to navigate thick seams and tricky fabric textures. Your patience transforms old jeans into personalized masterpieces, turning each stitch into a story of creativity and skill. Embrace the art of hand sewing denim, and watch your wardrobe come alive with unique, handcrafted designs.
Frequently Asked Questions (FAQs)
What hand stitch is best for denim?
Like a trusty compass guiding a sailor, the back stitch is your go-to for denim hand sewing.
It’s strong, versatile, and won’t let you down when you’re mending or adding personal flair to your favorite jeans.
Can you hand sew denim without a machine?
You can absolutely hand sew denim!
Grab a sharp, sturdy needle and durable polyester thread.
Use running and back stitches, work slowly, and reinforce seams.
Patience and practice will help you master hand-stitching your favorite denim projects.
How do you hand sew denim together?
Imagine conquering denim with just a needle and thread.
Start by selecting a sharp, sturdy needle and strong polyester thread.
Use running stitches for basic seams, backstitching for strength, and work slowly through thick layers.
What tension and stitch length for denim?
Set your machine’s stitch length to 3-4 mm for denim.
Increase tension slightly with heavier thread.
Test on scrap fabric first to verify even stitches and prevent bunching or loose threads.
How can I prevent hand-sewn denim from unraveling?
Like a sailor battling fraying ropes, you’ll want to use pinking shears or baste your edges before stitching.
A tight zigzag stitch or hand-sewn backstitch will lock those denim threads in place, preventing unraveling.
What needle works best for multiple denim layers?
Grab a long, sturdy chenille needle (size 18-22) with a large eye.
It’ll punch through multiple denim layers effortlessly.
Giving you the strength and control you need for thick, rugged fabric.
Can I repair vintage denim with hand stitching?
Fixing vintage denim is like mending a storybook—use strong thread, a sharp needle, and patience.
Patch thin spots from inside.
Secure edges with a backstitch.
Finish with straight stitches to reinforce durability.
How do I maintain stitch tension while hand sewing?
Keep your thread taut but not overly tight.
Use even pulling motions and secure each stitch with a gentle tug.
Avoid yanking, as that weakens tension.
Practicing steadiness and alternating finger pressure helps, too.
What thread resists wear in denim projects?
Tough as nails, polyester or cotton-covered polyester thread is your go-to for denim projects.
It resists wear, handles stress, and won’t snap under pressure.
making it perfect for seams, hems, and topstitching.
Conclusion
Don’t let thick seams or tricky stitches keep you from breathing new life into your denim.
With these hand stitching techniques for denim, you can patch, embellish, and transform jeans that seemed destined for the back of your closet.
Mix creativity with practical skills—like choosing the right thread or mastering simple stitches—and you’ve got endless possibilities.
Whether it’s embroidery or repairs, every piece you create will be uniquely yours. Ready to turn old denim into something amazing?
- https://www.ebay.com/itm/Bernina-Height-Compensation-Tool-NEW-Jeans-Bulky-Seams-/253563827005
- https://sewingers.com/how-to-embroider-jeans/
- https://sewguide.com/how-to-sew-denim/
- https://www.thelaststitch.com/10-tips-for-sewing-jeans/
- https://zerowastechef.com/2024/02/27/turn-old-jeans-into-awesome-denim-bag/


