This site is supported by our readers. We may earn a commission, at no cost to you, if you purchase through links.
 Sewing denim might make you feel like you’re wrestling a bear, but it’s simpler than it looks.
First, choose your pattern and denim wisely; remember, heavy denim often requires more cajoling.
Prewash your fabric to avoid any post-sewing shrinkage surprises.
To ensure the best results when sewing denim, it’s essential to choose the right needle, such as a sharp needles for quilting and dense fabrics. Adjust your sewing machine with a denim needle and set it to a longer stitch length.
When you sew, hold the fabric firm, and don’t be afraid to use a hump jumper for thicker seams.
Press each seam as you go—no skipping!
Ready to stitch? Great!
There’s more to know about mastering those stubborn rivets and threads.
Table Of Contents
Key Takeaways
- Choose the right denim fabric considering weight, stretch, and thickness to suit your project needs, and prewash to avoid shrinkage surprises.
- To achieve the best results when sewing denim, use a denim or jeans needle in size 90/14 or 100/16, especially when working with thick denim seams. Equip your sewing machine with a denim needle, adjust stitch length, and consider using a hump jumper for smooth sewing over thick seams.
- Use strong polyester thread for main seams and heavier topstitching thread for decorative stitches to ensure durability and style.
- Press seams with a pressing cloth to prevent shine marks, and maintain machine tension to avoid puckered or skipped stitches.
Choosing The Right Denim Fabric
Choosing the right denim fabric is like picking the perfect apple from a tree—it’s important to know exactly what you’re looking for.
You’ll focus on fabric weight, stretch, and thickness to match your project’s needs.
You’ll also want to make sure the finished garment fits just right.
Denim Fabric Weight
When you’re picking denim fabric, weight matters.
It helps you choose the right project.
Here’s a quick rundown:
- Lightweight (4-10 oz): Ideal for shirts.
- Medium weight (11-13 oz): Perfect for jeans.
- Heavyweight (14-19 oz): Great for jackets.
Use a denim weight chart to compare options and choose wisely for your sewing adventure!
Non-stretch Vs. Stretch Denim
Choosing between non-stretch denim** and stretch denim boils down to understanding fit differences and project ideas.
Non-stretch denim, known for its rigid feel, offers durability and a classic look, but requires time to break in.
For those new to denim sewing, a denim fabric guide can be a valuable resource in making informed fabric choices.
Stretch denim provides comfort and flexibility.
How Much Fabric Do I Need?
Deciding between non-stretch and stretch denim, you’re ready to figure out fabric yardage for jeans making.
To gauge this, consider:
- When sewing denim, it’s also essential to prepare your fabric for mending by ironing on a vellum patch behind the rip, following tips on how to sew a run in jeans. Pattern sizing: Check your jeans sewing patterns for exact fabric requirements.
- Project type: Basic jeans or those with extra features need different amounts.
- Denim width: Wider fabric means less yardage needed, which saves your wallet.
Where to Buy Denim Fabric?
Feeling ready to start your jeans-making journey? Let’s talk about where you can snag the right denim fabric.
Online retailers offer a vast selection, perfect for picky sewists.
Check out local fabric stores for a hands-on approach, or visit fabric markets to find unique denim options.
Don’t overlook big box stores and thrift stores for budget-friendly sewing projects.
Essential Supplies for Sewing Denim
To sew denim successfully, you’ll need specific supplies like "Jeans" needles and sturdy thread designed for heavy-duty tasks.
Don’t worry if you’ve never heard of a hump jumper; it’s just a handy tool that helps your machine glide over thick seams without a hitch.
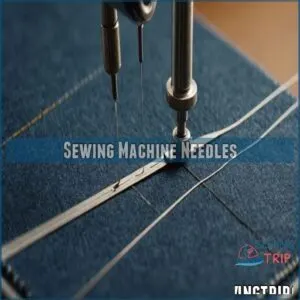
Sewing Machine Needles
Several needle types conquer denim’s toughness.
For heavier denim, you’ll need a size 100/16 jeans needle; lighter denim works well with a size 80/12.
Topstitch needles handle thicker threads.
Brands like Schmetz and Organ are popular choices.
Regular needle maintenance—cleaning and replacement—prevents skipped stitches and broken needles.
Remember, the right needle is key to successful denim sewing!
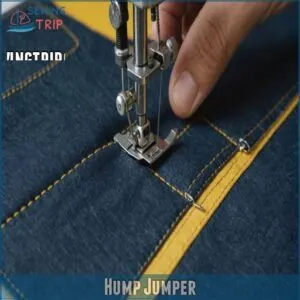
Hump Jumper
Ever run into trouble sewing bulky seams? A hump jumper’s your secret weapon for handling denim like a pro. This handy gadget helps even out seam thickness, so your machine keeps stitching smoothly.
You can find hump jumpers for sewing denim online, including at sewing hump jumper stores.
To make life easier:
- Explore alternatives: Try folded fabric
Hardware
With the hump jumper handled, it’s time to explore hardware—the heart of denim’s durability.
When selecting the right hardware for a professional finish, consider the importance of a high-quality denim zipper, as suggested in the denim sewing guide.
Choose robust rivets, steadfast buttons, and stout zippers for a professional finish.
Check out hardware options online or at local fabric stores where **
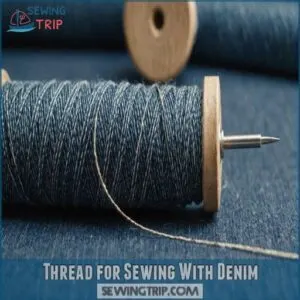
Thread for Sewing With Denim
You’ve got the hardware sorted, but don’t overlook thread choice.
Using all-purpose polyester thread for seams provides strength, while thicker topstitching thread adds professional flair.
Consider thread color and weight—denim’s thick layers demand robust tension control.
A blend of denim thread types keeps things balanced.
Remember, sewing denim is an art, needing the right threads to shine.
Preparing Your Denim
Start preparing your denim by tackling troublesome prewashing.
This step is essential to prevent unwanted shrinkage and color bleeding later.
Afterward, grab your sharpest scissors or a best rotary cutter tool for precise cutting, ensuring you follow the grain of the denim fabric.
When pinning, use sturdy pins to keep the heavyweight or lightweight denim in place.
It’s a bit like her
Frequently Asked Questions (FAQs)
Is denim hard to sew?
Hark, friend! Sewing denim isn’t intimidating; it’s just thicker. Use a denim needle, adjust your machine’s tension, and maybe a walking foot. You’ll conquer those seams in no time!
How to sew denim?
Grab your sewing machine, denim needles, and sturdy thread.
Adjust tension settings and stitch length for your denim’s weight.
Consider a hump jumper for thick seams.
Don’t forget to finish edges to prevent fraying.
Enjoy the process!
Can you sew denim with a sewing machine?
You can absolutely sew denim with a sewing machine!
Use a "Jeans" needle, set the tension right, and handle layers gently.
A hump jumper helps too, making bulky seams a breeze.
Enjoy your denim adventure!
How do you sew stretch denim jeans?
Think sewing stretch denim is like herding cats?
Use a ballpoint needle, stretch-friendly thread, and a longer stitch length to prevent puckering.
Adjust tension carefully, test on scraps, and remember, no two denim seams are the same!
How to sew denim shorts?
Start by selecting a jeans pattern, then cut the denim, ensuring precision.
Use "Jeans" needles and polyester thread.
Adjust your sewing machine’s tension by first setting your tension dials around 4, similar to serging thick layers. Adjust your sewing machine’s tension.
Finish seams to prevent fraying.
Hem the shorts and press for a polished look.
How do you sew a denim shirt?
Craft a denim shirt by choosing a medium-weight denim for comfort.
Use "Jeans" needles, adjust your machine’s tension, and try flat felled seams for strength.
Prewash denim to avoid shrinkage, and press seams carefully with steam.
Can I sew denim on a regular sewing machine?
Sewing thick fabrics like denim on a regular machine requires understanding fabric density and using the right needles, similar to how sewing leather tips can help with tricky leather projects. Sewing denim on a regular machine is like training a dog to learn new tricks.
It’s doable with the right tools: use a “Jeans” needle, adjust tension, and avoid thick seams.
Enjoy your creative journey!
Is denim difficult to sew?
Denim’s thickness presents a challenge, but it’s not impossible!
You’ll need the right needle and machine settings.
Don’t worry, with practice, you’ll master it.
It’s all about the right tools and techniques.
Do I need a special thread to sew denim?
Like a trusty sidekick, you’ll want all-purpose polyester thread for denim’s main seams and heavy-duty or topstitching thread for those eye-catching stitches.
It’s all about ensuring strength and durability without compromising on style.
What tension do you need to sew denim?
To sew denim effectively, use a walking foot if available to ensure uniform feeding and prevent puckering, especially when working with stretchy fabric tension tips. To sew denim effectively, start with a tension setting of around 5 on your sewing machine.
Adjust as needed to make sure smooth stitching and avoid skipped stitches, especially when working with heavier denim fabrics.
How can I avoid puckered seams in denim?
Think of denim like a stubborn mule; you need a firm grip.
Use a walking foot, adjust tension to suit thickness, and lengthen your stitch to 3 mm.
Press seams thoroughly to tame those pesky puckers.
What stitch length is best for stretch denim?
For stretch denim, aim for a stitch length of 5 to 3 mm.
This provides balance—enough strength for seams while allowing some give.
Adjust as needed during the project to prevent seams from stretching out.
How do I attach rivets to jeans?
Grab your rivet tools, denim, and a dash of patience.
Punch a hole where needed, sandwich your rivet pieces around the fabric, and hammer them securely.
Be gentle, so the rivet sets smoothly, not crooked!
Tips for pressing seams without shine marks?
Imagine your seams are rebellious teenagers sneaking out at midnight.
To keep them in check, always use a pressing cloth between the iron and fabric, and set the iron on the cotton setting.
How to deal with slipped stitches in denim?
Slipped stitches happen. Check your needle, tension, and thread. Resew carefully, using a backstitch to reinforce. Don’t worry, it’s fixable!
Conclusion
Who knew sewing denim could be as easy as deciphering a teenager’s text message?
With your newfound skills in choosing fabric, prepping your machine, and tackling those tricky seams, you’re ready to face denim head-on.
Adding rivets or strategizing stitch lengths might make you feel like MacGyver, but you’re now equipped to handle it all.
Remember, mastering how to sew denim is about patience, practice, and a touch of creativity—and you’ve got this!
- https://www.wawak.com/sewing/sewing-machine-accessories/machine-accessories/the-hump-jumper-18-116-2pack/
- https://www.instagram.com/kerukjeans/?hl=en
- https://www.youtube.com/watch?v=ALSay5Tke7g
- https://www.dalstonmillfabrics.co.uk/fabric-blog/denim-weight-conversion-oz-to-gsm
- https://denimhunters.com/denim-wiki/denim-explained/denim-weight/


