This site is supported by our readers. We may earn a commission, at no cost to you, if you purchase through links.

Most sewers discover the hard way that table size isn’t just about fitting the furniture into a room—it’s about whether you can comfortably maneuver a quilt through your machine, store your tools within arm’s reach, and work for hours without your shoulders screaming for mercy.
The right dimensions balance your available space with the reality of fabric management, ergonomic positioning, and the storage you’ll need to keep thread, scissors, and patterns organized. Understanding standard sewing table measurements and how they relate to your body and projects transforms this purchase from a guessing game into a confident decision.
Table Of Contents
Key Takeaways
- Sewing table dimensions should balance three critical factors: your body’s ergonomic needs (typically 29.5–31 inches high for seated work with forearms parallel to the floor), your project requirements (40 inches for garments up to 78 inches for quilts), and your actual room footprint, including clearance for movement and fabric flow.
- Material choice directly impacts long-term usability—metal construction offers superior durability and vibration reduction for precision stitching, while solid wood provides warmth at a lower cost but requires more maintenance and can warp under pressure from heavy machines.
- Storage solutions should prioritize accessibility over capacity by placing frequently used tools within arm’s reach through magnetic strips, vertical wall systems, and pull-out drawers, while reserving under-table and cabinet space for bulky items like fabric bolts and batting that don’t need constant access.
- Proper ergonomics prevent the chronic injuries that affect 88% of sewers (lower back pain) and 72% (neck discomfort) by maintaining 90-degree elbow and knee angles, alternating between sitting and standing every 20 minutes, and ensuring your work surface height matches your seated elbow position rather than arbitrary standard measurements.
Sewing Table Essentials
When you’re setting up a sewing workspace, the table itself matters more than you might think. The right design needs to work with your machine, move when you need it to, and keep you safe while you work.
Let’s look at three essentials that’ll help you choose a table that actually makes sewing easier.
Design Aesthetics
Beyond the practical checklist of height and storage, your sewing table should feel like an extension of your creative vision—a piece that doesn’t just contain fabric, but maintains its own in the room. Think of it as furniture first, workspace second. Consider how color palettes from your favorite textiles might inform your choice, or how ambient lighting improves both visual harmony and function. The right table integrates seamlessly with your home decor style, turning your sewing room design into a space you’ll actually want to spend time in.
- Choose finishes that echo your interior design preferences, from sleek modern metals to warm wood tones.
- Seek personalization options that reflect your unique aesthetic while maintaining furniture layout flexibility.
- Prioritize style integration so your workspace inspires creativity rather than disrupting your home’s flow.
- Remember that visual harmony between function and beauty makes every project more enjoyable.
Compatibility With Machines
Once you’ve settled on a table that complements your space, the next step is making sure it actually works with your sewing machine—because a beautiful table that leaves your machine wobbling or misaligned won’t do you any favors.
Start by checking machine size compatibility, making sure your sewing machine table accommodates both flatbed sewing and freearm sewing configurations without cramping your workspace. Look for features that boost vibration reduction, which keeps stitches straight and prevents fatigue during long sessions. Verify there’s adequate needle clearance beneath the surface—especially critical for specialty stitches or thicker fabrics.
Don’t overlook practical details like power access for your machine cord and foot control placement that won’t force awkward leg arrangements. The right sewing table sizes transform your equipment into a cohesive system, letting you focus on the craft rather than fighting your setup.
Mobility and Safety
After confirming your machine sits securely on the table, you’ll want to think about how easily you can reposition that setup—and whether the table itself poses any hazards as you move around your workspace.
Consider these mobility and safety essentials:
- Caster safety with locking mechanisms prevents unwanted rolling during precision work
- Rounded edges minimize bruising and fabric snags during movement
- Stable rolling tables allow safe transport between sewing zones without straining your back
- Proper ergonomics in sewing table sizes reduce backaches and support injury prevention throughout long sessions
Storage Solutions
A well-organized sewing table keeps your workspace functional and your mind clear, which matters when you’re wrestling with yards of fabric or hunting for that one specific button.
Storage isn’t just about shoving things into drawers—it’s about creating a system that makes your projects flow smoothly. Let’s look at how different storage options can tackle everything from bulky fabric bolts to the smallest notions.
Large Item Storage
If you’ve ever watched fabric bolts and batting bundles take over your workspace like uninvited houseguests, you know that large item storage isn’t just helpful—it’s the difference between a functional sewing room and a fabric avalanche waiting to happen.
Smart storage solutions start with prioritizing what eats up the most space. Spacious drawers accommodate bulky batting and interfacing, while tall cabinets accommodate fabric bolt storage upright, preventing creases and keeping yardage visible. Under-table solutions increase floor space, tucking away cutting mat storage and ironing board storage beneath your work surface.
| Storage Challenge | Space-Saving Strategy | Accessibility Benefit |
|---|---|---|
| Fabric Bolt Storage | Vertical storage in cabinets | Easy visual inventory |
| Project Bin Placement | Rolling carts under tables | Quick access without clutter |
| Pattern Envelope Storage | Shallow drawer dividers | Flat, wrinkle-free filing |
The right storage ability transforms chaos into a system where everything has its place—and you can actually find it.
Small Item Organization
Thread spools, scissors, seam rippers, pins—when these essentials scatter across your workspace like confetti, even the simplest project turns into a frustrating scavenger hunt. Smart small item organization transforms chaos into efficiency, and it doesn’t require fancy solutions.
Consider these storage solutions for space optimization:
- Clear stackable containers keep thread storage visible and dust-free
- Magnetic strips along walls provide bobbin organization and pin cushion alternatives
- Needle keepers mounted within arm’s reach prevent lost specialty needles
- Vertical storage pouches amplify wall space for scissor placement
- Tiered caddies on your work surface offer instant tool storage access
Under-table solutions like rolling carts keep backup supplies close without cluttering your creative zone.
Tool Accessibility
When your rotary cutter sits buried in a drawer three steps away, that split-second delay compounds into minutes of lost momentum throughout your day. Smart tool proximity changes everything—mount magnetic strips at arm’s length for scissors and rulers, position immediate access trays within your natural reach zone, and install side-mounted holders for rotary cutters.
An organized layout with accessibility aids creates efficient workflow, turning your sewing table size and space into a powerhouse of ergonomic comfort where tool storage works with you, not against you.
Construction Quality
When you’re choosing a sewing table, the way it’s built matters just as much as its size. A well-constructed table won’t wobble, warp, or fall apart halfway through a project, and it should feel solid under your hands from day one.
Let’s look at three key aspects that separate a reliable workhorse from a frustrating investment.
Material Durability
Metal or solid wood construction acts as the foundation your sewing table relies on, determining whether it will stand strong through thousands ofhours of use or disappoint you when you need it most. Metal vs. Wood comes down to how you work—metal tables offer greater material longevity and won’t warp under pressure, while solid wood brings warmth but requires more care.
You’ll need surface scratch resistance to protect against rotary cutters and pins, plus heat resistance for your iron if you press nearby. Stain resistance matters too, especially around fabric dyes and marking tools.
When evaluating sewing table size and space alongside material durability, remember that construction quality of tables directly impacts your creative flow—a wobbling surface ruins precision work no matter how many sewing table features it offers.
Work Surface Smoothness
A slightly rough work surface might seem harmless, but it can drag delicate silks off course or catch lightweight fabrics mid-cut, turning what should be smooth precision work into a frustrating tug-of-war. Finish quality determines whether your work surface material allows fabrics to glide or snag, so inspect the table width and table length carefully before purchasing.
- Fabric snagging prevention: Polished surfaces reduce material friction across your entire work surface.
- Surface maintenance routines: Regular cleaning preserves smoothness and glide enhancement over time.
- Friction testing: Run sample fabrics across the surface to evaluate real-world performance.
Assembly Ease
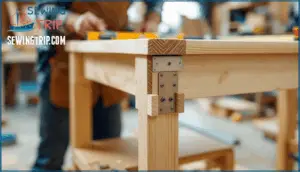
Getting your sewing table up and running shouldn’t feel like a second project, especially when you’re keen to dive into the creative work waiting on your to-do list. Assembly ease directly impacts how quickly you’ll move from unpacking to actual sewing, which is why setup complexity matters more than you might think.
Look for tables with pre-drilled holes, clearly labeled parts identification, and instruction clarity that doesn’t leave you guessing. Tool requirements should be minimal—ideally just a screwdriver or Allen key. Consider the time investment; most well-designed tables take 30 to 60 minutes to assemble.
| Assembly Factor | What to Look For | Why It Matters |
|---|---|---|
| Setup Complexity | Pre-assembled sections, modular design | Reduces frustration and errors |
| Parts Identification | Numbered components, visual guides | Speeds up the process |
| Tool Requirements | Standard household tools only | No specialty equipment needed |
| Instruction Clarity | Step-by-step photos, logical sequence | Prevents costly mistakes |
Check dimensions—height, width, and length—before you start to make sure your workspace accommodates the final footprint comfortably.
Delivery Logistics
Getting your sewing table home and set up doesn’t have to feel like a puzzle. You’ll want to think through a few practical details before your table arrives, from how it enters your space to what you’ll need for assembly.
Here’s what matters most when planning for delivery and setup.
Home Delivery Considerations
Before you commit to that dream sewing table, imagine this: a delivery truck pulls up, and you’re suddenly faced with a flat-packed puzzle that won’t fit through your doorway or up your staircase. Smart planning prevents headaches down the line.
- Compare shipping costs against local pickup or assembly services
- Request damage prevention measures like blanket wrapping and doorway protection
- Review delivery options and returns policy before purchasing
- Confirm assembly ease and whether professional help is included
Assembly Tools and Location
Once you’ve cleared delivery hurdles, the real fun begins — setting up your new table with the right tools and a workspace that won’t leave you cramped or frustrated. Most tables require basic assembly tools like screwdrivers, adjustable spanners, and Allen keys, though many manufacturers include these. Choose a location with adequate dimensions — you’ll need clearance around the table for comfortable movement and access to storage features.
| Tool Requirements | Setup Time | Location Factors |
|---|---|---|
| Screwdriver set | 30-60 minutes | Clear floor space (width + 3 feet) |
| Allen keys (often included) | Varies by model | Level surface essential |
| Adjustable spanner or pliers | Add 15 mins for adjustable height | Proximity to electrical outlets |
| Rubber mallet (optional) | Post-assembly adjustments: 10 mins | Natural lighting preferred |
| Electric driver (speeds assembly) | Professional help: 20-30 mins | Room for fabric spread |
Consider your assembly space carefully — you’ll want room to lay out parts, reference instructions, and maneuver larger components without banging into walls or furniture. A clear area roughly twice the table’s footprint gives you breathing room during setup. Post-assembly, verify the table’s height and stability before loading it with your machine and supplies.
Table Size Insights
When you’re choosing a sewing table, size isn’t just about fitting it into your space—it’s about how the dimensions support your work and your body.
The right table gives your materials room to breathe and keeps you comfortable through long projects.
Let’s look at what makes a table size work for you.
Space for Materials
Your workspace dimensions determine how smoothly you’ll manage everything from compact garment pieces to expansive quilt layouts. Standard fabric rolls measure up to 59 inches wide, so you’ll want tabletop dimensions that prevent material overhang and keep your pattern layout space functional.
Tables ranging from 40 inches for smaller projects to 78 inches for ambitious quilts give you the surface space to spread fabrics fully, while integrated storage space beneath keeps your workspace organization clean and your creative flow uninterrupted.
A key feature is adjustable table height to accommodate different tasks.
Ergonomic Comfort
Your sewing table height directly affects your comfort and posture during every project. Proper workspace ergonomics means positioning your sewing surface at elbow height while seated—typically 30 to 31 inches from the floor—which promotes body alignment and reduces strain across your neck, shoulders, and back. A good chair supports the proper body alignment for optimal comfort.
Consider these ergonomic design priorities:
- Adjustable features that let you shift between sitting and standing positions
- Posture support through recessed platforms that align your machine flush with the tabletop
- Health impact awareness, since improper height increases musculoskeletal disorder risk
When your knees bend at 90 degrees and your forearms rest level on the work surface, you’ve found the sweet spot for ergonomics in sewing—protecting your body while keeping your creative energy flowing through hours of detailed work.
Configuration Options
Not all sewing tables come in one fixed size or shape, and that’s actually a good thing. You can adapt your workspace by combining multiple tables, adding drop-leaf extensions, or choosing rolling options that move with your projects.
Here’s how different configurations can help you build the setup that works best for your space and sewing style.
Combining Tables
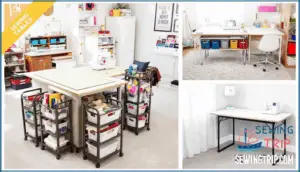
Think of combining tables as building blocks for your sewing room—you can snap together exactly the workspace you need today, then rearrange it completely when tomorrow’s project demands something different. Modular setups let you expand workspace without committing to one fixed layout, and corner configurations make smart use of awkward spaces that would otherwise sit empty.
- Workspace Expansion: Join two tables to meet cutting table length considerations for quilts or large garments, achieving ideal sewing table dimensions.
- Custom Layouts: Table integration conforms to your room’s footprint, whether you need an L-shape or straight run.
- Flexible Sizing: Start small and add tables as your skills grow, maintaining a good size for a sewing table that evolves with you.
Drop-leaf and Rolling Tables
When your workspace needs to pull double duty—expanding for a king-size quilt one day and tucking away the next—drop-leaf and rolling tables become the shape-shifters of your sewing room.
Drop-leaf stability means you can fold down extensions when you’re done, reclaiming precious floor space while keeping your machine securely anchored.
Rolling tables offer portability benefits that let you wheel your setup wherever light is best, though you’ll want locking casters for rolling safety during actual stitching.
Both options deliver space optimization without sacrificing the ergonomic comfort or dimensions your projects demand.
Material and Features
The materials and features you choose can make or break your sewing experience, affecting everything from comfort to precision.
Your table’s surface, adjustability, and lighting work together to support long sessions without strain.
Let’s look at three key features that transform a basic table into a workspace built for serious projects.
Surface Types
Your table’s surface is like the canvas for an artist—it sets the stage for every cut, stitch, and press you’ll make, so choosing the right material isn’t just about looks, it’s about making your projects easier from start to finish.
Different surface types offer distinct advantages for your work surface dimensions and daily tasks:
- Laminated tops: Smooth cutting surface with excellent scratch resistance and easy surface cleaning
- Heat-resistant materials: Perfect for pressing seams without damaging your work surface
- Glass inlays: Reduce glare while providing enhanced surface smoothness
- Matte finishes: Minimize reflections and offer ideal material texture for precision work
Adjustable Heights
Have you ever noticed how your shoulders start to creep toward your ears after an hour hunched over your machine, or how standing up feels like unfolding a rusty lawn chair? Adjustable heights solve this problem by letting you find your ideal height, whether you prefer sitting or standing.
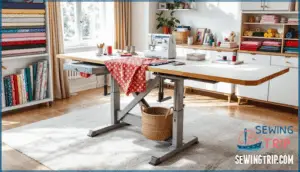
Modern tables offer manual cranks or motorized options that shift settings smoothly, delivering ergonomic benefits like posture improvement and reduced strain. This user customization means your table height conforms to you, not the other way around, supporting ergonomic comfort throughout every project.
Built-in Illumination
Good lighting isn’t just helpful—it’s the difference between threading a needle on the first try and squinting until your eyes water. Built-in illumination with ideal brightness and proper light temperature eliminates shadow reduction issues, letting you catch every detail.
LED systems offer energy efficiency, while their integrated design keeps your sewing table dimensions clean and uncluttered. Adjustable task lighting adapts as your project demands, supporting both precision and comfort at any height or length.
Space Optimization
When you’re working with limited square footage, smart storage becomes your best friend. Vertical solutions and under-table options can transform even a compact sewing area into a fully functional workspace.
Here’s how to make every inch count without sacrificing accessibility or comfort.
Vertical Storage
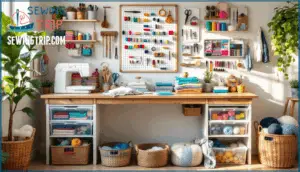
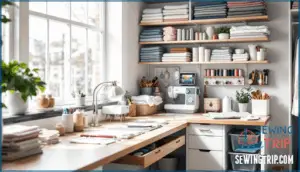
If your floor space feels tight, look up—because your walls contain untapped potential for storing everything from thread spools to pattern templates. Pegboard systems and wall-mounted storage keep tools visible and accessible, while shelving units above your sewing table create dedicated zones for fabric storage and supplies.
Hanging organizers transform blank walls into functional displays, freeing your work surface from clutter. These vertical storage solutions prove that smart organization isn’t about having more space—it’s about using every inch wisely.
Under-table Solutions
Building on the concept of vertical storage, the space beneath your sewing table is like a secret compartment waiting to be discovered—one that can swallow bulky items and keep them surprisingly accessible.
Consider these smart undertable solutions for workspace organization:
- Slide stackable bins underneath for fabric scraps, patterns, and sewing accessories.
- Install pull-out drawers that respect knee clearance while maximizing drawer accessibility.
- Position storage away from motor placement zones to maintain legroom dimensions and posture support.
Personal Preferences
No two sewers work the same way, and your ideal table size depends on what you actually make and where you’re setting up shop.
Think about the projects you tackle most often and measure the room you’re working with. These two factors will guide you toward a table that fits both your craft and your space.
Project Types
Before you commit to a specific table, take a step back and think about what you’re actually making—quilts sprawl differently than garment pieces, and both demand their own spatial approach.
Quilting projects need generous dimensions to accommodate layers without bunching, while garment construction requires precision space for pattern layout.
Home decor items and craft projects fall somewhere in between, but accessory making can thrive on smaller surfaces. Match your table to what you create most often, and you’ll work smarter, not harder.
Room Space Evaluation
Once you’ve zeroed in on what you’re making, measure the actual footprint you’ve got to work with—walls, doorways, and existing furniture all play a role in whether that dream table will fit or feel cramped. Sketch your workspace dimensions and map the room space around high-traffic zones, factoring in accessibility needs like comfortable clearance for your chair.
Account for ambient lighting sources, and consider future expansion if your sewing room size might evolve—smart layout planning now prevents cramped regrets later.
Ergonomics in Sewing
Your body will thank you for getting the ergonomics right from the start. A well-designed sewing setup prevents strain, fatigue, and long-term injury by positioning your work at the proper height and angle.
Here’s what you need to focus on to keep your sewing sessions comfortable and pain-free.
Preventing Injuries
Around 88% of sewing machine workers battle lower back pain, and 72% endure neck discomfort—stark reminders that preventing injuries in sewing demands more than good intentions. Ergonomics and workspace design form your first line of defense.
Eighty-eight percent of sewing workers suffer lower back pain while seventy-two percent endure neck discomfort—proof that proper ergonomics isn’t optional
Posture awareness matters: alternating between sitting and standing at your workstation setup reduces repetitive strain considerably. Ergonomic accessories like adjustable armrests ease shoulder stress, while comfortable lighting conditions prevent eye fatigue during detail work.
Regular breaks following the "20:20 rule"—changing activity every 20 minutes—combat static posture strain before it starts, keeping you creative and pain-free.
Sewing Surface Height
Setting your sewing surface at the ideal height—around 29.5 inches for seated work—protects your body from strain. Posture alignment improves dramatically when forearms rest parallel to the floor, elbows bent at 90 degrees. Adjustable tables let you fine-tune dimensions to your frame, directly impacting comfort during extended sessions.
Here’s how to nail best height:
- Measure from your seated elbow to the floor, then add 5.5 to 7 inches for ergonomics for sewing that matches your proportions.
- Check that your knees bend at 90 to 110 degrees with feet flat—table height recommendations emphasize this alignment to prevent lower back issues.
- Consider measurement techniques for free-arm machines, where the needle area, not the tabletop, defines functional height.
Proper dimensions mean you’ll sew longer without fatigue or injury.
Frequently Asked Questions (FAQs)
What Sewing Table Materials Provide the Most Durability?
Like a craftsman choosing between iron and oak, you’ll find metal sewing tables offer greater durability and joint strength compared to wooden alternatives.
Metal construction withstands decades of use, while wood provides adequate longevity at lower material costs, balancing surface resilience with budget considerations.
Should My Sewing Table Match Other Furniture in My Sewing Room?
Your sewing table doesn’t need to match perfectly, but aesthetic harmony helps create visual flow in your workspace design.
Consider color coordination and material choices across sewing furniture and coordinating storage units for style consistency without sacrificing function.
Is It Difficult to Assemble Sewing Tables at Home by Myself?
Most sewing tables arrive with straightforward assembly instructions and require minimal tools, streamlining the setup process. Usually, home delivery includes all necessary hardware, and clear step clarity makes part identification simple, so you can manage assembly solo without much time commitment.
Are There Any Tips for Moving or Repositioning Heavy Sewing Tables?
Heavy sewing tables move easier with proper Lifting Techniques and Floor Protection like furniture sliders. Upgrading to quality casters transforms stationary models into rolling tables, and Moving Equipment like dollies helps navigate tight spaces without damaging floors or straining your back.
Consider Disassembly Options if your table has removable legs or sections.
What Style of Sewing Table Legs Provide the Most Stability?
Tables with metal legs and wide bracing systems offer greater stability. Look for adjustable feet to level uneven floors, and consider leg placement—four sturdy corners beat wobbly center braces. Weight capacity ratings reveal true strength for heavy machines.
How do sewing tables affect electricity or outlet needs?
Your sewing table location impacts outlet proximity—placing it near power sources avoids extension cords.
Consider power strips with surge protection for your sewing machine, built-in illumination, and foot pedal, while implementing cord management to prevent tripping hazards in your sewing setup.
Can sewing tables support embroidery or serger machines?
Yes, most sewing tables support embroidery or serger machines if they meet Machine Weight Limits and provide Tabletop Stability.
Quality sewing furniture includes Vibration Dampening, Accessory Compatibility, and Power Cord Access—making sure your sewing machine table remains ergonomically friendly at proper dimensions for comfortable, secure operation.
What maintenance do sewing tables require over time?
Routine surface cleaning keeps your workspace dust-free, while regular hardware checks help screws and joints stay stable over time.
Protect finishes from scratches, address damage promptly, and read customer reviews about construction quality before purchasing for long-term material durability.
Are there sewing tables designed for left-handed users?
Most sewing tables aren’t specifically handed, but you can create left-handed ergonomics through reversible features and ambidextrous design.
Swap storage sides, adjust workspace orientation, or request custom adaptations for mirror sewing setups at an ergonomically friendly height that suits your dimensions.
Conclusion
Hesitant to commit because you’re unsure how big a sewing table needs to be for your space? Remember: the perfect dimensions aren’t found in a catalog—they’re measured against your body, your projects, and your room’s footprint.
A table that allows for comfortable arm positioning, accommodates fabric flow, and stores essentials within reach transforms tedious sessions into productive ones.
Prioritize ergonomic height and sufficient surface area over trendy features. Your shoulders, neck, and finished seams will thank you for choosing function over guesswork.
- https://siemachtsewingblog.com/2016/12/sewing-table-buying-guide/
- https://www.reddit.com/r/sewing/comments/13m3smc/perfect_sewing_table_size/
- https://arrowsewing.com/arrow/heavyweight-sewing-table/
- https://www.techsew.com/us/support/what-are-the-weight-and-dimensions-of-this-machine/
- https://sjobergs.se/en/product/sjobergs-sewing-machine-table-light-gray/

