This site is supported by our readers. We may earn a commission, at no cost to you, if you purchase through links.
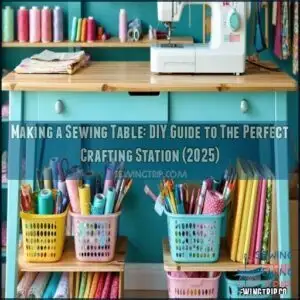 Making a sewing table lets you design the perfect workspace for comfort and efficiency.
Start by choosing a table height that matches your chair and keeps your arms relaxed—too high, and you’ll feel like you’re arm wrestling your fabric.
Measure your sewing machine’s footprint carefully, then cut a sturdy tabletop with an opening to fit. Smooth the edges, add braces for support, and secure legs that won’t wobble.
Don’t forget storage—drawers or baskets can turn chaos into calm. Use durable materials like plywood or oak, but keep it simple.
A splash of paint or finish adds personality—and maybe a little sewing magic.
Table Of Contents
Key Takeaways
- Measure your sewing machine footprint and cut the tabletop opening accurately for a snug, stable fit.
- Prioritize ergonomics by matching the table height to your needs, reducing strain during long sewing sessions.
- Use durable materials like plywood or butcher block for the tabletop and reinforce the structure for stability.
- Add functional features like storage solutions, lighting, and vibration-absorbing supports to enhance your workspace.
Planning Sewing Table
When planning your sewing table, start by deciding on the height and dimensions that suit your needs and workspace.
Keep ergonomics in mind to guarantee a comfortable setup, reducing strain during long sewing sessions.
Determining Table Height
Finding the right ergonomic height for your sewing table helps reduce strain and improves posture impact.
Shoot for a level around your hips to comfortably lean while cutting or sewing.
Adjust to suit your height and tasks for better sewing comfort.
- Aim for 30-34” high.
- Match cutting height to your arms.
- Use adjustable table legs.
- Test different positions.
- Prioritize workspace ergonomics.
Choosing Table Dimensions
Your sewing table dimensions depend on the available space and the tasks you’ll tackle, like creating a comfortable cutting area.
For flexible sewing table plans, aim for a 4×8 surface with ergonomic height adjustments.
Consider material thickness for durability and corner fitting for snug placement.
Tailor your sewing table ideas to match your room’s space requirements while maximizing functionality.
Considering Ergonomics
For comfort and injury prevention, consider posture support and reach distance in your sewing table plans.
Here’s a short, engaging blockquote in the same tone as the paragraph about posture and ergonomics:
Prioritize your body’s comfort—proper reach and posture support transform sewing from painful to pleasurable!
An ergonomic sewing table should align with your elbow height, minimizing strain, and include adjustable features like height settings.
Make certain your vision angle avoids neck strain by positioning tools within view, allowing for small tweaks that can make your sewing table design both functional and pain-free!
Customizing Table Design
When personalizing your sewing table design, think about your specific needs and space.
Small tweaks can make crafting seamless and fun.
- Add adjustable height for comfort and better ergonomics.
- Use a clever corner design or mobility options to maximize space.
- Include integrated lighting or fabric storage for efficient sewing table customization.
These sewing table modifications make your setup truly yours!
Gathering Materials
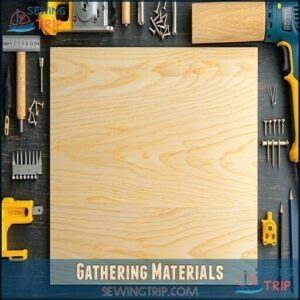
You’ll need the right materials to build a sturdy, functional sewing table, so start by making a detailed list of what’s required.
Focus on durable options like plywood or butcher block for the tabletop, and don’t forget tools like a jigsaw and wood screws to bring your project together.
Selecting Table Top Materials
Start with durable materials like a butcher block for a professional finish or plywood grades for cost-effective versatility.
Furniture-grade birch guarantees a smooth surface, while pine offers affordability.
Adding a homasote layer enhances surface durability for cutting and sewing.
MDF works for smooth edges, but a cost analysis shows hardwoods like butcher block are worth the investment long-term.
For a lighter alternative to MDF, consider using poplar ply for a more cost-effective solution.
Choosing Support Structure
When choosing a support structure for your sewing table, prioritize frame stability and load capacity.
Use a 3/4" plywood support board to strengthen the base design. Cut six 5"-wide strips for support rails and create four beveled braces for joint reinforcement.
This guarantees table stability during sewing projects, making your crafting station sturdy enough to handle heavy-duty use. Consider exploring various table leg options for enhanced stability.
Purchasing Necessary Tools
Now that you’ve chosen your support structure, you’ll need the right tools for the job. Your essential toolkit should include a power drill, measuring tape, level, jigsaw, and circular saw.
Don’t skimp on tool quality – good woodworking tools save time and frustration. A power drill is essential, and you can find various models online.
Remember safety equipment like goggles and gloves. On a budget? Consider rental options for pricier items you won’t use often.
Sourcing Materials From Home Depot
Now that you have your tools ready, let’s get you stocked with materials from Home Depot. You’ll find everything needed for your DIY sewing table in one convenient stop.
Home Depot offers quality butcher block countertops and various plywood options at competitive prices. Their hardware selection is extensive, with everything from wood screws to table legs.
For accurate measurements, consider adding transparent rulers to your shopping list.
- The smooth feel of perfectly cut butcher block under your fingertips as you glide fabric across your finished table
- That satisfied smile when you spot the exact plywood thickness you need on the shelf
- The quiet thrill of comparing hardware options and finding the perfect match for your design
- That "I’ve got this" feeling when the helpful associate directs you to specialty woodworking tools
- The pride of pushing your cart to checkout, knowing you’re one step closer to your dream sewing space
Cutting Table Components
You’ll need to carefully cut and prepare the table components for your sewing station, focusing on the machine opening and support structures that will transform ordinary materials into a functional workspace.
With your materials gathered, it’s time to measure your sewing machine’s footprint and create the perfect-sized opening, making sure all edges are sanded smooth for safety while you work on your fabric masterpieces.
This process will help you achieve a well-organized sewing area, allowing you to efficiently work on your projects with a functional workspace.
Measuring Sewing Machine Footprint
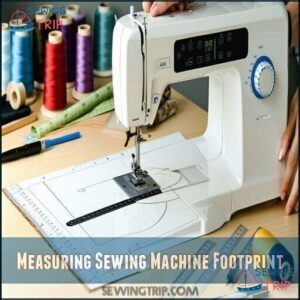
Before diving into your sewing table project, you’ll need to take precise measurements of your sewing machine footprint.
Most modern machines measure around 40cm wide, 25cm deep, and 30cm high.
Create a template using cardboard or paper, tracing around your machine to capture accurate dimensions.
Remember to account for bobbins access and any knee lift mechanisms for flush mounting and vibration reduction during sewing.
Cutting Table Top Opening
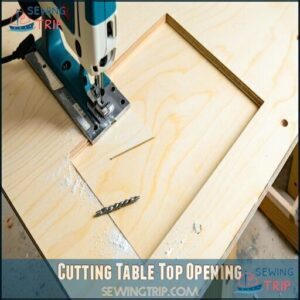
With a steady hand, cut your table top opening using a jigsaw technique after measuring your machine’s footprint.
Transform your fabrics with precision using a perfectly cut opening that embraces your machine like a glove.
Position the opening 6 inches from the front edge and 4 inches from the side.
Use a Forstner bit for clean corner cuts before switching to your jigsaw.
For proper flush mounting, verify dimensions are precise.
Add opening reinforcement underneath to support your sewing machine table and prevent vibration.
Sanding Edges for Safety
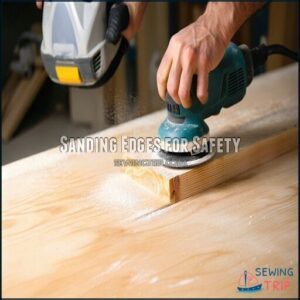
After cutting the opening for your sewing machine, smooth those rough edges with thorough sanding.
Start with 80-grit sandpaper, then move to 120-grit for finer finishing.
Safety gear is essential – wear a mask to prevent inhaling dust.
Focus on burr removal and slight edge rounding to protect your hands and fabric during use.
Good dust collection keeps your workspace clean and your lungs healthy while building your DIY sewing table.
Creating Drop Table Supports
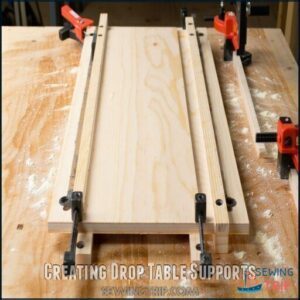
With your smooth sanding complete, let’s focus on the drop table supports that’ll cradle your sewing machine perfectly.
Create L-shaped supports by gluing 3/4″ poplar strips to 3 1/2″ planks. You’ll need three supports total—two side pieces with 45-degree angles and one centered back piece.
Clamp everything tightly as the glue dries for maximum reinforcement. A sturdy platform is vital for larger sewing machines.
This DIY table construction step guarantees your machine sits flush with minimal vibration, ensuring a stable and secure sewing experience.
Assembling Sewing Table
You’ll now bring your sewing table to life by connecting the support structure to the table top and securing the legs for rock-solid stability.
With your components prepared, you’ll transform separate pieces into a functional crafting station that won’t wobble when you’re in the middle of a complex quilting project.
Building Support Structure
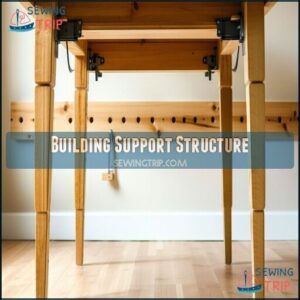
With your cut pieces ready, it’s time to build a rock-solid support structure for your sewing table.
The foundation needs to be sturdy enough to handle both the weight of your machine and the vibrations from sewing.
For proper support structure assembly:
- Attach support rails to the underside of your table frame using pocket holes
- Install plywood support boards for improved load bearing capacity
- Add leg reinforcement brackets at each corner for maximum joint stability and to ensure a solid base.
Attaching Table Top
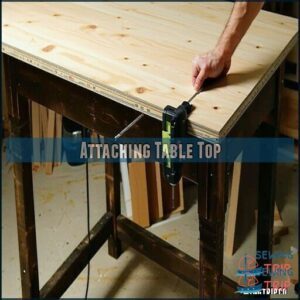
Every successful sewing table needs a properly attached table top – it’s where all your creative magic happens.
When attaching your table top, focus on alignment, joint reinforcement, and secure screw placement.
| Step | Technique | Tools Needed |
|---|---|---|
| Positioning | Center top on frame | Measuring tape |
| Surface Adhesion | Apply wood glue to joints | Applicator brush |
| Screw Placement | Pre-drill at 8" intervals | Drill with bits |
| Joint Reinforcement | Add corner brackets | Screwdriver |
| Leveling Techniques | Check with level, adjust | Carpenter’s level |
The key steps for a successful attachment include proper positioning, surface adhesion, screw placement, joint reinforcement, and leveling techniques to ensure your sewing table is both functional and durable.
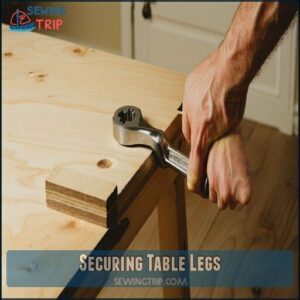
Securing Table Legs
Always double-check your table leg attachment methods before proceeding.
Secure the legs using appropriate hardware, ensuring even weight distribution across all mounting points.
You’ll want to use washers with your bolts to prevent wood damage.
For ideal stability enhancements, tighten connections firmly but don’t overtighten and strip the threads.
Consider aesthetic integration by aligning legs precisely at corners according to your measurements—crooked legs aren’t just unstable, they’re visually distracting too.
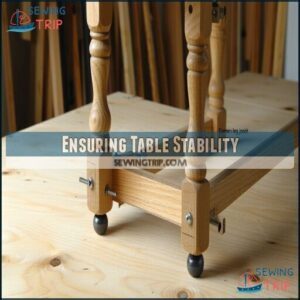
Ensuring Table Stability
Three key elements guarantee your sewing table stability: proper leg bracing, joint reinforcement, and even weight distribution.
Add diagonal supports between table legs to prevent wobbling. Check that all joints are secure with appropriate hardware.
You’ll want to install leveling feet to accommodate uneven floors. Consider material selection carefully—solid wood provides better vibration reduction than particleboard.
Your sewing machine support should be reinforced beneath the table for additional strength during high-speed operation. Ergonomic designs help prevent injuries and strains during long sewing sessions to ensure a comfortable and safe sewing experience with proper vibration reduction.
Finishing Touches
You’ll transform your nearly-complete sewing table into a functional masterpiece with these essential finishing touches, from applying protective finishes to installing your machine just right.
Now’s the time to add those personal storage solutions that’ll keep scissors and thread within arm’s reach, making your sewing sessions flow as smoothly as fabric through your machine, with essential finishing touches and a well-installed machine being key to a successful outcome, and ultimately creating a functional masterpiece.
Applying Finish to Table Top
With your table firmly assembled, it’s time to protect your hard work with the right finish. Sand your table top with 220-grit sandpaper between each coat for smoothness.
Apply polyurethane using long, even strokes for maximum finish durability. Consider furniture wax as a final topcoat selection for a soft sheen.
Different sealer options offer varying protection levels – water-based finishes dry faster, while oil-based provides deeper protection. You can also use a sealer to lock in color if you’re working with dyed leather.
Installing Sewing Machine
With your table’s finish dry, it’s time to install your sewing machine.
Lower your machine into the opening, aiming for flush mounting with the table surface.
Insert any knee lift mechanisms through pre-cut holes. Add support bars underneath to reduce vibration while sewing.
Check your machine leveling – it should sit slightly above or exactly even with the tabletop. This setup guarantees easy bobbin access and smooth fabric feeding.
Adding Custom Storage Solutions
Numerous storage solutions will transform your sewing table into an organizational paradise. With your table’s structure complete, it’s time to add personalized storage that keeps supplies at your fingertips.
The table can also feature custom storage shelving to accommodate various craft items.
Here are 5 custom storage ideas to explore:
- Install drawer inserts with divided compartments for thread organization
- Add under-table shelves for fabric storage and current projects
- Create a pull-out thread rack on hidden compartments
- Mount a pegboard above your sewing table for frequently used tools
- Incorporate magnetic strips under the table edge for pins and needles
Finalizing Table Assembly
The finish line is in sight! After all your hard work, it’s time to finalize your table assembly with these key steps:
| Task | Tool Needed | Time Required |
|---|---|---|
| Hardware Tightening | Screwdriver/Wrench | 15 minutes |
| Leveling Adjustments | Level | 10 minutes |
| Joint Reinforcement | Wood Glue/Screws | 20 minutes |
| Stability Testing | Body Weight | 5 minutes |
| Final Inspection | Eyes/Hands | 10 minutes |
Double-check all connections, tighten loose screws, and test stability before placing your machine, ensuring a thorough final inspection with your eyes.
Frequently Asked Questions (FAQs)
What is the best lighting for sewing tables?
The best lighting for sewing tables combines adjustable LED task lamps and overhead daylight bulbs.
Aim for bright, shadow-free light to see details clearly.
Add a clip-on magnifier light for close-up work—your eyes will thank you!
How do I soundproof the sewing table?
Ever feel like your sewing machine’s having a rock concert on your table?
Add foam padding underneath, use vibration-absorbing mats, and secure joints tightly.
Voilà, a quieter, happier stitching experience for your crafty adventures!
Can wheels be added for portability?
You can add wheels by attaching locking casters to the table legs.
Choose heavy-duty wheels that can support the table’s weight, drill pilot holes, and secure them with screws for smooth movement and stability.
How to manage power cords and outlets?
Ever feel like cords have a mind of their own?
Use under-table cable trays, mount power strips on legs, and clip cords along edges.
It keeps everything tidy, safe, and frustration-free while sewing masterpieces!
What are ideal sewing chair considerations?
Choose a chair with adjustable height, lumbar support, and a padded seat.
Look for wheels for mobility and breathable fabric to prevent discomfort.
A good ergonomic chair keeps you comfy, even during long sewing sessions.
Conclusion
Did you know ergonomic workspaces can boost productivity by 20%?
By making a sewing table, you’ve created a custom setup suited to your needs and comfort. From precise measuring to proper leg stability, every detail adds to your efficiency and reduces strain.
Your finished table isn’t just a workspace—it’s a crafting companion built to last. With durable materials and smart storage, sewing now feels more organized and rewarding.
Enjoy your personalized crafting station and happy sewing!
- http://us3.campaign-archive2.com/?u=ff0cc8f1530eb27adf828ba0e&id=e4d02f6c0c
- http://learnwithbrooksann.com/signup
- http://en.wikipedia.org/wiki/Homasote
- https://reads.alibaba.com/sewing-tables-unveiling-the-core-features-for-your-crafting-needs/
- https://www.sewsteady.com/product-category/sewing-tables-insets-inserts/?srsltid=AfmBOopXazw4N4DVRtMxyuQDqC2F4KFLu_TB0VV2czzbqO4lOBHCbVxE

