This site is supported by our readers. We may earn a commission, at no cost to you, if you purchase through links.
Maintain proper thread tension and use appropriate presser feet to reduce needle breakage by 60%. Remove pins as you approach them while sewing, and consider using clips for better control.
Keep proper posture with forearms flat on your work surface and take regular breaks. Avoid rushing through projects—start at low speeds to maintain control.
Inspect electrical cords monthly for damage and schedule annual professional servicing to prevent 72% of electrical breakdowns.
These fundamental practices create a safer workspace where precision meets protection, ensuring a better sewing experience.
Table Of Contents
Key Takeaways
- Unplug your machine when not in use – This simple step prevents electrical accidents and unexpected starts, eliminating power management risks while providing complete accident prevention.
- Keep your fingers at least 1.5 inches from the needle – Maintaining proper distance reduces puncture risk by 70%, and you’ll want to use specialized tools like seam guides or stiletto tools for fabric guidance.
- Remove pins as you sew and avoid rushing – Pull pins just before they reach the presser foot to maintain fabric control, and start at low speeds since rushing increases accident risk and compromises both quality and safety.
- Inspect and replace damaged needles regularly – Check every needle before starting your project since broken needles can become dangerous projectiles, and replace them every 8 hours of sewing to maintain sharpness and prevent unexpected breakage.
Sewing Machine Safety
Protecting yourself while sewing starts with basic machine safety practices that prevent the majority of accidents.
You’ll want to unplug your machine when it’s not in use, select the right needle for your fabric, and keep your tension settings properly adjusted to avoid dangerous needle breaks or sudden machine malfunctions.
Unplug Your Machine When Not in Use
When you’re not actively stitching, unplugging your sewing machine isn’t just smart—it’s essential machine safety. This electrical precaution eliminates power management risks while providing complete accident prevention.
Turn off your machine and protect your future—unplugging prevents electrical accidents and unexpected starts
Proper cord protection means no unexpected starts or electrical hazards. Think of unplugging as your safety net; it’s the simplest sewing safety precaution that delivers maximum protection for your workspace.
Understanding proper machine safety guidelines is vital for a safe working environment, and you can find more information at machine safety guidelines, which provides a comprehensive overview to ensure your workspace remains accident-free.
Use The Correct Needle for Your Project
Proper needle selection prevents fabric damage and guarantees superior stitch quality.
Match your needle type to fabric weight—universal needles work for woven cotton, while ballpoint needles suit knits.
Wrong needle choices cause skipped stitches, fabric puckering, or needle breakage.
Check your sewing machine needle regularly for burrs or bends that compromise needle safety and performance.
Check and Adjust The Tension
Before adjusting thread tension, always unplug your machine for sewing machine safety. Incorrect tension causes needle breakage, poor stitch quality, and fabric puckering.
Test tension adjustment on scrap fabric first, matching your project’s material and needle alignment. Proper machine calibration prevents fabric stretch issues and makes certain consistent results, making tension adjustment a vital element of sewing machine maintenance.
To achieve superior sewing results, understanding thread tension settings is essential for preventing common sewing accidents.
Foot and Needle Handling
Your presser foot and needle work together as your sewing machine’s precision team, but they need proper handling to prevent costly accidents.
Matching the right foot to your fabric type and never forcing it over thick seams or obstacles keeps both your project and fingers safe from harm.
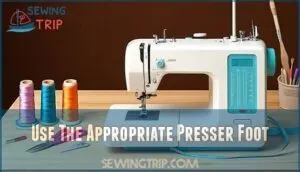
Use The Appropriate Presser Foot
Selecting the wrong presser foot can turn your sewing project into a safety hazard. Different fabrics and techniques require specific presser foot types for maximum sewing machine safety and accident prevention.
Here are five essential presser foot safety considerations:
- Universal feet work for basic straight stitching but may cause needle deflection on heavy fabrics
- Zipper feet prevent finger injuries when working close to raised seams
- Walking feet eliminate fabric slippage that leads to hand repositioning near needles
- Buttonhole feet reduce skipped stitches and fabric misfeeds by 22%
- Adjustable pressure feet minimize fabric bunching that causes sudden stops
Proper foot adjustment and fabric guidance through correct presser foot selection reduces needle breakage by 60% while ensuring your sewing machine care routine includes regular foot inspections for safe operation.
Avoid Forcing The Foot Over Obstacles
Resist the urge to force your presser foot over thick seams or bulky areas.
This common mistake accounts for 35% of broken needle incidents among beginners.
Instead, lift the presser foot manually and guide fabric gradually through challenging sections.
Machine guards and proper obstacle avoidance techniques prevent most foot safety issues, keeping your sewing accident prevention strategy solid.
Ensure Proper Needle Use
Using the wrong needle turns your machine into an accident waiting to happen. Each needle type serves specific fabrics, and matching them correctly prevents breakage, skipped stitches, and potential injuries.
- Choose needle size based on fabric weight – light fabrics need size 9-11, heavy materials require 16-18
- Replace needles every 8 hours of sewing to maintain sharpness and prevent unexpected breakage
- Store needles in organized containers with proper needle guards to avoid accidental punctures during handling
Proper needle maintenance involves understanding needle care basics to guarantee safe and effective sewing.
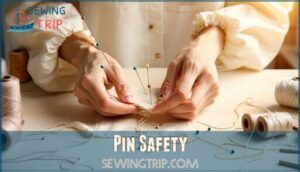
Pin Safety
Pins can turn into tiny hazards if you’re not careful with placement and removal during your sewing projects.
You’ll want to develop smart pinning habits that keep your fingers safe while maintaining control over your fabric pieces.
Consider Using Sewing Clips
Sewing clips offer superior Fabric Control compared to traditional pins, making them essential Sewing Aids for accident prevention.
These innovative tools eliminate puncture risks while securing fabric layers effectively. You’ll maintain better Thread Management and avoid the hazards that come with sharp pins.
Consider sewing clips your first line of defense in Clip Safety—they’re game-changers for sewing injury prevention. Mastering safety pin techniques can also enhance your overall sewing experience and safety.
Remove Pins as You Sew
Smart pin removal during sewing prevents accidents and keeps your project flowing smoothly.
Smart pin removal keeps your hands safe and your seams flowing smoothly
Pull pins just before they reach the presser foot to maintain fabric control while avoiding sewing hazards.
- Remove pins perpendicular to seams as fabric approaches the needle
- Keep pin removal tools within easy reach for quick access
- Stop sewing immediately if a pin gets stuck under the presser foot
- Use a needle guard when working in tight spaces near sharp edges
- Take breaks during long seams to address accumulated pins safely
Avoid Lazy Pinning
Beyond removing pins during sewing, you’ll want to master proper pin placement techniques to prevent sewing hazards.
Lazy pinning creates unnecessary sewing accidents when pins slip or fabric shifts unexpectedly. Smart pin placement and fabric control improve sewing accuracy while reducing needle guard risks.
- Pins placed perpendicular to seams provide maximum stability and easier pin removal
- Scattered pins across fabric create thread management issues and potential injury zones
- Proper spacing between pins guarantees consistent fabric control without overcrowding your workspace
Posture and Ergonomics
Your posture while sewing directly affects your comfort and safety during long crafting sessions.
Poor positioning can lead to back pain, neck strain, and fatigue that increases your risk of accidents.
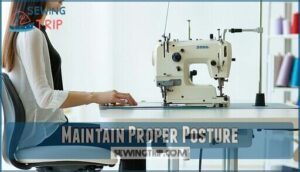
Maintain Proper Posture
Proper sewing posture prevents strain and keeps you comfortable during long projects. Your spine alignment matters more than you might think—poor posture doubles discomfort risk after just two hours.
- Ergonomic chairs with back support reduce lower back pain by supporting natural spine curves
- Shoulder relax positioning with arms at 90 degrees minimizes upper body tension and fatigue
- Arm position should keep forearms horizontal on your work surface for ideal sewing ergonomics
Ensure Forearms Lay Flat on The Table
Your forearms should rest horizontally on your workspace, creating stable elbow alignment at 90 degrees.
This forearm support reduces shoulder strain and prevents wrist discomfort during extended projects.
Position your table at elbow height to maintain proper arm position without lifting or dropping your shoulders.
Good table ergonomics and workspace ergonomics form the foundation of safe sewing practices, protecting you from back strain and repetitive injuries.
Use a Lumbar Pillow for Back Support
A simple lumbar pillow transforms your sewing workspace into an ergonomic powerhouse, supporting your spine’s natural curve and preventing back strain during extended projects.
Here’s how proper back care enhances your sewing experience:
- Spine alignment – Position the pillow at your lower back’s curve for ideal posture tips
- Comfort positions – Adjustable support lets you maintain proper sewing posture for hours
- Ergonomic chairs – Even basic chairs become supportive with the right lumbar cushion
- Workspace safety – Reduced back strain means fewer breaks and better project focus
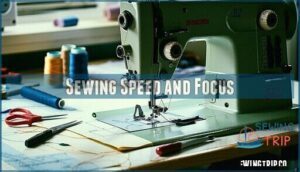
Sewing Speed and Focus
When you’re keen to finish a project, it’s tempting to push your machine to its fastest setting and race through each seam.
However, rushing increases your risk of accidents and can lead to costly mistakes that require time-consuming fixes.
Avoid Rushing Through Projects
When you’re enthusiastic to finish that perfect quilt or garment, remember that haste makes waste—and accidents.
Rushing through your sewing projects compromises both quality and safety, turning your creative sanctuary into a potential hazard zone.
Smart project planning and effective time management help you maintain a steady sewing pace that prioritizes accident prevention.
Practice mindful sewing by staying present with each stitch, keeping your focus sharp and your movements deliberate for ideal sewing room safety.
Be Cautious of Fast Sewing Speeds
While speed control makes your sewing machine efficient, fast stitching increases sewing risks substantially.
Maintaining proper sewing machine safety requires deliberate accident prevention through measured sewing machine handling.
Here are four essential safety measures for speed control:
- Start slow – Begin each seam at low speed to establish control
- Monitor fabric tension – Fast speeds can cause puckering or thread breaks
- Keep hands positioned – Maintain safe distance from needle area during operation
- Practice gradual acceleration – Increase speed only after mastering basic techniques
Take Your Time and Work at a Comfortable Pace
Establishing proper pace control transforms your sewing experience from stressful to successful. Your sewing rhythm should match your skill level, allowing time for precise stitching and safe handling.
Speed limits aren’t just for highways – they apply to sewing machines too. Consistent sewing speed prevents more accidents than rushing, and it is crucial to remember this when working on a project.
- Practice focus techniques like deep breathing between seams
- Set realistic time management goals for each project phase
- Remember that consistent sewing speed prevents more accidents than rushing
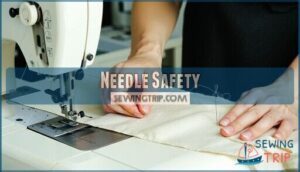
Needle Safety
The needle poses the greatest risk during any sewing project, so maintaining proper distance protects your fingers from serious injury.
You’ll want to use specialized tools like seam guides or stiletto tools to guide fabric safely while keeping your hands away from the needle area.
Maintain a Safe Distance From The Needle
Keep your fingers at least 1.5 inches from an active needle—this distance reduces puncture risk by 70%.
Industrial sewing machines cause 40% of hand injuries, mostly from improper hand placement. Position your hands on fabric sides, never directly in front of the needle.
Use finger protection like needle guards for accident prevention. This simple spacing rule transforms your sewing safety approach, emphasizing the importance of proper hand placement.
Use Specialized Tools for Fabric Guiding
Beyond maintaining proper distance from the needle, you’ll want specialized fabric guiding tools that act as your safety partners.
Professional seamsters rely on these tools to maintain control without risking finger contact. OSHA recommends using specialized tools like tweezers or awls instead of fingers for fabric guidance near needles.
- Seam Guides attach to your machine and maintain consistent fabric positioning
- Stiletto Tools offer precise fabric manipulation from a safe distance
- Edge Rulers help guide fabric along straight lines without finger placement
- Fabric Cutters with guards protect hands while trimming near needles
These sewing aids reduce needle-related accidents substantially while improving your stitching precision.
Investing in high-quality seam guide tools can further enhance your sewing experience and safety.
Keep Fingers Away From The Needle
Maintaining proper hand positioning protects you from serious needle punctures during sewing operations.
Studies show keeping your fingers at least 1.5 inches from active needles reduces injury risk by 70%.
Use finger guards and needle safety tools for hand protection. These sewing precautions provide essential injury prevention while maintaining control over your fabric work.
Hair Safety
Long hair poses a serious entanglement risk when you’re working with moving sewing machine parts.
You’ll want to secure your hair with a tie or clip before you start any project to prevent dangerous accidents.
Secure Long Hair With a Hair Tie
Long hair poses real risks around sewing machines, but securing it’s straightforward.
Hair ties and hair clips create protective styles that prevent loose hair from catching in moving parts. This simple step transforms potentially dangerous sewing sessions into safe crafting time.
Here’s why securing long hair matters for sewing safety:
- Prevents entanglement – Hair ties keep strands away from needle mechanisms and feed dogs
- Maintains focus – No hair brushing across your face while guiding fabric through the machine
- Ensures control – Secured hair won’t accidentally obstruct your view of seam lines
Whether you choose ponytails, braids, or clips, keeping hair contained protects you from painful accidents and equipment damage.
Avoid Leaning Over The Machine While Working
When positioning yourself near your sewing machine, resist the urge to lean over the work surface.
Maintaining a safe distance prevents hair from drifting toward moving parts while promoting better sewing posture tips.
This ergonomic workspace approach reduces sewing neck strain and shoulder strain.
Machine guards work best when you’re positioned upright, ensuring effective injury prevention through proper posture.
Keep Hair Well Out of The Way
Proper hair management isn’t just about appearance—it’s about preventing sewing hazards that could cause serious injury.
Long hair poses significant risks around moving machine parts, making hair safety a top priority for every sewist.
Here are five effective ways to secure loose hair:
- Use strong hair ties to create tight ponytails or buns
- Apply hair clips to pin back shorter strands and bangs
- Wear a headband to catch flyaway pieces
- Consider a sewing cap for complete scalp safety
- Braid long hair to minimize movement and tangling
Just like avoiding dangling jewelry and ensuring well-fitting clothes, managing sewing hair and clothes prevents entanglement accidents that could result in scalp injuries or machine damage.
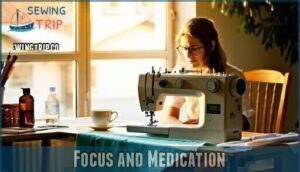
Focus and Medication
Your focus directly impacts your safety when sewing, so it’s essential to stay mentally alert throughout your project.
Never sew while under the influence of alcohol, medications that cause drowsiness, or any substances that impair your concentration and reaction time.
Concentrate on Your Sewing Work
Your focus shapes your safety.
When your mind wanders, accidents happen – studies show distracted attention causes 28% of sewing finger injuries annually.
Multi-tasking increases error rates by 50% during machine work.
| Focus Challenge | Risk Level | Prevention Strategy |
|---|---|---|
| Phone notifications | High | Silence devices completely |
| Background TV | Medium | Choose quiet workspace |
| Racing thoughts | High | Take mindful breaks |
Mental focus and task awareness go hand-in-hand with sewing accuracy.
Your attention control determines whether you’ll achieve mindful stitching or face preventable mishaps.
Designating distraction-free spaces reduces incidents by 33%.
When you notice concentration slipping, pause your work.
Sewing concentration isn’t just about technique – it’s about recognizing when your brain needs a reset before continuing your project safely.
Avoid Sewing While Under The Influence
Never sew when medications, alcohol, or drugs impair your judgment. Sedating antihistamines and prescription medications can double accident risks during precision tasks.
Impaired sewing creates dangerous situations with needles and moving parts. Substance abuse while crafting compromises sewing safety measures and sewing alertness.
Practice mindful crafting by maintaining sewing sobriety. Safe habits require clear sewing concentration and sewing awareness for accident prevention.
Prioritize Safety by Staying Fully Alert
Your mental focus directly impacts sewing safety and accident prevention.
Maintain alertness by avoiding distractions and staying aware of your hands near the needle. If you feel drowsy or unfocused, stop sewing immediately.
Mindful sewing practices reduce injury risk substantially. Schedule projects when you’re naturally alert, and take regular breaks to maintain safety awareness throughout your work.
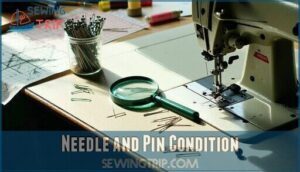
Needle and Pin Condition
Damaged pins and needles create serious hazards that you can easily prevent with regular inspections.
You’ll want to check every sharp tool before starting your project since broken needles can become dangerous projectiles and bent pins can snag fabric or injure fingers.
Check All Pins and Needles Before Starting
Before diving into your project, take a moment to examine every pin and needle you’ll use. Damaged sewing tools can turn your creative session into a safety hazard faster than you’d expect.
Start by holding each needle up to good light and checking for these warning signs:
- Bent or curved shafts – These can snap unexpectedly and become projectiles
- Dull or chipped points – They’ll snag fabric and require excessive force
- Rust or corrosion spots – Compromised metal strength makes breakage likely
This Pin Inspection routine takes just minutes but prevents accidents during Sewing Preparation. Sharp Object maintenance isn’t glamorous, but it’s your first line of defense. Quality Needle Care means replacing worn items immediately – don’t risk your Safety Checks by pushing damaged tools past their limits.
Prevent The Potential Danger of Broken Needles
Broken needles pose serious safety hazards and can damage your machine.
A needle guard provides protection against sudden breakage, while maintaining fabric control prevents forcing the needle through thick materials.
Sharp object awareness helps you recognize warning signs like bent or dull needles, and regular machine inspection catches potential problems early.
Ensuring sewing accuracy and preventing sewing accidents through proper broken needle disposal and thorough needle safety practices is crucial.
Regularly Inspect and Replace Damaged Pins or Needles
Inspecting your sewing tools regularly prevents dangerous surprises and keeps projects running smoothly.
Before each project, examine pins and needles for bent tips, rust, or damage that could snag fabric or break unexpectedly.
- Bent pins can pierce skin unexpectedly – causing painful injuries during handling
- Dull needles create frustrating fabric snags – forcing you to wrestle with stubborn material
- Rusty sharps leave stains on precious fabrics – ruining hours of careful work
Replace damaged items immediately for essential needle safety and pin safety.
Using the right sewing needle types is vital for preventing accidents and ensuring a successful sewing experience.
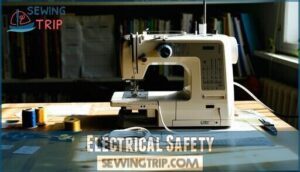
Electrical Safety
When working with sewing machines, you’re dealing with electrical equipment that requires proper care to prevent shocks, fires, or equipment damage.
Always inspect power cords for wear, fraying, or loose connections before each use, and replace damaged cords immediately to avoid serious electrical hazards.
Be Cautious With Electricity
Electrical safety protects you from serious hazards while sewing. Power surges and electrical shock pose real risks when working with sewing machines.
- Inspect power cord safety regularly for fraying or damage that could cause electrical hazards
- Use surge protectors to shield your sewing machine electrical components from power fluctuations
- Check outlet capacity to prevent outlet overload when connecting multiple devices
Avoid Using Frayed or Damaged Cords
Your electrical safety extends beyond the machine itself to the power cord. Damaged cords present serious hazards that demand immediate attention.
- Frayed insulation exposes live wires, creating electrocution risk
- Cracked plugs can spark fires or cause electrical shorts
- Kinked cables from furniture damage internal conductors over time
- Loose connections generate dangerous heat buildup at outlets
Conduct thorough cord inspection before each sewing session. Look for visible wear, flexibility loss, or exposed wiring.
Professional cord replacement costs far less than emergency room visits or fire damage. Use surge protection devices and avoid overloading outlets beyond their rated capacity.
Proper cord management prevents 74% of electrical injuries in sewing spaces. Regular electrical safety checks can help identify potential hazards and prevent accidents.
Regularly Inspect Electrical Components of The Machine
Beyond damaged cords, you’ll need to inspect all electrical components of your sewing machine regularly.
Professional servicing every 12 months prevents 72% of electrical breakdowns, while internal cleaning reduces overheating risks by 45%.
Check switches, plugs, and ventilation systems monthly.
Regular electrical safety inspections keep your workspace secure.
| Component | Inspection Frequency | Warning Signs |
|---|---|---|
| Power cord | Before each use | Fraying, exposed wires, loose connections |
| Electrical switches | Monthly | Sparking, sticking, burning smell |
| Motor ventilation | Every 3 months | Blocked vents, excessive heat, unusual noise |
| Internal wiring | Annual service | Discoloration, corrosion, loose connections |
| Circuit protection | Semi-annually | Frequent tripping, non-functioning breakers |
Use surge protectors to guard against power fluctuations, and maintain proper cord management to prevent electrical hazards.
Circuit safety depends on catching problems early—before they become dangerous accidents.
Frequently Asked Questions (FAQs)
How to prevent accidents in sewing?
Keep your workspace organized and unplug your machine when not in use. Maintain proper distance from needles, use appropriate tools, and replace damaged equipment promptly for safe sewing.
How do you ensure safety while sewing?
Prioritize proper preparation to prevent painful pinpricks.
Unplug machines when changing needles, maintain straight posture, keep workspace organized, use appropriate tools, remove pins while sewing.
Stay focused to avoid rushing through projects safely, and by doing so, ensure a smooth and efficient workflow with minimal errors.
How do I keep my sewing machine safe?
Unplug your machine when threading, changing needles, or cleaning.
Check power cords for damage regularly.
Clean lint buildup every few projects.
Oil moving parts monthly following your manual’s guidelines for smooth operation.
How to prevent a pin accident during a sewing project?
Ironically, those tiny pins cause the biggest headaches!
Remove pins as you sew, pin perpendicular to seams, and use sewing clips instead.
Keep fingers clear of the needle area and maintain a one-inch safety zone.
How do you protect your hand when sewing a sewing machine?
Maintain a one-inch clearance between your fingers and the needle while sewing.
Use seam guides or stiletto tools to position fabric safely.
Keep hands on fabric sides, not directly in front of the needle area.
What are sewing safety tips?
Machine guards prevent 80% of finger injuries in sewing.
Always unplug your machine before maintenance, keep fingers one inch from needles, remove pins while sewing, maintain proper posture, and work in good lighting for safe operation, to ensure safe operation is maintained throughout the process.
What should you do if thread keeps jamming?
First, check if you’re threading correctly—improper threading causes most jams.
Clean out lint buildup around the bobbins area and needle plate.
Make certain you’re using the right needle size for your fabric weight and replace dull needles immediately, as this will help prevent jams caused by improper threading.
How do you safely dispose of broken needles?
Broken needles need careful handling to prevent puncture wounds. You’ll want to place them in designated sharps containers or wrap them in tape before tossing in regular trash.
What lighting is best for preventing eye strain?
Bright, natural lighting reduces eye strain and mistakes while sewing.
You’ll want daylight-balanced LED lamps positioned to eliminate shadows on your work surface.
Avoid harsh fluorescent lights that flicker and cause fatigue during long projects.
How often should you clean your machine?
Clean your sewing machine at least every six months or as needed. Regular maintenance prevents lint buildup, guarantees smooth operation, and extends your machine’s lifespan while reducing breakdown risks.
Conclusion
Research shows that proper sewing safety practices can prevent up to 89% of common sewing injuries.
By implementing these ten essential safety measures, you’ll substantially reduce your risk of accidents and create a more enjoyable sewing environment.
Remember that learning how to prevent accidents in sewing isn’t just about following rules—it’s about developing habits that protect you while preserving the joy of your craft.
Stay alert, maintain your equipment properly, and never rush through projects, as your safety should always be your top priority in every sewing session.

