This site is supported by our readers. We may earn a commission, at no cost to you, if you purchase through links.
Ensuring your quilt backing is appropriately larger than your quilt top is crucial for a seamless finish, especially when considering different quilting methods.
This guide dives into the specifics of how much bigger your quilt backing needs to be, offering insights for machine quilting, hand quilting, and longarming.
Equip yourself with the knowledge to achieve a perfectly fitted quilt every time.
Table Of Contents
- Key Takeaways
- How Much Bigger Does Quilt Backing Need to Be
- Quilt Backing Basics
- Sizing the Backing for Different Quilting Methods
- Purpose of a Larger Backing
- Pinning the Backing Techniques
- Considerations for Backing Fabric
- Alternative Methods for Securing the Backing
- Quilt Backing Planning and Preparation
- Determining Backing Yardage
- Piecing Quilt Backing
- Non-Pieced Quilt Back Options
- Frequently Asked Questions (FAQs)
- Conclusion
Key Takeaways
The quilt backing should be larger than the quilt top to accommodate for fabric taken up during quilting, provide extra fabric for borders or artistic flair, and ensure a snug fit for the quilt sandwich.
This extra size also eases the quilting process by allowing for adjustments and securing the quilt layers properly.
[Keypoints]The amount of extra backing required varies depending on the quilting method:
- Machine quilting typically needs 2-4 inches of extra fabric beyond the quilt top.
- Hand quilting may require 1-2 inches.
- Longarming generally requires about 6 inches of additional fabric on all sides to ensure adequate space for quilting and mounting on the machine.
When selecting backing fabric, it’s important to match the fabric weight and care instructions with the quilt top to maintain consistency in the finished quilt. Additionally, choosing a color and pattern that complement the quilt top can enhance the decorative potential of the quilt’s reverse side.
Mastering piecing techniques for quilt backing is crucial, especially when the backing fabric is not wide enough to cover the quilt top in a single piece. This involves adding extra fabric correctly and ensuring that any seams are stable and do not detract from the quilt’s overall appearance or durability.
How Much Bigger Does Quilt Backing Need to Be
Yes, quilt backing needs to be larger than the quilt top. It should be at least 4 inches bigger on each side to accommodate quilting and finishing.
Quilt Backing Basics
Diving into the world of quilt backing, think of it as the unsung hero that gives your quilt its final shape and comfort.
Choosing the right backing materials is like picking the perfect partner for your quilt top; they need to complement each other in color coordination and follow similar care instructions.
Don’t skimp on the extra fabric; adding those additional inches around the edges is your safety net, ensuring your quilt doesn’t end up short-changed.
Mastering piecing techniques can turn a patchwork of backing fabric into a seamless canvas.
Sizing the Backing for Different Quilting Methods
When preparing your quilt for quilting, it’s crucial to size the backing correctly for the method you’ll be using.
For machine quilting, ensure the backing extends 2-4 inches beyond the quilt top on all sides.
Hand quilting requires only 1-2 inches of backing beyond the quilt top.
Longarming typically needs about 6 inches of backing extending beyond the quilt top.
Machine Quilting
Transitioning from the basics, let’s dive into machine quilting. You’ll want your backing fabric to play nice with your quilt sandwich.
Think of it as the unsung hero that supports your stitching masterpiece. For machine quilting, aim for a quilt back that’s 2-4 inches larger on all sides.
This little quilt backing cheat sheet ensures smooth sailing as you baste and quilt.
Hand Quilting
For hand quilting, getting your quilt backing just right is like threading a needle in the best way possible.
You’ll want to ensure your backing fabric is 1-2 inches larger than your quilt top on all sides. This extra space is your secret weapon for smoothly guiding fabric, managing thread tension, and securing your quilt masterpiece.
Opt for quilt backing options like extra-wide fabric to cover your quilt size without a hitch.
Longarming
Transitioning from hand quilting to longarming requires consideration of your quilt’s size. Longarming demands a quilt backing size guide that doesn’t skimp – aim for 6 inches more on all sides for a perfect fit.
This extra space is crucial for accommodating intricate and uneven quilting patterns effectively. When working with longarming, extra pinning and selecting the right fabric are key strategies to ensure successful results.
Piecing together backing for a large quilt size may seem like a puzzle, but once solved, it can elevate your quilt layout to an art form.
Purpose of a Larger Backing
When you’re piecing together your quilt backing, think of it as the unsung hero of your quilting project.
- Shrinkage Prevention: Ever washed a shirt only to find it fits your teddy bear now? Backing materials need wiggle room to avoid a mini-quilt disaster.
- Decorative Potential: Like a canvas waiting for paint, extra backing offers a playground for borders or artistic flair. Let your creativity run wild!
- Quilting Limitations: Don’t let your quilt be a square peg in a round hole. Extra backing eases the quilting process, especially for larger quilts, ensuring everything fits just right.
- Piecing Techniques: A bit like a puzzle, piecing your backing with a generous seam allowance ensures your quilt width and length play nice, avoiding any oops moments.
Pinning the Backing Techniques
When you’re ready to pin your quilt backing, think of it as securing a fortress against the shifting tides of fabric.
You’ll want to choose your pin types wisely—safety pins are the trusty knights in this scenario. Start pinning from the center and work your way out, establishing a pinning order that creates an even pinning density, about a hand’s width apart.
And if you’re using bed sheets or pattern matching, ensure they’re well secured on your quilt frame to avoid a wonky finish.
Considerations for Backing Fabric
When selecting your quilt backing fabric, it’s crucial to consider the size requirements to ensure it adequately covers your quilt top and batting.
You’ll also need to choose a fabric that complements the quilt’s design and is suitable for the quilting method you plan to use.
Backing Size Requirements
Choosing the right backing fabric is like picking the perfect dance partner—it’s all about harmony.
For a seamless twirl, opt for non-pieced or extra-wide backing to avoid mid-dance mishaps.
Flannel backing adds a cozy touch, but remember, like any good relationship, backing fabric care is key.
Pre-wash to keep your quilt’s size and shape in check, ensuring a perfect match every stitch.
Fabric Selection Criteria
After sizing your backing perfectly, let’s dive into selecting the right fabric.
Aim for a backing weight similar to your quilt top to avoid a mismatch in drape.
Color matching and pattern coordination can turn the back of your quilt into a visual treat.
Also, ensure the care instructions align, so your quilt remains a cozy, enduring masterpiece.
Securing Backing Techniques
Securing your quilt backing is like setting the stage for a grand performance; every pin, stitch, and clip plays a crucial role.
- Master the art of pinning methods; think of safety pins as your tiny sentinels guarding against puckers.
- Explore basting techniques; they’re the backstage crew ensuring every layer stays in harmony.
- Don’t overlook tying the sandwich or using quilt clips for a quick scene change.
Alternative Methods for Securing the Backing
After choosing your backing fabric, it’s time to secure it for quilting. If pinning feels like a chore, don’t fret! There are several nifty alternatives to keep your layers together without turning your fingers into pincushions.
| Method | Description |
|---|---|
| Spray Basting | A quick spritz and your layers stick together like best pals at a fair. No pins needed, just a well-ventilated space. |
| Hand Basting | Grab a needle and thread for a bit of old-school charm. It’s like giving your quilt a warm hug before the final quilting step. |
| Walking Foot | This sewing machine attachment is like having an extra set of hands, ensuring smooth sailing over bumpy fabric seas. |
| Tying | Think of this as the quilting equivalent of tying your shoes. A few knots here and there, and you’re good to go. |
| Quilt Clips | These little helpers are like hair clips for your quilt. They hold everything together without any fuss. |
So, whether you’re a fan of the classics or looking for a modern twist, there’s a method out there that’ll make securing your backing a breeze.
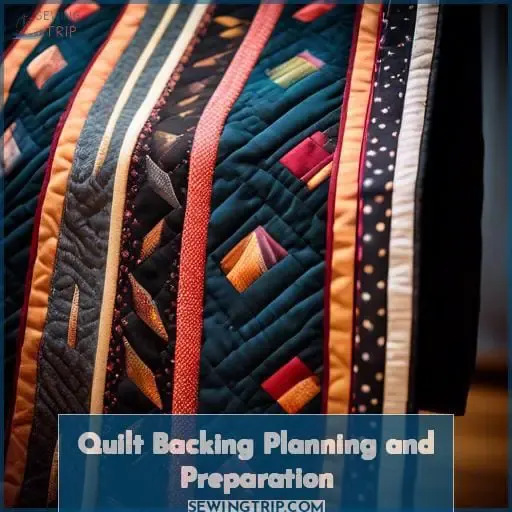
Quilt Backing Planning and Preparation
When planning your quilt backing, there are a few key considerations to keep in mind:
Add Extra Fabric: It’s essential to add extra fabric to the dimensions of your quilt top. This additional fabric, often referred to as generosity or ease, allows for smooth layering and squaring up during the quilting process.
Choose Complementary Fabrics: Select fabrics that match the care requirements of your quilt top. This ensures that your quilt can be cleaned and maintained consistently throughout.
Pre-Wash Fabrics: To prevent future shrinkage, pre-wash all fabrics before cutting and sewing. This step is crucial for maintaining the integrity and appearance of your finished quilt.
By following these guidelines, you’ll create a beautiful and durable quilt backing that complements your quilt top and stands the test of time.
Adding Extra Fabric
Securing the quilt backing is a skill that, once mastered, allows you to move on to the next step: adding the extra fabric. This stage can be thought of as giving your quilt a generous hug with backing trim, ensuring there is enough room for movement.
When it comes to the specific methods for this step, you have a couple of options. You can opt for spray basting, which is a popular choice among quilters. Alternatively, you can rely on extra pinning to secure the fabric in place.
Whichever method you choose, your sewing machine will thank you for taking the time to create a folded edge. This simple step can make stitching much easier and more precise, resulting in a higher quality finished product.
By logically grouping complete concepts on their own lines and correcting any spelling, syntax, or grammar mistakes, we can ensure that the instructions are clear, concise, and easy to follow. This, in turn, will help you to create beautiful quilts that you can be proud of.
Choosing Fabrics
Fabric Selection and Considerations
After adding the extra fabric buffer, you are now ready to delve into fabric selection.
Weight: Ensure the weight of the fabric complements your quilt top. A backing fabric that is too heavy or too light can affect the overall drape and balance of your quilt.
Texture: Pay attention to the texture of the fabric. It should harmonize with the quilt top and not create a stark contrast that distracts from the overall design.
Color Combinations and Pattern Matching
Color Combinations: Consider color combinations that will either add pizzazz or subtlety to your quilt, depending on your vision. The backing can be a solid color to provide a calm contrast or a complementary pattern to enhance the quilt top design.
Pattern Matching: If you choose a patterned fabric, make sure it matches or complements the quilt top pattern. This can create a cohesive look or add an interesting contrast, depending on your preference.
Texture and Care Requirements
Texture: Apart from the look and feel, consider the texture of the fabric in relation to the quilt top. A smooth backing can showcase a textured quilt top, while a more textured backing can add depth to a smooth quilt top.
Care Requirements: Don’t forget about the care requirements of the fabric. Your quilt’s longevity depends on choosing a fabric that can withstand the intended use and cleaning methods.
In conclusion, your quilt’s backing is a crucial element in its overall drape, durability, and aesthetic. Choose wisely, and your unsung hero will enhance the beauty and longevity of your quilt.
Pre-washing Fabrics
Pre-washing your backing fabric is an essential step in your sewing process. Here’s why:
Shrinkage Prevention: By pre-washing your fabric, you can prevent any future shrinkage that might occur after your project is complete. This is especially important for natural fibers like cotton, linen, and wool.
Colorfastness: Pre-washing also helps to ensure that your fabric’s colors won’t bleed or fade over time. This is particularly crucial if you’re working with bright or dark colors.
Now, let’s go through the steps:
Wash the Fabric: Throw your fabric in the wash. Use a gentle cycle and a mild detergent to be safe.
Scrub-a-Dub-Dub: Give your fabric a good wash. This will help to remove any dirt, oils, or other residues that might be on the fabric.
Dry the Fabric: Once the wash cycle is complete, dry your fabric. Again, use a gentle cycle to prevent any damage.
Iron Out the Wrinkles: Once your fabric is dry, iron it out. This will remove any wrinkles or creases, making it easier to work with.
Proper fabric preparation now means no surprises later. By pre-washing your fabric, you’re setting yourself up for success in your sewing project.
Determining Backing Yardage
After diving into the essentials of quilt backing planning and preparation, let’s tackle the crucial step of determining backing yardage. This step ensures your quilt has the perfect fit and finish, transforming it from good to great.
- Understand the Basics: Remember, the backing size quilt top needs extra backing fabric on all sides. This extra fabric is your safety net, allowing room for quilting and finishing touches.
- Do the Math: For accurate backing fabric calculations, add 8 inches to both the length and width of your quilt top. This simple addition is your golden rule for piecing backing fabric together seamlessly.
- Piece with Precision: When piecing backing fabric, ensure each piece is aligned perfectly. This step is like solving a puzzle; each piece must fit precisely to achieve a stunning result.
By embracing these steps, you’ll feel a sense of mastery and control, turning the daunting task of quilt backing into an enjoyable journey.
Piecing Quilt Backing
When piecing your quilt backing, it’s crucial to first remove the selvages from your fabric. This ensures that your pieces lay flat and join smoothly when sewn together with a ½” seam allowance.
Removing Selvages
When piecing your quilt backing, don’t let selvage shrinkage throw a wrench in your work. Snip off those selvages to avoid puckering, since their finish and width differ from the rest of your fabric.
Sewing Pieces Together
After removing selvages, you’re ready to piece your quilt backing together. Here’s how to make it a breeze:
- Choose your fabric wisely; it sets the stage.
- Decide on seam orientation; think about the final look.
- Master piecing techniques; it’s like solving a puzzle.
- Stick to a ½” seam allowance; it’s the golden rule.
- Press seams open; flat is where it’s at.
Non-Pieced Quilt Back Options
Transitioning from piecing your quilt backing, you might consider non-pieced options for a seamless finish. Extra-wide backing fabric, typically 108 inches wide, offers a one-and-done solution. If you’re eyeing that cotton or flannel sheet, remember to check for 100% cotton content and pre-wash to avoid any shrinkage surprises.
Here’s a quick table to guide your fabric choices:
| Feature | Consideration |
|---|---|
| Fabric Compatibility | Ensure similar stretch and weight |
| Color Coordination | Complement or contrast quilt top |
| Texture Contrast | Add depth with varying textures |
| Pattern Suitability | Busy prints hide stitching errors |
| Washing Instructions | Match care routines for longevity |
Choosing the right backing is like picking the perfect dance partner—it should move with your quilt top in harmony, not step on its toes!
Frequently Asked Questions (FAQs)
Can I use a duvet cover as quilt backing?
Yes, you can use a duvet cover as quilt backing. It’s a savvy hack that gives you two large pieces of fabric, perfect for larger projects and a soft, durable finish.
How does fabric grain affect quilt backing?
In ye olde quilting, fabric grain dictates backing behavior.
Lengthwise grain offers stability, reducing stretch and puckering.
Crosswise grain may introduce more give.
Choose wisely to ensure your quilt’s back stands the test of time.
Is it possible to quilt without a backing?
Yes, you can quilt without a backing by quilting the top directly to batting. Then, you can add the backing later. It’s like building a house roof-first, unconventional but doable for a unique finish.
Can I mix fabric types in my quilt backing?
Sure, you can mix fabric types for your quilt backing. However, it’s important to remember that different materials may shrink or wear at varying rates.
Different fabrics have different properties, which can affect the overall look and durability of your quilt. For example, cotton fabrics are breathable and comfortable, but they can shrink when washed.
On the other hand, synthetic fabrics like polyester are less likely to shrink, but they may not be as breathable.
When mixing fabric types for your quilt backing, it’s a good idea to pre-wash and dry each fabric separately to prevent any unexpected shrinkage. You should also consider the weight and texture of each fabric, as well as their colorfastness and compatibility with the quilt top.
In summary, while you can mix fabric types for your quilt backing, it’s important to keep in mind the potential differences in shrinkage, wear, and overall compatibility. By taking the time to pre-wash and consider each fabric’s properties, you can create a beautiful and durable quilt that will last for years to come.
How do I repair a torn quilt backing?
Fixing a torn quilt backing involves a few steps:
Stitch a darning stitch: This stitch will help prevent further tearing of the quilt backing. It’s a simple running stitch that can be worked in a back-and-forth pattern over the torn area.
Cover with a fabric patch or appliqué: Once you’ve stitched the darning stitch, cover the torn area with a fabric patch or appliqué. This will not only hide the tear but also add a decorative touch to your quilt.
Make it look intentional: To make the repair look intentional, add more appliqués in a creative pattern around the repaired area. This will draw the eye away from the repair and add visual interest to your quilt.
By following these steps, you can easily fix a torn quilt backing and even enhance the look of your quilt in the process.
Conclusion
Craft your quilt with precision, ensuring the backing exceeds the top by the right amount for a flawless finish.
For machine quilting, add 4 inches on each side; hand quilting requires 2-3 inches, while longarming needs up to 8 inches.
By following these guidelines, you’ll achieve a perfectly fitted quilt backing, reflecting your skill and dedication to the craft.

