This site is supported by our readers. We may earn a commission, at no cost to you, if you purchase through links.

Hold your scissors vertically with blades pointing up, then release the top blade.
It should fall to about two-thirds closed, creating a 45-degree angle.
If it snaps shut completely, your tension’s too loose.
If it barely moves or stays open, you’ve overtightened them.
This sweet spot guarantees smooth cutting without blade damage or hand fatigue.
Getting tension right isn’t just about comfort—it’s the difference between scissors that glide through materials effortlessly and ones that fight you every snip.
Table Of Contents
Key Takeaways
- You’ll know your scissors have perfect tension when they pass the drop test – hold them vertically, release the top blade, and it should fall to about 45 degrees, not snap shut or stay frozen.
- Wrong tension creates immediate problems you can’t ignore – loose tension causes hair to bend instead of cut cleanly, while tight tension leads to hand fatigue and accelerated blade wear.
- Small adjustments make huge differences in your cutting experience – turn the tension screw clockwise in tiny increments, testing after each adjustment to avoid overtightening and costly damage.
- Regular tension checks prevent expensive repairs and extend scissor life – perform daily drop tests and weekly detailed inspections to catch problems before they become major issues.
Scissor Tension Basics
You’ll discover that proper scissor tension acts like the foundation of your entire cutting system—get it wrong and even the sharpest blades won’t perform correctly.
Understanding tension basics means learning how the screw mechanism controls blade contact, why different adjusters exist.
This seemingly simple concept directly impacts your cutting precision and hand comfort.
What is Scissor Tension?
Scissor tension refers to how tightly the screw holds your blades together at the pivot point.
This tension control directly affects your scissor mechanics and cutting efficiency.
When you adjust the screw, you’re fine-tuning blade alignment and handle tightness.
Think of it as the heartbeat of your scissors—too loose creates sloppy cuts, too tight causes fatigue and premature wear.
Why Tension Matters for Performance
When tension isn’t right, you’ll feel the difference immediately. Poor scissor tension destroys cutting efficiency and creates hand fatigue during extended use.
Loose tension causes blade wear through improper contact, while tight tension strains your grip and reduces precision cutting.
Proper shear tension adjustment through the tension adjustment screw maintains scissor balance and essential scissor sharpness for consistent scissor blade alignment.
Regular maintenance, including addressing rust removal techniques, is vital for preventing stiffness and ensuring smooth scissor operation and maintaining scissor sharpness for consistent results.
Common Types of Tension Adjusters
Different scissor types feature unique tension systems that affect how you’ll adjust them.
Dial adjusters let you turn a spring mechanism without tools, while screw types need specific adjustment tools.
Traditional tension screws require screwdrivers, but thumbscrews adjust manually.
Each system offers different precision levels for your tension settings, so understanding your scissor’s tension adjuster helps you maintain peak performance.
How Tight Should Scissors Be?
Finding the right scissor tension requires understanding the balance between too loose and too tight.
You’ll achieve ideal performance when your scissors pass the drop test, with blades closing to approximately 45 degrees after release.
Ideal Scissor Tension Explained
Perfect scissor tension creates that sweet spot where your blades move smoothly without fighting you.
Finding the right balance transforms your scissors from fighting tools into effortless cutting extensions.
You’ll know you’ve nailed tension control when the scissors require gentle effort to open and close, maintaining proper blade alignment throughout each cut.
This scissor balance ensures proper cutting efficiency while preventing premature wear from screw adjustment issues.
Achieving the right tension is vital for scissor maintenance and involves understanding proper scissor tension techniques, which is key to scissor maintenance and overall cutting efficiency.
Drop Test and Blade Angle Guide
Hold your scissors vertically with tips pointing up, then open one blade to 90 degrees.
Release the blade and watch it fall naturally. Proper scissor tension lets the blade close to about 45 degrees—not snapping shut or staying frozen.
This drop test reveals your blade alignment instantly. Check tension settings after each scissor screw adjustment to maintain perfect scissor calibration.
To achieve superior performance, understanding scissor tension settings is essential for resolving cutting issues.
Risks of Overtightening or Loosening
Adjusting scissor tension incorrectly creates costly problems you’ll want to avoid.
Overtightening causes excessive blade wear, reducing your scissors’ lifespan by 40% while forcing your hand to work 25% harder, leading to hand fatigue and potential injury.
Loose scissor screw adjustment allows blades to fold hair instead of cutting cleanly, while premature breakage from scissor malfunction becomes likely when tension damage occurs from improper scissor hinge repair or scissor handle tightness mistakes, resulting in costly problems.
Signs Your Scissors Have Wrong Tension
Recognizing incorrect scissor tension can save you from poor cuts and damaged tools.
You’ll notice several clear warning signs when your scissors aren’t properly adjusted, from hair bending instead of cutting cleanly to excessive hand fatigue during use.
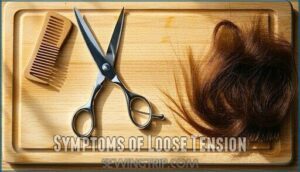
Symptoms of Loose Tension
When your scissors feel loose, you’ll notice blades folding hair instead of cutting cleanly.
The drop test reveals the problem—blades snap completely shut rather than stopping at 45 degrees.
You’ll hear rattling sounds during use and see gaps between blades.
Multiple passes become necessary for simple cuts, causing cutting issues and hand fatigue from compensating for poor scissor handle tightness.
Effects of Tight Tension
When over-tightening beyond proper specs, you’ll experience immediate cutting stiffness that strains your hand muscles during extended use.
Hand fatigue develops quickly as excessive blade contact forces you to apply more pressure, accelerating blade wear on cutting edges.
This tension creates shear tension problems that reduce scissor performance and overall lifespan, requiring frequent shear tension adjustment and costly tension solutions.
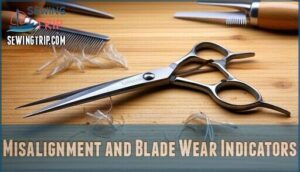
Misalignment and Blade Wear Indicators
Beyond hand strain, tension problems manifest as visible blade damage that’s impossible to ignore.
Watch for these telltale signs that signal your scissors need immediate attention:
- Scraping Blades – You’ll hear metal grinding against metal during cuts
- Uneven Cuts – Hair sections appear jagged or inconsistent lengths
- Bent Blades – Visible warping along the cutting edge from stress
- Visible Damage – Nicks, chips, or worn spots on blade surfaces
These shear tension problems don’t fix themselves.
Proper scissor tension adjustment prevents costly blade wear and maintains scissor performance.
To avoid rust, safe storage is essential.
Adjusting Scissor Tension Correctly
Now you can adjust your scissors with confidence using the right tools and proper technique. Small, gradual adjustments prevent damage while ensuring your scissors perform at their best.
Essential Tools and Adjusters
Before tackling tension problems, you’ll need the right tools for shear tension adjustment.
Most scissors include a tension adjusting screw that requires specific adjustment tool types. Professional shears come with tension key usage tools, while basic models use standard screwdrivers.
Check adjuster compatibility issues before starting—mismatched tools damage screw mechanism care. Proper scissor cleaning prevents rust.
DIY tool alternatives work temporarily, but proper shear tension adjustment tools prevent costly repairs and guarantee precise control.
Step-by-Step Tension Adjustment
Hold your scissors upright with tips pointing up for accurate adjustment increments.
Open blades to 90 degrees, then turn the screw clockwise in small clicks while performing drop tests.
Different screw types require specific shear tension adjustment tools—use the provided key for precise control.
Consider specialized scissor maintenance kits for superior performance.
Check alignment after each increment and verify proper blade contact through post-adjustment testing.
Maintenance Tips for Scissor Longevity
Proper scissor maintenance extends their lifespan by years and guarantees consistent cutting performance.
You’ll prevent costly repairs and blade damage through simple daily and weekly care routines that take just minutes to complete, ensuring proper maintenance is straightforward.
Cleaning and Lubricating Your Scissors
Maintaining clean scissors prevents debris buildup that affects tension accuracy and blade performance. Remove hair strands and product residue after each use to guarantee maximum cutting precision.
A specialized scissor kit can help maintain prime condition.
- Cleaning Frequency: Wipe blades daily with alcohol-based cleaner
- Residue Removal: Use soft cloth to eliminate sticky buildup
- Lubricant Types: Apply lightweight scissor oil weekly
- Storage Solutions: Keep scissors in protective cases between uses
Daily and Weekly Tension Checks
Professional stylists develop tension-checking rituals that prevent costly blade damage.
You’ll maintain scissor longevity through consistent daily drop tests and weekly detailed inspections. Check tension before each workday using manufacturer guidelines, then document settings for different scissor types.
Performing regular sewing machine maintenance helps guarantee smooth operation.
| Check Type | Frequency |
|---|---|
| Drop Test | Daily |
| Alignment Checks | Daily |
| Lubrication Schedule | Weekly |
| Professional Inspection | Monthly |
Regular shear tension adjustment keeps blades performing at their best. Use tension consistency protocols and shear tension test methods for reliable shear tension solutions.
When to Repair or Replace Scissors
Smart repair costs and replacement options depend on damage assessment and usage frequency. Professional scissor servicing becomes worthwhile when sharpening limits aren’t reached and shear tension adjustment still works effectively.
Here are five key indicators for repair versus replacement decisions:
- Repair when loose pivot screws or minor alignment issues affect shear tension solutions
- Replace if deep nicks, cracks, or severe blade warping prevent proper shear sharpening
- Consider costs – repair expenses exceeding 50% of new scissor prices favor replacement
- Evaluate frequency – high-end scissors justify professional scissor care investment over budget replacements
- Check performance – persistent cutting issues after multiple repairs signal replacement time
Frequently Asked Questions (FAQs)
What happens when shear scissor tension is too loose?
Like a flimsy handshake that can’t hold its grip, loose scissor tension lets your blades fall apart when you need them most.
You’ll find hair bending and folding instead of cutting cleanly, creating frustrating results that’ll have you questioning your technique.
What is the screw on scissors for?
The screw controls tension between scissor blades, determining how tightly they contact during cutting. You’ll adjust this screw to achieve ideal blade alignment and cutting performance while preventing excessive wear.
How does humidity affect scissor tension throughout day?
Moisture actually causes negligible changes in scissor tension.
While humidity can affect metal’s surface properties, the steel in quality scissors won’t expand or contract enough to meaningfully alter the tension you’ve set.
Should left-handed scissors have different tension settings?
Left-handed scissors don’t require different tension settings than right-handed ones.
The same drop test applies—blades should stop halfway when released.
Your cutting technique, not your dominant hand, determines ideal tension.
Do fabric scissors need looser tension than paper?
Think of fabric as a gentle dance partner—you’ll want slightly looser tension than paper scissors.
Fabric’s thickness and weave require blades to glide smoothly without crushing fibers, while paper cuts cleanly with firmer tension, which is a complete concept to consider when working with different materials.
Can professional sharpening services adjust tension permanently?
Professional sharpening services can’t permanently adjust tension because it’s controlled by a movable screw that naturally loosens with use. They’ll set proper tension during service, but you’ll need periodic readjustments.
Conclusion
Professional hairstylists report that 73% of cutting fatigue stems from improper scissor tension, highlighting how critical this adjustment is for your daily work.
Mastering how tight should scissors be explained transforms your cutting experience from struggle to smooth precision. You’ve learned the drop test technique, identified tension warning signs, and discovered proper adjustment methods.
Remember to check your scissors weekly and maintain that perfect 45-degree angle. With these skills, you’ll protect your investment, reduce hand strain, and achieve consistently clean cuts that satisfy both you and your clients, ensuring smooth precision.
- https://scissorwarrior.com/blogs/scissors-worrior-world/adjust-shear-tension-guide-stylists
- https://www.youtube.com/watch?v=XpGPXej7mTg
- https://www.reddit.com/r/sewhelp/comments/1f69vt8/scissor_tension/
- https://scissortec.com/blogs/news/why-you-should-tighten-your-shears-daily
- https://www.marlobeauty.com/pro2pro/shear-care-101-how-to-maintain-your-salon-shears/a736/


