This site is supported by our readers. We may earn a commission, at no cost to you, if you purchase through links.
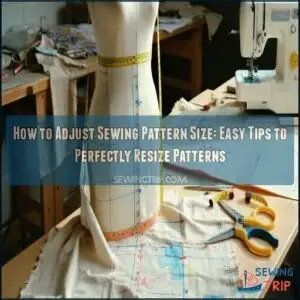
If you’re taller or shorter, add or remove length at the "lengthen/shorten" lines—these are your pattern’s built-in adjustment spots.
Need more room for curves? Try the "slash and spread" method: cut the pattern, then spread or overlap to increase or decrease width.
For small tweaks, the shift method works wonders by nudging seams outward or inward. Always test with a toile (a practice garment).
Perfecting the fit takes patience, but those custom results? Absolutely worth it. Keep tweaking!
Table Of Contents
Key Takeaways
- Compare your measurements to the pattern’s size chart and focus on adjusting key areas like bust, waist, and length.
- Use techniques like the slash-and-spread method to resize and ensure proportions stay intact.
- Always make a toile (mock-up) to test your adjustments and confirm the fit before cutting your final fabric.
- Work in small increments for resizing to maintain balance and avoid distorting the design.
Understanding Size Charts on Sewing Patterns
Size charts on sewing patterns can feel a bit like deciphering a secret code, but they’re essential for getting the perfect fit.
Getting the perfect fit starts with understanding size charts and taking accurate measurements—your guide to sewing success!
Start with accurate body measurements—bust, waist, hips—using a soft tape measure. Compare these to the chart, keeping in mind ease allowance (the wiggle room built into garments).
Patterns aren’t one-size-fits-all, so focus on size selection based on your largest measurement. Many patterns offer multi-sizing, meaning you can blend sizes for a custom fit—like adjusting a pattern to a larger bust while keeping smaller hips.
Don’t forget that sewing pattern alterations, like pattern resizing, require thoughtful chart interpretation. Once you tackle this step, you’re ready to adjust the pattern size confidently and sew with ease!
How to Make a Toile
A toile, or mock-up, helps you test your pattern adjustments on inexpensive fabric before cutting into your good material.
A toile is your secret weapon for perfecting fit before using your precious fabric—because practice makes perfect!
It confirms your resized pattern fits perfectly, saving you time and frustration later.
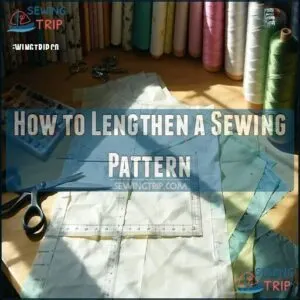
How to Lengthen a Sewing Pattern
Making a sewing pattern longer isn’t as tricky as it sounds, especially when you’ve got the right tools and a steady hand. Whether you’re adjusting for height or style, accuracy is key. Start by identifying where the length increase is needed—often at the hem or above the knee.
Use the slash and spread method to lengthen a pattern while maintaining its proportions. Here’s how:
- Mark grainlines carefully to avoid twisting seams later.
- Cut horizontally where lengthening is needed, spreading the pieces apart evenly.
- Blend new cutting lines smoothly for a natural adjustment.
- Check fabric drape to see how changes affect the overall fit.
To find the right tools, consider exploring options for sewing pattern lengthen. With precise sewing pattern alteration, pattern lengthening can feel practically seamless—both literally and figuratively!
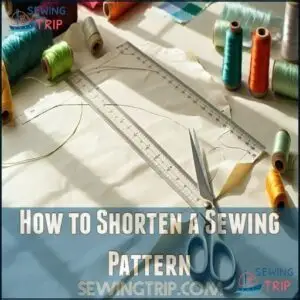
How to Shorten a Sewing Pattern
Shortening a sewing pattern might seem tricky, but don’t worry—you’ve got this! Start by identifying where to remove length, like above or below the knees for skirts or at the hemline for tops. Use the folding technique: fold the pattern at the adjustment line and tape it in place, keeping the grainline intact.
Double-check proportion adjustments to confirm all changes balance. Blending edges with a curved ruler smooths out any jagged lines. For achieving smooth curves, consider using a specialized measuring tool. Don’t forget hem considerations—shortening can impact flare or style.
Here’s a quick guide:
| Step | Action | Tip |
|---|---|---|
| Mark Adjustment Line | Fold pattern evenly | Measure for accuracy |
| Tape Folded Pattern | Align grainlines | Use clear tape for visibility |
| Smooth Edges | Blend with curved ruler | Test changes with a muslin |
Precision makes resizing a breeze!
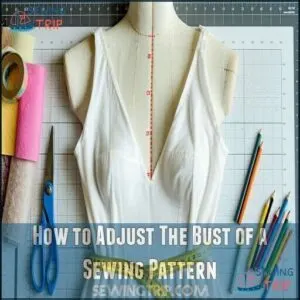
How to Adjust The Bust of a Sewing Pattern
Adjusting the bust of a sewing pattern might seem tricky, but it’s all about precise steps and patience.
Here’s what to focus on:
- Find the bust point for accurate alterations.
- Use the slash-and-spread method for a full bust adjustment or small bust adjustment.
- Adjust darts for proper fit around cup sizes.
- Refine princess seams for smooth shaping.
- Grade the bodice evenly.
The Slash and Spread Method
The slash and spread method is a go-to technique for sewing pattern resizing. It’s straightforward: you cut the pattern along marked lines (slashes) and spread or overlap the pieces to enlarge or reduce a sewing pattern.
This method works wonders for adding or removing fullness in areas like bust, waist, or length. For vertical lines, spread about 1/2 inch; for horizontal ones, aim for 5/8 inch.
Always check that changes stay proportional, using clear guidelines for proportion control. Don’t forget—anything over two sizes might distort the design, so keep adjustments minimal.
You can find various products related to the slash spread method online. Once slashed and spread, you’ll need to redraw curves and smooth edges, especially along necklines and armholes, for a clean finish.
Tracing a copy of the pattern first? Smart move! It leaves the original intact for future projects.
The Shift Method
Let’s roll into precise shifting with the shift method, a sewing pattern alteration you’ll want in your toolkit.
Unlike the slash-and-spread method, it keeps the original pattern intact, resizing without cutting.
Here’s how to adjust pattern size using this method:
- Use a clear ruler to mark straight corners.
- Shift horizontally with ⅜" spacing.
- Redraw smooth curves using a French curve ruler.
- Blend lines for uniform scaling.
- Double-check measurements to confirm proportional accuracy.
CAD software also works for digital adjustments and incremental changes, making it a useful tool for pattern alteration and ensuring accurate resizing.
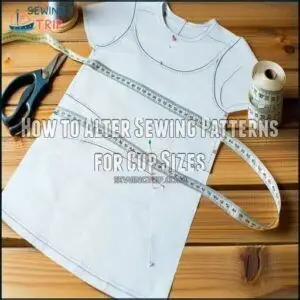
How to Alter Sewing Patterns for Cup Sizes
When a sewing pattern doesn’t fit your bust properly, it’s time to make a few tweaks.
The key to nailing a bust adjustment is accurate measurements and thoughtful planning. Cup sizes in sewing patterns don’t match bra sizes, so start by measuring your high bust and full bust to determine if you need a full bust adjustment or a small bust adjustment.
Follow these simple steps to adjust cup sizes like a pro:
- Identify the bust point on the pattern, marking it as your adjustment reference.
- Use the slash-and-spread method for increasing fullness or overlapping pieces to reduce it.
- Modify darts for proper dart placement, ensuring they point to the new bust point.
- Test with a muslin fitting to confirm everything aligns smoothly.
With patience and practice, your sewing pattern adjustment will enhance both fit and comfort!
Tips for Accurately Adjusting Sewing Patterns
Getting the fit just right with sewing pattern adjustments takes patience and precision. Start by confirming your body measurements are spot-on—accurate measuring is the backbone of any successful pattern alteration. When resizing, stick to small grading increments, like ⅜ inch for length or ⅝ inch for width, to maintain proportion control.
Here’s how to boost your pattern fitting game:
- Use Muslin Mockups: Create a test garment to check fit before cutting into your favorite fabric. It’s an easy way to catch issues early.
- Keep Seamlines Consistent: When making sewing pattern adjustments, double-check grainlines and confirm seams match properly across sections.
- Mix Methods When Needed: Combine techniques like slash and spread or shift methods for tricky areas like sleeves or pants.
To achieve a good fit, consider adjusting pattern widths by letting out seams. Pattern fitting doesn’t have to feel like guesswork. Take it slow, measure carefully, and trust the process!
Frequently Asked Questions (FAQs)
How do you adjust a sewing pattern?
To adjust a sewing pattern, measure your body accurately.
Then modify the pattern by cutting and spreading or overlapping pieces. Focus on key areas like bust, waist, or length.
Test with muslin for precision.
Can you change the size of a sewing pattern?
You can resize a sewing pattern using methods like slash-and-spread to enlarge or overlap to shrink. Accurate body measurements and careful adjustments guarantee the design stays intact and fits perfectly.
How do you resize a sewing pattern?
Think of resizing a sewing pattern like tailoring a puzzle to fit perfectly.
Use the slash-and-spread method, adjust specific areas like bust or waist, and always test with muslin for a flawless fit.
How do I enlarge a sewing pattern?
To enlarge a sewing pattern, use the slash-and-spread method.
Cut the pattern at key points, spread pieces evenly to add width or length, then redraw smooth curves.
Always test adjustments with a muslin first!
How do you adjust pattern sizing?
Resizing a pattern isn’t sorcery—it’s thoughtful tweaks.
Use the slash-and-spread method to add or remove inches, ensuring proportions stay intact.
Grab precise measurements, carefully distribute changes, and always test with muslin before cutting fabric.
How do I make a pants sewing pattern bigger?
Cut vertical lines on the pattern, then spread them evenly to add width.
Adjust waist, hips, and inseam markings proportionally.
Redraw smooth curves using a French curve ruler.
Test with muslin for precise fit.
How Do I Grade a Pattern From a Child’s Size to an Adult’s Size?
Stretch your wings slowly—grading a child’s pattern to an adult’s size takes patience.
Use the slash-and-spread method, divide increases evenly, and adjust for proportions.
Test with muslin for fit before cutting final fabric.
What Are the Differences Between Petite and Plus Sizes?
Petite sizes focus on shorter proportions like reduced sleeve and inseam lengths.
While plus sizes prioritize accommodating curves with extra width in the bust, waist, and hips.
Both guarantee better fit customized to body shape differences, ensuring a more comfortable and suitable garment for various body types, with complete concepts of sizing in mind.
How Much Should I Add When Grading a Pattern?
Don’t eyeball it—add 1-2 inches per step when grading patterns.
Anything more risks distortion, so work in small increments.
For larger adjustments, spread the change evenly across pieces to maintain balance and proportion.
What Tools Do I Need to Grade a Pattern?
You’ll need pattern paper, a clear ruler, a French curve ruler, fabric markers, scissors, and tape.
These tools help you measure, cut, and redraw patterns accurately, ensuring smooth adjustments without distorting the design.
Conclusion
Adjusting a sewing pattern size might seem intimidating, but it’s simpler than you think with the right steps.
Start by comparing your measurements to the pattern’s chart, then make small changes like lengthening, shortening, or tweaking for curves using methods like "slash and spread" or shifting seams.
Don’t skip making a toile—it’s worth the extra effort, and with practice, you’ll create garments that fit like they’re made for you because, well, they are, which is the result of enjoying the process.
Keep experimenting and enjoy the process.

