This site is supported by our readers. We may earn a commission, at no cost to you, if you purchase through links.
Grading involves proportionally scaling the entire pattern up or down while maintaining the design’s shape and balance.
Use the slash-and-spread method for significant size changes or the shift method for minor adjustments.
For specific fit issues, alter individual pattern pieces by lengthening, shortening, or adjusting width at key points like the bust, waist, or hips.
Always start with accurate body measurements and choose your base size carefully. Remember, it’s easier to make small adjustments than major overhauls.
The secret lies in understanding which techniques work best for different body shapes and garment styles, and this is the key to successful pattern adjustment.
Table Of Contents
Key Takeaways
- Take accurate body measurements first – You’ll need to measure your bust, waist, and hips while wearing proper undergarments, then compare these to the pattern’s size chart rather than relying on your usual clothing size, since pattern sizing differs from ready-to-wear garments.
- Master the slash-and-spread method for major adjustments – You’ll cut your pattern at specific adjustment lines, then spread the pieces apart to increase the size or overlap sections to reduce the size, maintaining proper proportions while making width and length adjustments.
- Make targeted alterations for specific fit issues – You’ll adjust individual pattern pieces by lengthening sleeves, modifying bust darts, or reshaping necklines to address pulling fabric, gaping, or poor shoulder fit, without starting from scratch.
- Test with muslin before cutting good fabric – You’ll create a practice version using inexpensive muslin fabric to identify fit problems and perfect your adjustments, saving time and money, while ensuring professional results.
Pattern Sizing Basics
You’ll need to understand how pattern sizes work before you can successfully adjust any sewing pattern to fit your body.
Start by comparing your actual measurements to the pattern’s size chart rather than relying on your usual clothing size, since pattern sizing often differs from ready-to-wear garments.
Measuring Body Size
Taking body measurements sewing correctly sets you up for pattern success. Your accurate measurements become the roadmap for perfect-fitting garments.
Precise measurements are your secret weapon for transforming any pattern into a perfect-fitting masterpiece.
Follow these essential steps for measurement consistency:
- Accurate Bust Measurement: Measure at your fullest point while wearing proper undergarments
- Waist and Hips: Find your natural waist and widest hip points for precise sizing
- Torso and Inseam: Record length measurements for proper proportions
- Posture Considerations: Stand naturally while someone else takes measurements for accuracy.
For the best results, use a non-stretch tape and follow essential measurement rules.
Selecting Pattern Size
Once you’ve recorded your body measurements, selecting the right pattern size becomes straightforward.
Compare your largest measurement to size charts rather than ready-to-wear sizes—they’re worlds apart.
Pattern styles include built-in ease allowance, so choose based on measurements, not store tags.
Use fitting evaluation techniques early to identify needed size adjustments.
This size chart sewing approach prevents major alterations later.
Understanding Pattern Terminology
Pattern terminology forms the foundation of successful sewing pattern sizing.
Grainline meaning refers to fabric’s natural stretch direction, while ease allowance provides comfortable movement room. Notches explained simply—they’re alignment markers ensuring perfect piece matching.
Your seam allowance creates sturdy construction borders. Understanding cutting layout maximizes fabric efficiency and maintains proper grain alignment.
Study your size chart sewing measurements against body measurement data for accurate sewing pattern sizing. These basics aren’t complicated—they’re your roadmap to professional results and perfectly fitted garments.
Adjusting Sewing Patterns
The art of sewing pattern adjustments transforms your garments from "almost fits" to "perfect match."
Start by comparing your measurements to the pattern’s size chart, then mark areas needing tweaks.
A muslin fitting reveals exactly where adjustments are needed before you cut into your good fabric.
Remember to consult sizing guides for accurate pattern selection.
Master these essential techniques for successful pattern resizing:
- Slash-and-spread method – Cut pattern pieces and spread them apart to add width, or overlap sections to reduce size
- Length adjustments – Add paper strips to lengthen or fold patterns to shorten, always maintaining grainlines
- Ease adjustment – Modify bust darts and waistlines to match your body’s curves for proper fit
Combining sizes works well when your measurements span different pattern sizes.
Style modifications and advanced alterations require patience, but they’re worth the effort.
Double-check measurements before cutting fabric – even small measurement errors can derail your project.
Grading Patterns Fundamentals
Pattern grading lets you resize any sewing pattern to fit different body measurements without starting from scratch.
You’ll learn three key methods that work with your existing patterns, saving time and money while getting the perfect fit every time.
Slash and Spread Method
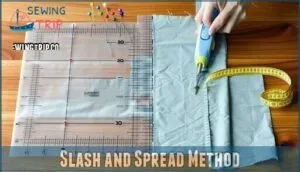
Slash and spread is your go-to technique for pattern resizing when you need precise control. This sewing pattern alteration method involves cutting your pattern at specific lines, then spreading pieces apart for size increases or overlapping them for reductions.
You’ll find it perfect for width adjustments, length adjustments, and dart manipulation without distorting complex shapes. The technique maintains proper proportions while giving you visual feedback on your changes.
Essential tools like clear rulers aid in precise pattern alterations. Remember to trace your original pattern first since you’ll be cutting through it.
This pattern alteration technique works beautifully for pattern adjustments, though grainline impact requires careful attention to maintain fabric drape.
Shift Method
While slash and spread works well manually, the shift method takes pattern grading into the digital age. This technique uses CAD software for quick scaling and accurate sizes across multiple pattern pieces.
You’ll move your pattern up, down, left, or right by measured distances while maintaining perfect proportions. Pattern preservation becomes effortless since you’re not cutting original pieces.
Here’s your step-by-step process:
- Upload your pattern into CAD software
- Input specific grade rules for your size range
- Align all seam lines precisely
- Adjust proportions using digital adjustments
- Export your perfectly scaled sewing pattern
Professional patternmakers prefer this grading technique for its speed and precision.
Grading for Multiple Sizes
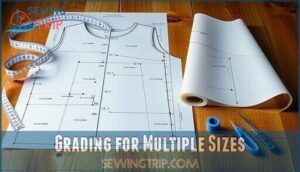
When creating multiple sizes from one pattern, you’ll need Proportional Grading techniques that follow specific Grade Rules.
Use Size Increments of 1-2 inches maximum to prevent distortion.
Measurement Charts guide your pattern scaling decisions, while Corner Alignment guarantees accuracy.
Master these grading rules for seamless size adjustments across your entire pattern collection.
Altering Pattern Parts
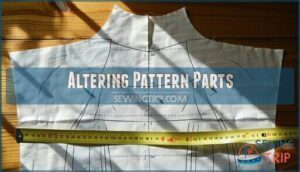
Once you’ve mastered basic grading techniques, you’ll need to tackle specific pattern alterations like adjusting length, width, and bust measurements to create your perfect fit.
These targeted changes let you transform any pattern into one that matches your unique body measurements without starting from scratch, allowing for a perfect fit.
Lengthening Patterns
When your pattern falls short, lengthening patterns through pattern alteration becomes your go-to solution. The slash and spread method delivers precise length adjustments for torso lengthening and sleeve extensions.
Here’s your step-by-step approach:
- Locate designated adjustment lines on your pattern pieces
- Cut straight across at these marked lines
- Spread pieces apart by your desired measurement
- Insert paper strips to fill gaps
- Redraw connecting lines to maintain smooth curves
For specialized materials, consider purchasing pattern lengthening products to simplify adjustments.
Hem adjustments require attention to grainline impact and proportional changes for professional results.
Shortening Patterns
While lengthening adds space, shortening requires precision to maintain your garment’s proportions.
You’ll fold the pattern at designated adjustment lines, creating clean length adjustments without distorting the design.
Here’s how to master shortening methods:
- Mark adjustment lines using pattern shortening tools for accurate petite size sewing
- Apply folding techniques at marked lines to preserve garment structure
- Secure with tape to check proportional refinement before finalizing
- Focus on blending edges for smooth shifts between pattern sections
- Consider grainline impact when making size adjustments to maintain proper drape
Test hem adjustments carefully.
You may also want to think about purchasing pattern products for assistance.
Adjusting Bust Size
Your bodice deserves the perfect fit, and bust alterations make all the difference.
Start with your High Bust Adjustment measurement to select pattern size correctly. For Full Bust Adjustment, use the slash-and-spread method near the bust point, adjusting Dart Placement accordingly.
Princess Seams require careful grading. For best results, explore specialized alteration tools.
Always test Cup Size Alterations with muslin for flawless sewing pattern fitting results.
Altering for Cup Sizes
When your bra fits but your sewing pattern doesn’t, you’ll need cup size alteration to match your curves perfectly.
Full Bust Adjustment increases bust room by slashing and spreading the bodice at the bust point. Small Bust Adjustment does the opposite—overlap sections to reduce cup space. Both techniques maintain shoulder and waist proportions while reshaping bust darts and Princess Seams.
- Measure high bust (above bust) and full bust (fullest part)
- Calculate difference to determine your pattern cup size
- Use Grading Darts to redistribute fabric smoothly
- Always test fit adjustments with a Muslin Fitting first
Troubleshooting Fit Issues
When you’ve adjusted your pattern but the garment still doesn’t fit right, you’re facing common issues like pulling fabric, gaping necklines, or shoulders that sit wrong.
You’ll learn to identify these problems and make targeted corrections that transform an awkward fit into a garment that looks professionally finished, with targeted corrections.
Common Fit Challenges
Most fit challenges stem from body proportions that don’t match standard patterns.
Drag Lines reveal stress points where fabric pulls too tightly. Excess Fabric creates unwanted pooling and bunching. Sleeve Tightness restricts arm movement, while Neckline Gaping exposes more than intended. Hemline Issues make garments hang unevenly.
These fit challenges require targeted alteration techniques and pattern modifications for proper size adjustments.
Overcoming Pulling and Tightness
When fabric pulls across your body, it’s screaming for help.
Your fabric is trying to tell you something—listen to those stress lines and pulling before they become bigger problems.
Stress lines reveal where your pattern needs size adjustments—usually around the bust, hips, or shoulders.
Start with muslin fittings to identify problem areas without wasting good fabric.
Add ease allowance where needed, considering your body shape and desired fabric drape.
Try alteration techniques like slash-and-spread for width or pattern adjustments for length.
These fit challenges vanish when you listen to what your fabric tells you.
Resolving Gapping and Sloping
Gapping challenges can turn your dream garment into a fitting nightmare.
When neckline gaping or shoulder slope issues arise, strategic pattern alteration becomes your best friend.
Follow these targeted solutions:
- Address Neckline Gaping: Reduce neckline width and adjust dart manipulation for better chest coverage.
- Fix Shoulder Slope: Modify armhole adjustments by reshaping the shoulder seam curve.
- Improve Back Shaping: Add or remove fabric through careful size adjustments for proper torso fit.
Mastering Pattern Adjustment
You’ve learned the basics of pattern grading and troubleshooting fit problems, but now it’s time to develop your skills with the right tools and techniques.
With proper grading equipment and a systematic approach to reusing patterns, you’ll transform any pattern into multiple sizes that fit perfectly every time.
Using Tools for Grading
Transform your pattern grading with the right tools.
Grading tools like transparent rulers and French curves make pattern scaling precise. Choose ruler types based on your project—smaller ones for bodices, larger for dresses.
Curve usage smooths armholes perfectly. Marking tools like gel pens guarantee visibility.
Software options offer digital precision, while proper workspace setup prevents errors.
Following pattern grading rules and pattern scaling rules guarantees professional results every time. Consider using cut and spread for resizing.
Reusing Patterns for Different Sizes
Once you’ve mastered grading tools, you’ll want to maximize your pattern investment. Smart sewists treat favorite patterns like recipe cards—they preserve the originals while creating working copies.
Here’s your pattern longevity strategy:
- Trace patterns onto durable paper, documenting your alteration history for future reference
- Create digital copies for digital adaptation across multiple devices
- Test fabric compatibility with each pattern alteration before cutting expensive materials
- Track style evolution by noting successful sewing pattern grading modifications
This approach guarantees you can adjust pattern size repeatedly without damaging originals.
Frequently Asked Questions (FAQs)
How to adjust a sewing pattern size?
Don’t put all your eggs in one basket—measure your bust, waist, and hips first.
Compare these to the pattern’s size chart, then use slash-and-spread method to grade up or down carefully.
How do I use one pattern for multiple sizes?
You’ll trace different size lines from the same multi-sized pattern.
Simply follow the cutting lines for your measurements, then grade between sizes if needed.
This saves money and lets you adjust patterns for family members easily, allowing you to also adjust patterns.
What is scaling a pattern to different sizes called?
Unlike photocopying at 110%, scaling a sewing pattern to different sizes is called "grading".
You’ll use specific techniques like slash-and-spread or shift methods to resize patterns while maintaining proper proportions and fit.
How to grade patterns between sizes?
You’ll use slash-and-spread or shift methods to resize pattern pieces.
Cut along specific lines, then spread apart to increase or overlap to decrease size.
Follow grade rules maintaining proportions between different body measurements.
How Do I Grade a Pattern From a Child’s Size to an Adult’s Size?
Rome wasn’t built in a day, and neither is pattern grading from child to adult sizes.
You’ll need to completely redraft the pattern since body proportions change dramatically—children’s patterns won’t simply scale up proportionally, which is a key point to consider in redrafting.
What Are the Differences Between Petite and Plus Sizes?
Petite patterns accommodate shorter torsos, arms, and legs with adjusted proportions.
While plus sizes focus on larger bust, waist, and hip measurements.
You’ll need different grading techniques for each body type’s unique fitting requirements, which involves understanding complete concepts of body measurements.
How Much Should I Add When Grading a Pattern?
When grading patterns, you’ll want to add or subtract 1-2 inches maximum per size change.
Divide adjustments evenly across multiple seams – typically 1/8 to 1/4 inch increments work best for maintaining proper proportions.
What Tools Do I Need to Grade a Pattern?
You’ll need clear rulers, French curve rulers, pattern paper, measuring tape, and fabric markers.
These tools help you slash, spread, and redraw pattern pieces accurately while maintaining proper proportions and smooth curves.
How do you reuse sewing patterns for different sizes?
Sally discovered she could transform her favorite dress pattern into three different sizes for her daughters.
You’ll trace the original pattern, then use slash-and-spread techniques to grade up or down while preserving the design’s proportions.
How to grade a sewing pattern between sizes?
You’ll use the slash-and-spread method to resize patterns between sizes. Cut pattern pieces at key points, then spread or overlap sections by 1/8 to 1/4 inch increments while maintaining proper proportions.
Conclusion
Mastering how to adjust sewing patterns for different sizes transforms your sewing experience.
You’ll save money, achieve better fits, and expand your wardrobe possibilities.
Start with accurate measurements, choose appropriate grading methods, and practice on simple garments first.
Remember that patience pays off when learning these techniques.
Whether you’re lengthening sleeves, adjusting bust darts, or scaling entire patterns, consistent practice builds confidence.
Your custom-fitted garments will look professional and feel comfortable every time you wear them.

