This site is supported by our readers. We may earn a commission, at no cost to you, if you purchase through links.

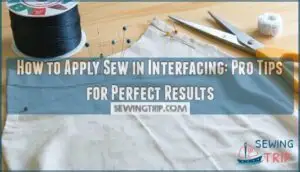
Pin the interfacing to the wrong side of your fabric, then baste around the edges with long, loose stitches about ¼ inch from the raw edges.
This temporary stitching keeps everything aligned during construction.
Unlike fusible interfacing that bonds with heat, sew-in interfacing relies on these basting stitches and your final seams to stay put.
It’s perfect for delicate fabrics that can’t handle iron heat or when you need more control over fabric drape.
The secret lies in proper grain alignment and strategic trimming techniques.
Table Of Contents
Key Takeaways
- Cut your interfacing slightly smaller than fabric pieces to reduce bulk in seam allowances and prevent show-through at edges.
- Pin interfacing to the wrong side of your fabric, then baste around edges with loose stitches about ¼ inch from raw edges to keep everything aligned during construction.
- Choose sew-in interfacing for delicate fabrics that can’t handle iron heat or when you need better control over fabric drape compared to fusible options.
- Match interfacing weight to your fabric type – lightweight for silks, medium for cottons, heavyweight for denim – and maintain proper grain alignment for professional results.
Understanding Interfacing Types
Understanding interfacing-types starts with grasping the fundamental difference between sew-in and fusible varieties.
Sew-in interfacing requires manual stitching to attach, offering superior flexibility for curved seams and delicate fabric selection. This method prevents stretching while maintaining natural drape—perfect for textured fabrics where adhesives fail.
Sew-in interfacing: where precision meets flexibility for fabrics that demand the best.
Fusible interfacing uses heat activation, making it faster for large flat areas. Your interfacing weights matter: lightweight for silks, medium for cottons, heavyweight for denim.
Nonwoven interfacing provides stability without grain direction, while woven versions follow fabric structure.
Choose sewing techniques based on your project’s demands. Sew-in interfacing gives you control over placement and removal, essential for professional results on challenging interfacing materials. For superior results, consider the interfacing fabric types to guarantee the right support and stability for your garment.
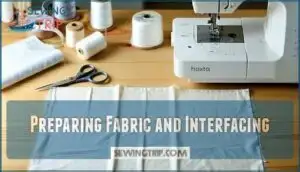
Preparing Fabric and Interfacing
Proper fabric preparation transforms your sewing project from amateur to professional. Start by matching the interfacing weight to your fabric’s characteristics – lightweight interfacing for delicate fabrics, heavyweight for sturdy materials.
Here’s your step-by-step preparation checklist:
- Pre-wash both fabric and interfacing to prevent future shrinkage issues
- Cut pieces with matching grain lines to guarantee proper drape and stability
- Pin interfacing to fabric’s wrong side with pins perpendicular to raw edges
- Test color compatibility on scraps to prevent show-through
- Press lightly if needed to set pins without distorting fabric
Place your sew in interfacing carefully on the wrong side of your fashion fabric. Align raw edges precisely while maintaining consistent seam allowances. This fabric stabilization technique prevents stretching during construction.
Choose interfacing methods that complement your fabric’s natural characteristics. Proper interfacing application starts with thorough fabric preparation. Use appropriate sewing tools and maintain grain alignment throughout the process. Understanding interfacing basics is vital for achieving professional results.
Stitching Process
Perfect stitching separates amateur projects from professional-looking garments.
Start by selecting the right needle—a universal or sharp needle works best for sew in interfacing.
Check your thread tension to prevent puckering or loose stitches that compromise the bond between layers.
Set your stitch length to 2.5mm for standard interfacing application.
This creates secure attachment without weakening the fabric.
Align raw edges carefully before pinning, then guide fabric smoothly through your machine.
Don’t rush—steady feeding prevents shifting.
For curved areas requiring curve stitching, switch to a zigzag stitch.
This allows flexibility while maintaining structure.
Use a quarter-inch seam allowance for interfacing methods on collars and cuffs.
The key to successful interfacing sewing lies in consistent pressure and even stitching.
Your main garment seam should cross over the interfacing stitching for maximum stability.
Practice these interfacing stitching techniques on scraps first—it’s the difference between wobbly construction and crisp, professional seam finishes that last through countless washes.
Mastering hand stitching techniques is essential for achieving professional results in garment construction.
Comparing Non-Fusible and Fusible Interfacing
When choosing between nonfusible interfacing and fusible interfacing, you’ll face a classic trade-off between convenience and quality.
Fusible interfacing bonds with heat and pressure, making application quick and simple.
You just iron it on, and you’re ready to sew.
However, this convenience comes with drawbacks – fusible bonds can weaken over time, and those annoying bubbles may appear after repeated washing.
Nonfusible interfacing requires stitching for attachment but delivers superior results.
Nonfusible interfacing maintains your fabric’s natural drape and breathability while providing better wash durability.
For custom jackets, hair canvas offers professional structure that lasts.
Lightweight fabrics benefit from sew-in interfacing that won’t compromise their flow.
Consider your project’s demands when selecting interfacing types.
Quick crafts work fine with fusible options, but heirloom garments deserve the extra effort of sew-in varieties.
Your fabric selection also matters – delicate materials often prefer gentle sew-in methods over heat application.
Choose fabric stabilizers that match your fabric weights for ideal support.
Understanding the basics of fusible interfacing is essential for making informed decisions about your sewing projects.
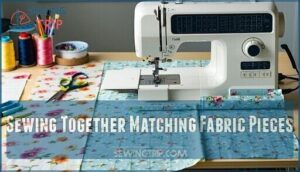
Sewing Together Matching Fabric Pieces
Align your fabric pieces with precision before stitching. Match the fabric grain perfectly and check that patterns line up exactly where they should. This attention to detail prevents puckering and guarantees your garment hangs correctly.
Set your machine to a medium stitch length when working with sew in interfacing. This creates strong seams without putting too much stress on the stabilizing fabric layers. Your seam allowance should remain consistent throughout the stitching process.
Consider the interfacing weight when selecting your thread and needle. Heavier interfacing requires a stronger needle to penetrate all layers cleanly. The fabric support from proper interfacing placement becomes evident as you stitch—your pieces won’t shift or distort.
To achieve professional results, understanding fabric pattern repeats is vital for aligning and matching fabric pieces correctly.
These sewing techniques for garment construction guarantee your interfaced sections maintain their intended shape. The stabilizing fabric works best when your stitching penetrates just beyond the interfacing attachment points, creating a secure bond between all layers.
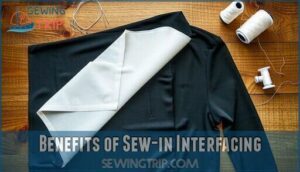
Benefits of Sew-in Interfacing
Beyond the typical challenges of garment construction, sew in interfacing delivers unmatched fabric support that transforms amateur projects into professional masterpieces.
Sew-in interfacing turns amateur projects into professional masterpieces with superior fabric support.
This traditional method creates garment durability without the stiffness that plagues fusible alternatives.
Sew in interfacing offers these key advantages:
- Fabric Stability – Prevents stretching and maintains grain alignment throughout the garment’s life
- Sewing Ease – Stays put during construction, eliminating shifting that causes uneven seams
- Professional Finish – Creates crisp edges and clean lines that won’t bubble or separate
- Garment Durability – Withstands repeated washing without degrading or losing adhesion
These interfacing tips guarantee your fabric reinforcement stays flexible while providing essential structure. Unlike fusible options that can create unwanted stiffness, sew in interfacing moves naturally with your fabric.
This stabilizing fabric technique gives you complete control over your garment’s final drape and appearance. Understanding interfacing basics is vital for selecting the right type of interfacing for your project.
Application Steps: Collar Example
Collar construction becomes straightforward when you master basic sew-in interfacing techniques. Start by cutting two collar pieces and one interfacing piece to exact pattern dimensions. Place the interfacing on the wrong side of one collar piece, matching raw edges perfectly.
Pin the interfacing within the seam allowance area, then stitch just inside the seam line to secure it temporarily. This fabric preparation step prevents shifting during assembly. Apply small dots of fabric glue stick if needed for extra stability.
Position collar pieces right sides together with the interfaced piece on top. Stitch collar seams, leaving the neckline open for attachment. Trim excess interfacing along stitch lines to reduce bulk and improve the finished appearance.
This method delivers superior garment stability compared to fusible options. The fabric reinforcement maintains natural drape while providing necessary structure. Your collar will maintain its shape through countless wears and washes, proving that proper interfacing adhesion creates lasting results. Using a dress form guide can help achieve accurate fittings and professional results.
Frequently Asked Questions (FAQs)
How do you apply sew-in interfacing?
Seventy percent of sewers skip interfacing, yet it’s essential for professional results.
Cut interfacing to match your fabric piece. Place it on the wrong side of your fabric.
Pin securely to prevent shifting during stitching. Baste within seam allowances, then sew your garment pieces together normally.
Why use sew-in interfacing instead of fusible?
You’ll get better drape and avoid those pesky bubbles that fusible interfacing creates after washing. Sew-in interfacing won’t degrade over time, keeping your garments looking professional longer.
Do you put interfacing on lining or fabric?
Like threading a needle, you’ll apply interfacing to your main fabric, not the lining. The interfacing bonds with your fashion fabric’s wrong side, giving structure where you need it most.
How to get interfacing to stick to fabric?
For fusible interfacing, place the adhesive side down on your fabric’s wrong side, then press firmly with a hot iron for 10-15 seconds. Let it cool completely before handling.
What types of fabric work best with sew-in interfacing?
Heavy-weight fabrics like denim, canvas, and wool work best with sew-in interfacing. You’ll get excellent results with cotton blends and structured materials that need reinforcement without losing their natural drape.
How do I know if my fabric and interfacing are compatible?
Wondering if they’ll play nicely together? Test interfacing on fabric scraps first. Check if the iron temperature setting works for both materials without damaging or creating unwanted stiffness.
What needle and thread should I use when applying interfacing?
Use a universal needle size 80/12 with all-purpose polyester thread. Match thread color to your fabric, not the interfacing. Sharp needles work best for precise stitching through multiple layers.
How can I prevent the interfacing from making the fabric too stiff?
Like telegraph operators of old, you’ll want to choose lightweight interfacing that matches your fabric’s weight.
Test on scraps first—heavier interfacing creates board-like stiffness, while lighter options maintain natural drape and movement.
Is it better to interface individual pattern pieces before or after construction?
Apply interfacing to individual pattern pieces before construction. You’ll get better precision, avoid fabric shifting, and guarantee proper placement. It’s much easier than wrestling with assembled pieces later.
Can sew-in interfacing be machine washed?
Yes, you can machine wash sew-in interfacing safely.
It won’t bubble or peel like fusible types might after repeated washes.
Use gentle cycle and avoid wringing to maintain its structure and longevity.
Conclusion
Like a skilled tailor who knows that rushed work shows in every stitch, mastering how to apply sew in interfacing requires patience and attention to detail.
You’ve learned the essential techniques: proper grain alignment, strategic trimming, and careful basting.
These fundamentals guarantee your garments maintain their intended drape while gaining necessary structure.
Remember to cut interfacing slightly smaller than fabric pieces and use loose basting stitches for best results.
With practice, you’ll confidently choose sew-in interfacing for delicate fabrics and achieve professional-quality finishes every time.


