This site is supported by our readers. We may earn a commission, at no cost to you, if you purchase through links.

Start by placing your main fabric wrong side up on the ironing board. Position fusible interfacing with the adhesive side down onto the fabric’s wrong side.
Cover both layers with a damp press cloth to prevent scorching. Set your iron to the appropriate temperature for your fabric type. Press firmly for 10-15 seconds in overlapping sections rather than sliding the iron.
Let the fabric cool completely before handling. For non-fusible interfacing, you’ll baste or stitch it in place instead. The key lies in matching weights correctly and understanding when each method works best.
Table Of Contents
Key Takeaways
- Match interfacing weight to your fabric – You’ll get professional results by choosing lightweight interfacing for delicate fabrics and heavyweight for structured pieces like coats and collars.
- Place fusible interfacing adhesive-side down – Position it on your fabric’s wrong side, then press with a hot iron for 10-15 seconds using firm pressure and a pressing cloth to prevent scorching.
- Cut interfacing slightly smaller than fabric pieces – Trim it about 1/8 inch inside seam lines to reduce bulk and prevent puckering at seam intersections.
- Let fused interfacing cool completely before handling – This ensures the adhesive bond sets properly and prevents shifting or bubbling that can ruin your project’s professional finish.
Attaching Interfacing Basics
You’ll need to attach interfacing to specific pattern pieces before you start sewing your project.
This extra layer gives your fabric structure and prevents stretching in areas like collars, cuffs, and button bands.
Cutting Out Pattern Pieces
Start by laying out your pattern pieces on the interfacing material. Follow grain direction carefully since it affects how the finished garment drapes and moves.
Use sharp cutting tools to guarantee clean edges and accurate shapes. Mark seam allowances clearly for precise piece preparation.
Different interfacing fabric types require specific handling during this initial cutting stage.
Pinning Interfacing to Fabric, Matching Raw Edges
Position your interfacing piece directly onto the fabric with both raw edges perfectly aligned.
Perfect alignment prevents shifting and ensures professional results every time.
Use sharp pins to secure the layers every 3-4 inches along the edges, focusing on curved areas where fabric stability matters most.
These pinning techniques prevent slippage during stitching and guarantee your interfacing attachment guide stays accurate throughout the process.
Different weights are needed, so consider fabric weight when choosing interfacing.
Stitching Interfacing With a Slightly Shorter Seam Allowance
Stitch along the interfacing edges with seam allowance precision, keeping your stitching line about 1/8 inch inside the standard seam allowance.
This interfacing stitching technique prevents fabric puckering and reduces bulk at seam intersections.
For curved seam interfacing, maintain consistent distance from the edge.
These bulk reduction methods guarantee smooth finishing while applying interfacing correctly in your sewing techniques tutorial.
Trimming Excess Interfacing Close to The Stitch
After stitching, grab sharp fabric scissors and carefully trim the interfacing close to your stitching line, leaving about 1/8 inch of interfacing beyond the stitch for stitch security.
This step prevents fraying and reduces bulk in seams.
For corner trimming, cut diagonally across corners to eliminate excess material, and when clipping curves, make small snips perpendicular to the stitching line.
These interfacing sewing techniques guarantee clean, professional results in your fabric preparation and interfacing application steps.
How to Attach Interfacing Sewing
Most sewers know that proper attachment makes all the difference in professional-looking results.
You’ll find two main methods for attaching interfacing: fusible interfacing application and hand-stitching techniques. Each method requires specific tools and careful attention to detail.
- Fusible interfacing application uses heat and moisture to bond interfacing adhesives permanently to fabric
- Hand-stitching involves basting interfacing to fabric edges using small, even stitches around seam allowances
- Sewing machines can attach non-fusible interfacing by stitching within seam allowances before construction begins
- Pattern adjustments may be needed when interfacing adds bulk to original measurements
- Interfacing removal becomes necessary if you make mistakes during the initial attachment process
The key to successful interfacing for sewing lies in understanding your fabric’s needs.
Light fabrics need gentle handling while heavier materials can withstand more aggressive attachment methods.
Practice these sewing interfacing techniques on scraps first to master the process before working on your actual project pieces.
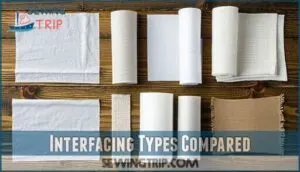
Interfacing Types Compared
Understanding the different types of interfacing helps you select the best option for your project. Each type offers unique benefits that affect how your finished piece looks and feels.
Non-Fusible Interfacing Characteristics
Non-fusible interfacing requires attach interfacing sewing methods like basting or stitching to secure it.
Understanding fiber content and weave structure helps you choose appropriate interfacing types for fabric stabilization.
These sewing interfacing techniques offer superior interfacing drape and breathability.
Check care instructions for durability factors before selecting your stabilizer.
| Characteristic | Impact on Your Project |
|---|---|
| Hand-sewn attachment | More time but precise control |
| Breathable structure | Comfortable finished garment |
| Natural drape | Maintains fabric movement |
| Washing flexibility | Follows fabric care needs |
| Repositionable | Allows adjustment during construction |
Fusible Interfacing Advantages and Disadvantages
Fusible interfacing offers quick application through heat-activated adhesive, making fabric stabilization faster than sewing methods.
Heat-activated adhesive makes interfacing attachment quick and creates permanent bonds with your fabric.
You’ll find fusible cost runs 25-40% less than non-fusible options while providing strong bond strength on most fabrics.
However, fabric compatibility varies – heat-sensitive materials like velvet won’t work, and long-term durability decreases after twenty wash cycles, and removal proves difficult once fused, affecting the overall fabric stabilization.
Woven, Knit, and Non-Woven Interfacing Differences
Understanding interfacing types explained helps you match materials perfectly.
Woven stability comes from crisscross threads, ideal for structured areas like collars.
Knit stretch preserves fabric elasticity in t-shirts and jerseys.
Non-woven cost efficiency makes it popular for crafts and bags.
Matching fabric weight is key for a balanced result.
This interfacing fabric guide shows woven works best with cotton, knit supports stretchy materials, and non-woven suits varied projects regardless of fiber content and best applications.
Attaching Fusible Interfacing Tips
Fusible interfacing saves time and creates strong bonds when you apply it correctly with the right heat and pressure.
You’ll need proper tools and technique to avoid common mistakes that can damage your fabric or create weak adhesion.
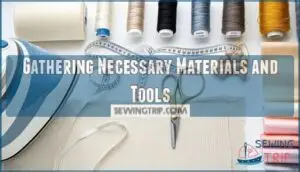
Gathering Necessary Materials and Tools
Before working with fusible interfacing, gather these sewing materials and tools for smooth application:
- Iron and pressing cloth – You’ll need a clean iron with adjustable temperature settings and a pressing cloth to protect delicate fabrics during the fusing process.
- Sharp fabric scissors and measuring tools – Cutting Surfaces work best when you use quality scissors for precise interfacing cuts and measuring tools for accurate sizing.
- Quality interfacing and fabric – Choose interfacing weight that matches your Fabric Selection needs, ensuring Thread Matching considerations align with your project’s final appearance and Tool Maintenance keeps everything sharp.
Many options are available if you need fusible options.
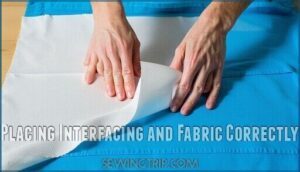
Placing Interfacing and Fabric Correctly
Place the interfacing’s adhesive side against the fabric’s wrong side, aligning grain directions perfectly.
This prevents puckering and guarantees smooth fabric reinforcement.
Match raw edges carefully to avoid shifting during the fusing process.
Position larger pieces first, then smaller ones.
Check that the interfacing texture lies flat without wrinkles or bubbles before proceeding with heat application.
For delicate fabrics, consider non-fusible interfacing options to ensure the best results with smooth fabric reinforcement.
Using a Pressing Cloth and Iron Temperature
Now you’ll need the right temperature settings and cloth types to fuse interfacing properly.
Set your iron to the fabric’s recommended heat level—cotton needs high heat while synthetics require medium settings.
Place a pressing cloth between the iron and interfacing to prevent damage. This barrier protects delicate fabrics from scorching and prevents fusible residue from sticking to your iron.
Understanding the correct iron settings is essential for effective fusing. Skip steam usage during initial fusing as moisture can interfere with proper adhesion.
Pressing Sections of Fabric and Interfacing
After positioning your fabric and interfacing correctly, you’ll press sections systematically to guarantee proper fusion.
Work in overlapping segments using steady pressure for 10-15 seconds each.
Key pressing techniques include:
- Temperature control – Use medium heat for delicate fabrics, high for heavier materials
- Moisture usage – Apply steam sparingly to activate adhesive without oversaturating
- Equipment choices – Select appropriate pressing cloth weight for your fabric type.
This methodical approach prevents damage while achieving professional results in your interfacing application steps.
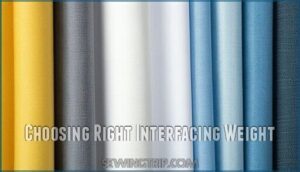
Choosing Right Interfacing Weight
You’ll need to match your interfacing weight to your fabric weight for the best results.
Lightweight fabrics require lightweight interfacing, while heavy fabrics need medium to heavyweight interfacing to provide proper support without adding unwanted bulk.
Identifying Fabric and Project Needs
First, examine your fabric types and project complexity to match the right support.
Lightweight cottons need delicate interfacing, while heavy wools require sturdy backing.
Consider garment structure – collars and cuffs demand firm support, while flowing skirts need flexible options.
Your durability needs and desired drape determine interfacing selection, which is crucial for the overall project outcome, and this fabric interfacing guide helps you understand which interfacing types work best for different sewing projects requiring fabric support.
Understanding Interfacing Weight and Color Options
Interfacing weight determines how much fabric support you’ll get, while color matching prevents show-through issues.
Light interfacing works for delicate fabrics, medium weight suits cotton shirts, and heavy options support structured garments.
Choose white for light fabrics, black for dark ones, and neutral tones for prints to maintain opacity levels and project impact.
For outerwear needing extra body, consider medium-weight interfacing options to provide the necessary support.
Selecting The Right Interfacing for Desired Results
Your project requirements determine the best interfacing choice.
Match fabric compatibility by selecting lightweight interfacing for delicate materials like silk, medium-weight for cottons, and heavyweight for coats.
Consider desired drape – woven interfacing maintains natural texture while non-woven adds body.
Understanding different interfacing options is essential for achieving the perfect result.
Choose your stiffness level based on garment needs.
Check washability needs against interfacing types explained in sewing guides for superior fabric support results.
Frequently Asked Questions (FAQs)
How do you attach interfacing?
Carefully choose compatible interfacing weight for your fabric.
Cut interfacing slightly smaller than fabric pieces.
Place fusible side down on fabric’s wrong side, then press with hot iron for 10-15 seconds using firm pressure.
Do you iron on interfacing before sewing?
Yes, you’ll iron fusible interfacing onto your fabric before sewing.
Apply heat and pressure for 10-15 seconds, then let it cool completely.
This bonds the interfacing securely to your fabric pieces.
Can you reuse interfacing after removing it?
While fresh interfacing sticks perfectly, removed interfacing loses its adhesive power.
You can’t effectively reuse fusible interfacing once it’s been heated and peeled away.
The backing becomes compromised, making reattachment unreliable for your sewing projects.
How do you fix bubbled or wrinkled interfacing?
Iron the area with a damp press cloth on medium heat. The moisture and warmth will relax the interfacing fibers, smoothing out bubbles and wrinkles for a clean finish.
Should interfacing extend beyond seam allowances completely?
No, interfacing shouldn’t extend beyond seam allowances.
You’ll trim it to stop about 1/8 inch inside the seam line.
This prevents bulk in your seams while ensuring proper support where you need it most.
Can you wash garments with attached interfacing?
Can’t you simply toss that freshly sewn garment into the wash without worry?
You can wash garments with attached interfacing, but check care labels first.
Most fusible interfacings handle gentle washing cycles well.
What happens if you skip interfacing entirely?
Without interfacing, your garments will lack structure and stability.
Necklines sag, button bands buckle, and collars lose their crisp shape.
You’ll get wrinkled, floppy results that scream homemade instead of professional-looking finished pieces.
Conclusion
Mastering how to attach interfacing sewing elevates your projects from basic to professional quality.
The theory that proper interfacing attachment determines garment structure proves true with every successful project.
You’ve learned fusible and non-fusible methods, weight matching principles, and pressing techniques.
These skills transform fabric handling and finished results, and practice with different interfacing types builds confidence.
Soon you’ll instinctively select the right weight and attachment method for each project, creating garments with lasting shape and a professional finish.
- https://www.moodfabrics.com/blog/all-about-interfacing/
- https://www.thesewingdirectory.co.uk/introduction-to-interfacing/
- https://www.youtube.com/watch?v=HML4zQv78b8
- https://www.sewdiy.com/blog/2017/sewing-tips-for-fusing-iron-on-interfacing
- https://sewmeyourstuff.wordpress.com/2012/10/21/how-to-attach-fusible-interfacing/

