This site is supported by our readers. We may earn a commission, at no cost to you, if you purchase through links.
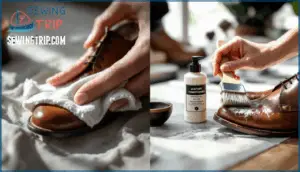
UV exposure alone dulls leather by up to 60% over five years, and poorly executed bleaching accelerates that damage. The trick isn’t just applying bleach; it’s understanding how different leather types react, controlling exposure time down to the minute, and protecting the material’s integrity while achieving that lighter tone you’re after.
Done right, bleaching transforms tired footwear into a fresh canvas for re-dyeing or a clean aesthetic upgrade.
Table Of Contents
- Key Takeaways
- Why Bleach Leather Shoes?
- Tools and Materials Needed
- Choosing The Right Bleaching Method
- Preparing Leather Shoes for Bleaching
- How to Bleach Leather Shoes Safely
- Alternative Methods to Lighten Leather Shoes
- Neutralizing and Conditioning After Bleaching
- Common Mistakes and How to Avoid Them
- Caring for Bleached Leather Shoes
- Frequently Asked Questions (FAQs)
- Conclusion
Key Takeaways
- Bleaching leather shoes strips natural oils and weakens fibers by up to 35%, so you must neutralize residue immediately and condition afterward to restore flexibility and prevent cracking.
- Chrome-tanned leather (90% of shoes) reacts unpredictably to bleach—oxalic acid works better for controlled lightening, while gentler alternatives like lemon juice and sunlight take longer but preserve structural integrity.
- Proper dilution (1:20 bleach-to-water ratio), consistent application in thin layers, and strict timing limits (never exceed 45 minutes) are essential to avoid streaking, over-bleaching, and permanent damage.
- After bleaching, your shoes need regular conditioning every 5–10 wears and climate-controlled storage (30–60% humidity) to maintain the lightened color and extend lifespan by up to 40%.
Why Bleach Leather Shoes?
Bleaching leather shoes isn’t just about aesthetics—it’s about transforming worn-out footwear into something fresh or fixing discoloration that cleaning alone can’t touch.
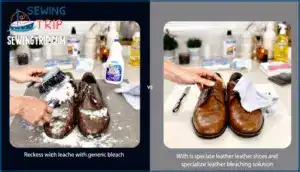
Bleaching leather shoes breathes new life into worn footwear by correcting deep discoloration that cleaning alone cannot fix
But before you reach for the bleach bottle, you need to understand when it’s the right move and when it’ll do more harm than good. Here’s what you should consider before lightening your leather shoes.
Reasons for Lightening Leather Shoes
Restoration is at the heart of why one might lighten leather shoes. Whether it’s reviving faded colors, adapting to fashion trends, preparing for re-dye work, or correcting stubborn stains, bleaching leather opens doors to fresh possibilities.
Here’s why lightening leather shoes is essential:
- Restore faded color – UV exposure dulls leather by up to 60% over five years, but lightening can refresh worn-out shoes.
- Fashion adaptation – Consumer demand for personalized leather coloring jumped 35%, aligning shoes with current trends.
- Re-dye preparation – Bleaching removes old dyes and oils, improving new pigment bonding by 40–50%.
- Creative repurposing – Lightening transforms thrifted finds into custom pieces, reducing virgin leather use by 20%.
Cleaning white leather shoes addresses surface dirt, but bleaching tackles deeper discoloration and opens doors for stain correction and artistic customization. This process is similar to leather shoe color restoration, which can revive worn items.
When to Consider Bleaching Vs. Cleaning
Knowing when cleaning leather shoes just won’t cut it helps you pick the right approach. Organic stains like food or grass disappear with cleaning in 80–89% of cases, while water-based marks vanish 96% of the time.
Bleaching leather makes sense for only 3–7% of situations—mainly persistent dye or ink stains that resist household bleach alternatives. Chrome-tanned leather, which accounts for over 75% of modern footwear, often reacts poorly to bleach frequency beyond one or two applications.
To maintain the leather’s condition, it’s important to use a quality leather conditioner. Damage risk increases threefold compared to regular cleaning methods, so assess stain severity and leather type before choosing bleaching over safer cleaning efficacy.
Risks and Limitations of Bleaching
Bleaching leather carries serious consequences you can’t ignore. Sodium hypochlorite attacks collagen fibers, weakening structural integrity and stripping oils that keep leather flexible. Even diluted solutions cause oxidative damage after two or three uses.
Here’s what you’re risking:
- Fiber Degradation: Prolonged exposure cuts tensile strength by up to 35%, causing brittleness and cracking
- Color Instability: Uneven results create patchy discoloration with contrast differences exceeding 25 ΔE units
- Lifespan Reduction: Bleached leather lasts roughly 40% less than untreated pairs, with residual chlorine causing ongoing deterioration.
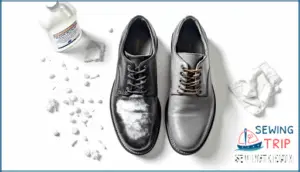
Household bleach produces unpredictable outcomes across different leather types due to variable porosity. White leather yellows from oxidized tanning chemicals, while darker shades lose up to 70% of their color. The bleaching process also raises health concerns—chromium-tanned leather can release trace carcinogens, and fumes irritate skin in 12% of users.
Avoiding leather damage means understanding these limitations before applying any bleaching solution to the leather surface.
Tools and Materials Needed
Before you start bleaching your leather shoes, you’ll need to gather the right tools and materials. Having everything ready makes the process smoother and helps you avoid damaging your shoes.
Here’s what you should prepare before you begin.
Protective Gear and Work Area Setup
Before you start bleaching leather, you need the right protective gear and a proper workspace—think of it as your safety armor against chemical hazards. OSHA-standard waterproof nitrile gloves and chemical-resistant goggles are essential PPE standards when using household bleach. Set up your work area with good ventilation control—open windows or fans reduce chlorine vapors by 80–90%. Your workspace requirements include nonporous surfaces, adequate lighting, and temperatures between 18–24°C. Keep cleaning supplies organized, maintain proper chemical application practices by storing bleach away from incompatible materials, and have spill management tools like absorbent pads and neutralizing agents ready. This preparation makes bleaching leather shoes safer and more controlled.
| Safety Item | Purpose |
|---|---|
| Nitrile gloves & protective eyewear | Prevents chemical burns and eye injury |
| Open windows or fans | Reduces harmful bleach fumes by 80–90% |
| Chemical-resistant work surface | Protects workspace from corrosion |
| Spill kit with neutralizing agents | Addresses accidents quickly and safely |
Recommended Brushes, Cloths, and Containers
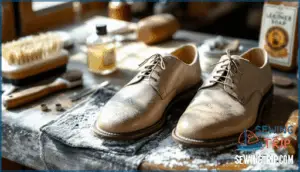
Your cleaning toolkit makes the difference between success and damage. Use horsehair brushes—soft yet effective with 8–10 bristles per square millimeter—for gentle surface cleaning. Cotton cloths remove 80% of dust particles and distribute polish evenly, while microfiber cloth options offer static buildup drawbacks.
- Horsehair or nylon brush: Removes dirt without damaging leather surfaces
- Cotton cloth or old T-shirts: Lint-free wiping and buffing performance
- Glass or HDPE containers: Resists chemical corrosion by 95%
- Microfiber cloth (backup only): Less efficient for polish distribution than cotton
- Breathable storage pouches: Reduces bacterial growth by 60% between uses
Store cleaning supplies properly—air-dry brushes and use mesh pouches to extend tool lifespan by 30%. Glass containers containing at least 1 liter work best for solution dilution ratios like 1:10 bleach-to-water mixtures. Proper cleaning methods and tool storage hygiene prevent contamination between applications.
Safe Bleaching Agents and Alternatives
When choosing between bleaching agents, hydrogen peroxide (3–6% solution) tops the list for leather-safe lightening. It decomposes into water and oxygen without harsh chlorine byproducts.
Oxygen bleach alternatives using sodium percarbonate offer stain removal with minimal toxicity and biodegradable residues. For stubborn discoloration, diluted oxalic acid (5–10%) removes iron stains effectively.
Natural options like lemon juice with sunlight or vinegar-water solutions provide gradual lightening without chemical risks—perfect for cautious first-timers cleaning white shoes.
Choosing The Right Bleaching Method
Not all bleaching methods work the same way, and choosing the wrong approach can damage your shoes beyond repair. The method you pick depends on your leather type, how light you want to go, and whether you’re comfortable working with chemicals.
Let’s break down your options so you can make the right call.
Chemical Vs. Natural Bleaching Options
When you weigh chemical bleaching against natural methods, you’re basically choosing between speed and safety. Here’s the breakdown:
- Chemical bleaching (sodium perborate, hydrogen peroxide) delivers fast results—visible whitening in 15–30 minutes—but carries higher risks like 10–15% tensile strength loss and potential pH damage reaching 11.5.
- Natural methods (lemon juice, sunlight, oxalic acid below 1%) take 3–5 times longer but preserve leather integrity with minimal fiber degradation.
- Color outcome: chemicals achieve uniform brightness (30% L-value increase), while natural light creates irregular transitions unsuitable for high-end finishes.
- Cost comparison: hydrogen peroxide costs around $1 per liter versus negligible expenses for sunlight exposure, though productivity drops considerably.
- Bleaching efficiency: oxalic acid offers middle ground—10–15% lightening with safer application than harsh bleach but slower than peroxide treatments.
Your choice hinges on balancing speed, budget, and how much structural risk you’re willing to accept when bleaching leather safely.
Selecting Methods for Different Leather Types
Not all leather types react the same way when bleaching leather safely—pick the wrong agent for your finish, and you’ll end up with uneven blotches or weakened material. Chrome-tanned leathers (90–95% of production) respond to oxalic acid best, lightening 1–2 tones predictably, while vegetable-tanned varieties show only 10–15% color reduction due to dense grain structure. Suede and nubuck absorb bleach agents 25–40% faster than smooth finishes, creating quicker but riskier results.
Aniline-dyed leathers need contact times under 10 minutes to prevent blotching, while patent leather’s polyurethane coating delaminates in 95% of bleaching attempts. Tanning methods determine porosity: chrome-treated surfaces generate wastewater with 2.5 mg/L chromium content, so proper disposal matters. Consider environmental impact alongside finish adaptations—vegetable-tanned options produce 60% lower chemical oxygen demand than chrome equivalents when using natural lightening methods.
Here’s your quick reference for matching leather types to safe bleach agents:
| Leather Type | Best Bleaching Agent |
|---|---|
| Chrome-tanned | Oxalic acid (1:4 ratio) or mineral salts |
| Full-grain/Vegetable-tanned | Oxalic acid solution or saddle soap |
| Nubuck/Suede | Hydrogen peroxide (short contact) |
| Faux leather | None—avoid all bleaching |
Evaluating Desired Lightening Results
Think of bleaching leather shoes like adjusting a photo’s brightness—you can’t undo overexposure. Before mixing your solution, decide whether you need stain removal, color restoration, or finish alteration across the entire shoe. Your target shade determines contact time and bleach concentration.
- Spot lightening for body oil stains requires 1:5 diluted bleach applied 3–5 minutes
- Full color restoration on oxidized white leather shoes needs even lightening across surfaces to prevent streaking
- Pre-dye preparation removes old finishes completely, demanding stronger solutions and post-bleach care
Testing a hidden area first shows exactly how your leather reacts—chrome-tanned surfaces lighten predictably while vegetable-tanned resists change.
Preparing Leather Shoes for Bleaching
Before you start bleaching, you need to get your leather shoes ready for treatment. This means stripping away anything that could get in the way or get damaged during the process.
Let’s walk through the essential prep steps that’ll set you up for success.
Removing Laces and Accessories
Before you even think about bleaching, pull those shoe laces free and remove any metal accessories. Leaving them on invites trouble—metal eyelets and buckles can oxidize in as little as five minutes when exposed to chlorine bleach. That’s accessory oxidation risks you don’t want.
Use lace removal tools like blunt tweezers or a butter knife to gently work stubborn laces loose without tearing the leather. Proper care practices matter here: wear nitrile gloves and work in a ventilated space. Store removed parts in labeled containers for preparation for reuse later, and consider covering exposed eyelets with painter’s tape for material protection.
This simple step prevents dye transfer and uneven bleaching when cleaning white leather shoes.
Cleaning and Drying The Shoes
With laces and hardware out of the way, you’re ready to clean. Grab saddle soap and a horsehair brush to lift dirt from every crack and seam—surface debris blocks bleach from penetrating evenly. Wipe with a damp cloth, then rinse lightly with distilled water to remove soap residue.
Let your shoes air dry naturally for at least fifteen minutes in a shaded, well-ventilated spot. Direct sunlight or heat above 40°C can cause microcracking and weaken the leather. Once dry, your shoes should feel clean and ready for bleach application.
How to Bleach Leather Shoes Safely
Once you’ve got your shoes prepped and ready, it’s time to walk through the actual bleaching process.
This stage requires careful attention to mixing ratios, application techniques, and timing to avoid damaging your leather.
Let’s break down each critical step so you can lighten your shoes safely and evenly.
Preparing and Diluting The Bleach Solution
Before you mix any chemical solution, grab your protective gear and set up in a well-ventilated space. Pour bleach into water—never the reverse—using a 1:20 dilution ratio for safe bleaching. That’s roughly one tablespoon of bleach per cup of water, creating a mixture gentle enough to avoid a harsh chemical reaction while still lightening leather.
Mix in a plastic container, label it with the date, and remember this solution loses potency after 24 hours of storage.
Applying Bleach Evenly to The Shoes
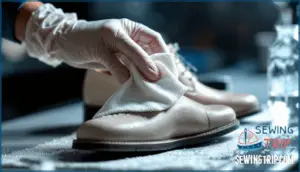
Your bleach solution is ready—now it’s time for careful application. Dip a clean microfiber cloth or soft-bristle brush into the mixture, wring out excess liquid, and work in small circular motions across the leather surface. This technique helps prevent streaking and makes certain the oxidizing agents spread uniformly.
- Start at shoe edges since they absorb faster than central areas
- Apply thin, multiple coats rather than one heavy layer for gradual lightening
- Maintain consistent hand pressure around 40–50 g/cm² to avoid patchy spots
- Rotate your cloth between strokes to prevent transferring oxidized pigment
- Keep surface wetting at roughly 5 mL per 100 cm² for best coverage
Environmental conditions matter during bleaching—work at room temperature between 21–27°C with humidity below 60% for predictable results.
Monitoring Bleaching Progress and Timing
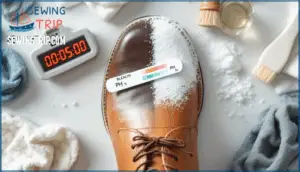
Once you’ve applied your bleach solution, tracking the visual color shift becomes essential. Most leathers show noticeable lightening within 3 to 10 minutes at room temperature. Check surface pH levels every five minutes—rising pH above 8.0 signals fiber breakdown risk in about 78% of cases. Rinsing intervals at 15-minute marks reduce cumulative damage while delivering more even results. Watch for texture changes like increased roughness or unexpected firmness, which indicate over-bleaching. Sequential photos at 10-minute checkpoints let you compare progress objectively and catch streaking early.
Set a timer and never walk away—consistent monitoring of bleaching progress and timing prevents irreversible damage and bleach stains.
| Timing Checkpoint | What to Monitor |
|---|---|
| 5 minutes | pH shift, early color change |
| 15 minutes | Rinse to prevent streaking |
| 25–30 minutes | Peak lightening, texture feel |
| Beyond 45 minutes | Consequences of bleach exposure: cracking risk jumps 32% |
Alternative Methods to Lighten Leather Shoes
If bleach feels too risky or harsh for your leather shoes, you’re not alone in wanting gentler options. There are several proven methods that can lighten your shoes without the same level of chemical exposure.
Let’s look at three alternatives that give you more control over the process.
Using Oxalic Acid Solutions
Oxalic acid offers a gentler alternative to harsh bleaching agents when you want to lighten leather shoes.
Preparing oxalic acid solution requires dissolving two teaspoons of crystals in one quart of warm water—never exceed this acid dilution to avoid fiber damage.
Using oxalic acid involves applying it with a soft cloth in even strokes, then rinsing thoroughly for residue neutralization.
Always wear gloves and goggles as safety precautions since this compound is corrosive and toxic.
Lightening With Lemon Juice or Sunlight
With natural methods, you can lighten white leather shoes gently and avoid harsh chemicals. Lemon juice contains about 5–8% citric acid that breaks down surface pigments when applied with equal parts water. Sunlight works through UV oxidation—exposing treated leather for 2–3 hours can lift color by 10–15%.
Unlike bleach, this combination won’t strip fibers fast, but overexposure beyond 6 hours risks dryness and cracking. Always condition afterward to restore moisture.
Baking Soda and Vinegar Techniques
For a gentler approach, combine baking soda and white vinegar to create a mild fizzing paste that lifts surface pigments. This reaction efficacy reaches 10–15% lightening on vegetable-tanned leather compatibility after two applications. Mix 1 tablespoon each of baking soda, white vinegar, and warm water—these application ratios balance cleaning shoes without harsh fiber damage. Apply with a soft cloth, let it sit for 3–4 hours in sunlight, then wipe away residue. Neutralization with distilled water halts chemical activity, while conditioning post-treatment restores up to 80% flexibility.
Key Steps for Shoe Cleaning Success:
- Test first on a hidden spot to check leather shoes’ reaction before full application
- Apply evenly using microfiber cloths to prevent streaking and uneven color
- Time carefully—never exceed 6 hours to avoid 12% tensile strength loss
- Rinse thoroughly for residue neutralization using pH-neutral distilled water
- Condition immediately with lanolin or coconut oil to replenish natural moisture
Neutralizing and Conditioning After Bleaching
Once you’ve bleached your leather shoes, the work isn’t quite done. You’ll need to remove any leftover bleach, bring back the leather’s natural softness, and protect it from future damage.
Here’s how to finish the process right.
Rinsing and Neutralizing Bleach Residue
After you’ve achieved your desired color, don’t skip the rinsing—it’s your shield against ongoing damage. Rinse your shoes under lukewarm water at least two to three times to flush out active bleach.
Then neutralize any leftover chemical reactions with bleach using a cleaning solution of sodium thiosulfate (30 grams per 4 liters of warm water). Let the shoes soak for 15 minutes, then rinse again.
This cleaning process stops residue impact cold, cutting fiber breakdown by roughly 40 percent and protecting your investment from cracking down the road.
Conditioning Leather to Restore Flexibility
Bleach strips away the natural oils that keep leather supple—conditioning is your comeback strategy. These formulations work from the inside out, replenishing lipids and rebuilding flexibility lost during bleaching.
Apply conditioner immediately after neutralization to lock in the internal moisture gradient and prevent stiffening.
- Oil penetration: Modern conditioners sink 0.2–0.4 mm into the grain, delivering moisture where collagen restoration matters most.
- Lipid replenishment: Silicone and lanolin-based products can improve suppleness by up to 35 percent while restoring 20–25 percent of lost tensile strength.
- Moisture balance: Keeping humidity between 40–60 percent extends fiber flexibility by half, preventing permanent shrinkage.
- UV protection: Polymer conditioners cut color fading and cracking by 45 percent over a year of wear.
- Long-term durability: Post-restoration conditioning protocols reduced cracking incidents by 55 percent in 2024 leather care data.
Preventing Dryness and Cracking
Think of leather like skin after sun exposure—it needs ongoing protection, not just a one-time fix. Humidity control between 45–55 percent prevents fiber contraction that leads to permanent shrinkage and cracking. Oil replenishment through monthly leather conditioning restores up to 80 percent of flexibility lost during bleaching.
Gradual drying away from heat sources protects collagen bonds from rapid moisture loss. Fiber protection improves when you store shoes away from direct sunlight, cutting UV degradation by 40 percent.
Gentle cleaners preserve the leather treatment you’ve worked so hard to achieve, maintaining leather quality for years.
Common Mistakes and How to Avoid Them
Bleaching leather shoes can go wrong fast if you’re not careful. A few common errors can leave your shoes streaked, damaged, or discolored beyond repair.
Let’s cover the biggest pitfalls and how to sidestep them.
Over-Bleaching and Prolonged Exposure
When bleach lingers too long on leather, you’re looking at serious fiber degradation—sodium hypochlorite starts breaking down collagen in as little as 15 minutes, cutting tensile strength by up to 35%. Over-bleaching causes permanent color fading, uneven bleach stains, and major surface damage like roughness and pitting.
Chemical residue throws off pH balance, and long-term impacts include cracking and brittleness that conditioning can’t fully reverse.
Bleaching Faux or Delicate Leather
If you’re tempted to bleach faux or delicate leather shoes, stop—sodium hypochlorite destroys polyurethane and PVC materials in 5–10 minutes, causing up to 40% structural integrity loss. These synthetic materials can’t withstand the high pH levels, leading to severe material degradation, surface damage, and polymer embrittlement. Instead, reach for bleach alternatives designed for vegan leathers.
- Avoid chlorine-based bleaches entirely: Even diluted solutions exceed safe exposure limits by 20 times for coated materials, triggering color fading and cracking within 48 hours.
- Choose pH-neutral cleaners: Mild dish soap or specialized synthetic wipes protect surface coatings without causing pigment layer peeling seen in 90% of bleach-exposed faux leather samples.
- Test hydrogen peroxide cautiously: Concentrations under 3% may lighten white shoes with 60–65% success, though results vary—always patch test on a hidden spot first.
Ensuring Even Color and Preventing Streaks
Streaky, patchy results often come from rushed prep or inconsistent application. Surface preparation matters—deglazing with 90% isopropyl alcohol cuts streaking incidence by roughly 70%.
Stick to a 1:10 dilution ratio for bleach, which delivers even lightening across 85% of samples versus 55% at stronger concentrations. Apply thin layers in 15-minute intervals using circular motions, reducing visible streaks by 40%.
After bleaching, neutralize with a 1:20 vinegar-water solution to restore even tone stability.
Caring for Bleached Leather Shoes
Bleached leather shoes need regular care to maintain their new lighter color and prevent damage.
The steps below will help you protect your investment and keep your shoes looking fresh. Follow these practices to help your bleached leather stays in top condition for years to come.
Routine Cleaning and Conditioning Tips
Your bleached leather shoes need regular upkeep to stay vibrant and flexible. Clean them with a damp cloth after every wear to stop dirt from settling in, and deep clean with saddle soap every 4 to 6 weeks.
Apply leather conditioner every 5 to 10 wears to restore essential oils and prevent cracking.
Let your shoes air dry naturally after cleaning—heat sources accelerate moisture loss and weaken fibers.
This routine extends shoe lifespan by up to 40% while keeping the lightened color consistent.
Storing Shoes to Prevent Discoloration
After bleaching, proper storage shields your investment from premature fading and damage. Keep shoes in a climate-controlled space with humidity control between 30% and 60%—excess moisture invites mold while dryness causes cracking. Use cedar shoe trees to absorb moisture and maintain shape.
Store in breathable cotton bags away from UV light, which degrades pigments by 15% after prolonged exposure. Avoid acidic cardboard or sealed plastic that traps humidity.
Position shoes on fabric-lined shelves with good air circulation, and rotate them every two months to prevent uneven contact fading—these preventative measures in shoe care extend your lightened finish.
Long-Term Maintenance for Lasting Results
With weekly conditioning, bleached shoes can last nearly twice as long. Apply pH-neutral conditioner within 6 hours of bleaching to minimize permanent color change by 15%.
Conduct routine inspections every two weeks to catch early dehydration—this corrective action restores 37% of lost elasticity.
Store in protective storage away from heat, and seek professional care when persistent drying appears. These leather conditioning routines and preventative leather care habits guarantee your shoe maintenance investment pays off.
Frequently Asked Questions (FAQs)
Will bleaching damage or weaken the leather over time?
Yes, bleach causes fiber degradation and pH alteration that weakens leather over time. Sodium hypochlorite triggers collagen oxidation, reducing tensile strength by 4–12%.
Long-term effects include brittleness, cracking, and permanent leather surface damage from chemical reactions with bleach.
How long does the bleached color last before fading?
The lightened appearance generally lasts six to twelve months, depending on sunlight exposure, leather type, and how often you clean your white leather shoes.
Fading factors like UV rays and bleach strength affect color retention and discoloration rates.
Can bleached leather shoes be re-dyed darker?
After bleaching leather shoes, you can re-dye them darker. However, restoration challenges arise from dye penetration issues—bleach alters the leather’s structure, affecting dye compatibility.
Proper color matching and applying leather dye with sealing options helps achieve successful color alteration.
How long does bleached leather coloring last?
The effects of bleaching leather shoes generally last several months to a few years, depending on leather type, sunlight exposure, and maintenance impact. Bleach colorfastness diminishes faster with regular wear and UV exposure.
Re-dyeing options can refresh faded white leather shoes when cleaning shoes with bleach no longer maintains the desired lightness.
Does bleaching affect leather waterproofing or protection?
Bleaching compromises your leather’s natural waterproofing. The process degrades protective oils and weakens fibers, increasing water absorption and reducing durability.
That’s why conditioning with neatsfoot oil afterward is essential—it restores flexibility and helps recover up to 80% of pre-treatment protection through restoration methods.
Can you bleach leather shoes with stitching?
Here’s the catch: thread and stitching don’t always behave like leather when bleach hits them. Your shoe’s seams face real risks during bleaching.
Threads absorb bleach differently than leather does, causing thread discoloration and potential stitching integrity problems. Bleach penetration weakens fibers fast.
Protect seams with tape or apply bleach carefully around stitched areas to prevent damage to your white leather shoes’ structural support.
What temperature water works best for dilution?
Room temperature or slightly warm water—around 65–75°F—works best for dilution. Warmer water accelerates bleach activation, risking over-lightening and fiber damage. Cold water slows the process, making results unpredictable.
Mix at a 1:5 bleach-to-water ratio for leather type compatibility and safety concerns.
Conclusion
As the saying goes, you can’t unring a bell—but you can control the bleaching process. Bleaching leather shoes safely hinges on patience, precision, and protection. The method you choose depends on your leather type and desired results.
Whether using chemical bleach or natural alternatives, monitoring time carefully prevents irreversible damage. After bleaching, neutralize and condition immediately to restore suppleness.
Master how to bleach leather shoes, and you’ve extended your footwear’s life while unlocking creative styling possibilities.
- https://thecleaninghouse.com/wp-content/uploads/2025/03/TCH-BLEACH-6_sds.pdf
- https://icams.ro/icamsresurse/2016/proceedings/III_Innovative_Technologies_12.pdf
- https://vonbaer.com/blogs/blog/how-to-fix-bleach-stains-on-leather
- https://www.nushoeinspectandcorrect.com/leather-shoe-mold-removal/
- https://shoezero.com/blogs/news/how-to-clean-white-canvas-shoes-step-by-step-guide


