This site is supported by our readers. We may earn a commission, at no cost to you, if you purchase through links.
When you clip corners, you’re trimming excess fabric from seam allowances at strategic angles, reducing bulk that creates those telltale lumpy, rounded corners.
For outward corners, cut diagonally about 1/8 inch from your stitching line. For inward corners, make small clips almost to the seam, stopping just before your stitches.
This simple technique allows fabric to lay flat when turned right-side out, creating those crisp, sharp points that scream "professionally made."
The difference between clipped and unclipped corners is like night and day—and there’s much more to master.
Table Of Contents
- Key Takeaways
- Clipping Sewing Tutorial
- How to Clip Curves in Sewing
- How to Press Corners and Curves
- When to Use Clipping Corners
- Tips for Clipping Corners Safely
- Sewing and Trimming Outward Right Angle Corners
- Sewing and Trimming Inward Right Angle Corners
- Techniques for Clipping Corners With Different Fabrics
- Frequently Asked Questions (FAQs)
- Conclusion
Key Takeaways
- You’ll cut diagonally across outward corners about 1/8 inch from your stitching line to eliminate bulk and create sharp, professional-looking points instead of rounded, lumpy corners.
- You’ll make small clips into inward corners almost to the seam line (stopping just before your stitches) to prevent puckering and allow the fabric to lay flat when turned right-side out.
- You’ll need different techniques for curves – make V-shaped notches every 3/8 inch on convex curves and small perpendicular snips on concave curves to prevent fabric bunching.
- You’ll achieve professional results by pressing properly after clipping – use a point turner or blunt tool to push out corners sharply, then apply appropriate heat to set those crisp lines permanently.
Clipping Sewing Tutorial
You’ll transform your sewing projects from amateur to professional once you master corner clipping techniques.
This essential skill eliminates bulk and creates those crisp, sharp corners that make handmade items look store-bought, giving them a professional look.
Importance of Clipping in Sewing
You’ve probably wondered why your sewn corners look chunky instead of crisp.
Corner clipping is your secret weapon for that professional finish you’re after. This sewing technique reduces bulk by trimming excess fabric from seam allowances, giving you sharp points and better fabric flexibility.
Master the corner clip—your pathway from homemade to haute couture perfection
Without proper fabric corner trimming, you’ll get lumpy corners that scream "homemade" instead of showcasing your skills with clean aesthetic appeal. This highlights the importance of using corner clipping to achieve a professional look.
Definition of Clip Curves in Sewing
What exactly does clipping curves mean in sewing? It’s making tiny snips into curved seam allowances so fabric lies flat when turned right-side out.
This technique prevents puckering and creates smooth, professional-looking curves.
Different curve types need specific clipping approaches—concave curves require small clips while convex curves need notched cuts for best results.
Clipping Outward Corners
Outward corners can be tricky, but diagonal clipping makes them crisp. Cut diagonally across your seam allowance, leaving about 1/8 inch from stitching. This bulk reduction technique prevents lumpy corners that scream "amateur hour!"
Here’s your game plan:
- Trim excess fabric at an angle to reduce bulk
- Use point turners to push out sharp corners perfectly
A corner point turner can help achieve this. This sewing corner clipping method transforms rounded, bulky corners into professional-looking points every time.
Clipping Inward Corners
Unlike outward corners, inward corners require a different approach.
Instead of diagonal cuts, you’ll make strategic clips to handle V-neck clipping and tight angles.
- Clip almost to the seam allowance: Make small cuts into the corner, stopping just before your stitching line to prevent puckering
- Trim excess fabric first: Remove bulk from layered fabrics around reinforced corners before clipping for cleaner results
This sewing corner clipping technique helps concave curves and inward corners lay flat when turned right-side out.
Consider using an inward corner tool to achieve more precise results.
How to Clip Curves in Sewing
Curves can be tricky, but they don’t have to make your project look wonky.
You’ll need to clip them just like corners, but with different techniques for inward and outward curves to keep everything smooth and professional-looking.
Clipping Convex Curves
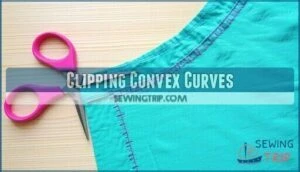
When working with convex curves (curves that bulge outward), you’ll need to clip strategically to prevent puckering.
Start by making small V-shaped notches every ⅜ inch along your seam allowance using pinking shears or sharp fabric scissors. The notch depth should match your curve severity—deeper cuts for tighter curves, shallow ones for gentle bends.
This clipping frequency guarantees the fabric has room to stretch and lay flat when turned right side out. Different fabric types require adjusted techniques: lightweight cotton needs minimal clipping, while thick materials demand more generous notches.
Remember, when you clip curves properly, you’re giving your fabric permission to behave beautifully around those tricky bends. For enhanced stability, consider using white fusible knit to prevent stretching, ensuring a smooth finish with minimal clipping and generous notches for a professional result, and achieving beautifully curved seams.
Clipping Concave Curves
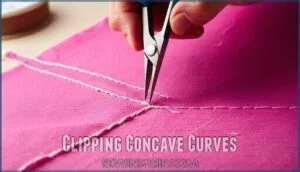
While convex curves bend outward, concave curves curve inward like a gentle smile. These inward-bending areas need special attention to prevent puckering and achieve smooth edges.
When working with concave curves, you’ll want to make small snips along the curve, stopping just before the stitch line. The key is Curve Clipping Depth – don’t go too close to your stitching! Snip Angle Matters too, so keep your cuts perpendicular to the curve.
Here’s your action plan for perfect concave curve clipping:
- Use sharp embroidery scissors for precision cuts – they’re the Best Scissor Type for detailed work
- Space snips about ¼ inch apart, adjusting based on Curve Complexity
- Focus on Preventing Fraying by keeping cuts clean and deliberate
- Test your technique on scraps first
This sewing definition clip curves technique transforms stubborn inward curves into beautifully flowing lines that lay flat when pressed. Further explore options for curve clipping depth to find the right tools.
How to Press Corners and Curves
After clipping your corners and curves, pressing transforms your work from good to great.
Use pressing tools like a point turner or chopstick to push out corners sharply before applying heat. For curves, gently smooth the seam allowance with your blunt tool, working from inside outward.
Here’s your pressing order:
- Push out corners: Use a point turner to create sharp edges after clipping diagonal cuts
- Smooth curved areas: Run your tool along curves to eliminate bumps and wrinkles
- Press evenly: Apply appropriate heat for your fabric types, setting those stitches permanently
Steam works wonders for stubborn fabrics that won’t cooperate. When troubleshooting pressing issues, remember that different sewing techniques require adjusted heat settings.
This step separates amateur work from professional seam finishes – don’t skip it!
- Pro tip: Think of pressing as "setting" your sewing corners like concrete – once pressed properly, those crisp lines become permanent features of your project.
When to Use Clipping Corners
Mastering when to clip corners transforms your sewing from amateur to professional. You’ll need clipping for any project with outward corners—bags, pillow covers, collars, and cuffs.
Fabric thickness determines how aggressively you should clip; thicker materials need more trimming. Project type matters too: quilted items require different corner angles than delicate blouses.
Consider seam complexity when deciding whether standard diagonal cuts or double-trimming works best. Your desired sharpness level guides the technique—crisp points need precise clipping, while softer corners can handle gentler trimming.
Remember, clipping corners isn’t always necessary for curved seam allowances. Accurate cutting is essential, ensuring crisp corner results.
Tips for Clipping Corners Safely
Safety matters when clipping corners—one wrong snip can unravel your hard work! Proper scissors safety and stitch protection keep your projects looking professional.
Essential Safety Guidelines:
- Leave breathing room: Cut 1/8 inch from stitching to prevent fabric fraying and maintain seam integrity
- Sharp tools, steady hands: Use quality scissors for accurate clipping—dull blades create ragged edges that compromise your work
- Point with purpose: Push corners out using blunt tools like chopsticks, not sharp objects that might puncture fabric
Corner clipping requires precision, not speed. Take your time with each cut, especially on delicate fabrics that fray easily. Remember, you can always trim more, but you can’t add fabric back once it’s gone!
Sewing and Trimming Outward Right Angle Corners
Perfect outward corners require strategic diagonal clipping and double trimming techniques.
Start by trimming seam allowances to 1/8" from your stitching line—this bulk reduction prevents rounded corners while maintaining seam integrity.
For corner definition, cut diagonally across the point, removing excess fabric from both sides.
| Fabric Type | Trim Distance | Special Notes |
|---|---|---|
| Lightweight | 1/8" from seam | Minimal trimming needed |
| Medium Weight | 1/8"-1/4" from seam | Standard corner clipping |
| Heavy Fabrics | 1/4" from seam | Grade layers differently |
This fabric trimming approach guarantees your outside corner sewing creates crisp points every time.
Remember: undertrimming creates bulk, overtrimming weakens seams.
Sewing and Trimming Inward Right Angle Corners
While outward corners get the spotlight, inward right angle corners need special attention for professional results.
Start by marking your pivot points with fabric pens before sewing—this prevents wonky angles that’ll haunt your finished project. After stitching, make precise snips into the corner up to your stitch line using small scissors.
Think of it as giving your seam allowance room to breathe. Remember to precisely align the fabric pieces to prevent shifting.
The key? Keep those clips 1-2 mm from your stitching for stitch security without compromising corner sharpness. Press seam allowances open, turn right side out, then use a blunt tool for crisp inside corner sewing results.
Techniques for Clipping Corners With Different Fabrics
Different fabric types need customized clipping approaches for professional results.
Cotton tolerates aggressive trimming at 1/8 inch from stitches, while stretch fabrics require conservative notching to prevent weakness.
Here’s your fabric-specific guide:
- Heavyweight fabrics (denim, canvas) – Use 45-degree angle cuts and heavy-duty shears through multiple layers
- Delicate materials (silk, chiffon) – Apply gentle pressure with fine-point scissors and pressing cloths
- Synthetic blends – Test on scraps first since some melt under heat or unravel unexpectedly
Match your clipping tools and interfacing effects to layer thickness for ideal corner sharpness across all fabric types.
Frequently Asked Questions (FAQs)
Can you clip corners in sewing?
Yes, you can and should clip corners when sewing.
It’s a simple technique where you cut diagonally across corner seam allowances to remove bulk, helping your projects turn out crisp and professional-looking instead of lumpy.
What is clipping corners in sewing?
Clipping corners means cutting diagonal slices across seam allowances at corner points before turning fabric right-side out.
You’ll trim excess fabric to eliminate bulk, creating sharp, crisp corners instead of rounded, lumpy ones, which helps in achieving crisp results.
How do you sew a corner?
Sew straight lines toward the corner, stop with your needle down, lift the presser foot, pivot the fabric ninety degrees, lower the foot, and continue stitching the next side.
Should you clip corners and curves after sewing?
Just like you wouldn’t leave a recipe half-finished, you’ll want to clip those corners and curves after stitching.
This simple step removes bulk, prevents puckering, and guarantees your project turns out crisp and professional-looking.
How do you handle outward corners when sewing?
For outward corners like blanket edges, you’ll trim diagonally across the corner’s seam allowance, leaving about 1/8 inch from your stitching line. This removes bulk so corners turn sharp and crisp.
How do you clip corners?
Nearly 80% of sewing mistakes happen at corners, turning beautiful projects into lumpy disasters.
You’ll clip by cutting diagonally across the seam allowance, leaving about 1/8 inch from your stitching line to prevent fraying.
How do you clip corners in sewing?
Cut diagonally across each corner’s seam allowance, leaving about 1/8 inch from your stitching line. This removes bulk so corners turn out sharp and crisp when flipped right-side out.
What is the purpose of clipping corners in sewing?
Clipping corners removes excess fabric from seam allowances, preventing bulk that creates lumps when you turn your project right-side out.
It’s your secret weapon for achieving those crisp, professional-looking corners that make your sewing shine, with professional-looking results being the ultimate goal.
Can clipping corners be done on all types of fabric?
Think every fabric is up for a trim? If only!
While most fabrics handle corner clipping well, avoid fraying-prone or delicate types.
Use sharp tools, go slow, and always test on scraps—your masterpiece will thank you.
Are there any alternative methods to clipping corners in sewing?
You can try grading (trimming one seam shorter), pressing without clipping, using pinking shears on seam allowances, or switching to French seams that enclose raw edges completely.
Conclusion
Perfect points and professional polish come from practicing proper corner clipping techniques.
You’ve discovered how to clip corners sewing transforms amateur work into expert-level craftsmanship.
These methods eliminate bulk, create sharp angles, and give your projects that coveted handmade-but-professional appearance.
Remember to trim at the right distance from your seam line, clip curves with precision, and press carefully.
Your future sewing projects will thank you for mastering these essential skills that separate beginners from seasoned seamsters.
- https://papertheorypatterns.com/pages/how-to-sew-right-angles
- https://sewcutepatterns.com/blog/clipping-inward-seams
- https://www.doinaalexei.com/beginnersewingtutorialblog/how-to-sew-self-finished-inner-and-outer-sharp-corners
- https://createkidscouture.blogspot.com/2015/05/sewing-101-clipping-corners-and-curves.html

