This site is supported by our readers. We may earn a commission, at no cost to you, if you purchase through links.
First, grab digitizing software like Ink/Stitch, SewArt, or Embroidermodder. Upload your JPG, then trace or auto-digitize the design so the tool maps out stitches.
Adjust colors and stitch types for the best look, then export as a SEW file.
Keep in mind, highly detailed images can get messy in stitches, so simpler is often smarter. With the right tool and a dash of patience, you’re ready to stitch your artwork to life—details ahead.
Table Of Contents
Key Takeaways
- Use embroidery digitizing software or a trusted online converter to turn your JPG into a SEW file, making sure the tool matches your machine’s needs.
- Simplify your designs and tweak stitch settings and thread colors for accuracy before you save and export the SEW file.
- Always test your converted SEW file in embroidery software or on scrap fabric to catch any issues before stitching your final project.
- Watch out for file size limits, design complexity, and security risks, especially when using online converters—always delete your files after.
Convert JPG to SEW
You want to turn a JPG image into a SEW embroidery file so your design is ready for a sewing machine.
Follow a few easy steps, and you’ll have the right file format for crisp, high-quality stitching.
This process will allow you to achieve the desired outcome with minimal effort.
What is SEW File Format?
Imagine this: you load a graphic into your embroidery software, and thanks to the SEW file format, your vision comes alive in thread.
Watch your digital artwork transform into vibrant stitches as the SEW file format brings every detail to life on fabric.
SEW files—born from SEW origins—store stitch coordinates, making them key for quality assurance and machine compatibility with embroidery machines like Brother and Janome.
This format stands out among embroidery file formats for its knack for translating digital designs into fabric.
- Enjoy seeing your art transformed into stitches.
- Relax, knowing your machine reads it right.
- Trust in precise, quality stitch-outs.
How to Convert JPG to SEW?
Turning your favorite image into a stitch-ready masterpiece starts with the right conversion software.
For smooth JPG to SEW conversion, check SEW limitations, design complexity, and color accuracy before you get stitching.
Online SEW converters offer quick results, but test stitch quality on your machine first.
Always preview your embroidery file formats to avoid surprises.
Many machines offer automated needle threading for convenience.
With a few tweaks, you’ll master image to embroidery.
- Check SEW limitations
- Review design complexity
- Test stitch quality
- Adjust for color accuracy
- Use reliable conversion software
Methods for Converting JPG to SEW
You’ve got a few reliable ways to turn your JPG into a SEW embroidery file, using either online tools or specialized digitizing software.
Each method gives you control over your design, allowing you to choose what works best for your project and your machine, with complete concepts and reliable ways to achieve your goal.
Online Conversion Tools
When you want results fast, online conversion tools make JPG to SEW conversion quick and easy. You just upload your image, let the online sew converter handle the magic, and download the final file.
Many support batch processing and free sew conversion but watch out for file size limits. Always remember, user privacy matters—so delete your files after.
Conversion speed is fantastic, though some platforms may have security risks. You may even be able to find a website that sells products related to online SEW converters.
| Feature | Online Converter Benefit |
|---|---|
| Conversion Speed | Fast processing |
| Batch Processing | Multiple files at once |
| File Size Limits | May restrict large designs |
| Security Risks | Risk if files aren’t deleted |
| User Privacy | Encryption, delete after use |
The key benefits of using online converters include fast processing, batch processing, and the importance of considering file size limits to ensure a smooth conversion process. Additionally, being aware of potential security risks and taking steps to protect user privacy are crucial.
Software Programs for Embroidery Digitizing
Even if you’re just getting started with embroidery software, today’s digitizing software programs make it simple to convert JPG to SEW.
Tools like Embird and Bernina Artlink don’t just support JPG imports—they offer both auto-digitizing for speed and manual digitizing techniques for precision.
Watch out for vectorization capabilities, which matter most with complex images. Learning curves differ, but many programs let you test and tweak stitches before saving.
Just remember: digitizing software costs and auto-digitizing accuracy can vary, so check trial versions first. Many users find success with Ink/Stitch capabilities, an open-source option.
Step-by-Step Guide: Converting JPG to SEW
You’re ready to turn your JPG image into a SEW embroidery file, and it’s easier than you might think.
Follow these clear, practical steps to make your design stitch-ready in no time.
Selecting The Right Conversion Tool
Plenty of embroidery software and online conversion tools promise easy JPG to SEW conversion, but a smart pick hinges on more than slick ads.
Compare software features, check batch conversion capability, and peek at user reviews for real-world insight.
Don’t forget cost comparison, and always consider file security—after all, you’re trusting your creative work with these convert JPG SEW tools.
Many designers also utilize vector programs for pattern drafting.
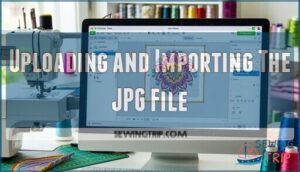
Uploading and Importing The JPG File
Once you’ve found your go-to tool, it’s time for some hands-on action—image import.
Whether it’s a user-friendly online platform or embroidery digitizing software, upload your JPG embroidery file.
Take a moment for file preparation: check resolution impact and file size to dodge headaches later.
Most tools offer straightforward import options, supporting broad format compatibility for a smooth jpg to sew conversion.
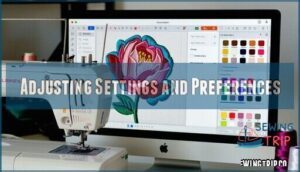
Adjusting Settings and Preferences
Now that your JPG is uploaded, it’s time to roll up your sleeves with embroidery software and refine your image to embroidery masterpiece.
Transform every pixel into perfect stitches—fine-tune your masterpiece for embroidery magic.
Focus on:
- Stitch Customization—Tweak stitch length, type, and direction for crisp results.
- Color Palettes—Pick thread colors that pop and check for palette compatibility.
- Hoop Size—Match hoop size and alignment to avoid design cutoffs.
- Density Adjustment—Balance coverage and flexibility, making stitch adjustments for solid, smooth fills.
These adjustments may require attention to precise stitch settings for ideal results.
These details boost your embroidery file format compatibility and make your jpg to sew conversion shine.
Saving The File as SEW Format
Wrapping up your jpg to sew conversion, pick a clear file naming scheme—you’ll thank yourself later.
Double-check format versions so your embroidery software recognizes the new SEW file format.
Save a backup, maybe on a USB drive or cloud storage, just in case.
When it’s time for sharing designs or further tweaking, organized storage options speed up every embroidery project.
Tips and Best Practices for Converting JPG to SEW
When you’re converting JPG files to SEW, focusing on color accuracy and precise stitching settings will help you get reliable results.
Always test your SEW file in embroidery software before letting your machine stitch, so you can catch any issues early and avoid wasting materials.
Ensuring Proper Color and Stitch Representation
After selecting your conversion tool, make sure your design stays true to the original by focusing on Color Palette Accuracy and Stitch Type Selection.
Adjust thread shades, experiment with stitch types, and simplify areas as needed for better stitch quality.
Before saving, double-check for:
- Natural Thread Color Matching using a physical chart
- Density Adjustment to prevent overcrowded stitches
- Simplified designs for accurate color representation
Getting color accuracy and stitch representation right makes your SEW file shine.
Testing The Converted File Before Stitching
You’ve spent time on Stitch Accuracy and Color Verification, but don’t rush ahead.
Before trusting your embroidery machine, try embroidery design testing on scrap fabric. This stitch testing helps spot issues—maybe the design complexity overpowers the hoop size or embroidery output isn’t matching your expectations.
Ignoring fabric pre-washing results can lead to unexpected shrinkage after the first wash.
Check for embroidery design stitch correctness and compatibility with your machine before stitching the real deal, ensuring a successful embroidery process with proper embroidery design testing and consideration of design complexity.
Common Challenges and Troubleshooting
When you convert JPG files to SEW, you might run into issues like file compatibility, stitch quality, or handling detailed images.
With the right troubleshooting steps, you can fix these problems and get your design ready for embroidery without much fuss, using the right approach to achieve quality results.
File Compatibility Issues
As you work through converting artwork, keep in mind that file compatibility can quickly trip you up.
Embroidery file formats each come with their own quirks and format limitations. If your design includes lots of gradients or more than ten colors, color difficulties may cause issues once you convert to SEW.
Simplifying your design early makes the process smoother. When things get messy, try converting to a PES format first—using intermediary formats often bypasses stubborn glitches.
Regular refinement, like reducing color count or cleaning up the image, helps guarantee better embroidery machine compatibility and sidesteps frustrating embroidery file format limitations, ensuring a smoother process with fewer glitches and better compatibility.
Stitch Density and Quality Concerns
After solving file compatibility problems, you’ll want to focus on stitch density and quality to keep your embroidery sharp. Adjust stitch density for high-contrast areas; too much causes thread tangles, too little leaves gaps.
Review different stitch types, as some handle details better than others. Check image quality, and reduce colors to avoid thread buildup. A precise density adjustment is key to professional results.
Don’t forget these tips:
- Fine-tune thread tension for smooth running.
- Match density adjustment to your fabric choice.
- Always preview designs before you start stitching.
Handling Complex and Detailed Designs
With complex designs, it pays to start with detail simplification and color reduction before converting from JPG to SEW.
Too much detail or color can overwhelm embroidery digitizing software and hurt image quality.
Tame busy areas by trimming unneeded sections, refining stitches, and managing layers to keep design complexity in check.
Manual enhancement after the initial conversion lets you tweak elements for better results.
Always test-stitch your SEW files—what looks good onscreen might need a little extra polish in thread to ensure the best possible outcome with manual refinement.
Frequently Asked Questions (FAQs)
How to convert JPG to sew embroidery files?
To turn a JPG into a SEW embroidery file, use digitizing software like SewArt or online converters.
Upload your image, tweak colors and stitches, then export as SEW.
Test the file before stitching anything fancy.
Can a JPG image be converted to a sew file?
Yes, you can turn a JPG image into a SEW embroidery file.
You’ll need embroidery digitizing software or a good online converter.
These tools trace your image’s shapes, colors, and details, ensuring stitch-compatible results.
Why should you save a JPG file as sew?
Nearly 70% of embroidery machines require specific file types.
Saving a JPG as a SEW file lets your machine read every stitch, turning your artwork into thread magic—with no guesswork, lost colors, or frustrating re-dos.
What are the benefits of converting JPG to sew?
Converting JPG to SEW lets your embroidery machine read and stitch custom designs accurately.
You’ll get sharper detail, fewer errors, and smoother stitching.
Plus, testing the SEW file first helps avoid surprises once the needle starts moving, ensuring a more accurate and custom design.
How to convert pictures to embroidery files?
Imagine flipping a photo into a sewing pattern—upload your picture in digitizing software, reduce colors, remove the background, and define stitch areas.
Save it as an embroidery file, test on-screen, and you’re ready to stitch.
Can you make an embroidery file based on a JPG image?
You can turn any JPG image into an embroidery file using digitizing software.
Just upload your photo, reduce colors, define stitch areas, and export to SEW format.
Always test your design in embroidery software before stitching.
How to convert jpg to jef file?
Breathe new life into your images—open digitizing software like SewArt or Ink/Stitch, reduce colors, remove backgrounds, and import your JPG.
Trace stitch areas, then save as a JEF file for embroidery magic, quick and flawless.
How to convert jpg to working file?
Start with embroidery software like SewArt or Ink/Stitch.
Upload your JPG, trim extra details, reduce color count, and trace stitch areas.
Export as a working file, such as PES or SEW, ready for machine embroidery.
How to convert jpg to document file?
Nearly 80% of documents start as images these days.
To convert a JPG to a document file, you’ll want to use OCR tools.
Upload your JPG, let the software scan for text, and download your document.
Can SEW files be resized without losing quality?
You can’t freely resize SEW files without risking a drop in stitch quality.
Stretching or shrinking them may mess up stitch density or alignment—always use embroidery software, preview changes, and test on scrap fabric first to ensure the best results with embroidery software.
Conclusion
Think of converting a JPG to SEW like charting a map before a road trip—you need the right tools for a smooth journey.
With the right digitizing software and a clear method, you’ll see how to convert JPG to SEW with less stress.
Keep each step organized, double-check your settings for accuracy, and don’t rush the process.
Simpler designs work best, and testing your files guarantees better results.
You’ve got this—your embroidery creations will come together smoothly.

