This site is supported by our readers. We may earn a commission, at no cost to you, if you purchase through links.

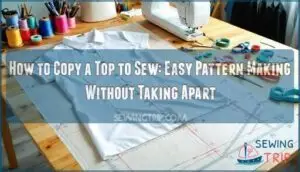
Start by taping large sheets of paper together, then smooth your top onto the surface. Trace the front, back, and sleeves separately, marking important details like button placements and seam lines.
Don’t forget to add seam allowances when you’re done tracing. This method beats starting from scratch because you’re working with proven measurements.
The real magic happens when you understand how professional pattern makers handle tricky areas like armholes and necklines.
Table Of Contents
Key Takeaways
- Start with quality tools – You’ll need tracing paper, painter’s tape, and a flexible ruler to capture curves accurately without damaging your garment.
- Choose the right garment – Pick a top that fits you perfectly and matches your sewing skill level, avoiding overly complex construction details if you’re a beginner.
- Trace systematically – Tape along seam lines first, then trace each piece separately onto paper, marking important details like button placements and dart locations.
- Test before committing – Always sew a muslin test garment first to identify fit issues and make pattern adjustments before cutting into your final fabric.
Get The Right Tools
Before you start tracing your favorite top, you’ll need three essential tools that make pattern copying simple and accurate.
Having the right supplies from the start saves you time and prevents frustrating mistakes that can ruin your project.
Smart preparation beats pattern panic every time.
The presence of complete concepts** is crucial for the success of your project.
Tracing Paper
You’ll need quality tracing paper for accurate pattern transfer from your favorite top.
This translucent material lets you see through to the original while creating durable copies.
- Paper Durability: Choose medium-weight tracing paper that won’t tear during handling
- Paper Transparency: Clear visibility helps align pattern pieces perfectly
- Transfer Accuracy: Smooth surface prevents skipping when marking tools glide across
- Paper Alternatives: Tissue paper or medical exam paper work in a pinch. Consider purchasing a large paper roll for extensive pattern making.
Tape
Three smart Tape Types make garment copying straightforward. Blue painter’s tape won’t leave residue, while masking tape works for quick projects. Clear tape handles delicate fabrics without damage. Fabric tape can also be used for various no-sew projects, making it a versatile addition to your toolkit.
| Tape Application | Best Practice |
|---|---|
| Curved seams | Overlap short strips |
| Straight edges | Use long continuous pieces |
| Armholes | Apply narrow tape carefully |
| Necklines | Secure with gentle pressure |
| Darts/pleats | Tape both sides for stability |
Your Taping Techniques determine success when you copy clothing patterns. Securing Curves requires patience—work slowly around armholes and necklines. Preventing Distortion means avoiding stretching while taping. These Tape Alternatives help duplicate garment designs perfectly, letting you clone your clothes like a pro.
Ruler
When tracing your favorite top, flexible rulers become your best friend for capturing those tricky curves.
These bendable tools adapt to armholes, necklines, and side seams where rigid rulers fail. Simply press the flexible ruler against curved edges, then transfer that exact shape to your pattern paper.
The ruler markings guarantee measuring accuracy while curve adaptation makes pattern grading effortless. This essential tool transforms copy clothing pattern projects from guesswork into precision sewing pattern drafting for perfect pattern making results.
You can also find a flexible sewing tool online, which is a valuable resource for perfect pattern making.
Choose The Garment to Copy
The perfect starting garment makes all the difference in your pattern-making success.
Pick a top that fits you like a dream and has construction details you can actually recreate with your current sewing skills.
Start with a top that hugs you perfectly and matches your sewing skill level.
Choose Well-Fitting Garment
Anyone can transform their beloved garment into a sewing pattern from garment with careful fit assessment and style selection.
Start your garment cloning method by choosing a well-fitting garment that fits your body perfectly through the shoulders, bust, and waist.
Consider fabric considerations like weight and stretch when planning to copy existing clothes.
Evaluate garment complexity honestly—beginners should avoid intricate details, and note any alteration needs before starting to replicate favorite top.
– Examine Construction Details
Study every construction detail like you’re a detective solving a puzzle.
Look for seam identification patterns, analyze darts placement for shaping, and examine pocket construction methods.
Note facing techniques at necklines and armholes, plus yoke details that define the garment’s structure.
This garment examination reveals construction analysis secrets you’ll need for accurate pattern replication.
Understanding fabric grain and drape is essential for achieving the desired look, and it helps in accurate pattern replication.
– Select Similar Fabric Type
Selecting fabric that mirrors your original’s characteristics guarantees successful clothing replication.
Focus on fabric weight and drape matching – lightweight cotton behaves differently than medium-weight poplin.
Test the stretch factor by gently pulling both fabrics.
Compare fiber content since natural fibers shrink more than synthetics.
Consider texture considerations too – smooth finishes layer differently than textured surfaces.
Your fabric choice directly impacts how the finished garment fits and moves, so take time with fabric comparison before committing.
Prepare The Garment
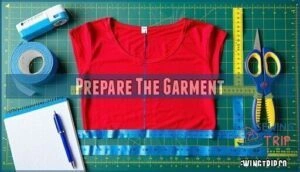
Now that you’ve picked your perfect garment for clothing replication, it’s time to prep it like you’re getting ready for surgery. First, give that top a good wash and press – wrinkles are pattern tracing’s worst enemy.
Lay it flat on your work surface and smooth out every bump and fold. Think of it as giving your garment a spa day before the big copy readytowear project.
Mark your center front and back lines using the natural fold lines as your guide. This symmetry alignment step is your secret weapon for avoiding lopsided results. Grab your 3M blue painters tape and mark these reference points clearly.
Take a moment for detail documentation – snap photos of construction details, pocket placement, and any special features. Trust me, you’ll thank yourself later when you’re wondering how that neckline was supposed to look. If you spot any fit issues you want to fix, now’s the time for pre-copy alterations. Remember, fabric considerations matter here – your tracing tools work best on smooth, stable surfaces.
Tape The Pieces
With your garment prepped and ready, it’s time to start the taping method that’ll transform your favorite piece into a DIY clothing copy. Begin with 3M blue painter’s tape—it’s your best friend for this job.
Start taping along seam lines, working systematically from one section to another. For securing curves like armholes and necklines, use shorter tape pieces that follow the natural bend without puckering. Press firmly but don’t stretch the fabric as you work.
Pattern stability depends on smooth, wrinkle-free application. Use narrow tape for tight curves and wider strips for straight edges. These taping strategies create a stable foundation for accurate tracing.
Remember that you can also find temporary fabric tape for repositioning if needed. The adhesive types matter—painter’s tape removes cleanly without damaging delicate fabrics.
Work methodically around each piece, ensuring complete coverage of areas you’ll trace. This clone favorite garment technique requires patience, but proper taping makes all the difference in your final pattern’s accuracy.
Trace Each Piece
Now comes the real magic – transforming your taped garment into a workable sewing pattern from garment. With your tape strips perfectly positioned, you’re ready to create accurate outlines that’ll let you replicate clothing item after item.
Start tracing each taped section onto your transfer paper, keeping those tape strips exactly where they are. Think of this as creating a blueprint for your clone favorite garment project. Move your pencil slowly around every curve and corner, capturing each detail with precision. This is where sewing pattern duplication becomes an art form.
For folded garments, focus on symmetrical tracing by working with just one side. Your ruler becomes your best friend here, helping you maintain straight lines while following the garment’s natural shape. Don’t rush – marking details like shoulder points, neckline curves, and hemlines now saves headaches later.
Keep that tape flat and wrinkle-free as you trace. If sections start lifting, gently smooth them back down. Using the right marking tools in sewing will help guarantee accurate pattern outlines. This careful approach guarantees pattern preservation and sets you up for garment replication success when you’re ready to cut fabric.
Create The Pattern
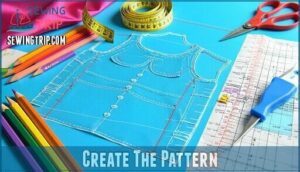
Now you’ll turn your traced pieces into a real sewing pattern.
This step transforms your tape-and-paper work into something you can actually use to cut fabric and create your new top.
Add Seam Allowances
Once you’ve traced your pattern pieces, you’ll need to add seam allowances to transform your tracing into a functional sewing pattern.
This vital step guarantees your finished garment fits just like the original.
Standard seam allowance width is 5/8 inch, though different areas may require adjustments:
- Curved seam allowances around necklines and armholes need careful marking with a French curve for smooth curves
- Cornering seam allowances at collar points and pocket corners require precise 90-degree turns to maintain sharp edges
- Consistent seam allowance measurements prevent fitting issues—use a seam gauge or ruler for accuracy
- Serged seam allowances can be narrower (3/8 inch) if you’re using an overlock machine for finishing
- Pattern making tutorial tip: mark your cutting line clearly to distinguish it from the original tracing line
Use chalk or washable markers to draw these allowances around each piece’s perimeter for your sewing pattern drafting success.
For accurate curves, consider using a specialized drawing tool.
Mark Alterations
While you’re admiring your perfectly traced pattern pieces, don’t skip the vital step of marking alterations—this is where you’ll reverse engineer clothing into your dream fit.
Use chalk or fabric pens to note fitting adjustments like lengthening sleeves, taking in waistlines, or adjusting bust areas.
To guarantee accurate alignment, it’s important to understand sewing pattern symbols.
These customization notes transform your sewing pattern from garment into personalized perfection.
Mark alteration placement clearly with dots or arrows, indicating exactly where style modifications need to happen.
Pattern refinement through thoughtful pattern adjustments guarantees your finished piece fits like it was made specifically for you.
Cut Out The Pattern
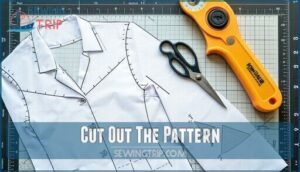
Sharp cutting tools are your best friend when creating pattern pieces from your traced garment outline.
Position your pattern paper flat on a cutting mat, then secure each traced piece with pattern weights or pins to prevent shifting during the fabric cut process.
Pay close attention to fabric grain markings you’ve transferred – they’re essential for maintaining the original garment’s drape when you reverse engineer clothing later.
Use fabric shears or a rotary cutter for clean, precise cuts along your traced lines.
Don’t rush this step; cutting accuracy directly affects your final fit.
Add notch placement marks by cutting small triangular shapes at key alignment points like shoulder seams and sleeve attachments.
These tiny details make a huge difference when assembling your sewing pattern from garment pieces.
Label each sewing pattern cut out immediately after cutting to avoid confusion during construction, ensuring that you maintain precise cuts and follow the original garment outline for the best results.
Sew a Test Garment
Now you’re ready to sew a test garment using your freshly cut pattern pieces. This muslin step saves you from heartbreak later.
Think of it as a dress rehearsal before the main show—you wouldn’t want to discover fit issues after cutting into your gorgeous final fabric.
Choose an inexpensive fabric with similar weight and drape for accurate fit analysis. This fabric choice helps predict how your final garment will behave:
- Baste seams temporarily for easy pattern refinement adjustments
- Focus your fit check on shoulders, bust, and waistline areas
- Mark seam adjustments directly on the muslin with fabric markers
- Test detail copying like pocket placement before final construction
Your test garment reveals exactly where tweaks are needed for perfect fit adjustments.
Make Adjustments
Most sewers discover that fitting issues surface after their first test run, making pattern adjustments the bridge between good and great garment fitting.
This stage separates novice sewers from those who create professional-looking clothes that actually fit.
Your muslin mockups reveal exactly where pattern grading and alteration techniques come into play:
- Seam adjustments – Take in or let out side seams, shoulders, and armholes based on how the test garment sits
- Dart modifications – Reshape bust and waist darts for better contouring and fit adjustments
- Sleeve refinements – Adjust the cap height and width for comfortable arm movement without pulling
- Style modifications – Taper side seams, adjust necklines, or tweak hem curves for your preferred silhouette
Keep testing and tweaking until you nail the fit.
Mark every clothing alteration directly on your pattern pieces for future reference.
Frequently Asked Questions (FAQs)
How do you sew a top?
Like building a house requires blueprints, sewing a top needs a pattern.
Start by cutting fabric pieces, then sew shoulder seams, attach sleeves, join side seams, and finish the neckline and hem.
Should you extract a pattern from a sewn garment?
You should extract patterns from well-fitting garments you love. This method gives you perfectly custom-made pieces that match your body’s measurements and preferred fit better than commercial patterns.
How do you clone a sleeve pattern?
Lay your sleeve flat, smooth out wrinkles, then trace around the entire outline onto pattern paper. Add half-inch seam allowances and mark the grainline for accurate cutting.
How do you make a tuck pattern?
Picture a fabric’s secret fold as a hidden treasure waiting to be discovered.
You’ll measure the tuck’s depth, then trace around the folded fabric onto pattern paper.
Mark fold lines, add seam allowances, and you’ve captured that dimensional magic.
How do I make a collar from a paper pattern?
Cut the collar pattern pieces from sturdy paper, adding seam allowances.
Pin the pieces to your fabric, ensuring proper grain alignment.
Cut carefully, then construct the collar by stitching the outer edges together.
How to take a pattern from your favourite clothes?
Perfectly pattern your preferred pieces by placing painter’s tape strategically on seams, tracing tape onto paper, adding seam allowances, and transferring everything to fabric for flawless fitting.
How to copy a design onto a shirt?
Copying a design onto a shirt requires tracing your favorite garment’s outline onto pattern paper, adding seam allowances, then cutting and sewing the fabric pieces together using your traced template.
How do I copy an item of clothing?
Don’t reinvent the wheel when copying clothing! Lay your garment flat, trace each piece onto paper with seam allowances, then cut and sew your duplicate.
How to trace a piece of clothing?
Lay your garment flat on tracing paper, smooth out wrinkles, then carefully trace around each piece using a flexible ruler for curves and straight edges for seams.
Is it possible to hand sew a top?
Like threading a needle with determination, you can absolutely hand sew any top! It’ll take patience and time, but your hands can craft beautiful garments just like sewing machines do.
Conclusion
Successfully learning how to copy a top to sew is like having a master key that opens up endless wardrobe possibilities.
You’ve discovered the secret that professional seamstresses have used for decades – why reinvent the wheel when you can trace perfection?
Now you can recreate that favorite shirt that fits just right or transform a beloved but worn-out garment into fresh new pieces.
With practice, you’ll develop an eye for spotting which tops will translate beautifully into patterns and which details need special attention during the copying process, allowing you to unlock a world of endless wardrobe possibilities.


