This site is supported by our readers. We may earn a commission, at no cost to you, if you purchase through links.
 Sewing questions often pop up when you’re starting or troubleshooting your craft. Wondering which tools you need? Grab sharp scissors, a seam ripper (you’ll use it more than you’d expect), and a reliable sewing machine.
Confused about fabrics? Pay attention to texture, stretch, and weight to match your project. Deciding on a machine? A basic mechanical one works for beginners, but computerized models are versatile for advanced work.
Facing thread breaks or bunched stitches? It might be your tension or using the wrong needle. Sewing questions are like little puzzles—you solve one, and suddenly you’re stitching with confidence! Ready to tackle seams like a pro? Stick around.
Table Of Contents
- Key Takeaways
- Getting Started With Sewing
- Selecting a Sewing Machine
- Understanding Notions and Supplies
- Working With Fabrics and Clothing
- Troubleshooting Common Sewing Machine Issues
- Achieving Quality Seams and Finishes
- Transferring Patterns and Markings
- Dealing With Fabric Jams and Bulky Sections
- The Importance of Pressing in Sewing
- Frequently Asked Questions (FAQs)
- Conclusion
Key Takeaways
- You’ll quickly realize that threading your machine, picking the right tension, and fixing skipped stitches are some of the most common challenges beginners face, but solving these builds confidence fast.
- Start strong with the right tools—sharp scissors, a seam ripper, quality needles, and a reliable sewing machine are essential for smooth progress.
- Choosing the right fabric matters—consider texture, weight, and stretch to avoid project mishaps and get the best results every time.
- Troubleshooting issues like thread bunching or tension problems requires patience, but understanding how your machine works makes solving them second nature.
Getting Started With Sewing
Whether you’re dreaming of crafting your own wardrobe or just want to mend a favorite pair of jeans, sewing is a skill that’ll transform your creative horizons.
Grab your first sewing machine, thread that needle, and get ready to stitch your way from beginner to confident creator—it’s easier than you think!
Essential Tools
Five must-have sewing tools will transform your crafting game faster than you can say "thread and needle"! Grab sharp fabric cutters that slice through material like butter, precision measuring tapes for spot-on sizing, and quality sewing needles that won’t bail on you mid-project.
Don’t skimp on seam rippers – they’re your rescue squad for those "oops" moments. Thread clippers and a basic mechanical sewing machine round out your starter sewing kit.
Mastering sewing essentials is key to creating professional-looking projects. With these trusty companions, you’ll be stitching up masterpieces in no time.
Choosing Fabric
Every sewist knows that choosing the right fabric can transform a good project into a spectacular creation.
When selecting sewing fabric, consider these critical elements:
- Fiber content impacts durability and comfort
- Texture determines how the garment will drape
- Color and pattern reflect your personal style
- Weight influences the final project’s structure
- Stretch and recovery match your design requirements
Your fabric selection is the foundation of sewing success – choose wisely, and watch your creativity come to life.
Where to Source Fabric
Once you’ve picked your perfect fabric, finding the right place to buy it becomes your next mission.
Fabric stores and online sewing retailers offer treasure troves of textiles.
Check out local markets, thrift shops, and wholesale dealers for unique finds.
You can also explore sewing fabric options to discover a wide range of materials.
Pro tip: Chat with shop owners – they often have insider knowledge and killer deals on sewing fabric that’ll make your projects shine.
Selecting a Sewing Machine
When you’re ready to transform your sewing dreams into reality, selecting the right machine can make all the difference in your crafting journey.
Whether you’re a complete newbie or looking to upgrade, understanding how to choose a sewing machine that matches your skills and project goals will set you up for stitching success.
Choosing Machine Type
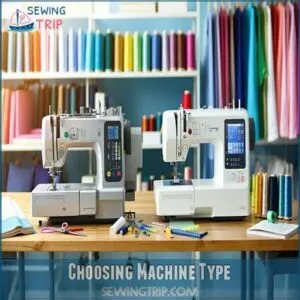
Ready to discover your sewing potential? Choosing between mechanical and computerized sewing machines isn’t just about price – it’s about finding your perfect creative companion.
- Mechanical machines: Budget-friendly workhorses
- Computerized models: Tech-savvy sewing magic
- Your skills, your style, your machine
Mechanical machines nail basic stitches without breaking the bank, while computerized options offer automatic features that’ll make your projects sing. Understanding Sewing Machine types is vital for making an informed decision. Head to your local sewing shop and test-drive different machine types. Feel the fabric glide, listen to the motor’s hum, and find the sewing machine that speaks your crafting language.
– Evaluating Key Features
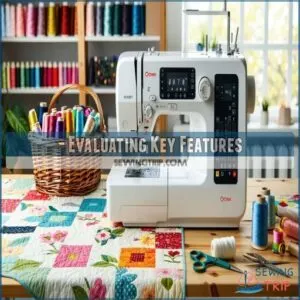
After picking your sewing machine type, it’s time to zoom in on key features that’ll make or break your crafting dreams.
Look beyond the shiny exterior and compare stitch options, throat space, and built-in bells and whistles. Check bobbins accessibility, speed controls, and included accessories.
Your perfect machine is like a trusty sidekick – it should adapt to your project needs, whether you’re whipping up quick repairs or tackling complex quilts.
When selecting a machine, consider the benefits of precision sewing to enhance your overall sewing experience. Choose wisely, and you’ll discover a world of creative possibilities.
– Assessing Your Needs
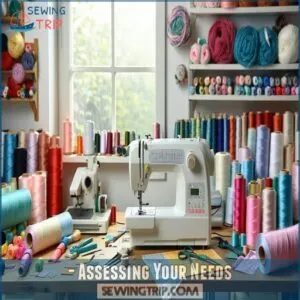
Eyeing that sewing machine like a pro? Hold up! Your sewing goals and personal style matter more than flashy features.
Consider your skill level, budget, and space requirements. Will you tackle delicate knits or heavy denim? Dreaming of quilting or just mending?
Match your machine to your vision, not vice versa. To get started, understanding sewing basics is essential for making informed decisions.
Pro tip: A versatile machine beats a fancy one that’ll collect dust. Your creativity deserves the right sidekick.
Understanding Notions and Supplies
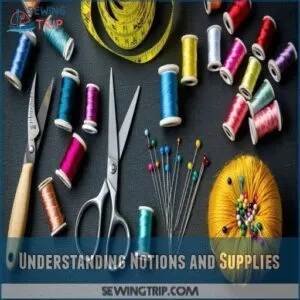
You’ll need more than just a sewing machine to create stunning projects – notions and supplies are your secret weapons in the sewing world.
From scissors that glide through fabric like butter to threads that hold your masterpiece together, these tools will transform your crafting from amateur hour to professional-level precision.
Sergers/Overlockers
Ready to level up your sewing game with an overlocker? These powerhouse machines are game-changers for serious sewers.
Unlike standard sewing machines, overlockers trim, finish, and seam fabric in one smooth motion, giving your projects that pro-level polish.
Key overlocker advantages:
- Lightning-fast seam finishing
- Professional edge treatments
- Perfect for knit fabrics
- Reduces fabric fraying
- Speeds up complex projects
Master your interlock machine, and watch your sewing efficiency soar!
Scissors for Sewing
After wrestling with your overlocker’s intricate edges, it’s time to master the art of cutting. Your scissors are your silent heroes in the sewing world.
- Pick shears with razor-sharp blades that glide through fabric like a hot knife through butter
- Invest in bent-handle models for ergonomic comfort and precision
- Maintain multiple specialized scissors for different fabric types
- Clean and sharpen blades regularly to preserve their cutting prowess
- Choose quality over cost – your scissors are an investment in craftsmanship
Slice, trim, and conquer with confidence.
Sewing Threads
Those sharp scissors you just used?
Now let’s talk threads – the unsung heroes of sewing magic! Choosing the right sewing threads can make or break your project.
| Thread Type | Best For | Skill Level |
|---|---|---|
| Cotton | Quilting & Wovens | Beginner |
| Polyester | Stretch Fabrics | Intermediate |
| Silk | Delicate Fabrics | Advanced |
Match thread colors seamlessly, adjust tension carefully, and watch your stitches transform from good to pro-level perfection.
Working With Fabrics and Clothing
You’ll be amazed at how choosing the right fabric can make or break your sewing project, transforming a simple piece of cloth into a stunning creation.
From pre-washing to understanding fabric stretch and behavior, mastering fabric selection and preparation is your secret weapon in creating professional-looking garments that fit like a dream.
Washing Fabrics
When choosing fabrics for your sewing project, washing them beforehand isn’t just smart—it’s your secret weapon. Sort fabrics by color and weight, preventing unexpected color bleeding and shrinkage.
Cold water works magic for delicate prints, while warm water tackles everyday textiles. Pre-treat stubborn stains with white vinegar or gentle soap, then air dry carefully.
To achieve the best results, follow fabric care guidelines for each type of fabric. Pro sewing tip: Tumble dry on low to relax fabric’s natural stiffness and remove sizing. Your machine will thank you with smoother stitching, and your finished project will look professional from the first stitch. Happy washing!
Sewing Stretch Fabrics
After conquering fabric washing, you’re ready to tame stretch fabrics like a pro.
Grab your ballpoint needle and brace for action!
Knit materials demand special attention: use zigzag stitches, slow down your machine, and let the fabric glide smoothly.
A walking foot becomes your secret weapon, helping you navigate slippery spandex and elastic knits without breaking a sweat.
Mastering the art of sewing non-stretch trim is essential for creating professional-looking garments with stretch fabrics.
Troubleshooting Common Sewing Machine Issues
Every sewing machine has its quirks, and you’ll inevitably encounter frustrating hiccups that can make you want to toss your machine out the window.
Don’t panic – with a few troubleshooting tricks up your sleeve, you’ll transform those pesky problems into smooth sailing sewing sessions that’ll have you creating like a pro in no time.
Thread Bunching
Hit pause on thread bunching nightmares! Your sewing machine’s thread tension can go haywire from multiple culprits like poor thread quality, incorrect needle size, or fabric friction.
Gently tweak the tension dial and consult your manual’s troubleshooting guide. Small, deliberate adjustments prevent bigger sewing problems.
Pro tip: different fabrics demand different tension settings, so experiment carefully. Familiarizing yourself with sewing machine parts can also help you identify potential issues.
When in doubt, take it slow and trust your machine’s potential to deliver smooth, professional stitches.
Skipping Stitches
When thread bunching throws you off, skipping stitches can feel like another sewing machine gremlins waiting to ambush your project. Sewing machine troubleshooting doesn’t have to be a mystery – let’s tackle those pesky skipped stitches head-on.
- Inspect your needle for damage or dullness. A bent or worn needle is a prime culprit for stitch interruptions.
- Check your machine’s thread tension. Uneven tension can cause stitches to jump ship mid-seam.
- Verify you’re using quality thread matched to your fabric weight and machine specifications.
Think of your sewing machine like a precision instrument – each component needs to work in perfect harmony to create those smooth, consistent stitches you’re after.
Inconsistent Tension
After wrestling with skipped stitches, tension troubles might feel like your sewing machine’s throwing a tantrum.
Uneven stitches or puckered fabric scream "tension adjustment needed!"
Understanding thread tension is key to resolving these issues.
Grab your manual and start by completely rethreading both top and bobbin threads.
Make tiny tension tweaks, testing on scrap fabric between adjustments.
Remember, patience is your best friend when fine-tuning thread tension and conquering those pesky seaming issues.
Achieving Quality Seams and Finishes
Just battled thread tension issues? Now it’s time to level up your seam game! Crafting pro-level seams isn’t rocket science—it’s about precision and patience.
Here’s your roadmap to seam perfection:
- Cut fabric with laser-sharp accuracy using high-quality scissors
- Press seams religiously before opening or topstitching
- Choose tight, stable stitch lengths for rock-solid construction
- Finish raw edges using French seams, binding, or serging
- Backstitch start and end points for unbreakable strength
Your sewing machine is your paintbrush, and seams are your canvas. Slow and steady wins the race—don’t rush through each stitch. Remember, every pro was once a beginner who mastered the art of taking their time and paying attention to detail.
Transferring Patterns and Markings
Got great sewing patterns but struggling to mark them perfectly? You’re not alone! Transferring sewing patterns requires precision and the right tools.
Check out these pro marking techniques that’ll transform your project from amateur to amazing.
| Marking Tool | Fabric Type | Visibility |
|---|---|---|
| Chalk Marker | Light Fabrics | Temporary |
| Tracing Wheel | Medium Weight | Precise |
| Washable Pen | Dark Fabrics | Easy Removal |
| Tailor’s Tacks | Delicate Fabrics | Non-Destructive |
Selecting the perfect marking method is like choosing a dance partner – it’s all about compatibility. Test your tools on scrap fabric first to guarantee clean, removable marks. Remember, your pattern marks are the secret roadmap to a killer finished garment. Pro tip: Less is more. Mark only what you absolutely need, and your sewing will sing with professional-level precision.
Dealing With Fabric Jams and Bulky Sections
Marking patterns can leave you with bunched-up fabric nightmares that’ll make any sewist want to pull their hair out. When stitching thick areas, slow down and treat your machine like a delicate dance partner.
Stop periodically to lift the presser foot and smooth out fabric layers, preventing those dreaded feed dog jams. Thick sections like collars and cuffs demand special attention – reduce foot pressure and let fabric glide smoothly.
To further minimize issues, understanding how to prevent sewing machine jams is essential for a seamless sewing experience. Pro tip: Trim those bulky seam allowances and use clever cutting techniques like clipping curves and notching corners.
Your sewing machine isn’t a wrestling opponent – it’s a precision tool. Gentle handling beats brute force every time. Think of each thick section as a challenge to be finessed, not conquered.
The Importance of Pressing in Sewing
Pressing isn’t just ironing – it’s a sewing superpower that takes your projects from “meh” to runway-worthy. While ironing smooths the fabric, pressing focuses on specific areas like seams and hems, setting the shape and giving your garments a polished, professional finish.
Here’s the key: press as you sew. Don’t skip it, no matter how tempting. Flattening seams and shaping pieces as you go helps everything align better later. Use tools like a pressing cloth for delicate fabrics or a tailor’s ham for curved seams.
- Pro tip: Let your fabric cool before moving it. Heat sets the shape, but cooling locks it in.
Keep your iron in top shape—clean it often and watch your heat settings. Proper heat control prevents disasters like scorched fabric. Thoughtful pressing isn’t extra work; it’s your secret to sewing success.
Frequently Asked Questions (FAQs)
What are the most common sewing questions?
How do you thread your machine, choose the right needle, or fix skipped stitches?
These are just a few common sewing questions that pop up.
Getting started is all about practice, patience, and the right tools.
What questions do you ask a beginner about sewing?
What interests you most about sewing?
Do you prefer hand or machine sewing?
Have you tried threading a needle?
Do you know your tension basics?
What kind of project excites you to start?
Are there sewing FAQs?
Sewing FAQs? Absolutely! Beginners often ask about threading machines, choosing fabrics, or fixing puckered seams.
Advanced sewers dig into patterns and troubleshooting. Think of it as a sewing cheat sheet for every level—you’re covered!
Does it really matter if you sew right sides together?
It definitely matters!
Sewing right sides together guarantees your seams are hidden inside the finished piece, giving it a polished look.
Skip this step, and you’ll end up with exposed seams—nobody wants that mess.
What should a new sewer know before starting a sewing machine?
Master your sewing machine by reading the manual—it’s your cheat sheet.
Practice threading it, adjust tension gently, and keep fingers safe.
Start with scrap fabric, and remember, mistakes are just extra stitches of experience!
What are the best sewing tools for beginners?
Start with fabric scissors, a seam ripper (you’ll use it a lot), pins, tape measure, hand needles, thread snips, and an iron.
Trust me, these basics will save you from countless sewing headaches.
What is a common question on sewing?
Figuring out how to thread your sewing machine is like solving a puzzle—it’s a common question.
You’ll check the manual, follow the guides, and practice until it feels like second nature.
Where can I ask sewing questions?
You can ask sewing questions in online sewing forums, join Facebook groups, or head to Reddit’s r/sewing.
Local sewing clubs and classes are also great.
Don’t forget YouTube—they’ve got tips for everything!
How do you explain sewing?
Sewing’s about connecting materials with needle, thread, and creativity.
Picture turning fabric into something magical—a cozy pillow or a fitted skirt.
You’ll master skills, fix mishaps, and bring ideas to life, one stitch at a time.
What is mean by sewing?
Sewing means joining fabric or materials using thread and needles, either by hand or machine.
It’s how you create, repair, or alter clothing, accessories, and more—kind of like crafting magic with a practical twist.
Conclusion
Did you know 73% of beginner sewers struggle most with their first machine setup? Mastering these sewing questions early on makes all the difference.
From picking sharp tools to tweaking tension, you’ve got the know-how to tackle common sewing hurdles.
Build confidence by pairing your skills with the right fabric and threads. Whether you’re sewing stretch fabrics or troubleshooting bunched stitches, it’s all about experimenting and sticking with it.
Keep learning, and watch your projects shine!
- https://www.google.com/maps/place/Sing+Mui+Heng+Pte+Ltd+(Chinatown+branch)/,103.841942,17z/data=!3m2!4b1!5s0x31da19a33da328f7:0x48ce822c66a8d77!4m5!3m4!1s0x31da1974c6492e83:0x25887e9360dd3f68!8m2!3d1.2857481!4d103.844136?shorturl=1
- https://goo.gl/maps/y3CrM52ypsjq8vtu8
- https://www.allfreesewing.com/Basics-and-Tutorials/Sewing-Questions-Answered-NSM2018
- https://seamsecrets.com/the-complete-beginners-guide-to-sewing-answering-the-20-most-common-questions/
- https://www.fashionmakerspace.com/blogs/news/most-common-sewing-questions-that-beginners-need-to-know


