This site is supported by our readers. We may earn a commission, at no cost to you, if you purchase through links.
You’ll need batting if you want a padded cover. Pin fabrics right sides together, sew around three sides, then turn right side out.
Create box corners by pinching the fabric into triangles at the corners and stitching across. Hem the bottom edge for a clean finish.
Like putting a cozy jacket on your trusty stitching companion, a well-fitted cover keeps dust at bay. The secret to professional-looking covers lies in those perfectly squared corners.
Table Of Contents
Key Takeaways
- You’ll need to measure your sewing machine’s height, width, and depth accurately, then add 1 inch for seam allowance to ensure your cover fits properly.
- Choose durable fabrics like cotton, canvas, or denim for your sewing machine cover, considering both functionality and aesthetic appeal to match your sewing space.
- Creating box corners is essential for a professional-looking cover—fold the fabric at each corner, align the seams, mark your corner depth, and sew perpendicular to the seam.
- You can customize your cover with embellishments, bias binding, or fusible fleece for added stability, transforming a practical item into a personalized statement piece.
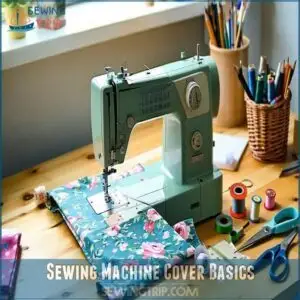
Sewing Machine Cover Basics
Protecting your sewing machine starts with understanding its size, shape, and how much fabric you’ll need.
Don’t worry—it’s easier than it sounds, and you might even enjoy the process!
Measuring Sewing Machine Dimensions
Accurate sewing machine measurements are key to a perfect custom cover.
Grab a measuring tape and jot these dimensions down:
- Machine Height: Measure from the base to the tallest point.
- Machine Width: Note the widest part, left to right.
- Machine Depth: Check from front to back.
Remember to round measurements up for seam allowance.
Consider overall size variations when measuring.
Think of it as giving your machine a comfy sweater, not a tight squeeze!
Calculating Fabric Requirements
Now that you’ve measured your sewing machine, it’s time to calculate fabric requirements.
Add 1 inch to heights and widths for seam allowances.
Double the machine’s height, add the depth, and include an extra inch for a perfect fit.
Factor in fabric width and pattern matching to avoid surprises.
Planning yardage wisely minimizes waste.
Remember: sewing projects thrive on precision, and fabric measurements keep your sewing patterns sharp and your creations flawless!
To guarantee the best outcome, consider fabric weight and drape for your cover, ensuring a great sewing experience.
Choosing Suitable Fabrics
Picking the right fabric is like choosing the perfect outfit—it should fit the job and look good too!
Focus on these:
- Fabric Weight: Go for sturdy materials like cotton, canvas, or denim for durability.
- Fiber Content: Verify it suits the sewing machine environment. Polyester blends add strength.
- Washability & Colorfastness: Choose fabrics that handle spills or sunlight.
- Pattern Matching: Use creative designs or fabric scraps for personalized, eye-catching covers.
Consider using durable cover fabrics for long-lasting protection.
How to Cover Sew Machines
Think of a sewing machine cover as a stylish suit for your trusty machine, offering dust protection, pet prevention, and sunlight shielding.
To create one:
- Measure Dimensions: Note the height, width, and depth, rounding up for seam allowance.
- Cut and Prep Fabric: Mark and cut fabric pieces, adding an inch for the perfect fit.
- Sew Panels Together: Stitch the pieces, ensuring neat seams for a smooth finish.
These covers can also be enhanced with decorative fabric choices to match your sewing space.
Machine covers balance accessibility tradeoffs while enhancing aesthetic appeal and sewing machine protection!
Creating Reversible Covers
You’ll love showing off both your favorite fabrics with a reversible cover that protects your sewing machine twice as nicely.
With the right measurements and a few simple steps, you can create a custom cover that flips inside out whenever you want a fresh look in your crafting space.
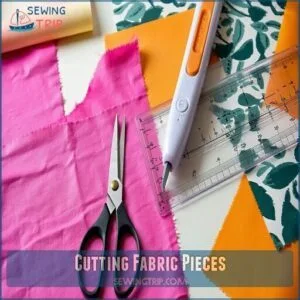
Cutting Fabric Pieces
When you’re ready to transform your fabric into a beautiful sewing machine cover, start by measuring and cutting your exterior and interior pieces with care.
Lay your fabric on a flat surface, considering the fabric grain and pattern placement.
Add extra inches for seam allowances to prevent fabric waste, and use sharp cutting tools for clean edges.
Use these tools to ensure clean cuts, and don’t forget to round off corners for that professional finish.
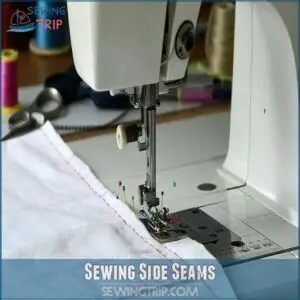
Sewing Side Seams
The perfect side seams form the backbone of your reversible sewing machine cover.
Place fabric pieces right sides together and pin along edges. Use a consistent 3/8" seam allowance as you stitch, backstitching at both ends for durability.
Press seams open to create crisp edges and reduce bulk.
For professional seam finishing, trim corners carefully and consider French seams for added strength.
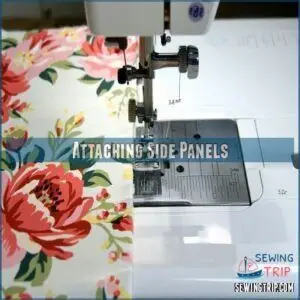
Attaching Side Panels
You’ve reached the pivotal stage of your sewing adventure – attaching those side panels. This step transforms flat fabric into your machine’s cozy new home.
- Pin panels to main pieces with right sides touching, aligning raw edges
- Use a consistent 3/8" seam allowance for professional results
- Ease fabric around curved seams by making tiny clips
- Match fabric patterns at panel junctions for seamless appearance
- Press seams open to reduce bulk and create crisp edges
Adding Handle Openings
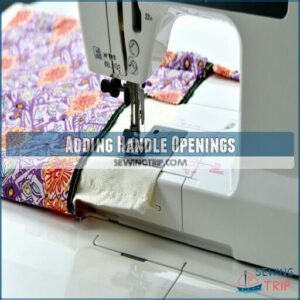
The strategic placement of handle openings can make your sewing machine cover both functional and stylish.
Mark the handle placement on your fabric, then reinforce the area with an extra layer of fabric to prevent tearing.
Cut along your marked lines carefully, and finish the edges with zigzag stitching or binding.
For a professional look, topstitch around each opening, ensuring your DIY sewing machine cover remains practical and attractive.
To enhance durability, consider using foam stabilizer and interfacing to give the handle openings more structure.
Sewing Machine Cover Construction
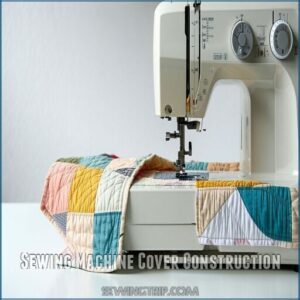
You’ll transform your plain sewing machine into a stylish showpiece with this easy-to-follow construction guide that walks you through quilting, boxing corners, and finishing edges.
Now you can protect your trusty stitching companion from dust while adding a personal touch that makes your sewing space feel more like home.
Quilting Main Fabric and Batting
Having assembled your materials, lay your batting between your main fabric and scrap muslin backing.
You’ll need to quilt these layers together before continuing. Choose simple quilting patterns like straight lines or gentle curves that complement your fabric design.
Secure all three layers with pins or basting spray before quilting. This creates structure and prevents shifting while adding a professional touch to your sewing machine cover.
For best results, consider the batting quilting distance recommended for your chosen material, using simple quilting patterns and ensuring the right quilting distance.
Trimming Quilted Fabric
After quilting, you’ll need to trim your quilted fabric back to your original measurements.
Grab your rotary cutter and straightedge for precise cuts along all four sides.
Don’t rush this step—accurate cutting methods guarantee your seam allowance precision remains intact.
Remember, we’re aiming for clean edges that’ll make your sewing techniques smoother later on.
Think of trimming as giving your fabric a neat haircut, which is a crucial step for achieving professional-looking results with precise cuts.
Creating Box Corners
Now that your quilted fabric is perfectly trimmed, it’s time to create those box corners that will give your sewing machine cover its structured shape.
To make box corners, fold the fabric at each corner so the side and bottom seams align perfectly.
Mark your corner depth (usually the same as your machine’s depth), then sew a straight line perpendicular to the seam.
Trim excess fabric, leaving a ½" seam allowance. These mitered corners guarantee your cover fits snugly without awkward angles.
Finishing Bottom Edge
With your box corners now perfectly shaped, it’s time to tackle the bottom edge of your cover.
You’ll need bias tape for a professional finish. Wrap the bias tape around the raw edge, pin in place, and sew with your adjustable bias binding foot.
For a decorative edging, choose patterned bias tape or consider alternatives like an elastic hem or serged edge. Don’t forget proper seam allowances for a clean finish.
Customizing Sewing Machine Covers
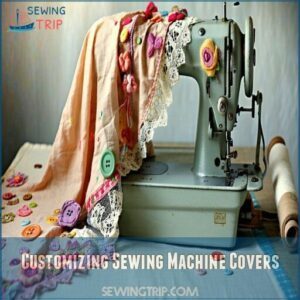
You can transform your plain sewing machine cover into a personalized masterpiece that reflects your unique style with just a few simple additions.
Add buttons, ribbons, or fabric appliqués to your cover for that perfect finishing touch that’ll make your sewing space feel more like home.
You can add these elements to your cover to give it a personal touch and make your sewing space more inviting.
Using Fusible Fleece for Stability
Many sewists underestimate how fusible fleece can transform your sewing machine cover from floppy to fantastic.
This stabilizing material adds structure while protecting your precious machine.
Apply it easily by:
- Cutting fleece slightly smaller than your fabric pieces
- Setting iron to medium heat with no steam
- Pressing fleece adhesive side against fabric’s wrong side
- Holding for 10-15 seconds, moving section by section, to achieve a secure bond with the adhesive side.
Adding Embellishments
Your sewing machine cover can transform from practical to eye-catching with thoughtful embellishments. Add ribbon accents along seams or create appliqué designs from fabric scraps for a personal touch.
Beads and sequins work beautifully for accent areas, while embroidery floss lets you add custom patterns. For adding ribbon, consider exploring a wide selection of sewing ribbon options.
Don’t forget fabric paint for simple decorations – it’s perfect for handmade gifts. Creative sewing doesn’t need to be complicated to make a statement with personal touch.
Creating Adjustable Bias Binding
While embellishments add personality to your cover, the edge finishing will make or break your project.
Creating adjustable bias binding elevates your sewing machine cover instantly. Your bias tape’s width options depend on your fabric’s grain and your machine’s bias binder foot compatibility.
For perfect corners, slow down at each turn using proper cornering techniques. Binding attachment methods vary—you can pin first or use the "stitch as you go" approach for a professional finish.
Ensuring Proper Fit and Functionality
To guarantee your cover fits like a glove over your sewing machine, double-check all measurements before making your final cuts. Your custom fit depends on precise measurement and proper seam allowance throughout the corner construction.
- Leave enough room for handle placement without stretching the fabric covering
- Test the reversible design by flipping the cover inside out before finishing
- Add 1/2 inch extra to your sewing machine dimensions when creating your pattern to ensure a proper seam allowance
Frequently Asked Questions (FAQs)
Can a regular sewing machine do a coverstitch?
Picture your trusty machine yearning for new skills—unfortunately, it can’t perform a true coverstitch.
You’ll need a specialized coverstitch machine or serger with coverstitch function for those professional-looking stretchy hems.
How to cover seams in sewing?
You’ll want to finish seam edges with binding, French seams, or zigzag stitches to prevent fraying.
Sergers work wonders too!
Just fold, press, and stitch for clean, professional-looking results every time.
Is a sewing machine cover hard to make?
Looking for a weekend project that’s actually doable?
Making a sewing machine cover isn’t hard at all – you’ll need basic measurements, simple straight stitches, and about an hour of your time.
You can do it!
What is the estimated cost to make a sewing machine cover?
A basic sewing machine cover will cost you $15-30, depending on your fabric choices.
You’ll need about 1-2 yards of fabric, batting, and maybe bias tape.
Sales can drop your price even lower!
Is the sewing machine cover machine washable?
Your fabric guardian can usually take a splash in the washer.
The washability depends on your materials—cotton covers are typically machine washable, while those with interfacing or special embellishments might need gentler hand washing.
How to cover industrial sewing machines?
Measure your industrial sewing machine‘s dimensions, then cut fabric 2-3 inches larger all around. You’ll need heavier fabric like canvas. Create box corners for a snug fit over all components.
Can I waterproof my machine cover?
Yes, you can waterproof your machine cover by using spray-on fabric waterproofing, laminated cotton, or PUL fabric.
You’ll need to seal the seams with waterproof tape or silicone sealant for complete protection.
Best storage solutions for multiple covers?
While some crafters stack covers haphazardly, you’ll maintain order by using labeled bins, hanging organizers, or fabric pouches.
Store them by season or machine type, preventing creases with acid-free tissue paper.
Cleaning and maintaining sewing machine covers?
Wash your covers regularly with mild detergent, air-dry completely, and spot clean as needed.
You’ll extend their life by storing them flat when not in use.
Don’t forget to check for loose threads!
Converting existing covers to fit new machines?
When Sarah downsized her machine, she simply measured the height difference and shortened her cover by folding excess fabric inside and adding new stitching.
You’ll need to measure, trim, and re-stitch based on your new machine’s dimensions.
Conclusion
Protecting your sewing companion is like giving it a cozy hug!
Now that you know how to cover sew machines properly, your trusty stitcher will stay dust-free and ready for action.
Remember, precise measurements and those box corners make all the difference between a floppy cover and a professional-looking one.
Whether you’ve opted for a simple or reversible design, you’ve gained a valuable skill that keeps your investment safe while adding a personal touch to your sewing space.

