This site is supported by our readers. We may earn a commission, at no cost to you, if you purchase through links.
The difference between a quilt that lasts 20 years and one that pills, puckers, and shifts apart after a few washes often comes down to one overlooked step: how you attach the batting.
Most beginners focus on fabric choice or stitch patterns — the visible stuff. But the batting layer is what gives a quilt its warmth, structure, and that satisfying weight when it settles over you on a cold night. Get it wrong and even the most beautiful quilt top won’t save you.
Sewing batting to fabric correctly means understanding your materials, building a stable quilt sandwich, and basting with enough intention that nothing moves when the needle hits it. Here’s exactly how to do it.
Table Of Contents
Key Takeaways
- Cutting your batting 4–8 inches larger than the quilt top on every side prevents edge thinning and keeps your sandwich square before basting ever begins.
- Basting from the center outward — whether by pin, spray, or thread — is the single habit that stops layers from shifting and puckering during quilting.
- A walking foot reduces fabric drift by roughly 35%, and pairing it with an 80/12 or 90/14 needle and a stitch length of 2.8–3.5 mm ensures clean, even stitches through all three layers.
- Prewashing your fabric guards against 3–5% cotton shrinkage and dye bleed that would otherwise distort the seams you worked hard to perfect.
Choose The Right Batting, Fabric, and Quilting Tools
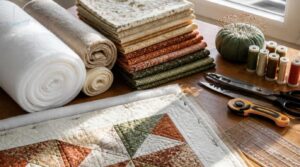
Getting your materials right before you sew a single stitch makes everything easier down the line. The batting, fabric, and tools you choose will shape how your finished quilt looks, feels, and holds up over time. Here’s what you need to know before you start.
If you’re new to quilting, practicing with beginner traditional quilt blocks is a great way to get comfortable with your materials before tackling a full project.
Cotton Batting
Cotton batting is made from 100% natural fibers — breathable, soft, and heavier than polyester, which gives your finished quilt real drape and warmth.
After washing, it shrinks slightly, creating that sought-after crinkled texture. It’s a reliable choice when you layer the fabric and batting into a quilt sandwich, especially for baby quilts where breathability matters most. You should also consider how different fiber compositions affect the final weight and warmth of your project.
Polyester Batting
Where cotton leans on texture, polyester batting leans on durability. It shrinks just 1–2%, keeping your quilt sandwich stable when you layer the fabric and batting and sew the layers together.
Four reasons quilters reach for it:
- Loft consistency — even thickness throughout, no lumps
- Moisture resistance — dries quickly after washing
- Thermal bonding — locks fibers in place during basting
- Hypoallergenic options — safe for sensitive skin
Its smooth fabric drape holds up wash after wash.
Cotton-Polyester Blends
Think of a cotton-poly mix as the middle ground — you get breathability and texture from cotton, plus polyester’s wrinkle resistance and color retention stability without the bulk.
| Mix Ratio | Key Benefit | Best Use |
|---|---|---|
| 80/20 Cotton-Poly | Soft hand feel | Everyday quilts |
| 65/35 Cotton-Poly | Balanced durability | Bed quilts, basting projects |
| 50/50 Cotton-Poly | Abrasion resistance | High-use quilt sandwiches |
Moisture wicking properties keep the quilt sandwich comfortable, and shrinkage stays low — making layering far more predictable.
Low-Loft Versus High-Loft
Loft is simply how thick your batting sits between layers.
Low-loft batting stays flat, drapes smoothly across a bed, and dries faster — great for wall hangings or warm climates. High-loft batting traps more air, delivering noticeably more warmth and that cushioned, three-dimensional puff. The tradeoff? It can compress over repeated washings and takes longer to dry completely.
Essential Quilting Tools
Five tools do most of the heavy lifting here. A rotary cutter with a sharp blade — sizes run 28 to 60 mm — slices fabric cleanly and fast. Pair it with a self-healing cutting mat to protect your table and extend blade life.
The mat’s grid lines make it especially handy for projects that demand straight cuts, like when you’re sewing a baby blanket with satin binding and every edge needs to be clean and even.
Transparent quilting rulers keep your measurements honest, rust-proof pins hold layers steady, and dedicated fabric scissors handle what the rotary can’t.
Measure and Cut Batting for Fabric Layers
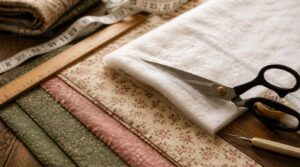
Accurate measuring and cutting set the foundation for a quilt that lies flat and finishes clean. Get this step wrong and you’ll be chasing wrinkles and misaligned seams for the rest of the project. Here’s what you need to work through before a single stitch goes in.
Batting Size Allowance
Cut your batting 4 to 8 inches larger than the quilt top on every side — that margin isn’t extra; it’s insurance. Without it, edge coverage risks creep in: batting shifts, corners thin out, and binding gets bulky fast. High-loft batting needs the fuller end of that range.
Consistent perimeter margins keep your quilt sandwich square and your layering aligned before you ever baste.
Fabric Prewashing
Skip prewashing and you’re rolling dice — cotton fabrics can shrink 3 to 5 percent after their first wash, distorting seams you spent hours perfecting. Dark or saturated fabrics carry dye bleeding risk, so test a swatch for colorfastness first.
Machine wash on a gentle warm cycle, then press lightly with an iron to restore fabric grain alignment before cutting.
Rotary Cutting Tips
A rotary cutter moves through layered fabric about 60% faster than scissors — but only if your setup is right. Always use a self-healing cutting mat with the grid lines aligned to your fabric edge.
For batting, a 45 mm standard blade controls most cuts cleanly. Keep the blade locked when you pause, and cut away from your body.
Squaring Fabric Edges
Skewed edges throw off every cut that follows. Press your fabric flat first, then align the center fold with a horizontal mat gridline.
Place your clear quilting ruler flush against the fold. Trim the opposite edge in one smooth pass.
- Verify squareness by measuring diagonals from opposite corners — they must match
- Recheck dimensions after each trim
- Re-trim in small increments if anything’s off
Reducing Batting Waste
Batting scraps add up fast. A solid cutting plan cuts waste by 20% — group shapes tightly, save offcuts for stuffing or coasters. Store scraps by type to reuse across future projects and trim surplus from your quilt sandwich layers.
| Scrap Size | Best Reuse |
|---|---|
| Large pieces | Quilt sandwich fill |
| Medium strips | Appliqué padding |
| Small chunks | Sachet stuffing |
| Tiny bits | Corner reinforcement |
Prepare The Quilt Sandwich Before Sewing
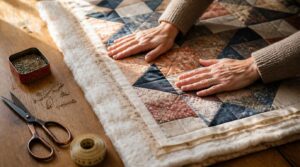
Getting the quilt sandwich right is what separates a flat, professional finish from a lumpy mess. Each layer has to go down in a specific order — and the way you handle it matters more than most beginners expect. Here’s exactly how to set it up before a single stitch is made.
Pressing The Fabric
Before anything touches batting, press your fabric first — wrinkles locked into layers stay there permanently.
Set your iron to match the fabric type. Cotton tolerates higher heat; synthetics need lower temperatures to avoid glazing. Always test an inconspicuous corner first.
Keep these steps in mind:
- Use steam for relaxing fibers
- Keep a pressing cloth on delicate surfaces
- Avoid ironing batting itself
- Let fabric cool fully before layering
Backing Face Down
With your fabric pressed and ready, it’s time to build the quilt sandwich from the ground up — starting with the backing.
Lay it right side facing down on a clean, flat surface. The wrong side faces up. Square the backing carefully to the batting and quilt top; even slight skew now creates visible misalignment after binding. Pin edges every 6–8 inches to hold it steady.
Batting in The Middle
With the backing secured, center your batting directly on top — it plays a middle order role, stabilizing the quilt sandwich while the layers build around it. Smooth it outward from the center, much the same way strike rotation keeps steady momentum alive.
Cotton batting can shift easily, so don’t rush. Every wrinkle you leave now becomes a pucker after sewing.
Quilt Top Face Up
Now lay your quilt top face up — design side visible — directly over the batting. This is the side your audience sees, so alignment matters. Check that seams sit flat and motifs land where you planned.
Color contrast and value balance read differently once layered, so take a quick look before basting locks everything in place.
Smoothing Wrinkles and Bubbles
Run your hand from center outward in slow, deliberate strokes — think of it like smoothing a bedsheet across a mattress. This pushes trapped air toward the edges before it becomes a stubborn bubble. A soft squeegee works well on larger surfaces.
Any wrinkle you ignore now gets basted permanently into your quilt sandwich, so take the extra minute.
Baste Batting to Fabric Securely
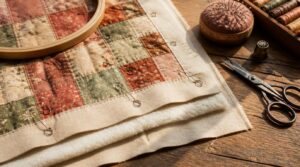
Basting is what holds your quilt sandwich together before a single quilting stitch goes in — skip it, and your layers will shift, pucker, and fight you the whole way through. The good news is there’s more than one way to do it, and each method suits different projects and working styles. Here’s what you need to know about each option.
Basting holds your quilt sandwich together—skip it, and shifting layers will fight you the whole way through
Pin Basting Method
Curved safety pins — sizes 1 or 2 — are your best friends here. Start at the center of your quilt sandwich and work outward in a grid, spacing pins every 3 to 5 inches.
Use smooth pliers to close each pin without straining your fingers. Keep density higher on larger quilts — this prevents sagging and fabric creep before you’ve sewn a single stitch.
Spray Basting Method
Spray basting turns your fabric sandwich assembly into a fast, pin-free process. Hold the can 12 inches away and sweep in straight, overlapping passes — always center outward.
- Test on scrap fabric first to prevent staining or pooling
- Apply light, repeated passes to avoid stiff spots
- Work in a ventilated area to reduce fume exposure
If edges lift after placement, re-spray and smooth flat.
Thread Basting Method
Thread basting is the slow lane — but it gives you the most control of any method.
Use contrasting cotton thread and a long, sharp needle to stitch a grid across your sandwich, starting from the center outward. Keep stitches 2–4 inches long so they’re easy to clip and pull later without distorting your fabric.
Preventing Layer Shifting
Shifting ruins even the best-basted sandwich. Secure your backing with painter’s tape first — that single step cuts drift by up to 90%.
Three habits keep layers locked:
- Keep the backing taut before pinning — tension reduces slack and drift.
- Baste from the center outward, whether pin basting or spray basting.
- Sew at a slower, more controlled speed to prevent fabric puckering.
Checking Layer Alignment
Before you sew a single stitch, treat each layer like a registration mark — it needs to sit exactly where you placed it. Lift a corner and check that your quilt top, batting, and backing haven’t crept out of position.
Even a small misalignment compounds across the fabric sandwich. A quick visual sweep at each basted zone catches drift early.
Sew Batting to Fabric Step by Step
Now it’s time to bring everything together at the machine. Getting the settings right before you start stitching makes all the difference between a flat, even quilt and one full of puckers. Here’s exactly how to work through each step:
Walking Foot Setup
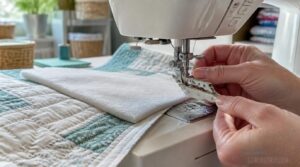
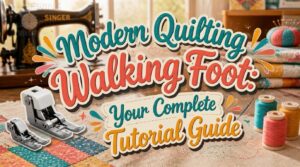
Swap out your standard presser foot for a walking foot before quilting through batting. Align the movable lever over the needle clamp screw — skipping this step means the top feed mechanism won’t engage, and your layers will drag unevenly.
Tighten the foot screw fully, then test on scrap fabric. The walking foot’s synchronized feed reduces fabric shifting by roughly 35%, keeping every stitch clean and flat.
Needle and Thread Choice
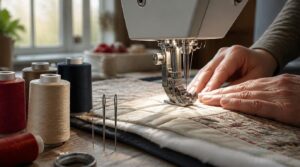
With your walking foot locked in, your needle and thread become the next decision. Reach for an 80/12 or 90/14 quilting needle — it pierces multiple layers cleanly and prevents skipped stitches.
Match a 50-weight cotton or polyester thread for standard batting. Want decorative contrast? A 40-weight thread in a bold color highlights every quilting line beautifully.
Stitch Length Settings
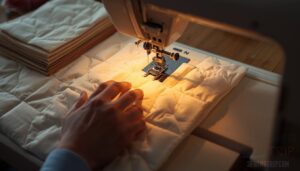
Needle choice locked in — now dial in your stitch length. For quilting through batting, set it between 2.8 and 3.5 mm. That range pierces all three layers without breaking thread.
- Lightweight fabrics: 2.5–2.8 mm prevents puckering
- Heavy batting layers: 3.0–3.5 mm resists thread breakage
- Always sew a test square first to confirm tension and formation
Sewing Center Outward
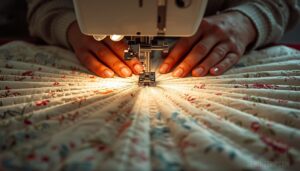
With your stitch length set, start at the center of your quilt sandwich — not the edge. Anchor the layers there first, then stitch outward in sections. This keeps fabric drag minimal as bulk stays near the needle.
Smoothing each pass toward the perimeter prevents trapped air from becoming a permanent pucker. Think of it as ironing with thread.
Trimming and Binding Edges
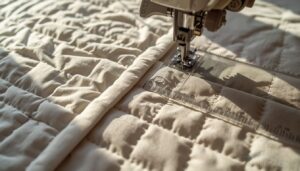
Trimming excess batting comes first — run sharp scissors close to your stitching line, keeping a scant quarter-inch allowance so binding sits flat. Square each corner with a ruler before attaching your double-fold binding.
Press strips in half, sew with a 1.9–2.2 mm stitch, then miter corners at 45 degrees to eliminate bulk. Stitch in the ditch to finish invisibly.
Frequently Asked Questions (FAQs)
Can you sew directly onto batting?
Yes — you can sew directly onto batting. Use light to medium weight batting, a sharp quilting needle, and a walking foot. As they say: the right tool makes the job.
How do you sew batting between two pieces of fabric?
Layer the backing face down, batting in the middle, and quilt top face up — your fabric sandwich. Baste all three layers, then sew from the center outward for even tension.
How to attach batting to fabric without quilting?
Fusible fleece, adhesive spray basting, tack stitching, and binding edge finishes all secure batting without quilting stitches. Each method holds your fabric sandwich firmly — no machine quilting required.
Can batting be recycled or repurposed, and if so, how?
Old batting deserves a second act. Cotton scraps suit industrial composting, while polyester downcycles into fiberfill.
Cotton-poly blends challenge sorting facilities by fiber content, but textile recycling programs, home upcycling, and creative industrial repurposing still keep usable material out of landfills entirely.
Can I reuse batting from old quilts?
Treasured heirloom or tired filler — old batting can be either. Inspect for matting and thinning first. If loft holds up, revive it gently. For baby quilts or skin contact, fresh batting wins on hygiene every time.
How do I fix puckering after sewing?
Puckers usually mean uneven tension. Lower your upper thread tension, run a fabric scrap test, then steam press to relax fibers. If that fails, unpick the seam, adjust stitch length, and resew with fusible interfacing for stability.
Should batting extend beyond fabric edges initially?
Yes — batting should extend 2 to 3 inches beyond your quilt top on all sides. That extra margin keeps corners covered, prevents edge gaps, and gives you room to trim cleanly when binding.
What tension settings work best for batting?
Think of machine tension like a handshake — firm enough to hold, loose enough not to crush. Aim for tension between 4 and 2, testing on a three-layer swatch first to catch tunneling or loose loops before they reach your quilt.
How do I store leftover batting properly?
Leftover batting deserves proper care. Store it in a breathable cotton bag, away from sunlight and moisture. Label each piece with fiber type and loft. Aim for 40–60% humidity to keep fibers fresh and compression-free.
Can batting be reused after a quilt is disassembled?
Old batting is like fabric with a second life — reuse is entirely possible if it’s clean and loft is intact. Inspect for mold, odors, or thinning spots. Discard any compromised sections before reassembling.
Conclusion
The quilt you finish today will outlast the patience it took to make it. Every layer you smoothed, every pin you placed — that intention builds into something a grandchild might one day pull from a chest.
Knowing how to sew batting to fabric correctly is what separates a keepsake from a casualty. The sandwich holds. The stitches hold. And years from now, when that quilt still lies perfectly flat, you’ll know exactly why.
- https://suzyquilts.com/how-to-machine-quilt
- https://mrsquilty.com/blogs/news/choosing-the-right-quilt-basting-methods-spray-pin-or-thread
- https://www.broadclothstudio.com/blog/how-to-pin-baste-your-quilt
- https://www.famcut.com/blogs/updates/best-batting-for-quilts
- https://www.stringandstory.com/blog/pinbasting