This site is supported by our readers. We may earn a commission, at no cost to you, if you purchase through links.
Reduce the color palette to 10-15 dominant shades for cleaner results. If colors look muddy, boost contrast and simplify the palette. You can also draw patterns manually using graph paper and colored pencils.
The key is starting simple – busy backgrounds and complex scenes will frustrate you faster than a tangled thread. Master these basics first, then discover sophisticated techniques that transform ordinary photos into heirloom masterpieces.
Table Of Contents
- Key Takeaways
- Why Create Custom Stitch Patterns?
- Choosing The Best Photo for Patterns
- Tools and Software for Pattern Design
- Converting Photos to Stitch Patterns Step-by-Step
- Colour Matching and Thread Selection Tips
- Fixing Common Issues in Custom Patterns
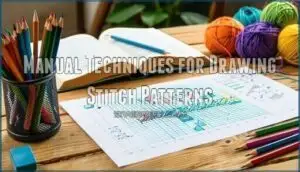
- Manual Techniques for Drawing Stitch Patterns
- Frequently Asked Questions (FAQs)
- Conclusion
Key Takeaways
- You’ll get the best results by choosing simple photos with clear subjects and high contrast – avoid busy backgrounds and complex scenes that’ll turn into muddy messes when converted.
- Start with free online converters like Stitch Fiddle for quick patterns, then upgrade to professional software like PCStitch Pro when you need advanced color matching and editing control.
- Keep your color palette limited to 10-15 shades maximum and use DMC thread conversion tools to match digital colors to real embroidery floss for cleaner, more manageable projects.
- Don’t skip the manual approach – graph paper and colored pencils give you complete control over stitch placement and help you understand pattern design before diving into complex digital tools.
Why Create Custom Stitch Patterns?
Creating custom stitch patterns lets you turn personal photos and ideas into unique embroidery projects that can’t be found anywhere else.
You’ll transform meaningful memories into handmade pieces that make perfect custom gifts or commemorate special moments in your life.
Personalization and Unique Gifts
Custom cross stitch patterns transform ordinary gifts into treasured keepsakes. You’ll create tailored textiles that speak directly to recipients’ hearts. Whether converting family photos or designing unique embroidery from scratch, these stitched memories become meaningful custom gifts.
Your handmade pieces showcase thoughtfulness that store-bought items can’t match, making every creation a one-of-a-kind masterpiece. Understanding the benefits of custom sewing patterns can also augment your stitching experience.
Commemorating Special Moments
Your wedding photos, baby’s first steps, or grandma’s birthday can become treasured heirloom creations through custom cross stitch patterns. These personalised gifts capture life’s milestones in thread and fabric.
Photo conversion transforms special occasions into lasting memory keeping projects. Creating custom patterns from meaningful moments produces custom designs that tell your family’s story for generations.
Artistic Expression in Stitching
Beyond preserving memories, cross stitch becomes your canvas for unlimited artistic expression. Creating custom patterns unleashes your personal style through stitch innovation and creative stitches.
You’ll transform ordinary embroidery pattern design into something uniquely yours. Each cross stitch pattern reflects your artistic freedom, turning stitching techniques into personal masterpieces. Your design inspiration shapes every custom creation you make.
Choosing The Best Photo for Patterns
You’ll need the right photo to create a clear, workable cross stitch pattern. Pick images with simple subjects, strong contrast, and minimal background details for the best results.
Simple Compositions Work Best
When selecting photos for Cross Stitch Pattern creation, focus on Image Selection with clear subjects. Background Simplification helps your Cross Stitch Design shine through better Pattern Making Techniques.
- Choose photos with one main subject rather than busy scenes
- Look for clear Subject Isolation from distracting elements
- Avoid cluttered backgrounds that compete for attention
- Select images with strong Visual Balance and composition
- Pick shots where Creating Vector Images will translate well to stitches
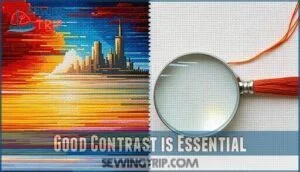
Good Contrast is Essential
Strong visual clarity separates stunning Cross Stitch Patterns from mediocre ones. You need sharp contrast between light and dark areas for effective colour matching and thread selection. Poor contrast creates muddy results that lose detail during conversion.
| Contrast Level | Pattern Quality | DMC Thread Colours | Visual Clarity |
|---|---|---|---|
| High | Excellent | 15-25 shades | Crystal clear |
| Medium | Good | 25-35 shades | Moderately clear |
| Low | Poor | 35+ shades | Blurry/muddy |
| Very Low | Unusable | 50+ shades | Indistinguishable |
Image editing software helps improve contrast before pattern conversion. Adjust brightness and shadows to improve pixel density and colour balance.
Avoid Complex Colors and Backgrounds
Complexity kills clarity in cross stitch patterns. Color Simplification works best with photos that have three to five main colors maximum. Busy backgrounds compete with your subject, so consider Background Removal through image editing software.
Rainbow gradients and intricate textures become muddy messes when converted. Contrast Enhancement works better with solid colors than subtle variations.
Pixel Reduction simplifies your cross stitch pattern automatically, making thread selection and colour matching with DMC embroidery floss much easier.
Photo Size Considerations
- Image Resolution determines pattern clarity – higher resolution creates sharper details
- Pixel Density affects stitch count – each pixel becomes one cross stitch square
- Aspect Ratio influences fabric size requirements and project proportions
- Graph Paper scaling helps visualize final dimensions before starting
Tools and Software for Pattern Design
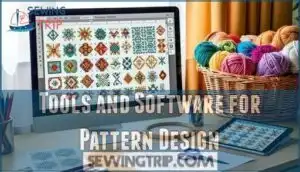
You’ll need the right digital tools to transform your photos into workable cross stitch patterns.
Three main options exist: free online converters for quick basic patterns, professional software for detailed editing control, and mobile apps for creating patterns anywhere.
Free Online Converters
Free Online Converters transform your images into cross stitch patterns instantly. Simply upload your photo to tools like Stitch Fiddle or PixelStitch for immediate pattern editing. These online designers offer stitch preview features and basic converter tools without software installation.
Online cross stitch tools provide quick results, though options remain limited compared to professional alternatives. Understanding various knitting stitch designs can help beginners create more complex and interesting patterns.
Professional Cross Stitch Software
Professional embroidery software like PCStitch Pro and WinStitch takes your pattern creation to the next level. These programs offer sophisticated editing tools that free online converters simply can’t match.
Here’s what professional software brings to your stitching table:
- Color Management – Match digital colors to specific DMC thread numbers with precision, eliminating guesswork when shopping for floss
- Pattern Optimization – Automatically adjust stitch density and grid sizing to create cleaner, more workable designs from your photos
- Stitch Simulation – Preview how your finished piece will look on different fabric colors before you start stitching
- Professional Export Options – Generate high-quality PDFs with symbols, color keys, and thread usage estimates for complex projects
Programs like DP Software Cross Stitch Professional Platinum handle up to 220 colors per pattern, while MacStitchWinStitch accommodates over 30 floss brands. Digital stitching becomes second nature with features like unlimited zoom, bulk fill tools, and built-in motif libraries. For beginners, utilizing a cross stitch guide can be incredibly helpful in exploring the various software options and choosing the best one for their needs.
Mobile Apps for Pattern Creation
Mobile apps let you design on the go. Stitchly converts photos to patterns with ease. Cross Stitch Pattern Maker offers minimalist design. Your phone becomes a portable studio. Users can explore the cross stitch app for more features.
| App Name | Key Features | Platform |
|---|---|---|
| Stitchly | Photo conversion, DMC threads | iOS |
| Cross Stitch Pattern Maker | Import images, intuitive | iOS |
| Pattern Keeper | Progress tracking, symbol highlighting | iOS |
| Magic Needle | Realistic patterns, quick creation | Android |
Converting Photos to Stitch Patterns Step-by-Step
You’ll transform your chosen photo into a workable cross stitch pattern using digital tools that handle the technical conversion automatically.
The process involves three main steps: uploading your image, adjusting the grid settings to match your fabric, and fine-tuning the stitch details for clear results.
Uploading and Editing Images
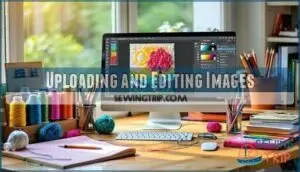
Now that you’ve chosen your pattern creation tool, it’s time to upload your chosen photo. Start with image editing basics by adjusting brightness and contrast before conversion. Most graphics software, like Photoshop or free alternatives, offer photo enhancement features.
Here’s your upload checklist:
- Resize your image to 200-400 pixels maximum width for manageable stitch counts
- Apply colour correction to boost contrast between light and dark areas
- Use digital filters to sharpen edges and reduce background noise
- Convert to vector image format in Adobe Illustrator or Inkscape for crisp lines
- Refine pixels by reducing the color palette to 10-15 dominant shades
Remember, pixel refinement now saves hours of stitching later.
Setting Grid Size and Dimensions
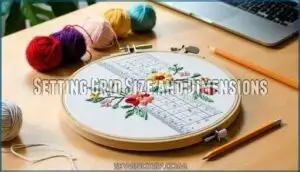
Once you’ve uploaded your image, you’ll need to set the Grid Sizing and Pattern Scaling. These determine your final project size and affect detail retention and stitching time.
| Grid Size | Final Dimensions (14-count) |
|---|---|
| 50×50 | 3.5" x 3.5" |
| 100×100 | 7" x 7" |
| 150×150 | 10.7" x 10.7" |
| 200×200 | 14.3" x 14.3" |
Fabric Selection and Dimension Adjustment are crucial when setting your grid dimensions. They impact stitch density and project complexity.
Customizing Stitch Types and Density
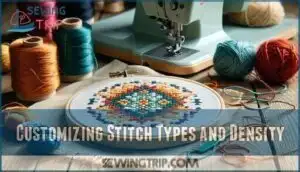
Once you’ve set your grid dimensions, it’s time to fine-tune your stitch variety and density control. This step transforms your basic pattern into a professional-looking design that captures every detail.
- Adjust thread weight – Lighter threads create delicate details while heavier ones add bold contrast
- Control pattern scaling – Increase density for complex areas, reduce for simple backgrounds
- Balance fabric tension – Match stitch types to your fabric’s weave for the best results
Most cross stitch software lets you experiment with different embroidery techniques. Try mixing full crosses with half-stitches for texture variety. Custom cross stitch patterns benefit from strategic density changes that highlight focal points while keeping backgrounds simple.
Colour Matching and Thread Selection Tips
You’ll need to match your pattern’s colors to real embroidery thread brands like DMC or Anchor floss. Start by identifying your main colors, then use conversion charts or apps to find the closest thread matches for accurate results.
Choosing Your Colour Palette
After converting your photo, you’ll face palette selection decisions. Colour theory guides smart thread choices—warm hues create energy while cool tones bring calm. Consider hue contrast between adjacent areas and tint variation within single colors.
Start with 6-8 embroidery thread colors maximum for beginner custom cross stitch patterns. DMC embroidery thread offers consistent quality and extensive color matching options.
Matching Digital Colours to Floss Brands
Most embroidery software struggles with accurate colour conversion from digital images to actual floss brands like DMC. Your RGB values won’t always match perfectly with available thread colors.
Use conversion tools like CrazyArtZone for basic DMC matching, but always check physical thread samples under natural light. Digital screens can deceive you—what looks perfect onscreen might disappoint in real thread.
For accurate results, understanding thread conversion tools is essential to achieve the desired embroidery outcome.
Using DMC Embroidery Floss Packs
DMC floss packs simplify your thread selection process. These curated collections match common Cross Stitch and hand embroidery patterns perfectly. Each pack contains coordinated colors that work together seamlessly.
You’ll find packs organized by themes like pastels, jewel tones, or seasonal colors. This eliminates guesswork in Floss Colour Theory and ensures your embroidery patterns maintain visual harmony throughout your stitching project.
Understanding floss preparation techniques is also essential for achieving professional-looking results.
Fixing Common Issues in Custom Patterns
You’ll encounter specific problems when converting photos to stitch patterns, but most issues have straightforward fixes. These problems include muddy colors that blend together, lost details from the original image, and patterns that become too complex to stitch comfortably.
Unclear or Muddy Colours
Muddy colours plague many custom cross stitch patterns, turning vibrant photos into disappointing designs. Colour Correction and Image Enhancement tools in your graphics program can salvage these projects through strategic adjustments.
- Boost contrast settings – Increase pixel clarity by adjusting brightness and shadows in your embroidery software before converting to cross stitch patterns
- Simplify your palette – Limit thread matching to 15-20 colours maximum for cleaner digital rendering
- Apply sharpening filters – Most vector image programs offer tools that refine definition between colour boundaries
- Test print patterns – Check how your embroidery patterns appear on paper before selecting final thread colours for stitching
Loss of Detail in Conversion
Watching your favorite photo turn into pixelated chaos can be heartbreaking. When conversion algorithms compress your image, they often merge similar colors and lose fine details. Higher image resolution helps preserve intricate elements during conversion.
Try using Photoshop or Inkscape to refine your photo before feeding it into embroidery software. Vector images resist pixelation effects better than standard photos, maintaining crisp edges that translate beautifully into cross stitch patterns.
Understanding custom embroidery techniques is vital for creating detailed and accurate stitch patterns.
Overwhelming Pattern Complexity
Complex patterns can overwhelm beginners and create stitching nightmares. When your design custom patterns become too intricate, Pattern Simplification becomes your best friend. Start with Color Reduction to limit your palette to 10-15 shades maximum. This Complexity Analysis prevents frustration later.
- Use Grid Management to break large patterns into smaller, manageable sections
- Apply Stitch Optimization by combining similar colors into single thread choices
- Reduce fine details that won’t show clearly in finished cross stitch patterns
- Choose online tools to design custom patterns with built-in complexity filters
- Test your embroidery pattern on a small fabric sample first
Manual Techniques for Drawing Stitch Patterns
You can create custom stitch patterns using basic tools like graph paper and colored pencils to map out your design square by square.
These hands-on methods give you complete control over every stitch placement and let you see your pattern develop naturally as you work.
Using Graph Paper and Colored Pencils
Graph paper becomes your best friend for Cross Stitch Grid Creation. Choose paper with squares matching your fabric count. Mark one square per stitch for accurate Stitch Planning.
Use colored pencils for Color Coding different thread colors. Grid Mapping helps visualize your cross stitch patterns before stitching.
This Pencil Techniques approach gives you complete control over embroidery patterns design. For ideal results, consider using high-quality graph paper products to improve your stitch planning experience.
Tracing With Lightbox or Window
Lightbox tips make pattern transfer smooth and accurate. Place your design under the glass surface and position fabric on top. Prepare fabric by securing edges with tape.
Window methods work just as well on bright days. Turn your vector image into manageable sections using Inkscape before tracing.
These tracing techniques help create precise cross stitch patterns and embroidery patterns without grid paper limitations.
Drawing Freeform Designs on Fabric
Some patterns work better when drawn directly on fabric. Use water soluble pens for fabric marking – they wash out completely after stitching.
Start with simple shapes and build confidence before attempting complex hand drawing. **This freehand stitching approach lets you create embroidery patterns without digital tools.
**
Practice design transfer techniques on scrap fabric first to perfect your hand embroidery patterns.
Frequently Asked Questions (FAQs)
How much does custom pattern software cost?
You’ll find free options like FlossCross and Cross-Stitched Pattern Generator, subscription services like Love It Stitch It starting around $10-15 monthly, and premium software ranging from $89-
What fabric count works best for beginners?
You’ll want 14-count Aida fabric as your starting point.
It’s forgiving enough for wobbly stitches yet detailed enough to create satisfying results. The holes are clearly visible, making it easier to keep your crosses uniform and neat.
How long does pattern creation typically take?
Simple patterns take 30 minutes using online converters. Complex custom designs from photos need 2-4 hours for editing colors and symbols. Professional software speeds things up once you’ve mastered it.
Can patterns be resized after creation?
Yes, you can resize most cross stitch patterns after creation. **Digital tools let you adjust dimensions easily.
** Manual patterns need redrawing on different grid sizes.
Consider thread count changes when scaling up or down for best results.
Whats the maximum recommended pattern size?
A 3-inch border is usually safe for maximum pattern dimensions. You’ll want patterns under 400×400 stitches for manageable projects.
Fabric width determines final limits—standard Aida comes 43-60 inches wide, allowing massive designs theoretically but causing practical handling nightmares.
Conclusion
Like a gardener tending seedlings before they bloom into full gardens, mastering how to create custom stitch patterns requires patience with fundamentals. Start with simple photos and basic software tools.
Practice color reduction and grid adjustments on easy subjects first. Your early attempts might look rough, but each project teaches valuable lessons.
Soon you’ll transform cherished memories into beautiful handcrafted pieces. Custom patterns let you stitch stories that store-bought designs simply can’t tell.
- https://www.artsylyons.com/blog/from-doodle-to-design
- https://egausa.org/5-ways-to-design-your-own-embroidery-patterns/
- https://www.needlenthread.com/2017/08/how-to-make-printable-hand-embroidery-patterns.html
- https://www.domestika.org/en/blog/3588-10-free-tools-to-create-your-own-embroidery-patterns
- https://awesomepatternstudio.com/blog/blog/cross-stitching-according-to-your-own-design-creating-a-pattern/

