This site is supported by our readers. We may earn a commission, at no cost to you, if you purchase through links.
 To make your own sewing patterns, start by gathering essential tools: a measuring tape, ruler, sturdy pattern paper, tracing wheel, and French curves.
Measure your body accurately—waist, hips, and bust—keeping the tape snug but not tight.
Use these measurements to draft basic pattern blocks like a bodice or skirt directly on paper with a sharp pencil.
For clean lines, trace curves with French rulers. Add seam allowances (usually ½ inch) and notches for alignment.
Secure the paper with pattern weights while cutting to avoid shifting. Want more precision?
Test the pattern with a muslin fabric first to perfect the fit.
Table Of Contents
- Key Takeaways
- Essential Tools for Making Your Own Sewing Patterns
- Taking Accurate Body Measurements for Pattern Making
- Methods to Create Your Own Sewing Patterns
- Drafting Basic Pattern Blocks and Slopers
- Altering Pattern Blocks to Create Unique Designs
- Pattern Grading Techniques for Different Sizes
- Adding Seam Allowances and Notches to Patterns
- Digitizing and Printing Your Sewing Patterns
- Testing and Refining Your Sewing Patterns
- Organizing and Storing Your Sewing Patterns
- Frequently Asked Questions (FAQs)
- Conclusion
Key Takeaways
- Take accurate body measurements for bust, waist, hips, and other key areas to ensure a great fit for your patterns.
- Use essential tools like pattern paper, rulers, a measuring tape, and French curves for precise drafting.
- Test your patterns with a muslin mock-up to check the fit and make adjustments before cutting the final fabric.
- Add seam allowances, notches, and grainlines to your patterns for easier assembly and accurate sewing.
Essential Tools for Making Your Own Sewing Patterns
To create accurate sewing patterns, you’ll need a few essential tools like a measuring tape, ruler, and pattern paper.
Add a good tracing wheel, French curves, and sharp scissors to guarantee precise marking and cutting.
Measuring Tape and Ruler
Accuracy starts with the right tools—your measuring tape and ruler are indispensable. Use them to verify each line and measurement is precise. You can find a variety of sewing measuring tapes online.
- Pick a flexible tape measure for curves and double-check ruler accuracy before starting.
- Lay fabric flat and measure from key landmarks like waistlines or hips.
- Hold the tape snug but avoid tightness for proper body measurements.
Consistency guarantees patterns fit perfectly every time.
Pattern Paper and Tracing Wheel
To create your own sewing patterns, pattern paper and a tracing wheel are must-haves. The right tools make pattern drafting smoother and more accurate.
You can find various sewing pattern papers online.
- Select sturdy paper like oak tag, artist tracing paper, or specialized pattern paper for durability.
- Use a serrated tracing wheel to neatly transfer designs and markings.
- Pair the wheel with carbon paper for clean, visible Tracing Techniques.
- Keep your wheel in good condition by inspecting it regularly for sharpness and smooth rolling.
With these, pattern making becomes efficient and straightforward!
French Curves and Hip Curves
Mastering curve drafting starts with French curves and hip curves—essential tools for pattern drafting.
These rulers help you design smooth armholes, necklines, and hip fitting shapes. Simply line up the curve ruler to follow your measurements, then trace gently to perfect those tricky lines.
A French curve ruler product listing offers a variety of options. Use French tools for precise body shaping or blending sizes.
Hip curves are ideal for skirts and pants. With practice, your curve rulers will make pattern making faster and more professional-looking every time.
Drafting Pencils and Erasers
When working on pattern drafting, a good pencil is key for neat, reliable lines.
Here’s what you’ll need:
- Drafting Pencils: Use sharp HB or mechanical pencils for detailed work.
- Eraser Materials: A soft eraser removes graphite without tearing pattern paper.
- Sharpener Tools: Keep pencils sharp for consistent precision.
- Drawing Aids: Pair pencils with rulers or measuring tape for clean, accurate patterns.
Focus on quality, and your results will stand out!
Pattern Weights and Scissors
Pattern weights are a must for keeping sewing patterns steady without pin damage. Paired with scissors or rotary cutters, they make pattern cutting smooth and precise.
A well-stocked sewing kit includes essential tools for various tasks. Use sharp blades exclusively for fabric to maintain clean edges.
Here’s a quick guide:
| Tool | Use | Tips |
|---|---|---|
| Pattern Weights | Secures patterns | DIY with rice, fabric |
| Fabric Scissors | Cuts fabric precisely | Keep for fabric only |
| Rotary Cutter | Quick clean cuts | Use with cutting mats |
| Fabric Snips | Small detail cutting | Great for tight spaces |
Combine these sewing tools for accurate pattern making.
Taking Accurate Body Measurements for Pattern Making
Accurate body measurements are your best tool for sewing success. Using a measuring tape, assess your body proportions.
For bust measurements, wrap the tape around the fullest part of your chest. For waist measurements, find your natural waistline—it’s where a ribbon settles when tied. For hips, measure the widest part, typically around your bottom.
Keep the tape snug but not tight to maintain precise garment sizing. Learning essential sewing pattern making measurements is critical for a well-fitting garment.
Recording back and front waist lengths aids fit analysis and helps align anthropometrics with your custom design.
Methods to Create Your Own Sewing Patterns
You can create your own sewing patterns using methods like drafting from scratch, tracing garments, and modifying existing patterns.
Each approach requires accurate measurements, careful marking, and attention to fabric details for the best results.
This process involves understanding that complete concepts must be applied to achieve professional-looking outcomes.
Drafting Patterns From Scratch
Drafting patterns from scratch gives you full control over designs, starting with Pattern Blocks. Use your accurate measurements and essential Drafting Tools like rulers and French curves.
Begin with these basics:
- Bodice block: For tops and dresses, measuring bust and waist.
- Skirt block: For perfect fit around hips.
- Sleeve block: Custom-fitted to arm length and width.
Focus on precise Block Construction. Each draft lets you create your own sewing patterns customized to style and fabric selection.
Tracing Existing Garments
Tracing clothes is a simple yet powerful method for creating patterns. Lay your garment flat on pattern paper, smoothing out fabric wrinkles for accuracy.
Begin pattern tracing along the edges, ensuring to mark grainlines, darts, and notches. Use Garment Deconstruction techniques if seams obstruct flat tracing.
Analyze fabric stretch or shape carefully to account for fitting. Reverse Engineering allows you to recreate favorite styles precisely—ideal for learning how to make your own designs, using techniques like pattern tracing.
Modifying Commercial Patterns
Transform dull commercial patterns into unique masterpieces with just a few steps.
Start by analyzing the fit – check for tight spots or extra room. Make smart fit adjustments by altering shoulder width, sleeve length, or seam modifications.
Experiment with dart placement or style tweaks like adding unique lines. Try swapping fabrics for a fresh twist on classic designs.
Pattern hacking lets you alter existing patterns, customizing them to match your creativity and body perfectly, which involves smart fit adjustments and allows for unique masterpieces.
Draping on a Dress Form
Draping on a dress form lets you shape garments directly on a figure, bringing designs to life in 3D.
Start by padding the form to match your measurements, use muslin fabric for easier adjustments.
Pin and smooth it over the curves, creating precise shaping along seams and darts.
This fabric draping technique helps refine garment construction, forming a custom-fitted pattern before cutting final materials.
Deconstructing Existing Clothing
Deconstructing clothing is an effective way to uncover its hidden design blueprint for pattern making.
Follow these steps to reconstruct and reverse-engineer your garment:
- Use a seam ripper for careful seam dissection without damaging fabric.
- Press each piece flat for accurate tracing.
- Trace deconstructed pieces on paper, marking symmetrical sides.
- Add seam allowances, grainlines, and notches for precision.
Always match fabric textures and stretch for a seamless clothing reconstruction process.
Drafting Basic Pattern Blocks and Slopers
To draft basic pattern blocks and slopers, start by taking accurate body measurements, like bust, waist, hips, and height.
Use these measurements to draw precise lines and curves on pattern paper, creating foundational shapes for garments like bodices, skirts, and sleeves, which are essential for making garments.
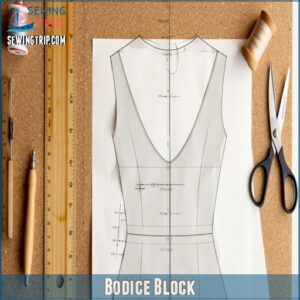
Bodice Block
A bodice block is the first step to mastering pattern making.
It’s the base for tops and dresses, ensuring accurate Bodice Fitting. Use precise measurements like bust, waist, and back length. Mark key points and connect with straight and curved lines during Block Drafting.
| Tools Needed | Measurements Required | Tips for Accuracy |
|---|---|---|
| Ruler, Paper | Bust, Waist, Back | Use snug but not tight tape |
| French Curve | Shoulder to Waist | Draw smooth, clean lines |
| Pencil, Eraser | Upper Torso Length | Double-check all marks |
Keep your block symmetrical for seamless Garment Construction.
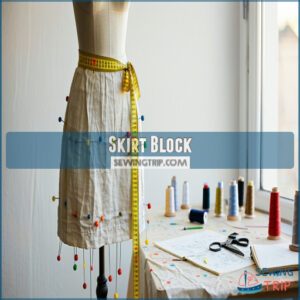
Skirt Block
A skirt block is essential for creating custom skirt patterns that fit perfectly. Here’s a simple guide:
- Measure your waist, hips, and desired skirt length accurately.
- Draft your basic blocks using these measurements, ensuring smooth hip curves.
- Adjust the waistline for your preferred skirt silhouette and flexibility.
- Test the pattern with muslin to verify fit before cutting fabric.
This foundation simplifies pattern drafting and fabric selection, making it easier to create custom skirts that meet your needs.
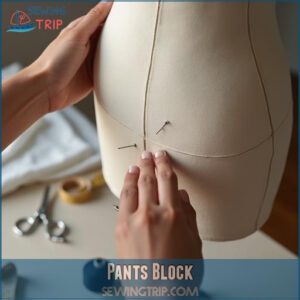
Pants Block
Creating a pants block is key to well-fitting trousers.
Start by taking measurements for your waist, hips, and inseam. For accurate Pants Fitting, draft from the center outward, focusing on smooth curves for the crotch Hook.
Use a ruler for straight edges and square off corners to guarantee balanced seams. Adjust waist and hips for a flattering Pant Silhouette during drafting.
Test your block with a muslin toile to refine any inaccuracies. Pattern Drafting and Pants Block adjustments are essential for creating reliable blocks for sewing patterns.
Sleeve Block
A sleeve block forms the foundation for crafting perfect-fitting sleeve patterns.
Accurate measurements are key when drafting patterns, so grab a tape measure and track:
- Upper arm circumference for sleeve cap width
- Sleeve length from shoulder to wrist
- Armhole curve measurements taken from your bodice block
- Elbow and wrist widths for flexibility
On pattern paper, outline these measurements, creating smooth curves.
Add ease for movement at the sleeve cap and upper arm.
Carefully check each line for accurate pattern drafting results that guarantee comfort!
Collar and Neckline Blocks
Once you’ve mastered sleeves, it’s time to shape your design with collar styles and neckline types using pattern fitting techniques.
Start with your bodice block and adjust the neckline by lowering it 1.5" to 2" or reshaping based on your collar pattern idea.
This block drafting step forms the base for endless neckline blocks and innovative sewing techniques, giving your patterns unmatched versatility for unique designs.
Altering Pattern Blocks to Create Unique Designs
You can transform basic pattern blocks into personalized designs by adjusting darts, seams, and lines to match your vision.
Start by marking changes directly on the pattern, such as shifting darts or adding style lines, to reshape the silhouette and incorporate new details.
Dart Manipulation Techniques
Patterns you’ve created can come to life with dart manipulation—a powerful tool in pattern making techniques.
Through precise fabric draping and pattern fitting, you can expertly shape garments to enhance silhouettes.
Try these:
- Relocate darts to redefine garment design while retaining fit.
- Transform darts into soft gathers to add texture or ease.
- Combine or remove darts to refine seam shaping and simplify clothing lines.
Dart placement molds fabric, making sewing pattern creation flexible and innovative.
Adding Design Features and Details
Start by refining your base with added design elements. Add darts to accentuate shape, or pockets for practicality.
Incorporate collars, cuffs, or unique seams for personalization. For more texture, include pleats, gathers, or layered embellishments like ruffles.
Modify patterns to fit details precisely, ensuring smooth flows between seams. Remember, carefully measure and adjust your pattern to maintain balance, and always test changes on a muslin before cutting into your final fabric.
Adjusting for Different Fabric Types
Fabric choices impact texture effects, drape control, and stretch limits in pattern making.
Different fabric weights and types affect sewing measurements and fit. Test patterns to account for fabric manipulation and its behavior.
- Weight Factors: Heavier fabrics need larger seam allowances.
- Drape Control: Add extra ease for light, flowy materials.
- Stretch Limits: Reduce ease for stretchy, body-hugging fabrics.
Always sew a muslin for precise adjustments!
Creating Variations in Silhouette
Silhouette design is all about reshaping your basic blocks to match your vision.
Start by identifying the silhouette variations you want—like flaring a straight skirt into an A-line or tapering wide pants.
Use dart manipulation to shape the garment and shift volume strategically. Adjust for body proportion and fabric choice, balancing comfort with style.
For instance, pleats can add fullness, while tucks create structure. Experiment with pattern making to explore endless possibilities in creating personalized design features.
Incorporating Style Lines and Seams
Style lines and seams let you play with creativity in pattern making. They add flair without changing the fit.
To get started:
- Sketch your planned style lines directly onto your pattern using a pencil and ruler.
- Add princess seams or center panels for better shaping and visual interest.
- Use dart manipulation to turn darts into seams that sculpt the fabric.
- Experiment with seam placement and topstitching to highlight these changes.
Your sewing pattern design becomes uniquely yours, allowing you to express your style in every stitch.
Pattern Grading Techniques for Different Sizes
Pattern grading helps you adjust a design to fit multiple sizes by following a set of consistent rules.
You’ll use size charts and specific measurements to create patterns for a full range of body shapes and proportions, which is a key concept in pattern grading.
Understanding Size Charts and Grading Rules
Size charts vary between pattern companies, so understanding sizing systems is essential.
Grading rules help adjust patterns to fit multiple measurements accurately, and use these rules to distribute changes evenly across the garment.
Start by analyzing fit and comparing individual measurements against standard size charts, and measurement conversions may also be necessary.
By mastering pattern grading techniques, you’ll achieve consistent results, creating garments custom-made perfectly to any size with manual precision and accuracy.
Manual Grading Methods
Manual grading lets you adjust patterns without software.
It uses simple measurement conversions and pattern scaling techniques.
- The cut-and-spread method involves slicing your pattern, spreading pieces evenly to size up, or overlapping to size down.
- The shift method works by moving the pattern by measurements, then redrawing outlines for precise grading.
Always follow grading rules and refer to size charts for consistency when increasing or decreasing sizes.
Digital Pattern Grading Software
Digital pattern grading software simplifies size calculations, making sewing pattern tutorials less tedious.
These tools combine precision drafting with efficiency, tailoring designs for any size: Consider exploring various digital pattern making solutions for enhanced design workflows.
- Adobe Textile Designer: Perfect for creating digital patterns with stunning detail.
- TUKAcad: Offers robust grading tools for seamless adjustments.
- Optitex: Merges 2D and 3D pattern making software features.
- Gerber’s AccuMark: Industry leader for automated pattern grading.
Save hours, boost accuracy!
Grading for Different Body Types
Grading patterns for different body types requires careful body type analysis and systematic size adjustments.
Start by taking detailed measurements of key areas – bust, waist, and hips. Apply proportion guidance to maintain style integrity across sizes.
Consider several pattern grading methods for adjusting patterns. When curve fitting, adjust darts and seams gradually between sizes.
Use manual grading techniques to modify pattern pieces, ensuring each size maintains proper fit and shape. Create a personalized size chart to track your measurements and adjustments, following a clear pattern grading approach for systematic size adjustments and maintaining style integrity.
Adjusting Patterns for Plus Sizes
Working with plus size patterns requires thoughtful modifications that respect body proportions and comfort.
When grading up patterns, focus on curve modifications that enhance the natural shape while ensuring proper fit.
- Add 1-inch ease allowance across shoulder blades for movement
- Increase dart depth by 1/4 inch for every size up
- Extend side seams gradually, maintaining natural body curves
- Create smoother flows at waistline by adjusting pattern angles
Your pattern adjustments should prioritize both style and comfort, with careful attention to body shaping techniques that flatter fuller figures, considering the overall proportions.
Adding Seam Allowances and Notches to Patterns
You’ll need to add seam allowances of 1/2 inch (1.3cm) around your pattern pieces and mark essential notches to guarantee your garment pieces fit together perfectly.
Your pattern’s success depends on these precise markings, which work like a roadmap to guide you through the sewing process.
Standard Seam Allowance Measurements
When crafting precise sewing patterns, proper seam allowances serve as your essential cutting margins.
Here’s a straightforward guide to standard measurements:
Always mark your grain line before adding these measurements to ensure accuracy in your garment construction.
Marking Notches and Balance Points
Notches and balance marks are your pattern’s roadmap, ensuring precise seam alignment and pattern accuracy.
Place notches along seams, darts, and curves to guide assembly, spacing them 1/2 inch apart.
Add balance marks at key points, like sleeve caps or pocket, for smooth sewing.
Always label these clearly in your pattern legends, as proper notch placement guarantees your pieces align perfectly, respecting seam allowances for flawless construction during pattern drafting and sewing.
Indicating Grainlines and Cutting Instructions
Adding grainlines and clear cutting instructions guarantees your fabric behaves as intended. Grainline marking helps align pattern pieces for precision during fabric placement and cutting.
- Draw grainlines parallel to the selvage edge, ensuring straight orientation.
- Add instructions like "Cut on the fold" or "Place fabric on bias" for flexibility.
- Use weights or pins for stability while mapping out cutting layouts.
- Check notches align with seam allowances for smooth sewing.
- Minimize fabric waste by planning efficient pattern cutting layouts.
Carefully marked grainlines and cutting layouts produce well-fitted, professional results.
Labeling Pattern Pieces
Labeling pattern pieces is all about clarity and organization.
Start with pattern naming and piece identification, like “Front Bodice” or “Sleeve.”
Add numbers and specify quantity to cut. Make sure label placement is visible, and mark grainline indication.
Use notch marking for aligning seams. Include sewing pattern symbols for darts or folds.
These details simplify sewing pattern reading and are pattern making essentials for a smooth, accurate sewing project.
Creating Pattern Legends and Symbols
Pattern legends and symbols are essential for a clear sewing process.
Use sewing pattern symbols like arrows for grainlines, triangles for notches, and dashed lines for fold edges.
Create a symbol guide and include these in your pattern instructions.
Consistent drafting notations—like dots for darts or circles for button placements—make your work precise.
These sewing markings act as a pattern code, ensuring an accurate and professional finish in your pattern drafting.
Digitizing and Printing Your Sewing Patterns
You can turn your hand-drawn patterns into digital files by scanning them and adjusting the details using software.
Format them for at-home printing or send them to large-format printers for professional results.
Scanning Hand-drawn Patterns
To digitize your hand-drawn patterns, scanning them correctly is key. Accurate body measurements are essential for proper pattern drafting.
Set your scanner to at least 150 dpi for crisp quality. Large patterns can be scanned in sections and combined later using Image Editing tools. Save files in formats like.jpg or.png for Digital Storage and File Sharing.
Follow these steps:
- Lay your pattern flat to avoid distortion.
- Align edges before scanning.
- Scan each piece individually.
- Save with clear labels for easy Pattern Conversion.
Using Digital Pattern-making Software
When using digital pattern-making software, you’ll streamline your pattern creation with accuracy and flexibility.
Start by choosing sewing software with features like design simulation or pattern editing to match your needs.
Here’s how to begin:
- Watch software tutorials to learn fundamental tools.
- Experiment with basic digital sewing patterns for practice.
- Use digital pattern grading software for size adjustments.
- Explore virtual fitting tools to preview designs.
With consistent practice, your skills will grow, transforming your sewing projects into precision-crafted pieces!
Formatting Patterns for Home Printing
After finishing your digital patterns, it’s time to prepare them for home printing.
Proper settings guarantee accurate results.
| Feature | Why It Matters |
|---|---|
| Scale | Keeps pattern true to size |
| Page Formats | Matches your printer’s paper |
| Print Resolution | Guarantees crisp, clear lines |
| Margin Settings | Prevents edges from cutting off |
| File Compression | Speeds up printing efficiently |
Always use 100% (Actual Size) for Page Scaling and select A4 or Letter based on your location.
Accurate settings make pattern drafting hassle-free during sewing pattern creation!
Large-format Printing Options
When patterns outgrow home printers, consider large-format printing. It saves time and frustration with precise scaling.
- Plotter machines handle digital patterns with ease.
- Local print shops offer affordable options, but check ink costs and paper types.
- Online services specialize in sewing patterns with quick shipping.
- Avoid scaling issues by verifying printer calibration.
Professional printing guarantees accuracy for pattern storage and sewing pattern organization software, keeping your projects on track.
Creating Printable Pattern Instructions
Clear Pattern Instructions make your pattern design truly beginner-friendly.
After organizing your digital patterns for printing, add detailed step-by-step Measurement Guides, clear diagrams, and simple notes explaining each process.
Highlight how to assemble pieces, focusing on precise joins.
Include Drafting Basics for adjustments and tips for resizing.
Use readable Digital Formats like PDFs, ensuring compatibility with home printers.
Don’t forget to explain seam allowances, grainlines, and fabric folds clearly.
With these Printing Tips, creating your own sewing patterns becomes even easier for users!
Testing and Refining Your Sewing Patterns
To test your sewing pattern, start by making a muslin or toile using fabric similar to your final material.
Use this sample to check the fit, adjust seams, and refine the design for accuracy.
Making a Muslin or Toile
A muslin (or toile) is your garment’s sneak peek, made with plain muslin fabric. It lets you check fit and construction before cutting expensive fabric. Think of it as a trial run for perfection!
- Fit Testing: Spot issues like tight seams or sagging early.
- Sewing Trials: Practice stitching tricky areas.
- Garment Prototyping: Test pocket placement, darts, and design lines.
- Toile Construction Adjustments: Mark directly on the muslin for tweaks in creating a pattern.
Fitting Adjustments and Alterations
Once your muslin is ready, focus on fixing fit issues.
Compare it to your body’s measurements and note areas needing sewing corrections. Common alternations include adjusting seam allowances, shortening sleeves, or fixing uneven hems.
Use alteration techniques like the slash-and-spread method for full busts or overlapping darts for a smaller bust. Redraw hemlines for garment revisions or smooth out waistlines.
Remember, different fabrics may impact fit. Accurate pattern alterations guarantee a better fit and create garments perfectly custom-made to you, using techniques such as adjusting for a full bust or ensuring perfect fit.
Documenting Pattern Revisions
Keeping track of your pattern revisions is like building a map for future success.
A reliable system guarantees you can manage updates effortlessly.
- Label every version with changes and the date.
- Create a change log, noting pattern alterations and fit adjustments.
- Use digital tools like Adobe Illustrator or PDFs for version control.
- Take photos of evolving physical patterns for reference.
Effective archive management ensures organized pattern storage, easy access, and consistent organization.
Treat this as your pattern’s growth diary to simplify revisions and perfect your creations.
Gathering Feedback From Testers
A critical Tester Panel is essential for refining your sewing pattern.
Recruit sewists of varied skill levels to test, guaranteeing diversity in feedback. Accurate body measurements are essential for a proper fit, so testers should understand how to take them correctly using essential sewing tools.
Provide clear instructions, a muslin fitting guide, and User Surveys or Feedback Forms. Ask testers to share photos of their finished garments.
Use their insights on areas like fit and clarity for pattern modification. Pattern testing guarantees your sewing pattern creates consistent, high-quality results across all users.
Final Pattern Checks and Quality Control
The final step in pattern checking is focusing on quality control.
Look closely at every detail before calling it done.
Review these key areas:
- Pattern Accuracy: Confirm measurements, grainlines, and notches match seamlessly.
- Fit Testing: Try a muslin to perfect the fit.
- Seam Quality: Check your seam allowances and finishes are professional.
- Fabric Selection: Verify it enhances the design.
Error correction now saves future headaches.
Clear, precise pattern instructions guarantee success in sewing!
Organizing and Storing Your Sewing Patterns
Keep your sewing patterns neat by folding them carefully and storing them flat or rolled in labeled containers.
Use a digital system to back up scanned patterns, organizing them by type, size, and project.
Physical Storage Solutions
To keep your patterns safe and organized, consider storage solutions like file cabinets or clear shelf bins.
Archive folders are perfect for protecting individual pieces, while labeled pattern boxes group similar designs together.
Maximize pattern organization by categorizing based on type or size.
For smaller spaces, stackable storage bins make every inch count.
Whether it’s a drawer or a whole shelf, having a tidy pattern catalog guarantees quick access when inspiration strikes.
Digital File Management Systems
Digital file management systems simplify pattern organization.
Use cloud storage tools like Google Drive or Dropbox to access patterns anywhere, while digital archives guarantee safe data backups.
Improve file organization by sorting patterns into folders labeled by name or project type.
Protect files with cyber security practices, like strong passwords.
Build a pattern catalog with tools like Trello, adding images, notes, and fabric suggestions to every pattern.
This setup saves space, guarantees pattern backups, and keeps everything accessible, making storage solutions efficient and stress-free.
Categorizing Patterns by Type and Size
Categorizing sewing patterns by type and size simplifies your pattern-making process and boosts efficiency. It guarantees quick access to designs and sizes, keeping your custom sewing patterns organized.
Start by grouping patterns based on type, like dresses, pants, or tops, and use clear labels. For sizes, refer to size and grading rules to separate designs systematically.
Here’s a step-by-step approach:
- Label each pattern with its type, size, and measurements.
- Store them in large, durable envelopes for protection.
- Use tabs or dividers to separate sizes within each type.
- Include measurement guides for reference.
- Arrange envelopes by pattern type, maintaining clear segmentation.
A well-ordered system means seamless sewing projects later, and it is crucial for efficient organization and quick access to your designs, which is key to a successful custom sewing experience.
Creating a Pattern Catalog
A pattern catalog simplifies pattern organization and keeps your sewing library easy to browse. Think of it as your design vault.
- Pick your format: a digital archive or a physical binder.
- Record details: pattern name, size range, date created, and fabric recommendations.
- Add sketches, photos, or pattern storage locations for quick reference.
Your catalog grows with you, so update it often. It’s your personalized system, ensuring every sewing pattern stays accessible and organized.
Backing Up and Protecting Your Patterns
Your pattern storage system is the backbone of your sewing projects.
After building a pattern catalog, let’s make sure those custom patterns are safe. Different storage and backup methods can protect your creations from being lost.
| Backup Method | Advantages | Challenges |
|---|---|---|
| Cloud Storage | Accessible anywhere | Requires internet |
| External Hard Drive | High storage capacity | Susceptible to damage |
| USB Flash Drive | Compact and portable | Limited storage space |
| Printed Copies | Tangible backup | Needs physical storage |
Combine digital backup with physical copies for ultimate pattern protection.
Use file organization tools to label digital archives by type, project, or date.
Regular backups make sure your pattern templates stay secure, ready for your next sewing adventure.
Frequently Asked Questions (FAQs)
Should you create your own sewing pattern?
Creating your own sewing pattern lets you tailor garments precisely to your measurements and style.
It’s ideal if store-bought patterns don’t fit or match your vision.
Plus, it’s a rewarding skill-building experience.
How to start making your own sewing patterns at home?
Start by taking accurate body measurements—bust, waist, hips, and length.
Sketch the garment design, then draft basic pattern blocks on pattern paper.
Add seam allowances, mark notches, and guarantee symmetry for precise results to ensure a well-made garment, with symmetry being crucial.
How do I make my own sewing patterns?
To make your own sewing patterns, sketch your design, take accurate measurements, and draft basic shapes on paper.
Use tools like rulers and French curves, add seam allowances, and test fit with a muslin mock-up to ensure a proper fit, this process involves accurate measurements.
Should I make sewing patterns from existing commercial patterns?
Using commercial patterns as a starting point is smart.
You’ll save time and learn how the pieces come together.
Modify details, adjust measurements, or add design elements to create custom patterns customized to your needs.
What do I use to make a sewing pattern?
You’ll need pattern paper, measuring tape, rulers, pencils, erasers, and scissors.
Add a tracing wheel for transferring, French curves for smooth lines, and muslin for testing.
Don’t forget labels and seam allowance markings!
Is there an AI that can make sewing patterns?
Think of AI as your digital tailor—it can assist with sewing pattern creation using tools like PatternMaker or CLO 3D.
While not perfect, it accelerates design, offering customizable templates and virtual fitting options.
How can I make my own pattern for free?
Draft your own pattern for free by tracing existing clothes or measuring yourself.
Use paper, a ruler, and a pencil to sketch.
Add seam allowances, smooth curves with a French curve, and label pieces.
What paper can I use to make sewing patterns?
Paper preferences promise pattern precision.
Start with pattern paper or kraft paper for durability, but tracing paper works wonders for details.
Even butcher paper or newspaper helps, make certain it’s smooth, sturdy, and easy to mark, with pattern paper being a key choice for durability.
How do I make my own patterns?
To create your own sewing patterns, start by sketching your design, take accurate body measurements, and draft using pattern paper.
Use rulers, curves, and tracing tools for precision, and test the fit with a muslin mock-up.
What are the different ways to make sewing patterns?
Explore pattern-making with methods like draping fabric directly on a dress form, tracing existing garments, or drafting flat patterns using slopers.
Each approach blends creativity with precision, ensuring your designs fit beautifully, which is a key aspect of using slopers.
Conclusion
Start shaping, sewing, and succeeding with your skills by learning how to make your own sewing patterns.
Focus on precise measurements, proper tools, and drafting basic blocks like bodices or skirts.
Test your patterns using muslin, adjusting for fit before cutting final fabrics.
Add seam allowances, notches, and grainlines for organized assembly.
Store your patterns carefully for future use.
With practice and patience, you’ll master the art of creating custom designs custom-fit perfectly to your needs.
- https://fairfitstudio.com/blog/patternmaking-101-how-do-i-start-making-my-own-patterns
- https://www.theshapesoffabric.com/2021/05/04/pattern-making-basics/
- https://thecraftblogger.com/learn-how-to-make-a-sewing-pattern-pattern-drafting-resources-for-beginners/
- https://itch-to-stitch.com/grade-pattern-size-two/
- https://thesewingloftblog.com/sewing-pattern-storage-ideas/

