This site is supported by our readers. We may earn a commission, at no cost to you, if you purchase through links.
This guide offers clear, step-by-step instructions to help you close seams invisibly, whether you’re mending a beloved toy or finishing a handmade pillow.
With practical tips and a focus on achieving perfect results, you’ll learn to apply this versatile stitch across various projects, elevating your sewing skills and bringing a professional touch to your work.
Let’s dive into the art of invisible sewing.
Table Of Contents
- Key Takeaways
- How to Do a Ladder Stitch or Invisible Stitch
- Understanding Ladder Stitch
- Applications of Ladder Stitch
- Materials Needed for Ladder Stitch
- Tools for Ladder Stitch Sewing
- Preparing for Ladder Stitch
- Step-by-Step Ladder Stitch Guide
- Tips for Perfect Ladder Stitches
- Finishing the Ladder Stitch
- Practicing Ladder Stitch for Mastery
- Frequently Asked Questions (FAQs)
- Conclusion
Key Takeaways
The ladder stitch is known by several names, including invisible stitch, blind stitch, and slip stitch, highlighting its versatility and discreet nature for various sewing applications. It is widely used for mending tears, closing seams on plush toys and pillows, attaching bias binding, and repairing linings, making it a valuable technique for both repairs and finishing touches in sewing projects.
Essential materials for executing a ladder stitch include high-quality thread that matches the fabric color, a sharp and thin needle for precision, and scissors for clean snipping, with the option of double threading the needle for added strength.
Proper preparation involves ensuring the needle is sharp, selecting the appropriate thread and fabric weight for the project, double threading the needle with a secure knot, and practicing stitch spacing and technique for a flawless finish.
How to Do a Ladder Stitch or Invisible Stitch
Yes, you can do a ladder stitch or invisible stitch by alternating small stitches across the seam’s opening and pulling the thread taut to hide the stitches within the fabric folds, creating an invisible seam.
This technique is ideal for closing gaps in st■ toys, pillows, or garment linings invisibly.
Understanding Ladder Stitch
Imagine you’re a magician in the world of sewing, and the ladder stitch is your go-to spell for making seams disappear.
When you’re working with the ladder stitch, fabric suitability is key. You want a material that will conceal your sorcery, allowing the thread to blend seamlessly. The right needle size can feel like finding the magic wand that fits perfectly in your hand—too large, and your spell may fail, leaving visible holes.
Thread tension is the incantation you must master. Too loose, and your fabric parts ways like a poorly kept secret; too tight, and it bunches up, betraying your hidden handiwork. With a matching thread, your stitch becomes an invisible line that holds everything together, as if by magic.
Applications of Ladder Stitch
The ladder stitch is a versatile hand-sewing technique that’s perfect for discreetly mending tears and closing seams.
Whether you’re repairing a plush toy or finishing a pillow, this stitch provides a clean, invisible closure.
Mending and Repairs
After mastering the ladder stitch basics, you’ll find it’s a game-changer for mending sweaters and repairing leather.
This hand-sewing technique makes joining fabrics a breeze, with invisible hems and seams that look professionally done.
Plush Toys
After mending a tear, tackle your child’s beloved plush toy next. Use the ladder stitch to sew seams invisibly, repairing small holes and ripped toys.
With a hand sewing needle and small stitches, it’ll look good as new!
Pillows and Cushions
Just like stitching up a beloved plush toy, ladder stitching pillows and cushions keeps the fluff where it belongs.
Perfect your invisible stitch to maintain cushion shape, ensuring your fabric patterns and decorative trims stay pristine.
Clothing Linings
When fixing torn linings or adding a touch of heirloom sewing to delicate fabrics, the ladder stitch shines.
- Choose lining fabrics that complement your main material.
- Use a thin needle for invisible seam closures.
- Ensure stitches are evenly spaced, securing each with a discreet stitch.
Attaching Bias Binding
After mastering linings, let’s tackle bias binding. It’s like giving your fabric a secret handshake with a sharp needle.
| Bias Tape | Fabric Choice | Needle Size |
|---|---|---|
| Your ally | Choose wisely | Go sharp or go home |
Adjust thread tension and stitch length for a hidden stitch that whispers quality.
Materials Needed for Ladder Stitch
Transitioning from the diverse applications of the ladder stitch, let’s dive into the essentials you’ll need to embark on this sewing adventure. Gathering the right materials is crucial for ensuring durability and efficiency in your projects.
At the core, you’ll need a high-quality thread that complements your fabric color. This thread becomes your invisible ally, blending seamlessly as you weave magic into your repairs or crafts.
A sharp, thin needle is your next recruit. It’s the silent hero that makes piercing fabric a breeze, ensuring your stitches are precise and nearly invisible.
As you prepare to start the ladder stitch, consider the thread tension. It’s a delicate balance—too tight, and your fabric puckers; too loose, and the stitches might betray their presence. Achieving this harmony is key as you embark on sewing the stitches, transforming hems, and closing seams with the finesse of a skilled artisan.
Armed with these insights, you’re not just sewing; you’re crafting stories with every stitch.
Tools for Ladder Stitch Sewing
For your ladder stitch sewing adventure, think of your tools as your trusty sidekicks. These aren’t just any gadgets; they’re your ticket to transforming a simple seam into an invisible line of magic. First up, the needle. Opt for a sharp, thin one. It’s like choosing a fine pen over a chunky marker for delicate handwriting.
Next, scissors. Not just any scissors, but ones that can snip with precision. Imagine them as your fabric’s best friend, ensuring no thread outstays its welcome.
Thread is your invisible ink. Match it to your fabric, and it’ll disappear into the background, leaving no trace behind.
Preparing for Ladder Stitch
After gathering your tools for the ladder stitch, it’s time to roll up your sleeves and prepare for the magic to happen. First off, ensure your needle is as sharp as a tack; a dull needle is no friend to delicate fabrics.
Next, pick your thread with care. Think Goldilocks: not too thick, not too thin, but just right.
Now, let’s talk fabric weight. You wouldn’t wear a parka in July, right? Similarly, choose your fabric according to the project at hand, whether it’s a lightweight sock monkey or a cuddly knot bunny lovey.
Before diving into the how-to of a ladder stitch or invisible stitch, double threading your needle and securing a knot at the end of the thread is crucial.
And remember, practice makes perfect. Stitch spacing and technique practice aren’t just fancy terms; they’re your ticket to mastering this sleight of hand.
Step-by-Step Ladder Stitch Guide
To begin your ladder stitch, you’ll need to prepare your needle and thread.
First, thread your needle with either a single thread or double thread in a color matching the fabric.
Pull an eight-inch to one-foot section (20 to 30 cm) of thread through the eye of your needle, then pull it until the ends meet and the needle is in the middle.
Knot it several times at the ends to ensure the knot is tight and strong. You can test the knot by pulling it between two fingernails.
Finally, snip off the threads below the knot, leaving about one cm (0.4 in) of thread remaining.
Starting the Stitch
Ready to dive into the art of the ladder stitch? Let’s kick off with choosing the right needle – think sharp and thin, your secret weapon for those invisible seams.
Your starting block? A clean, pressed edge on your fabric.
Now, about tension – it’s a balancing act. Keep your fabric relaxed but your thread just snug enough to avoid puckering.
And here’s a golden nugget: practice makes perfect. Whether you’re stitching up a sock monkey or mending your favorite plush, mastering your stitch spacing and tension now will pay off in seamless repairs later.
Sewing the Stitches
Once you’ve got the hang of starting your ladder stitch, it’s time to dive into the sewing itself.
Think of your needle as a tiny acrobat, swinging back and forth between the fabric edges, creating a seamless line.
Thread size matters too—go for a fine gauge to keep things discreet. As for fabric, avoid the bulky stuff to keep your stitches neat.
Tips for Perfect Ladder Stitches
To achieve flawless ladder stitches, it’s crucial to select thread that matches your fabric perfectly.
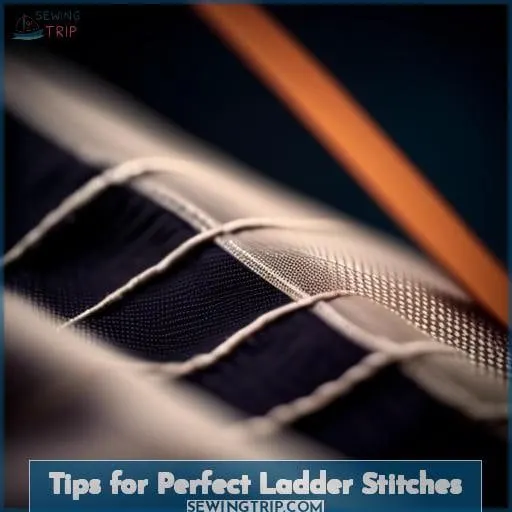
Ensure your stitches are small and evenly spaced for a seamless finish.
Always press your work after stitching to blend the stitches into the fabric.
Matching Thread
Once you’ve got the hang of the ladder stitch, it’s time to talk thread. The right thread color is crucial; it should blend seamlessly with your fabric.
But don’t overlook thread quality and durability—your repair should last. Opt for a thread that’s not too thick or heavy, ensuring your stitches stay hidden.
Small, Even Stitches
After choosing the right thread, focus on the nitty-gritty: needle size, thread tension, fabric thickness, and stitch placement.
Aim for small, even stitches; they’re the backbone of a sturdy, invisible seam. Adjust your thread tension to avoid puckering or gaps, and remember, the right needle size makes piercing the fabric a breeze.
Perfecting these stitches turns sewing into an art form.
Pressing After Stitching
After nailing those small, even stitches, pressing your work is the cherry on top. It’s like ironing out life’s wrinkles—suddenly, everything looks sharper and more put-together.
- Pressing results: Use a steam iron for crisp edges.
- Pressing tips: Protect delicate fabrics with a pressing cloth.
- Pressing techniques: Don’t drag the iron; lift and press to avoid stretching.
Finishing the Ladder Stitch
Now that you’ve got the hang of laying down those neat, tiny stitches, let’s wrap things up with a flourish. Finishing your ladder stitch isn’t just about tying off the thread; it’s about securing your hard work and ensuring that your invisible closure stays that way – invisible.
First, after your last stitch, sneak your needle under a nearby loop and gently pull to create a small knot. This is your securing stitch, the guardian of your sewing efforts. But wait, don’t snip that thread just yet! Weave the needle through a bit of the fabric, emerging a little distance away.
Now, when you trim the thread, the tail disappears into the fabric’s embrace, leaving no trace behind. This finishing touch is your secret handshake with the fabric, a nod to a job well done. Remember, the magic of a ladder stitch lies in its discretion. Keep practicing, and soon, you’ll be finishing your projects with the confidence of a sewing ninja.
Practicing Ladder Stitch for Mastery
After finishing your ladder stitch, you’re on the brink of turning a neat trick into a full-fledged skill.
- Experiment with ladder stitch variations. Try out different spacing or angles to see how they affect the final look of your project.
- Play around with thread color choices and fabric types. This won’t only make your work pop but also give you a feel for how different materials behave.
- Don’t shy away from using various needle sizes. A change in needle can make a world of difference in handling and stitch appearance.
Frequently Asked Questions (FAQs)
Can ladder stitch be used on leather?
Yes, you can use a ladder stitch on leather, especially for invisible seams or finishing touches. Just remember, you’ll need a sturdy needle, strong thread, and a bit of patience to tackle those tough hides.
How to repair a ladder stitch that’s come undone?
To mend a ladder stitch that’s unraveled, thread a needle with matching thread. Retrace the original path, weaving in and out with care.
Is ladder stitch suitable for stretchy fabrics?
Ladder stitch isn’t your go-to for stretchy fabrics; it lacks the give needed for those bouncy materials.
For a stretch-friendly finish, you’re better off exploring stitches specifically designed to dance with elasticity.
How to adjust ladder stitch for thick fabrics?
When tackling thick fabrics, think of it as threading the needle through a jungle.
Use longer stitches, about 1/2 inch apart, and ensure your thread’s tension is just right to avoid puckering.
Can ladder stitch be done with a sewing machine?
You can’t do a ladder stitch with a sewing machine; it’s a hand-sewing exclusive.
But don’t fret, mastering it by hand will give your projects that invisible finish you’re after, no machine magic needed.
Conclusion
Mastering how to do a ladder stitch or invisible stitch is simpler than you might think. With the right tools, materials, and a bit of practice, you’ll find yourself seamlessly closing gaps in toys, pillows, and garments, adding a professional finish to your projects.

