This site is supported by our readers. We may earn a commission, at no cost to you, if you purchase through links.
 To do sew-in extensions, start by detangling your natural hair completely, then part and braid it into secure anchor braids where the extensions will attach.
Use a curved needle and strong thread to sew the extensions onto the braids, knotting each section for stability.
For a smooth and natural result, align the extensions with your natural hair and trim or layer any uneven areas after installation.
Caring for your sew-ins is essential—wash gently with sulfate-free products and avoid heavy tension while styling.
In the end, the secret to flawless sew-ins is patience, precision, and a little practice.
Table Of Contents
- Key Takeaways
- What Are Sew in Extensions?
- How to Prepare Your Hair for Sew Ins
- How to Sew in Extensions
- Caring for Sew in Extensions
- How Long Do Sew Ins Last?
- Sew in Extension Maintenance
- Common Problems With Sew Ins
- Removing Sew in Extensions
- Sew in Extensions Vs Other Methods
- Finding a Stylist for Sew Ins
- Frequently Asked Questions (FAQs)
- Conclusion
Key Takeaways
- Start by detangling and braiding your natural hair into secure cornrows to create a solid foundation for the extensions.
- Use a curved needle and strong thread to sew the hair extensions onto the braids, knotting each section to ensure stability.
- Wash and care for your sew-ins gently with sulfate-free products and avoid heavy tension to keep them looking fresh and lasting longer.
- Regular maintenance helps protect your natural hair and extend the life of your extensions.
What Are Sew in Extensions?
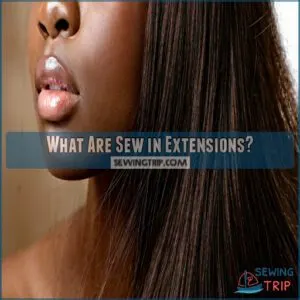
Sew-in extensions are a method of attaching hair wefts to your natural hair using a needle and thread.
They’re great for adding length, volume, and versatility to your hairstyle while blending seamlessly with your own hair.
Types of Hair Used
Choosing the right hair types for sew-ins sets the stage for stunning results.
Here’s a quick breakdown:
- Human hair: Offers a natural look, heat styling, and longevity.
- Synthetic hair: Budget-friendly but limits styling with heat.
- Virgin hair: Untouched, high-quality strands for premium results.
- Remy hair: Aligned cuticles for smooth, tangle-free blonde extensions.
Pick based on budget, styling needs, and maintenance preferences!
Adding Length and Volume
Want thicker, longer hair instantly? Sew-in hair extensions are your go-to solution for a natural-looking volume boost and added hair density.
With endless length options and extension materials, these offer unmatched versatility.
The sew-in method securely upgrades your look while keeping your natural locks safe.
Perfect for anyone aiming to ace hair thickening or experiment with sew-in hairstyles effortlessly!
How to Prepare Your Hair for Sew Ins
Preparing your hair properly is essential to guarantee your sew-in looks natural and lasts longer.
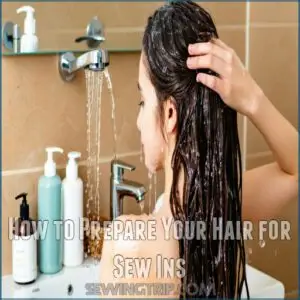
Start by washing, detangling, and creating neat sections to lay a strong foundation for the extensions.
Detangle and Part Hair
Every great sew-in begins with thorough hair preparation.
Start by using detangling tools to remove knots and smooth your hair.
Next, master parting techniques to create clean, precise sections—key for flawless braid patterns.
Take your time; proper hair sectioning guarantees your sew-in hair extensions blend beautifully.
- No more tangles ruining your style.
- Parting brings symmetry and perfection.
- Prep builds confidence and control.
Create Anchor Braids
Creating solid anchor braids is key to a durable sew-in.
Start by nailing precise hair sectioning with a rat tail comb.
Create cornrow braids close to your scalp—snug enough for stability but not too tight to avoid discomfort.
These sew in hair braids form the foundation for extensions.
Choosing the right braid pattern is crucial for styling versatility and scalp health.
Use proper braiding tools for smooth results.
Secure each braid with a small knot or twist to lock it in place.
- Prepare sections with clean, detangled hair.
- Braid evenly, ensuring sturdy anchor points.
- Knot ends for long-lasting braid foundation.
How to Sew in Extensions
You’ll need a curved needle and strong thread to start sewing your extensions securely into your cornrow braids.
With the right tools and proper technique, you can attach each weft row by row, starting from the bottom and working your way up for the most natural-looking results.
Tools Needed
Installing sew-in extensions gets much easier when you’ve got the right tools ready.
Think of it like building a house—you need solid tools for a secure result.
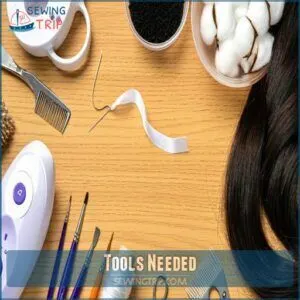
Here’s your go-to list of hair sewing tools:
| Tool | Use |
|---|---|
| Curved Sewing Needle | Glides through tight braids easily to attach extensions seamlessly. |
| Nylon Thread | The best sewing thread for extensions, durable and heat-resistant. |
| Weft Cutters | For trimming extension wefts or loosening threads cleanly. |
You’ll also want rubbing alcohol and cotton balls to disinfect sewing needles, keeping things clean.
A comb helps with parting, while sharp scissors are handy for cutting thread.
For smoothing and detangling, keep an extension brush nearby—your extensions will thank you!
To achieve professional results, mastering the sew in needle technique is essential for a secure and long-lasting hairstyle.
Attaching Extensions to Braids
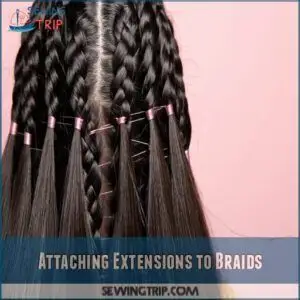
Before sewing hair into your scalp, use braid patterns that create solid anchor braids.
Proper preparation is essential for successful braiding, so shampoo and condition your hair beforehand.
Match the weft to the braid’s length and thread a curved needle with extension thread.
For detailed braiding instructions, consult this helpful braiding guide.
- Insert the needle under the braid, securing both the weft and hair.
- Use sewing techniques like spacing stitches 1/2 inch apart for an even hold.
- Knot each stitch twice to guarantee braided sewed in hair extensions stay secure throughout the hair weaving process.
Caring for Sew in Extensions
Taking care of your sew-in extensions keeps them looking fresh and protects your natural hair.
With proper washing, gentle styling, and preventing tangles, you can guarantee they last longer and stay flawless.
Note: Since there was only one sentence that could be logically separated, the reorganization mainly focuses on highlighting a key phrase and ensuring the structure is clear and readable.
Washing
Extension washing isn’t just about keeping things clean—it’s about preserving their beauty.
Stick to sulfate-free products for gentle cleansing and moisturized hair.
Use diluted shampoo, focusing on scalp care with circular motions.
Rinse thoroughly with lukewarm water to avoid tangles.
Skip flipping your hair upside-down, which spells trouble for bonds.
Finish with a microfiber towel pat-dry for frizz-free results.
For maintaining their quality and longevity, understanding hair extension types is vital for maintaining their quality and longevity.
| Step | Product Type | Focus Area |
|---|---|---|
| Pre-wash | Wide-tooth comb | Detangling ends |
| During wash | Diluted shampoo | Scalp cleansing |
| Conditioning | Sulfate-free | Mid-to-ends |
| Rinsing | Lukewarm water | Prevent buildup |
| Drying | Microfiber towel | Pat-dry gently |
Styling
Styling sew-ins adds flair to your look, but technique matters.
Start with a heat protectant before using hot tools, keeping the temperature under 375°F.
It’s key for hair extension styling longevity.
Experiment with loose waves, sleek straight looks, or creative updo styles like twisted buns.
For secure results, avoid pulling tightly when crafting braid designs.
Styling sew-ins also means considering hair texturing or color matching for a seamless finish.
Using a heat protectant spray is essential for preventing damage to your hair.
Try these tips for polished, versatile sew-in hairstyles you’ll love wearing daily.
- Use lightweight products for natural-looking curl techniques.
- Avoid heavy tension when creating braid designs.
- Limit heat styling to protect both extensions and natural hair.
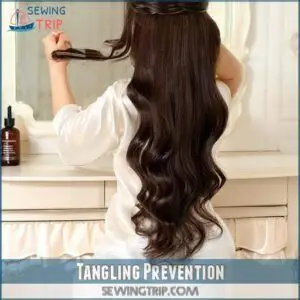
Tangling Prevention
Keeping sew in hair extensions tangle-free calls for consistent, thoughtful care.
Here’s how to master it:
- Use extension brushes or wide-toothed combs for gentle combing, starting at the ends and working up.
- Secure hair nightly in a loose braid or under a satin scarf.
- Switch to silk pillowcases to reduce friction and promote soft haircare.
- Avoid letting hair rub against collars or scarves, which cause tangles and excessive buildup.
How Long Do Sew Ins Last?
A solid sew-in weave usually lasts 6-8 weeks, but factors like care and materials influence its lifespan.
Want to keep it looking fresh? Follow these tips to maximize extension longevity:
- Use high-quality human hair for better durability over synthetic options.
- Get a professional installation—it guarantees precision and adds weeks to the sew duration.
- Protect natural hair with a silk pillowcase to avoid damage while sleeping.
- Limit heat styling and wash gently using sulfate-free products.
Remember, after 8 weeks, it’s time for removal!
Sew in Extension Maintenance
Keeping your sew-in extensions in top shape requires regular maintenance to protect both the extensions and your natural hair.
You’ll need to retighten loose areas and moisturize frequently to prevent dryness and breakage.
Retightening
Retightening your sew-in hair extensions is essential for keeping them secure and looking their best.
Plan for a touch-up every 4-6 weeks to reposition the wefts closer to your roots using a weaving needle and thread.
This process prevents sagging and keeps your style fresh.
Communicate with your stylist about any discomfort to avoid tension bumps or breakage.
A quick wiggle test between visits helps catch loose tracks early.
Stay proactive with your extension maintenance, and your sew-in will last longer while protecting your natural hair.
| Key Tips for Retightening | Benefits |
|---|---|
| Regular touch-ups | Prevents loose tracks |
| Notify stylist of tension | Avoids bumps and breakage |
| Gentle wiggle test | Identifies loosening early |
| Professional care | Guarantees seamless blending |
| 4-6 week intervals | Maintains durability |
Moisturizing
For long-lasting sew-in hair extensions, don’t skip moisturizing—it’s hair hydration 101.
Your natural hair and scalp need care beneath the extensions too.
Use nourishing products like leave-in conditioners or hair oils with argan or coconut oil to maintain softness.
Here’s how to keep everything fresh:
- Focus on roots and ends during application.
- Stick with air drying; blow dryers zap moisture.
- Include deep conditioning weekly for ultimate hair care.
Keep hair maintenance simple but consistent!
Common Problems With Sew Ins
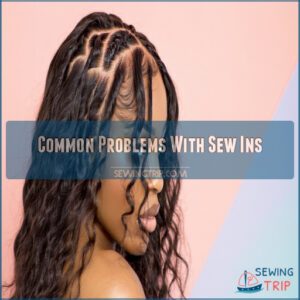
Sew-ins can sometimes lead to issues like itchiness or damage to your natural hair if not installed or cared for properly.
By understanding these common problems, you can take steps to avoid them and keep your hair healthy.
Itchiness
An itchy scalp can make sew in hair extensions unbearable.
Avoid the discomfort by maintaining proper scalp soothing practices.
Use aloe vera or apply tea tree oil to calm itchy roots from hair irritation.
Stick to gentle shampoos and conditioners, especially if you have sensitive skin.
Here’s a quick reference:
| Issue | Cause | Solution |
|---|---|---|
| Itchy roots | Tight braids or irritation | Massage scalp with oils |
| Allergic reactions | Cheap synthetic hair | Use high-quality extensions |
| Hair irritation | Product buildup | Wash extensions weekly |
A clean routine keeps itching at bay!
Damage to Natural Hair
Don’t let hair damage from sew-ins take away your confidence.
Tight braids can cause traction alopecia, leading to hair loss or permanent thinning.
Keep your natural hair safe by prioritizing gentle techniques and avoiding excessive tension.
Regular use of moisturizers prevents hair breakage and scalp irritation, while steering clear of heat tools helps with frizz control.
Schedule checkups with a stylist to catch early signs of hair shedding, split ends, or improper tracks.
Removing Sew in Extensions
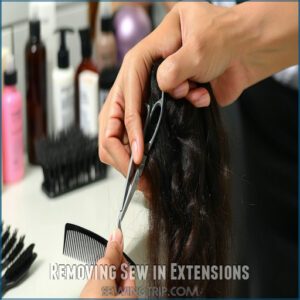
Removing sew-in extensions requires care to protect your natural hair from damage.
Take your time to carefully cut the thread and avoid cutting your own hair—when in doubt, it’s best to consult a professional.
Avoid Cutting Own Hair
Cutting out your own sew-in hair extensions might seem tempting, but it’s a slippery slope toward hair regrets.
Without proper tools or visibility, you’re likely to snip natural strands or ruin wefts permanently. Understanding the sew in removal process is essential to avoid common mistakes.
What could go wrong?
- Hair Trimming Tips ignored: Improper cutting leads to uneven or excessive breakage.
- Threads hide, risking natural hair damage.
- Cutting Techniques fail without experience. Spare yourself—this “shortcut” ends up costing more.
Seeking Professional Help
Getting a sew-in professionally removed safeguards your natural hair from unnecessary damage.
A skilled sew-in stylist near you can guarantee a smooth process while preserving your hair’s health.
During a hair consultation, ask about Professional Fees and methods used.
Check Salon Reviews and seek Expert Advice to find a reliable professional hairstylist.
Here’s a quick comparison of factors:
| Factor | DIY Removal | Professional Removal |
|---|---|---|
| Risk of Breakage | High | Low |
| Time Investment | Longer | Faster |
| Hair Health Outcome | Uncertain | Safer |
Choosing expert hands means your hair extensions will be removed with care, avoiding breakage while protecting your scalp and natural hair.
Sew in Extensions Vs Other Methods
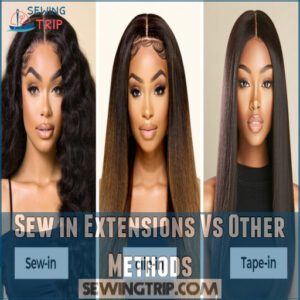
When choosing between sew-in extensions and other methods like clip-ins or tape-ins, it’s important to take into account your lifestyle and hair goals.
Sew-ins offer durability and a natural look, while clip-ins and tape-ins are quicker to apply but less secure.
Clip-Ins
How can you upgrade your look instantly without the commitment of sew in hair extensions?
Clip-in extensions are your go-to temporary fix for effortless styling.
They’re a breeze to apply, affordable, and kind to your natural hair.
| Advantages | Clip-in Extensions | Sew-in Extensions |
|---|---|---|
| Application Time | Minutes | Hours |
| Longevity | Temporary | Weeks |
| Damage Risk | Minimal | Moderate |
| Styling Flexibility | High | Moderate |
| Maintenance Cost | Low | High |
Clip-in methods let you experiment with hair accessory styles, from volume boosts to color changes.
Plus, clip-in safety is unmatched for beginners exploring different hair extension types.
Tape-Ins
If you’re eyeing versatility and speed, Tape In Methods may outshine sew in hair extensions—but both have their strengths.
Tape-ins use Hair Adhesives for a lightweight, seamless application, ideal for a quick hair extension installation.
They’re easier to refresh than sew-ins but demand gentler care to keep bonds intact.
| Feature | Tape-Ins | Sew-Ins |
|---|---|---|
| Lifespan | 4-8 weeks | 6-8 weeks |
| Application | Adhesive-based | Braided foundation |
| Maintenance | Frequent adjustments | Touch-ups as needed |
| Cost | $200-400 | $300-600 |
To remove tapein extensions safely, use oils or products designed for Extension Removal—or trust a stylist!
Finding a Stylist for Sew Ins
Finding the right sew-in stylist near you can make or break your hair extension journey.
A skilled stylist isn’t just skilled—they’re your hair’s partner in crime.
Look for someone with 2+ years of experience in sew-in extensions, backed by a professional certification in hair extension installation.
Their portfolio should show recent work that matches your vibe, and salon reviews are a goldmine for honesty.
Start asking friends with extensions or browsing directories like StyleSeat for a professional hair stylist who aligns with your goals.
Always book a hair consultation first—this is your time to discuss your vision and assess their fit.
Clear pricing is key, so confirm costs for both installation ($150–$600) and hair ($80–$600).
Remember, cheap work could cost more later.
Trust your gut with this, because the right stylist promises confidence, comfort, and a flawless sew-in extension experience.
Understanding the basics of hair extension techniques is essential for a successful sew-in installation.
Frequently Asked Questions (FAQs)
Can you sew in hair extensions?
Think sewing in extensions is too complicated?
It’s easier than you’d expect.
With braids as your base, a curved needle, and matching thread, you can securely attach wefts for a natural, polished look.
What are sew in hair extensions?
Sew-in hair extensions are sections of hair sewn onto braided natural hair using a needle and thread.
They’re a great way to add length, volume, or color, offering a durable, natural-looking style.
How do you install sew in extensions?
Practice makes perfect, so start by parting your clean, detangled hair and braiding it into neat cornrows.
Securely sew extensions onto the braids using a curved needle and strong thread, ensuring even tension throughout.
How do you sew in hair extensions?
Start by braiding your natural hair into cornrows as a base.
Attach the extensions by sewing them onto the braids with a curved needle and matching thread, ensuring even tension for a secure, natural look.
Are sew in extensions a good option?
Picture effortlessly longer, fuller hair framing your face.
Sew-in extensions are a great choice if you want durability and a natural look.
They’re reliable but require time, investment, and proper care for best results.
How to install sew-in hair extensions?
Prep your natural hair with clean, detangled cornrows.
Sew the extensions onto braids using a curved needle and matching thread, work bottom-up, keeping tension balanced.
Secure knots, style as desired, and protect overnight.
Can you do sew-in extensions yourself?
Sure, you can do sew-in extensions yourself, but it’s like giving yourself a tattoo—technically possible, but tricky and risky.
Without experience, you might damage your hair.
A stylist guarantees better results and safety.
How many bundles do I need for sew in extensions?
You’ll need 2-3 bundles for a full sew-in, depending on the length and volume you want.
Shorter extensions typically need fewer bundles, while longer ones or fuller looks might need all three, which can be considered a full sew-in.
How much do you tip on $1000 hair extensions?
Tip thoughtfully—the golden guideline for $1,000 extensions is 15-20%, so aim for $150-$
Appreciate the artistry, knowing your stylist’s skill shapes your look.
If service dazzled, go higher to truly show gratitude!
How long do sewn-in hair extensions last?
Sew-in hair extensions typically last 6 to 8 weeks with proper care.
Keep up with gentle maintenance, avoid harsh products, and schedule touch-ups to keep them secure and looking fresh throughout their lifespan.
Conclusion
Mastering how to do sew in extensions is like weaving a masterpiece—it takes patience, precision, and care.
By following these steps, from prepping your hair with secure anchor braids to sewing in extensions and ensuring proper maintenance, you’ll achieve a stunning, natural look.
Remember to handle your sew-ins gently, using sulfate-free products and keeping tension minimal during styling.
With regular upkeep and attention, your extensions will stay flawless, boosting your length, volume, and confidence.
- https://hottiehair.com/ufaqs/sew-in-hair-extensions-a-comprehensive-guide/
- https://www.wikihow.com/Sew-in-Hair-Extensions
- https://www.cliphair.com/blogs/hair-blog/the-ultimate-guide-to-sew-in-hair-extensions
- https://www.pinterest.com/ajsholar84/buns-updos-ponytails/
- https://saloninvi.com/brushing-hair-correctly/

