This site is supported by our readers. We may earn a commission, at no cost to you, if you purchase through links.
 You can enlarge a sewing template using several straightforward methods.
The slash and spread technique works best – simply draw lines where you want expansion, cut along them, and spread the pieces apart on paper to create your larger pattern.
You can also use a photocopier to scale up the entire template by percentage, or digitally resize it using your phone camera and basic editing software.
For precise fitting, take your measurements first and calculate the exact enlargement needed.
Pattern grading rulers help maintain proper proportions while adjusting.
Each method has its sweet spot depending on your tools and the complexity of your project.
Table Of Contents
Key Takeaways
- Measure first, then calculate your enlargement ratio – Take accurate body measurements and divide them by the pattern’s dimensions to determine exactly how much you will need to scale up your template.
- Use the slash and spread method for precise control – Draw lines where you want expansion, cut along them, and spread the pieces apart on paper to add size exactly where you need it.
- Try digital scaling with your smartphone – Photograph your pattern clearly and use basic editing software to resize it, which works great when you do not have access to a photocopier.
- Do not exceed two full sizes without advanced techniques – You can safely enlarge patterns up to 4-6 inches total, but larger increases require professional grading methods to maintain proper fit and proportions.
Determine Needed Pattern Size
Start by measuring yourself accurately to determine your target size. Take your body measurements including bust, waist, and hips using a flexible measuring tape. Record these numbers and compare measurements against the pattern’s finished garment dimensions listed on the envelope.
This comparison reveals your enlargement ratio – the mathematical relationship between your measurements and the pattern’s current size. Calculate how much you’ll need to enlarge each pattern piece by dividing your measurements by the pattern’s measurements. For example, if your bust measures 40 inches and the pattern’s bust is 36 inches, you’ll need roughly 11% enlargement.
Master the math first – your measurements divided by the pattern’s measurements equals your enlargement ratio.
Don’t forget to account for ease – the extra room built into garments for comfort and movement. To guarantee the best fit, consider using a muslin mock-up to test your pattern adjustments.
Before making changes, trace your original pattern onto fresh paper to preserve it. Mark all important details like grainlines, notches, and construction marks. When you’re ready to redraw edges after enlargement, remember to add appropriate seam allowances to maintain proper construction. This groundwork guarantees your sewing template enlargement will fit perfectly.
Capturing and Editing The Pattern Photo
When you can’t access a photocopier, your smartphone becomes your best enlargement tool.
Simply photograph your pattern clearly, then use basic photo editing software like Paint to resize it to your exact measurements.
Taking a Picture With Your Phone
Once you’ve determined your needed pattern size, capture a clear photo of your original pattern using your smartphone.
This digital approach streamlines sewing template enlargement and gives you flexibility with pattern enlargement techniques.
Position your phone directly above the pattern piece to avoid perspective distortion.
Here’s how to get professional results:
- Lighting Techniques: Use natural daylight or bright LED lights to eliminate shadows and guarantee even illumination across the entire pattern.
- Camera Settings: Enable your smartphone’s grid lines and use portrait mode if available for sharper focus on the pattern details.
- Image Stabilization: Hold your phone steady with both hands or use a tripod to prevent blur that could affect enlargement accuracy.
- Perspective Correction: Keep your phone parallel to the pattern surface to maintain accurate proportions for scaling.
- App Filters: Avoid using filters that might alter the pattern’s dimensions or clarity during the enlargement process.
Take several shots from the same angle and choose the clearest image for your sewing pattern enlargement methods.
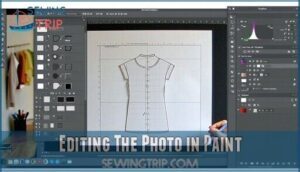
Editing The Photo in Paint
Once you’ve captured your pattern photo, open it in Paint’s interface to clean up the image.
Adjust the brightness and contrast for better image clarity, then use the line tool to darken faded pattern lines.
Make color adjustments to enhance visibility of markings and measurements, which helps guarantee accurate resizing.
Understanding pattern layout is crucial for this step, as it confirms your enlarged sewing pattern will be accurate when you apply template scaling methods.
Save in appropriate formats for your pattern enlargement needs, ensuring that your digital pattern resizing prep is complete and your enlarged sewing pattern will be accurate.
Understanding Pattern Grading
Pattern grading transforms your sewing template into the perfect size for your measurements.
It’s the magic behind turning that too-small pattern into a custom fit that actually works for your body.
Supplies for Resizing Patterns
Getting your tools ready makes pattern enlargement methods much smoother. You’ll need pattern paper for tracing your enlarged pieces, plus grading rulers that help shift lines precisely during template scaling.
Measuring tape guarantees accurate dimensions, while French curves redraw armholes and necklines perfectly. Don’t forget tracing wheels for transferring markings. These are essential for reliable pattern reproduction.
- Pattern paper – Creates clean copies without damaging originals
- Grading rulers – Provides multiple parallel edges for consistent adjustments
- French curves – Reshapes curved areas like necklines after scaling
- Measuring tape – Verifies body measurements match your enlarged template
These sewing supplies transform any enlarge sewing pattern project into manageable steps.
Making The Pattern Match Your Measurements
Before calculating your enlargement ratio, measure your body at key points: bust, waist, hips, and desired garment length.
Compare these body measurements to the pattern’s original dimensions.
Divide your measurements by the pattern’s to find your enlargement ratio and use this ratio to redraw edges accurately, maintaining proper seam allowances throughout your pattern alteration process.
Addressing Length Increases
Length adjustments require careful planning to maintain your garment’s proportions.
When you enlarge sewing pattern pieces, distribute length increases across multiple sections rather than adding bulk to one area.
Consider these key length zones for pattern enlargement:
- Torso Length: Add increments above and below the waistline
- Sleeve Length: Extend at the elbow and wrist areas gradually
- Pant Length: Distribute additions between knee and hem sections
Make incremental adjustments of 1-2 inches per section during pattern resizing.
This prevents distortion while preserving the original design’s balance and fit.
Techniques for Pattern Grading
Now that you understand what pattern grading involves, it’s time to learn the specific techniques that’ll help you resize your sewing templates accurately.
These two main methods—slash and spread, and shift—give you the control you need to adjust patterns without losing their original shape and fit.
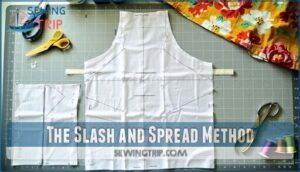
The Slash and Spread Method
The slash and spread method transforms your sewing pattern through strategic cuts and careful spreading.
Transform any pattern into your perfect fit with strategic cuts and careful spacing.
Start by drawing horizontal and vertical lines across areas needing enlargement—typically bust, waist, or hip regions. Cut along these lines, then spread each section apart by your desired spread amount, usually 1-2 inches for modest increases.
Tape the spread pieces onto fresh pattern paper, maintaining even spacing between cuts. This technique works brilliantly for complex shapes since you control exactly where size gets added.
After spreading, redraw smooth connecting lines—this blending lines step prevents awkward bumps in your finished garment. Understanding pattern grading basics guarantees the resized pattern maintains its original style and proportion.
Remember fabric considerations: stretch fabrics need less ease than woven ones. Always perform accuracy checks by measuring your enlarged pattern against body measurements.
The slash and spread method gives you precise control over pattern enlargement, making pattern resizing achievable for any sewing pattern project.
The Shift Method
While the slash and spread method works well for broad adjustments, you’ll find the shift method offers superior control for multi-size adjustments.
This technique creates minimal distortion while enabling precise fine tuning across pattern pieces. The shift method excels at pattern resizing through measured incremental shifts rather than dramatic cuts.
You’ll achieve customized outcomes by systematically moving pattern sections along predetermined lines. This grid method approach maintains original proportions while accommodating different body measurements.
Here’s how to master this sewing pattern enlargement technique:
- Calculate shift increments – Divide your total size increase by the number of shift lines (typically ¼ inch per size grade)
- Mark shift points – Draw parallel lines across your pattern where you’ll create the incremental shifts
- Execute systematic shifts – Move each section by your calculated measurement, taping pieces in their new positions
This method works particularly well when you need to enlarge sewing pattern pieces without compromising curved seams or complex design elements. You can find sewing product options to assist with this method.
Frequently Asked Questions (FAQs)
How to enlarge a pattern without a copier?
Don’t assume you need expensive equipment for this task.
Use the grid method: draw 1-inch squares on your original pattern, then create larger squares on new paper—2-inch squares double the size perfectly.
How to print a pattern larger?
You can’t print patterns larger directly, but you’ll achieve the same result using your computer’s print settings.
Select "poster" or "tile" mode, which breaks the pattern into multiple pages you’ll tape together for your enlarged template.
Can you enlarge patterns without changing proportions?
Yes, you can enlarge patterns proportionally using the grid method.
Draw a grid over your original pattern, then create a larger grid with bigger squares.
Transfer each section square by square to maintain exact proportions and design integrity.
Whats the maximum size increase for patterns?
How far can you stretch your creativity?
You can typically increase patterns up to two full sizes (roughly 4-6 inches) before needing advanced techniques like redrawing and re-slashing for proper fit.
How do you maintain fabric grain direction?
Keep your pattern’s grainline arrows parallel to the fabric selvage when tracing enlarged pieces. Transfer all grainline markings from your original pattern to maintain proper drape and fit.
Should you test enlarged patterns before cutting?
Picture yourself standing at your cutting table, scissors poised over precious fabric—you’ll absolutely want to test your enlarged pattern first.
Create a muslin mockup to catch fit issues before committing to your final material.
Can you enlarge vintage patterns safely?
Vintage patterns can be enlarged safely, but handle them gently since they’re often fragile.
Trace onto fresh paper first, then use grid or slash-and-spread methods to preserve the original while achieving your desired size.
Conclusion
Whether you’re adjusting vintage patterns, scaling modern designs, or creating custom fits, knowing how to enlarge a sewing template opens endless possibilities for your projects.
You’ve learned digital methods, traditional grading techniques, and precise measurement calculations.
Choose the slash and spread method for simple adjustments, digital scaling for quick results, or professional grading for complex patterns.
Each technique serves different needs and skill levels, and with practice, you’ll confidently resize any pattern to achieve perfect-fitting garments every time.
- https://vintagesewingpatterncompany.com/blogs/news/tailoring-tricks-how-to-increase-sewing-pattern-size-easily
- https://www.sewingpatternsbymasin.com/journal/my-pattern-making-tools
- https://www.sewingideaswap.com/enlarging-a-pattern/
- https://customstyle.wordpress.com/2013/07/09/pattern-sizing-experiment-part-1-grading-vs-ratios/
- https://browzwear.com/blog/mastering-pattern-grading-and-size-scaling-digitally-precision


