This site is supported by our readers. We may earn a commission, at no cost to you, if you purchase through links.
 A stuck zipper pull can turn a perfectly good jacket into deadweight at the back of your closet. The tab snaps off, the loop splits, or the slider refuses to catch—and suddenly you’re weighing the cost of professional repair against replacement.
Most broken zipper pulls don’t need either. With needle-nose pliers, a replacement tab, and ten minutes, you can restore function to zippers on coats, bags, and pants.
The fix hinges on understanding what failed: the pull itself, the slider it attaches to, or the teeth beneath. Once you’ve identified the damage, removal and replacement follow a straightforward sequence that works across most zipper types.
Table Of Contents
Key Takeaways
- Most zipper pull failures don’t require professional repair or full replacement—you can fix them yourself in ten minutes using needle-nose pliers and a matching replacement tab once you identify whether the problem is the pull, slider, or teeth.
- Accurate diagnosis matters more than quick fixes: check if the slider moves smoothly, inspect teeth alignment, and verify the pull’s attachment point before starting any repair to avoid wasting time on the wrong component.
- Replacement pulls must match your zipper’s size (#3, #5, or #10), material needs (metal for durability, plastic for lightweight use), and slider type (coil versus tooth designs), or you’ll end up with a repair that fails immediately.
- Preventive maintenance—monthly lubrication with graphite or wax, regular debris cleaning, avoiding forced zipping, and storing garments unzipped—extends zipper life far more effectively than repeated repairs.
How to Identify a Broken Zipper Pull
Before you start any repair, you need to know exactly what’s wrong with your zipper. A broken pull can show up in several ways, and understanding the damage helps you choose the right fix.
Let’s look at the key signs, materials, and assessment steps that will guide your repair.
Common Signs of a Broken Zipper Pull
A zipper pull that won’t budge, slips off entirely, or dangles by a thread signals it’s time for a quick fix before the whole zipper becomes unusable. Check for cracks in the pull tab itself or a loose connection to the slider.
Zipper jams often stem from worn metal or frayed fabric loops. If the slider moves but doesn’t catch, tooth breakage may be the culprit requiring immediate zipper repair.
Types and Materials of Zipper Pulls
Pulls come in coil and tooth designs—coil types use a continuous nylon chain, while tooth zippers rely on individual metal or plastic segments that grip together.
Metal finishes offer zipper durability for jackets and bags, while plastic materials suit lightweight clothing repair.
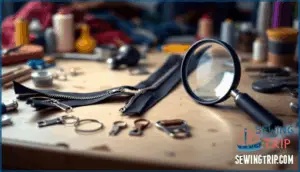
Custom designs vary in loop size—matching your slider guarantees smooth zipper repair. Sourcing the right zipper parts prevents future zipper replacement headaches.
Assessing Zipper Damage Before Repair
Before you grab any tools, check whether the slider glides smoothly or if teeth are missing—sometimes what looks like a pull problem is actually a zipper track issue. Conduct a proper zipper inspection to separate pull-specific zipper problems from deeper zipper component failures. This damage assessment guides your repair planning and helps you avoid unnecessary work.
- Slider movement: Does it catch, skip, or separate the teeth when you test it?
- Tooth alignment: Are individual zipper components bent, broken, or missing from either side?
- Fabric stress: Check for puckering or torn material around the zipper track that signals zipper maintenance neglect.
- Pull attachment: Verify the loop or hook connecting your pull to the slider—loose connections masquerade as zipper types requiring full replacement.
Accurate fault diagnosis prevents wasting time on zipper repair when a repair technician should manage complete zipper replacement instead.
Removing The Damaged Zipper Pull
Once you’ve confirmed your zipper pull is damaged, the next step is removing it without harming the slider or surrounding teeth.
The method depends on whether your pull has a closed loop, an open hook, or requires removing zipper stops first.
Here’s how to tackle each scenario safely.
Safely Prying Off Closed Loops
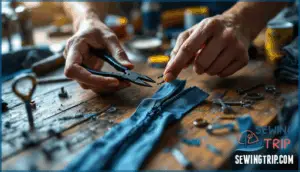
When that tiny metal loop refuses to budge, you’ll need the right grip and a steady hand to coax it free without mangling the slider beneath. Grab needle nose pliers or a flathead screwdriver as your pry tool. Position the tip at the loop’s base where it connects to the zipper slider.
Apply gentle, controlled pressure—rock it side to side rather than yanking straight up. This fastener safety approach prevents slider repair disasters and preserves your zipper for successful replacement.
Handling Open Loops and Hooks
If your pull tab features an open-ended loop or a simple hook, you’re in luck—these slip off with barely any resistance. Here’s your loop repair roadmap:
- Grip the old pull tab at its base where it connects to the zipper slider
- Slide it upward through the open hook or loop without twisting
- Inspect the slider for wear or damage requiring adjustment
- Clean any debris from the slider mechanism before fastener replacement
- Test the slider movement to confirm it glides smoothly along both tracks
This sewing technique takes seconds and requires no tools for zipper maintenance.
Removing Zipper Stops for Access
Some zippers won’t surrender their pull tabs without first unlocking the metal stops that anchor the slider to the tracks. For non-separating zippers, grip the bottom zipper stopper with needle nose pliers or end nippers and twist until it pops free. Separating zippers require removing the top stop instead.
This slider access step is essential for coil type zippers and fastener replacement when zipper teeth repair blocks your path to zipper replacement.
Choosing and Sourcing a Replacement Pull
Once you’ve removed the damaged pull, you need a replacement that fits your zipper properly. The right size and material make all the difference between a smooth fix and a frustrating one.
Here’s what you need to know to find or create the perfect replacement.
Selecting The Right Size and Material
Your replacement pull needs to match both the slider’s opening size and the zipper’s intended use, or you’ll end up with a repair that fails the first time you zip up.
Here’s what matters when selecting your replacement pull tab:
- Zipper size: Measure the slider’s width—usually #3, #5, or #10—and match it precisely
- Material choice: Metal for durability, plastic for lightweight garments, coated pulls for weather resistance
- Pull strength: Heavy-duty jackets need sturdy fasteners; delicate bags require gentler options
- Slider type: Coil zippers accept different pulls than tooth-style zippers
- Fastener quality: Check that loops close securely to prevent the pull from detaching during use
Match these factors to your specific zipper repair needs for reliable results.
Where to Find Replacement Zipper Pulls
You can find replacement zipper pulls at both online retailers and brick-and-mortar stores that stock zipper repair supplies. Specialist sewing shops like WAWAK list over 85 replacement pull tab options, while Amazon and eBay carry universal kits. Craft stores such as JoAnn and Michaels stock zipper parts, including pulls and zipper slider replacements. For bulk needs, wholesale markets like YKK serve tailors with lots of 100 to 1,000 pieces. Eco-friendly options using recycled materials now represent 15% of new designs, and custom designs are available for branded or themed pulls. When searching for replacement parts, consider checking the zipper pull options available from various suppliers.
| Source Type | Examples & Details |
|---|---|
| Online Retailers | WAWAK, Amazon, eBay, Etsy—multi-pack kits and same-day shipping |
| Brick Stores | JoAnn, Michaels, REI, Ace Hardware—repair kits with 5+ pulls |
| Wholesale Markets | YKK, Asian suppliers—bulk lots for professional repair shops |
| Eco Friendly | Recycled plastics, bio-based polymers—15% of 2025 designs |
| Custom Designs | Branded logos, team colors—3–7 day turnaround for small orders |
DIY Alternatives: Key Rings, Cords, and Ribbons
When you don’t have a replacement pull on hand, everyday items like key rings, paracord, and ribbon can step in to get your zipper working again. Thread a small key ring through the slider hole for instant grip.
Cord fixes work by knotting paracord or shoelace through the tab opening.
Ribbon repairs add flair—weave fabric ribbon for a soft, decorative DIY fastener that’s both functional and personal.
Installing The New Zipper Pull
Once you’ve found the right replacement, the actual installation is straightforward. You’ll attach the new pull tab to the slider, make sure everything’s secure, and test it out.
The key is taking your time and managing the zipper carefully so you don’t create new problems while fixing the old one.
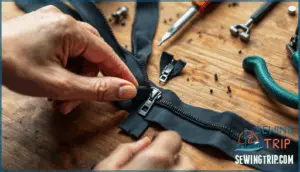
Attaching Replacement Pull Tabs Correctly
Once you’ve got the right replacement in hand, attaching it’s simpler than you’d think—it’s all about threading the loop through the slider opening without forcing anything. Here’s how to get it right:
- Align the pull tab with the slider’s metal loop opening before threading
- Guide the replacement pull tab onto the zipper slider gently to avoid bending
- Check the zipper track remains straight and undamaged during attachment
- Test tab security by tugging lightly once fastened—no wiggle room means success
Securing The Loop and Slider
After the pull tab’s in place, locking everything down takes just a careful squeeze with your pliers—this step keeps the slider from losing its grip mid-zip. Apply gentle pressure to the loop’s base where it connects to the slider, guaranteeing loop security without bending the metal.
Check zipper alignment by running the slider up and down. If it catches or separates, adjust the slider’s tension slightly. Proper securing techniques prevent pull tab fixing issues down the road.
Tips to Avoid Damaging The Zipper
One wrong move with your pliers or too much force on the slider, and you’ll turn a simple fix into a complete zipper replacement job. Use delicate manipulation when squeezing metal components—think tension control, not brute strength.
For zipper maintenance tips, apply zipper lubrication like graphite or beeswax to reduce friction. Match your fabric choice to the pull weight, avoiding zipper problems before they start.
Proper zipper care beats constant zipper component replacement.
Troubleshooting and Preventing Zipper Pull Issues
Even the best repair won’t last if your zipper keeps getting stuck or separating. You can avoid repeat breakages by learning how to fix common problems and maintain your zippers properly.
Here’s what you need to know to keep your pulls working smoothly and decide when it’s time to call in a professional.
Fixing Separated or Stuck Zippers
A zipper that splits apart or refuses to budge can derail your day, but most separation and jamming issues stem from a handful of fixable problems.
If your zipper separates after you zip it, gently squeeze the slider with pliers to tighten its grip on the teeth.
For stuck zippers, apply zipper lubrication—graphite pencil, soap, or wax—along the teeth. Check for fabric caught in the slider and realign bent teeth with needle-nose pliers.
Maintaining Zippers to Prevent Breakage
Preventive care—cleaning, lubricating, and mindful use—keeps zippers running smoothly for years.
Follow these zipper maintenance tips to prevent wear and avoid zipper problems:
- Clean debris regularly from teeth using a soft brush to remove dirt that causes friction
- Apply zipper lubrication monthly with graphite or wax for smooth operation and metal protection
- Avoid forcing stuck zippers—gentle pressure prevents tooth damage and fabric selection matters for durability
- Store garments unzipped to reduce tension on sliders and extend clothing maintenance intervals
When to Seek Professional Repair Services
Professional judgment matters when zipper damage exceeds simple pull replacement. Seek garment repair services for complex zipper malfunction, broken teeth, or high-value items where Service Quality justifies Professional Fees. Regular zipper maintenance is vital to prevent further damage and guarantee the longevity of the garment.
| Situation | DIY or Professional | Reason |
|---|---|---|
| Broken pull tab only | DIY repair | Simple replacement with minimal cost |
| Missing or damaged teeth | Professional repair services | Requires full zipper replacement and expertise |
| Designer or expensive garment | Professional | Damage Assessment protects investment value |
| Multiple zipper issues | Professional | Cost Analysis may favor expert Clothing Maintenance with Repair Warranty |
Professional zipper repair usually includes warranty coverage and proper Damage Assessment, guaranteeing your garment returns in working order.
Frequently Asked Questions (FAQs)
Can a zipper pull be fixed?
Yes, most zipper pulls can be fixed. Think of the pull as your zipper’s grip—lose it, and the whole system stalls.
You can replace broken pull tabs by removing the damaged piece and installing a new one on the zipper slider.
How do you fix a broken zipper slider?
To fix a broken zipper slider, start by removing it from the zipper track. Squeeze the slider gently with pliers to tighten loose metal or plastic parts.
If repairing coil zippers or metal zipper track issues fails, slider replacement becomes necessary for jacket zippers.
How do you remove a zipper pull?
Removing a zipper pull is like unlocking a stubborn door—you need the right approach. Use pliers to pry off the loop at the slider’s top, gripping firmly at the base.
For open loops, simply lift the pull tab off without tools.
How do I replace a broken zipper pull?
To replace it, slide your new pull tab onto the zipper slider loop. If the loop is closed, pry it open with pliers first.
Match your replacement pull tab size to your slider—heavy-duty zippers need larger pulls, smaller sliders need proportionate designs.
Can you repair a zipper pull?
You can repair most zipper pulls through slider replacement or pull tab repair. Zipper component replacement restores functionality without replacing the entire zipper.
Fixing coil zippers and repairing jacket zippers require proper zipper maintenance and care tips.
How do you replace the pull tab on a zipper?
To replace your pull tab, first pry off the old loop using pliers.
Then slide your new pull tab onto the zipper slider, confirming it matches your zipper type—coil or tooth—and secure it properly using appropriate fastening techniques.
How to fix a zipper that separates?
Did you know that roughly 40% of zipper failures stem from slider issues rather than broken teeth? If your zipper keeps separating after you zip it up, squeeze the slider gently with pliers.
This Zipper Alignment adjustment tightens the Zipper Slider, helping it grip the coil or teeth properly and preventing that frustrating Separating Zipper problem.
How do you get a zipper back on track?
To get your zipper back on track, realign the slider at the bottom and slowly guide it upward, confirming both sides of the teeth meet evenly.
Apply zipper lubrication if needed for smooth fastener adjustment during repair.
Can I customize my zipper pull design?
Absolutely—you can personalize your zipper repair with custom tabs and DIY designs. Try metal engraving, laser cutting, or simple DIY crafting using beads, charms, or woven cord for unique fashion accessories that transform functional zipper art into stylish accessorizing statements.
What materials are best for zipper pulls?
Metal options like brass and stainless steel offer durability. Plastic alternatives work well for lightweight zippers.
Leather choices add style to jackets and bags.
Nylon materials resist wear on outdoor gear.
Recycled products provide eco-friendly zipper pull solutions.
Conclusion
A snapped pull tab looks like failure, but it’s actually just a loose thread in the system. Once you know how to fix a broken zipper pull, the repair becomes maintenance—not crisis management.
You’ve removed the damage, matched the replacement, and secured the loop without straining the slider. The zipper works again because you understood what broke and addressed it with precision.
That jacket doesn’t belong in the closet. It belongs back in rotation.

