This site is supported by our readers. We may earn a commission, at no cost to you, if you purchase through links.
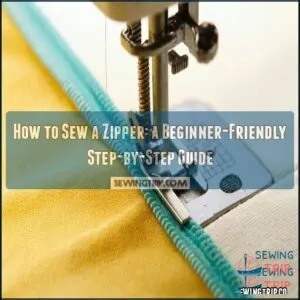 To sew a zipper, start by choosing the right type and length for your project.
Prepare your fabric by pressing the seam allowance open and marking where the zipper will go. Pin or tape the zipper in place, aligning its teeth with the center of the seam.
Attach your sewing machine’s zipper foot—it’s a real game-changer for precision! Sew close to the teeth on both sides, backstitching at the ends for durability.
Remove pins as you go to avoid breaking needles. Finally, press the seam for a polished look.
Once you’ve mastered the basics, invisible zippers and tricky fabrics await!
Table Of Contents
Key Takeaways
- Prepare your fabric by pressing seam allowances, marking zipper placement, and stabilizing edges with interfacing for a clean finish.
- Use a zipper foot on your sewing machine to stitch close to the zipper teeth with precision, ensuring alignment.
- Pin or baste the zipper in place before sewing to prevent shifting, and backstitch at both ends for durability.
- Troubleshoot issues like stuck zippers, broken teeth, or faulty pulls with simple tools like pliers and seam rippers.
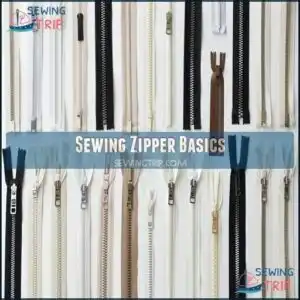
Sewing Zipper Basics
To sew a zipper, you’ll need the right tools, a prepared fabric edge, and a plan for alignment.
Understanding zipper types and sizes is essential for choosing the best one for your project.
Essential Tools and Materials
To sew a zipper smoothly, you’ll need a few essential tools.
Start with a sturdy sewing machine and the right zipper foot. Here’s a quick checklist:
- Zipper foot types: Standard or invisible zipper feet work great.
- Sharp scissors: Clean cuts guarantee neat edges.
- Needle size guide and thread: Match your fabric weight and color.
A specialized foot helps with precise zipper application.
Have pins and a seam ripper handy, too. These basics make zipper sewing easier and more professional!
Fabric Preparation Techniques
Before you sew a zipper, start with solid fabric preparation to avoid issues like puckering or uneven seams.
First, double-check your fabric edges. Use sharp scissors for clean, straight cuts. Stabilize stretchy or delicate fabric with interfacing—it adds structure and prevents distortion.
Don’t forget to pre-shrink fabric by soaking it in hot water if it’s prone to shrinking later. Secure raw edges by finishing them with a zigzag stitch or serger to stop fraying.
Verify proper seam finishing by pressing edges smooth with a warm iron. Mark zipper alignment clearly using tailor’s chalk or a fabric pen.
Remember to use a zipper presser foot for accuracy. Careful preparation means your zipper will glide smoothly, making your project look neat and professional.
Zipper Types and Sizes
Choosing the right zipper starts with matching it to your project.
Metal zippers suit jeans and heavy fabrics due to their durability.
Coil zippers handle curves well, while invisible types blend perfectly in formal wear.
Always check the Zipper Size Guide to confirm the right fit.
Plastic zippers offer lightweight, colorful, and budget-friendly options.
Understanding available zipper dimensions is vital for project success.
Remember, zipper lengths must match the opening for smooth application!
How to Sew a Zipper
Installing a zipper might seem tricky, but it’s manageable if you break it into steps. Here’s how to sew zippers like a pro:
- Place the zipper face down on the fabric’s right side. Align its teeth precisely with the seam allowance for a polished look.
- Use pins or baste it in place for stability; this prevents shifting as you sew.
- Attach the zipper foot to your sewing machine, adjusting tension as needed for smooth stitching. A zipper foot guide guarantees precise stitching along the edge.
- Sew slowly along each side of the zipper, using backstitches at both ends for durability.
Remember to select the right zipper, as metal zippers offer a durable option for many projects.
Master invisible zipper tricks, exposed zipper styles, and zipper length hacks through patience and practice. Soon, zipper sewing will become second nature!
Master zipper sewing with patience—unlock invisible tricks, trendy styles, and length hacks to create polished, professional projects effortlessly!
Preparing Fabric for Zippers
Before you sew a zipper, you need to prepare your fabric carefully.
This includes cutting it to the correct size, reinforcing it with interfacing, and marking where the zipper will go.
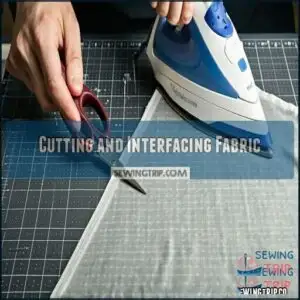
Cutting and Interfacing Fabric
Getting fabric ready starts with cutting along the fabric grain for stability—don’t rush this step.
Use interfacing to stabilize areas near zippers for a clean finish.
Check the table below for guidance:
| Fabric Type | Interfacing Type | Seam Allowance |
|---|---|---|
| Lightweight | Medium weight | 1/2 inch |
| Medium | Light fusible | 5/8 inch |
| Heavy | None needed | 1/2 inch |
| Stretch | Knit interfacing | 3/8 inch |
| Slippery | Spray stabilizer | 1/2 inch |
Secure interfacing on fabric edges before marking placement for a polished result!
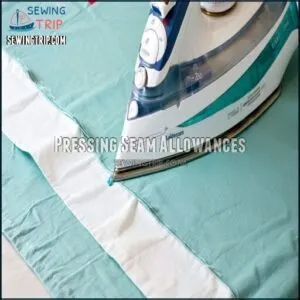
Pressing Seam Allowances
Before sewing, take a moment to press the seam allowance carefully.
Adjust your iron temperature to match the fabric type, and use a pressing cloth to avoid damage.
Press seam allowances open or follow the seam direction for your zipper style.
For curved seams, a tailor’s ham can help maintain shape.
Proper pressing sets the foundation for a neat zipper installation in your sewing tutorial.
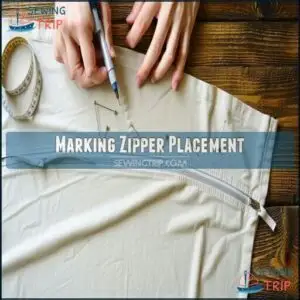
Marking Zipper Placement
With your seam allowances neatly pressed, it’s time to mark the zipper placement. Lay your fabric flat, right side up, and grab a fabric marker or pins.
Use accurate measurements for the zipper length to guarantee a snug fit. Mark along the seam allowance where your zipper will sit. Place everything carefully to guarantee zipper alignment.
Baste the opening with long stitches—it’ll hold things steady for the final sewing. For lightweight fabrics, consider adding interfacing support to enhance stability.
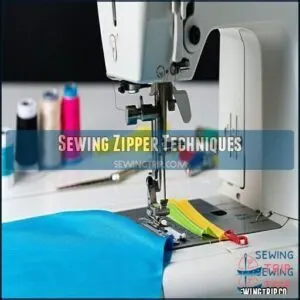
Sewing Zipper Techniques
You’ll need to master a few key steps to sew a zipper neatly and securely.
By attaching the zipper foot, stitching carefully along the teeth, and finishing with a strong backstitch, you can achieve clean, professional results.
Attaching Zipper Foot
To attach a zipper foot, swap out your presser foot by loosening the screw and sliding the zipper foot into place. Align it with the presser bar, then tighten the screw securely.
Make sure it’s snug by checking:
- Foot alignment: Matches your needle’s position for smooth stitching.
- Screw tightness: Prevents wobbling during sewing.
- Needle clearance: Avoids hitting the foot.
Most zipper feet adjust left or right, giving flexibility when sewing zippers. Many sewers find that having the right specialty sewing foot improves their project quality.
Sewing Along Zipper Teeth
Now that your zipper foot is ready, position the needle about 1/8 inch from the zipper teeth for precise stitch placement.
Use a medium stitch length (2.5-3.0) and sew slowly, ensuring steady teeth alignment with your zipper foot’s groove.
Needle selection matters—adjust it left or right to avoid hitting the teeth while keeping tension control steady.
A good zipper tutorial often highlights how patience is key. Remember zipper foot adjustments are necessary for the best results.
Pause if needed to check your progress and keep your zipper sewing smooth, straight, and neat throughout this zipper application process.
Finishing Touches and Backstitching
Finish your zipper sewing with precision. Start by using backstitching at both ends to lock in your stitches. Match your thread color for seamless results.
Trim extra threads and zipper tape cleanly. Gently press the seam with low heat for a polished look.
Test the zipper’s movement—smooth operation is key. For added zipper reinforcement and style, topstitch 1/4 inch from the seam.
These sewing techniques guarantee a durable, professional finish.
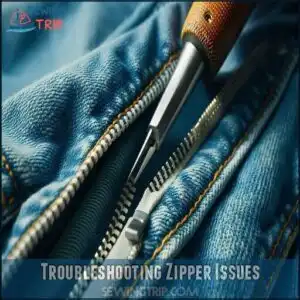
Troubleshooting Zipper Issues
When a zipper gets stuck, breaks, or pulls off, it can feel frustrating, but fixing it’s often easier than you think.
With the right tools and simple steps, you can solve common zipper problems quickly and keep your project on track.
Dealing With Stuck Zippers
A stuck zipper can be frustrating, but most zipper issues are easy to fix.
Stuck zippers are no match for patience—quick fixes like lubrication or tooth alignment restore smooth sliding in minutes!
Here’s how to tackle it:
- Zipper Lubrication: Rub a graphite pencil or zipper lubricant along the teeth.
- Tooth Alignment: Check for misaligned teeth and adjust carefully with pliers.
- Fabric Snags: Use a seam ripper to free trapped fabric gently—avoid tugging.
- Pull Tab Issues: Tighten a loose slider by squeezing it lightly with pliers.
- DIY Repairs: If all else fails, replacing the zipper might save your project.
Stay calm and troubleshoot patiently!
Repairing Broken Zipper Teeth
If broken zipper teeth mess you up, don’t sweat it—fixing them is doable.
Use pliers for metal teeth or consider coil repair for plastic ones. Alignment issues? Straighten teeth carefully. For a single missing tooth, trim it out.
Severe damage may call for professional repair or a full zipper replacement. Here’s a quick guide:
| Repair Type | Tools Needed | Difficulty | Cost | Durability |
|---|---|---|---|---|
| Tooth Replacement | Needle-nose pliers | Medium | Low | Long-lasting |
| Coil Repair | Scissors, thread | Easy | Minimal | Temporary |
| Alignment Issues | Small pliers | Easy | None | Permanent |
| Temporary Fixes | Safety pin/paper clip | Very Easy | None | Short-term |
| Professional Fix | N/A (visit a tailor) | N/A | Moderate | Permanent |
Test the zipper repair by sliding it up and down. Keep it aligned and smooth.
Replacing a Faulty Zipper Pull
Replacing a zipper pull is easier than you think, and it’ll save you from tossing out a perfectly good item. Start by gently using pliers to remove the damaged pull—this is called Pull Removal. Next, slide a New Pull onto the zipper track from the top. Make sure it’s the correct size because Matching Pulls are key for smooth operation. Finally, secure the Pull Installation by squeezing it lightly with pliers.
Before calling it done, test the zipper by sliding it up and down to confirm success.
- Tools you’ll need: pliers, seam ripper, and the replacement pull
- Common uses: jackets, boots, and bags
- Quick tip: Test replacement immediately
Frequently Asked Questions (FAQs)
How to sew a zipper for beginners step by step?
Start by pinning the zipper face-down along the fabric edge.
Use a zipper foot to sew close to the teeth. Backstitch at ends for durability.
Practice patience—sewing zippers gets easier with each attempt!
Are zippers difficult to sew?
Sewing a zipper can feel like wrestling a slippery fish at first, but with practice and patience, it gets easier.
Use pins, a zipper foot, and clear instructions to keep everything aligned smoothly.
What is the best stitch to sew a zipper?
A straight stitch works best for sewing zippers.
Use a zipper foot to get close to the teeth for precise stitching.
Always backstitch at both ends to keep the zipper secure and long-lasting.
How to sew zipper with zipper foot?
Putting the zipper in with a zipper foot is a "piece of cake."
Line up the zipper along the seam, pin it down, switch to the zipper foot, and sew close to the teeth carefully.
Can you sew in a zipper?
Yes, you can sew in a zipper with ease using a zipper foot.
Align it carefully, pin it securely to the fabric.
Sew close to the teeth for a clean, professional finish.
How to sew fabric pieces onto a zipper?
Align the zipper face down on your fabric’s raw edges, pin in place, and use a zipper foot for stitching.
Sew one side, pivot at the bottom, then repeat on the other side.
How do you sew a zipper with a Ripper?
To sew a zipper with a seam ripper, baste the seam closed, attach the zipper, and stitch around it.
This process allows for a functional and cleanly sewn zipper. Use the ripper to open the basted seam afterward, revealing the result.
Is a zipper pouch a good sewing project?
Ever wonder if zipper pouches make great projects?
They’re perfect for practicing zipper skills, managing simple seams, and creating something useful.
You’ll learn basics quickly, plus they’re handy for storage or gifts!
How to sew a zip step by step?
Position your fabric and zipper, pin it carefully, and attach the zipper foot.
Sew down one side, across the base, and back up.
Remove basting stitches, test the zipper, and press it neatly.
Are zippers easy to sew?
Sewing zippers might feel like climbing a mountain at first, but they’re surprisingly manageable.
With practice, the right foot attachment, and patient prep, you’ll zip through projects confidently in no time.
Conclusion
Mastering how to sew a zipper can feel like discovering a new skill in crafting.
Start with the basics—prepare your fabric, use the zipper foot, and sew carefully along the teeth.
Backstitch for strength and press for a clean finish, paying attention to small details, like alignment and stitching precision, for a polished result.
With practice, zippers become less intimidating, opening up endless sewing possibilities. Soon, even tricky projects won’t seem so challenging!

