This site is supported by our readers. We may earn a commission, at no cost to you, if you purchase through links.
Start by identifying the problem: is the slider stuck, are teeth misaligned, or has the zipper completely separated?
For separated zippers, use pliers to remove the bottom stop, then carefully guide both sides of the zipper back into the slider. Realign the teeth by gently working the slider up and down.
Once everything’s lined up properly, reattach a new stop or sew one in place. A bit of soap or graphite from a pencil can help lubricate stubborn zippers.
The real magic happens when you master the specific techniques for different zipper types and problems, and learn to apply a bit of soap or graphite to make the process smoother, leading to a perfectly working zipper with simple tools.
Table Of Contents
- Key Takeaways
- Fixing Broken Zippers
- How to Fix Broken Zippers
- Zipper Repair Techniques
- Fixing Zipper Function Issues
- Replacing Zipper Components
- Shortening Zippers
- Repairing Specialized Zippers
- Preventing Zipper Damage
- Advanced Zipper Repair
- Troubleshooting Zipper Issues
- Frequently Asked Questions (FAQs)
- Conclusion
Key Takeaways
- Diagnose first, then fix – You’ll save time by identifying whether you’re dealing with a stuck slider, misaligned teeth, or broken stops before grabbing your tools.
- Master the slider squeeze technique – You can fix 80% of zipper separations by gently squeezing the slider’s sides with pliers to restore the proper grip on the teeth.
- Use household items as lubricants – You’ll get stuck zippers moving again with soap, petroleum jelly, or graphite from a pencil applied along the teeth.
- Don’t force it – You’ll prevent further damage by working slowly and patiently, especially when realigning teeth or threading sliders back onto tracks.
Fixing Broken Zippers
A broken zipper doesn’t mean you need to replace the entire garment or bag.
You can fix most zipper problems yourself with basic tools and a few simple techniques that take just minutes to complete.
Identifying Zipper Issues
Before you tackle any zipper repair, you’ll need to diagnose what’s actually broken.
Three key areas demand your attention:
- Teeth alignment – Look for misaligned teeth or gaps that prevent proper interlocking
- Slider condition – Check for bends, cracks, or worn edges that cause slider issues
- Stopper integrity – Examine top and bottom stops for damage or looseness
Zipper inspection reveals whether you’re dealing with faulty teeth, stopper problems, or simple debris causing stuck zippers.
This detective work determines your broken zipper fix strategy.
A complete zipper repair kit is essential for a successful repair.
Gathering Repair Tools
Once you’ve spotted the problem, assembling your repair arsenal becomes your next victory.
You’ll need these game-changing tools to transform that stubborn zipper:
- Pliers – Your heavy-duty heroes for plier usage on stops and bent teeth
- Sharp scissors – Perfect for trimming excess tape and threads
- Lubricant – Petroleum jelly or graphite pencil for smooth operation
- Sewing supplies – Quality needle selection, thread choices, and sturdy fabric
- Complete sewing kit – Your backup plan with everything from fabric glue to handsewing essentials
Smart preparation beats frustration every time.
Preparing Zipper for Repair
Start your zipper inspection by examining the teeth for damage or misalignment. Gently remove any caught fabric—think of it as performing surgery on your garment.
Check tooth alignment and mark problem areas with your finger. Use pliers for stop removal or slider adjustment if necessary.
Proper fabric preparation sets you up for successful sewing zipper repair. To avoid future issues, understanding zipper pull types is essential for effective maintenance and repair.
How to Fix Broken Zippers
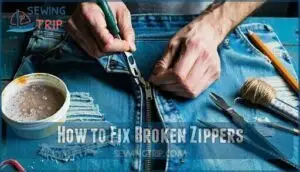
Fixing a broken zipper doesn’t have to be a nightmare. You’re about to become the zipper whisperer your wardrobe needs.
Begin by examining your zipper carefully. Check for misaligned teeth, bent sliders, or damaged stops. Most problems stem from a worn slider that’s lost its grip. Gently squeeze the slider’s sides with pliers to restore proper tension—this simple slider repair fixes over 80% of separation issues.
For stuck zippers, apply zipper lubrication using soap, petroleum jelly, or graphite from a pencil. Work the slider slowly to distribute the lubricant evenly.
– Inspect the slider** for gaps or bends and adjust with pliers.
– Use lubrication techniques** like soap or petroleum jelly to smooth stuck areas.
– Replace broken stops** by sewing on new ones securely.
When stops are damaged, remove them carefully and sew thread bars as replacements. This zipper maintenance approach prevents future slider mishaps. These sewing techniques will transform your fix broken zipper skills from amateur to expert level.
Zipper Repair Techniques
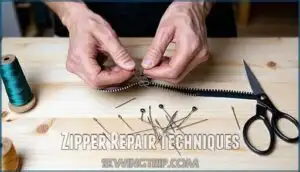
Now you can tackle the most common zipper repairs using three essential techniques that’ll save your favorite garments from the trash bin.
These methods work for everything from stuck sliders to misaligned teeth, giving you the skills to handle most zipper emergencies, using essential techniques to save your garments.
You will master zipper repairs with these methods.
Removing Bottom Stops
Position your end-cutting pliers around the metal bottom stop and gently grip it. Twist while pulling to extract the stop without damaging surrounding zipper tape.
For plastic stops, careful heating softens the material for easier stop removal. Keep the slider adjustment area clear during bottom stop extraction.
Wire cutters work on stubborn metal stops, but avoid cutting the zipper base threads.
This zipper repair technique opens access for tooth realignment and zipper replacement procedures. For efficient zipper repair, utilize proper zipper pliers tools to handle delicate parts.
Realigning Teeth
Misaligned teeth can turn your zipper into a frustrating puzzle. Here’s how to restore proper tooth realignment and fix those stubborn interlock issues.
- Examine the teeth – Look for bent or twisted segments that prevent smooth zipper alignment.
- Apply gentle pressure – Use needle-nose pliers for teeth straightening on metal zippers.
- Test the mesh – Work teeth together manually to check proper interlocking.
- Verify slider path – Confirm the slider glides smoothly after tooth realignment.
This teeth straightening process tackles most misaligned teeth problems effectively. For complex issues, utilizing a zipper repair kit can be highly beneficial.
Reattaching Stops
After aligning your zipper teeth perfectly, you’ll need to secure those vital stops back in place. Think of stops as the guardrails that keep your slider from taking an unwanted detour off the tracks.
Stop replacement requires matching your tool to the stop type. For zipper stop installation, position your pliers carefully and apply steady pressure until you hear that satisfying click. Metal stops need firm crimping, while plastic versions benefit from a drop of fabric glue for extra security.
If stop reattachment fails, create a thread barrier by sewing several tight stitches across both zipper tapes. This zipper repair technique guarantees your slider adjustment work stays put, completing your tooth realignment project with professional-grade zipper alignment results.
Fixing Zipper Function Issues
When your zipper moves smoothly but won’t stay closed or lock properly, you’re dealing with function issues rather than structural damage.
These problems typically stem from a worn slider, misaligned locking mechanism, or teeth that need lubrication to grip correctly.
Locking Mechanism Problems
Faulty slider mechanisms create zipper nightmares, but you can reclaim control with these fixes:
- Squeeze the slider sides gently with pliers to tighten loose mechanism grip on zipper teeth
- Apply graphite pencil to jammed teeth and worn components for smoother operation
- Check alignment of broken stop and slider position before attempting repairs
- Replace the entire slider if squeezing doesn’t restore proper zipper repair function
Understanding common zipper problems solutions is essential for effective repairs.
Slider Adjustment
A loose zipper slider causes most separation problems. Gently squeeze the slider’s sides with pliers to narrow gaps and improve zipper alignment. This slider tightening helps teeth mesh properly during zipper repair.
Pro tip: A tight slider grip prevents 90% of zipper separations—squeeze those sides and save your garment.
For slider replacement, remove stops, slide off the worn piece, and install a matching replacement. Widen slider grooves if needed for smooth teeth adjustment and better zipper smoothing** operation.
Lubricating Teeth
Beyond tightening your slider, a stuck zipper needs proper lubrication to glide smoothly.
Common household solutions work surprisingly well for teeth smoothing.
Try these lubricant types for effective zipper lubrication:
- Zipper wax or candle wax – creates lasting slider glide
- Petroleum jelly – softens stubborn teeth instantly
- Graphite from pencils – perfect for metal zippers
- Silicone spray – penetrates deep without staining
- Tooth oil or soap bars – gentle, accessible options
Apply sparingly along tracks, then work the slider back and forth.
Replacing Zipper Components
Sometimes zipper repairs go beyond basic adjustments and require replacing damaged components entirely.
When sliders crack, teeth go missing, or stops break off, you’ll need to swap out these parts to restore your zipper’s function.
You will receive a reward if you solve the task correctly.
Replacing Broken Sliders
When the slider fails completely, you’ll need zipper slider replacement. Broken tabs or worn sliders can make zipper repair seem challenging, but it’s straightforward with the right approach.
Here’s your zipper maintenance game plan:
- Slider Removal – Remove the top stop with pliers, then slide off the broken piece
- Match Your Replacement – Find a slider that matches your zipper’s width and type
- Check Zipper Alignment – Confirm tracks are straight before installing the new slider
- Reinstalling Slider – Thread it onto both tracks, making sure it faces the correct direction
- Test and Secure – Squeeze gently with pliers, test operation, then replace the stop
This fix broken zipper technique works for most slider failures. The key is patience during reinstalling slider – rushing leads to misalignment issues that’ll haunt you later. Proper zipper slider replacement involves understanding slider replacement options to guarantee a seamless repair.
Replacing Missing Teeth
Missing teeth don’t mean your zipper’s dead.
Start by removing the bottom stop with pliers, then harvest replacement teeth from a donor zipper of matching type and size.
Clean the repair area with rubbing alcohol before securing new teeth with super glue or fabric adhesive.
Use tweezers for precise tooth replacement placement.
Reinforce with heavy-duty thread stitching around each replacement for lasting zipper restoration.
Replacing Zipper Stops
When zipper stops break or disappear, your zipper becomes a runaway train.
First, use pliers for stop removal of any damaged pieces.
Position your slider where you want the new bottom stop, then squeeze fresh new bottom stoppers firmly into place with pliers.
Test your zipper alignment by sliding it up and down.
Proper stop replacement prevents future slider escapades and keeps your zipper stop replacement project successful.
Shortening Zippers
Sometimes you’ll need a zipper that’s too long for your project, but don’t worry—shortening one is easier than you think.
Whether you’re dealing with molded-tooth or continuous coil zippers, the right technique will give you a perfectly sized closure that works like new.
Shortening Molded-Tooth Zippers
Shortening molded-tooth zippers becomes manageable with proper technique. Mark your desired final length, leaving 3/4 inch clearance from the cut edge.
Follow these steps for zipper shortening:
- Remove excess molded teeth above the marked length using pliers or nippers
- Cut zipper tape cleanly with scissors after tooth removal
- Install new metal stops just above the final tooth using pliers
- Seal tape edges with flame to prevent unraveling
Test slider movement to verify smooth operation after molded teeth repair. Understanding zipper basics is vital for a successful repair.
Shortening Continuous Coil Zippers
Continuous coil zippers demand precision when you’re trimming them to size. Unlike their molded cousins, these flexible workhorses need careful coil cutting to avoid unraveling.
Here’s your game plan for zipper shortening:
- Cut the coil cleanly, leaving enough material for stop placement
- Remove excess teeth with needle-nose pliers for clean teeth realignment
- Install new stops securely above the final coil section
This zipper repair sewing technique works perfectly when sewing a zipper into smaller projects. Master this slider adjustment approach, and you’ll fix broken zipper issues like a pro every time.
Repairing Specialized Zippers
Invisible and closed-loop zippers need special handling since their unique designs create different problem points than standard zippers.
You’ll find that invisible zippers hide their teeth behind fabric tape, while closed-loop zippers form a continuous circle without traditional stops, making repairs trickier but still manageable with the right approach.
Fixing Invisible Zippers
Here’s the improved content for "Fixing Invisible Zippers":
After mastering zipper shortening, you’ll appreciate invisible zippers‘ unique challenges.
These hidden gems in dresses and skirts demand delicate handling to preserve their seamless appearance.
When your invisible zipper acts up, don’t panic.
Most problems stem from misaligned coils or bent teeth that prevent smooth operation.
Before attempting any zipper repair sewing, press the zipper tape flat with low heat to expose the coil for better access.
For slider repair and teeth realignment, use needle-nose pliers gently.
Always prioritize fabric protection by working slowly and testing your zipper sewing guide techniques on scraps first.
Fixing Closed-Loop Zippers
Occasionally, closed-loop zippers break where ends connect. You’ll need zipper alignment and careful slider repair techniques.
Cut the connecting loop with small pliers, then address tooth replacement or slider issues. For loop fixing, hand-sew ends together after repairs.
Stop adjustment may require new hardware. This zipper fix sewing method works for bags and jackets.
Proper sewing zipper replacement guarantees lasting zipper repair tips.
Preventing Zipper Damage
Taking preventive steps saves you from wrestling with broken zippers later. Proper storage, regular lubrication, and gentle handling keep your zippers running smoothly for years.
Storing Garments Properly
Proper garment care starts with smart fabric storage techniques.
Store freshly washed clothes inside out to shield zippers from dust and debris. When hanging garments, leave adequate space between items to prevent zipper protection issues like teeth snagging on neighboring fabrics.
For delicate pieces, practice careful garment folding with zippers closed and positioned face-up. This closet organization strategy maintains proper zipper alignment while your clothing maintenance routine reduces stress on fasteners, preventing premature wear and costly textile repair needs down the road.
Lubricating Zippers
A quality zipper lubricant transforms stubborn zippers into smooth operators. Apply petroleum jelly or zipper wax sparingly along teeth tracks. Graphite application from a pencil works instantly on metal zippers. Silicone spray provides long-lasting lubrication without residue buildup.
- Feel the satisfaction of effortlessly gliding zippers after proper slider smoothing
- Experience relief when your favorite jacket closes without wrestling matches
- Enjoy peace of mind knowing simple lubricant types prevent costly replacements
- Celebrate small victories with smooth-functioning zippers on camping gear
Avoiding Forced Closure
Why force a stuck zipper when patience works better? Forcing closure creates more problems than it solves. Your zipper needs gentle handling and soft closure techniques for proper zipper care.
When your zipper won’t cooperate, follow these steps:
- Stop immediately when you feel resistance during zipper closure
- Check for fabric caught in the slider or misaligned teeth
- Apply zipper lubrication to stuck areas before attempting closure
- Use slider adjustment techniques with gentle, even pressure on both sides
Proper maintenance prevents most stuck zippers and keeps your zipper repair needs minimal.
Advanced Zipper Repair
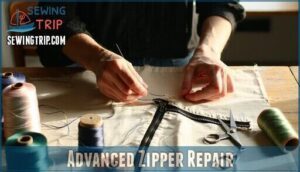
When basic repairs won’t cut it, you’ll need advanced techniques to tackle stubborn zipper problems that seem impossible to fix.
These methods require more precision and patience, but they’ll save you from replacing entire garments or bags when simpler solutions fail, which can be a significant advantage in terms of patience.
Fixing Stuck Zippers
That stuck zipper doesn’t have to spell doom for your favorite garment. Start with zipper cleaning using a toothbrush and soapy water to tackle debris removal. Once clean, apply zipper lubrication using graphite from a pencil, candle wax, or petroleum jelly to the teeth.
Work the slider gently back and forth to distribute the lubricant. Check for teeth alignment issues by examining the track visually. Misaligned teeth can be carefully straightened with needle-nose pliers.
For slider adjustment, gently squeeze the sides of the slider with pliers to restore proper grip on the zipper teeth – this fixes about 80% of stuck zipper problems.
| Problem | Solution | Success Rate |
|---|---|---|
| Debris buildup | Clean with soap and water | 90% |
| Misaligned teeth | Gentle realignment with pliers | 75% |
| Loose slider | Squeeze slider sides with pliers | 80% |
Remember: patience beats force every time when tackling stuck zippers and zipper repair challenges.
Replacing Zipper Pull Tabs
When your zipper pull breaks off, you don’t need expensive repairs.
A paperclip, key ring, or safety pin works perfectly as a temporary tab replacement. Thread it through the slider’s attachment point for instant pull repair.
For permanent solutions, buy matching zipper handles online that snap into place. Consider decorative charms or colorful tab materials to personalize your garment alteration while solving common sewing zipper problems.
Adjusting Zipper Length
If your zipper’s running long and wild, don’t sweat it—zipper length adjustment is a breeze.
You’ll master zipper trimming in no time:
- Remove stitching and snip off extra length with pliers.
- Do a quick stop removal and reattach stoppers, or sew stopping stitches if needed.
- Slide the slider back in place for perfect teeth realignment.
That’s zipper repair made simple!
Troubleshooting Zipper Issues
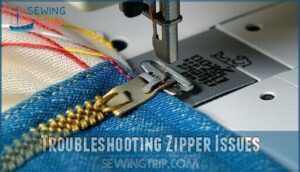
When your zipper refuses to cooperate, start by identifying the specific problem before reaching for your repair tools.
A little zipper detective work saves time and frustration—know the problem before you grab your tools.
Most zipper failures stem from worn sliders, misaligned teeth, or debris buildup—issues you can often fix with basic household items and a few minutes of patience.
Identifying Common Problems
Anyone can master zipper troubleshooting with the right approach. Start by examining your zipper for obvious zipper problems like stuck zippers or misaligned teeth. Slider issues often cause separation, while tooth damage prevents proper closure. Check for fabric tears near the tape and signs of zipper wear.
Understanding sewing zipper problems is essential for effective repairs.
| Problem Type | Visual Clue | Your Action |
|---|---|---|
| Zipper Malfunction | Won’t close completely | Check slider tension |
| Broken Zipper | Teeth separate behind slider | Inspect for worn slider |
| Stuck Zippers | Won’t budge at all | Look for debris buildup |
Identifying the root cause saves time and prevents fix broken zipper attempts that won’t work.
Applying Repair Solutions
Once you’ve identified the issue, grab your repair toolkit and get to work.
For stuck zippers, apply zipper lubrication using soap or graphite pencil along the teeth.
Slider repair often involves gentle squeezing with pliers to restore proper grip.
Tooth replacement requires careful realignment using needle-nose pliers.
These zipper repair solutions tackle most common fix broken zipper scenarios effectively.
Frequently Asked Questions (FAQs)
How to fix a zipper that bends?
Gently straighten bent zipper teeth using needle-nose pliers. Apply light, even pressure to avoid breaking them. If teeth won’t straighten or keep bending, the zipper needs replacement for reliable function.
How do you fix a broken zipper?
First, identify what’s broken – stuck slider, damaged teeth, or missing pull tab.
For stuck sliders, apply graphite from a pencil or soap along the teeth, then gently work the slider. If teeth are misaligned, carefully straighten them with pliers.
Replace missing pull tabs with a paper clip or safety pin.
For worn sliders that won’t grip, gently squeeze the sides with pliers to tighten them against the teeth, which can help fix stuck sliders or improve the grip of the slider.
Do zippers break or get stuck?
Imagine this scenario: you’re rushing to catch a flight when your suitcase zipper seizes up completely.
Yes, zippers both break and get stuck frequently.
Over 80% of zipper problems stem from worn sliders that lose their grip on teeth, causing separation or jamming issues.
What if a zipper pull is broken?
Replace the broken zipper pull with a makeshift alternative. You’ll attach a metal ring, twisted floral wire, or even a paperclip to restore functionality and get your zipper working again.
How do you fix a zipper on a jacket?
Inspect your jacket’s zipper for misaligned teeth or a worn slider. Clean debris from teeth, then gently squeeze the slider’s sides with pliers to restore grip and functionality.
How do you fix a zipper on jeans?
Grab needle and thread, sew a sturdy stop at the base if teeth are missing.
Tighten the slider with pliers if it’s loose.
For stubborn jams, a dab of candle wax works wonders—like magic for denim!
Can you fix a zipper on a backpack by yourself?
Yes, you can fix most backpack zippers yourself using basic tools like pliers, lubricant, and needle-nose pliers.
Common repairs include tightening loose sliders, removing debris, or replacing broken pulls with simple household items, which can be considered basic tools for common repairs.
Can I fix a broken invisible zipper?
Don’t throw in the towel yet! You can definitely fix an invisible zipper yourself using basic repair techniques like realigning teeth, replacing the slider, or lubricating stuck mechanisms.
What if the slider is completely off?
Remove the top stop with pliers, then carefully thread the slider back onto the zipper teeth from the top.
You’ll need to align both sides of the zipper tape properly before sliding it down and replacing the stop.
Can a tailor fix a broken zipper?
Like a knight in shining armor for fabric battles, absolutely! Professional tailors possess the expertise, specialized tools, and replacement parts needed to resurrect even the most stubborn broken zippers effectively.
Conclusion
Practice makes perfect when learning how to fix a broken zipper sewing.
You’ve now mastered the essential techniques for diagnosing problems, realigning teeth, and replacing components.
Whether you’re dealing with stuck sliders, missing teeth, or separated zippers, these repair methods will save your favorite garments.
Remember to lubricate regularly and avoid forcing closures, with these skills, you’ll confidently tackle any zipper challenge that comes your way, and become a master of repair methods.
- https://www.rei.com/learn/expert-advice/how-to-fix-a-jacket-zipper.html
- https://www.instructables.com/HOW-TO-FIX-A-ZIPPER-NO-REPLACE/
- https://www.reddit.com/r/sewhelp/comments/17b3ujn/best_way_to_fix_or_add_new_zipper/
- https://www.seamwork.com/sewing-tutorials/how-to-repair-a-zipper
- https://www.youtube.com/watch?v=fvNZGlZk49Q

