This site is supported by our readers. We may earn a commission, at no cost to you, if you purchase through links.
 Fixing zipper teeth is easier than you think!
First, inspect the teeth and make sure none are bent or misaligned.
Try moving the slider up and down to see if this aligns them.
If teeth aren’t catching, dab soap and water on a rag and clean them gently.
For more stubborn zips, use pliers to realign bent teeth or a paper clip to replace a missing one.
If the slider is loose, tighten it with pliers.
Once you master these simple tricks, your zippers will behave better than a cat that’s finally been fed.
Curious about more zipper tips? Read on!
Table Of Contents
- Key Takeaways
- Zipper Teeth Problems
- Inspecting and Reshaping The Zipper Slider
- Realigning and Replacing The Zipper Teeth
- Fixing Specific Zipper Issues
- Fixing Zippers on Specific Items
- Preventing Zipper Teeth Problems
- Repairing and Replacing Zipper Parts
- Common Zipper Teeth Issues
- Fixing Zipper Teeth at Home
- When to Replace The Zipper
- Frequently Asked Questions (FAQs)
- Conclusion
Key Takeaways
- Assess and realign misaligned or bent teeth using pliers, moving the slider to help align everything smoothly.
- Keep the zipper clean with soap and water, lubricate it with candle wax or petroleum jelly to prevent sticking.
- If the slider is loose or worn, tighten it with pliers or replace it for smooth operation.
- For missing teeth, sew above the gap or replace the entire zipper if needed to prevent further issues.
Zipper Teeth Problems
You’ve probably encountered your fair share of zipper woes, from teeth that separate after zipping to ones that open too soon.
Don’t worry—these issues are more common than you’d think, and luckily, there are simple solutions to get everything back on track.
Zipper Teeth Separate After Zipping
Is your zipper a rebel, constantly splitting open? Don’t despair! Often, it’s a simple fix.
Check your zipper slider alignment; worn zipper tracks or tension issues might be the culprits. A slightly oversized slider can also cause problems.
Gently adjust the slider’s position using pliers.
If the zipper teeth show damage, you might need a replacement.
A little TLC can get your zipper back on track!
Zipper Opens Too Soon
A misaligned zipper slider can cause the zipper to open too soon, turning your day into a surprise show.
Make sure the slider is in sync with the zipper track.
Proper slider alignment is key, keeping tension issues at bay.
Use the zipper pull’s locking mechanism for extra peace of mind, and let that zip stay zipped!
Inspecting and Reshaping The Zipper Slider
To fix zipper teeth issues, start by inspecting the slider, which might be the culprit behind your zipper headaches.
If it looks stretched or uneven, grab some pliers and gently reshape it—just don’t squeeze too hard, or you’ll have another problem on your hands!
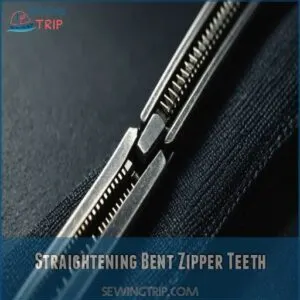
Straightening Bent Zipper Teeth
Straightening bent zipper teeth can save your favorite jacket.
Use pliers for this task.
Here’s the plan:
- Metal Teeth: Use gentle pressure to avoid damage.
- Plastic Teeth: Be extra careful; they’re more fragile.
You can find zipper teeth pliers at Zipper Teeth Pliers to help with this task.
- Start Small: Work on a few teeth at a time.
- Check Often: Make sure teeth realign properly as you go.
Mending Tears in The Zipper Fabric
When zippers go rebellious, a tear in the fabric might be the real villain.
Assess the fabric type and tear size.
Before you start mending, make sure to check for loose zipper pull tabs which can lead to further issues down the line.
Choose trusty sewing tools and patching options accordingly.
Prevent future mischief by reinforcing these areas.
Remember, "a stitch in time saves nine," keeping your favorite gear free of wardrobe malfunctions.
It’s creative, but practical too.
| Fabric | Tear Size | Sewing Tools |
|---|---|---|
| Polyester | Small | Needle, Thread |
| Denim | Medium | Patch Kit, Thread |
| Canvas | Large | Heavy-duty Needle |
| Nylon | Any | Adhesive Patch |
Realigning and Replacing The Zipper Teeth
When your zipper teeth don’t cooperate, it’s time to realign or replace them to keep your gear functioning.
Don’t worry, with a few simple steps like removing top stops and pressing the teeth together, you’ll have it running smoothly again in no time.
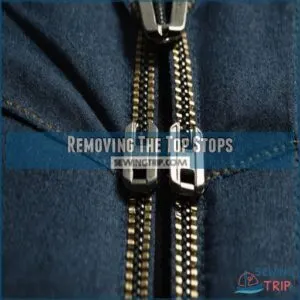
Removing The Top Stops
After reshaping the slider, you’ll need to tackle the top stops.
Removing these little guys is easier than you think.
Grab a reliable pair of pliers and follow these tips:
- Identify different top stop types.
- Use top stop removal tools.
- Pinch carefully, avoiding the fabric.
- Save them for top stop replacement.
- Remember their top stop purpose.
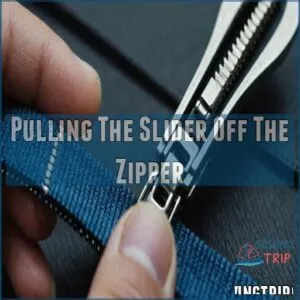
Pulling The Slider Off The Zipper
Once the top stops are removed, carefully pull the slider off the zipper.
It might feel a little stuck, but don’t worry!
Gently wiggle it free.
Sometimes, a little lubricant helps.
Here’s a handy guide:
| Slider Type | Removal Method | Tools Needed | Difficulty |
|---|---|---|---|
| Metal | Gentle pulling | None | Easy |
| Plastic | Gentle wiggling | Tweezers (optional) | Easy |
| Invisible | May require tools | Small flathead screwdriver | Moderate |
| Stuck Zipper Slider | Lubrication first | Lubricant (e.g., soap) | Moderate |
Remember, patience is key!
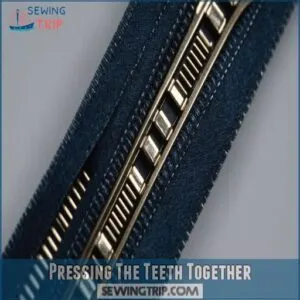
Pressing The Teeth Together
Ready for the next step? After pulling off the slider, it’s time to focus on zipper teeth alignment.
Press the teeth together firmly, ensuring they meet up like old friends.
Keep an eye on the spacing to avoid any zipper teeth tension.
If there’s friction, a little lubrication can smooth things out, making zipper teeth repair a breeze.
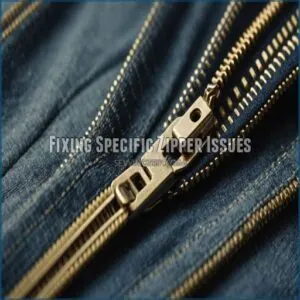
Fixing Specific Zipper Issues
When your zipper‘s being stubborn and not behaving, knowing how to tackle the specific issue makes all the difference.
From fixing a completely separated zipper to dealing with a broken slider, you’ll soon be back on track.
Zipper is Fully Separated
Facing a fully separated zipper can feel like you’re tackling a wrestling match with fabric.
Start by gently widening the grooves on the slider sides.
Carefully guide the teeth back into the slider one track at a time.
Once the zipper teeth are snugly back in place, slide it back and forth to check its smooth operation.
Voilà, your zipper repair mission is accomplished!
Zipper Slider is Broken
Got a broken slider? No worries!
First, remove the damaged slider using small pliers.
Choose a new slider that matches your zipper size—avoid guesswork here, or you’ll have common slider issues.
With skillful hands, slide it onto the teeth, checking for smoothness.
A little repair mastery will save your favorite bag or jacket from doom.
Fixing Zippers on Specific Items
When your bag’s zipper fails or you’re wrestling with a stuck tent flap, knowing how to tackle these specific items can save the day.
Don’t let frustration zip you up; arm yourself with these handy tricks to fix those stubborn zippers.
Fixing a Broken Zipper on a Bag
If your bag’s zipper is acting up, a quick fix might save it from the trash.
Start by sliding off the old, broken slider.
Align the zipper teeth snugly, like puzzle pieces, then slip on a new slider for a fresh start.
- Zipper slider replacement is a lifesaver.
- Examine for zipper track damage.
- Embrace DIY bag repair adventures!
Fixing Closed-Loop Zippers on Tents
Fixing a broken tent zipper? Many closed-loop zippers on tents are tricky, but one of the common issues is also a missing tooth, and replacing missing teeth with a sewn-in q-tip piece or cut fabric can be a lifesaver.
First, carefully remove the stitching and metal stop at the bottom.
Then, replace the slider.
Finally, sew a new stop.
That’s tent zipper simplified! A new slider is often all you need for this common tent zipper maintenance task.
Remember, a little preventative care goes a long way.
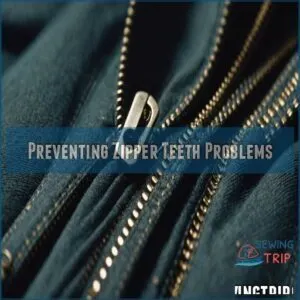
Preventing Zipper Teeth Problems
Preventing zipper teeth problems isn’t as tricky as wrestling an alligator, but it does take some care.
You can avoid most issues by regularly using the locking mechanism on the zipper pull and keeping the teeth lubricated for smooth operation.
Using The Locking Mechanism on The Zipper Pull
A well-functioning zipper pull is like your trusty sidekick.
Engaging its locking mechanism can save the day and keep those zipper teeth in line.
For added security, consider using a zipper guard solution.
Here’s what to do:
- Check the pull for a built-in lock.
- Slide it gently and test.
- Ensure the lock clicks, securing the zipper.
Maintaining it prevents unwanted wardrobe malfunctions.
Lubricating The Zipper Teeth
Lubrication is the secret sauce to smooth zippers.
Best DIY lubricants? Reach for candle wax, petroleum jelly, or lip balm.
Just glide a bit along the teeth to keep things moving like a charm.
This prevents zipper jams and adds a layer of care to your gear.
Zipper lubrication is your go-to zipper care tip for hassle-free outings.
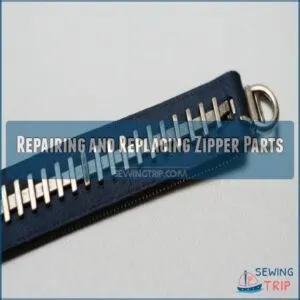
Repairing and Replacing Zipper Parts
If your zipper acts more rebellious than a teenager at a rock concert, repairing or replacing parts might be your best bet.
You’ll tackle the tricky slider and swap out broken teeth, leaving your zipper running smoother than ever.
Repairing The Zipper Slider
Got zipper issues? You might find a bent slider is the culprit behind your zipper jam.
Check the slider for uneven wear and consider fixing or replacing it entirely, using methods such as fixing broken zipper teeth.
Gently adjust its tension with pliers until it glides smoothly again.
Remember, don’t squeeze too hard—nobody wants a stuck zipper!
Any stubborn slider might just be politely asking for a swift replacement.
Replacing Broken Zipper Teeth
After taming the zipper slider, you’ll want to tackle any broken teeth.
Depending on your zipper tooth materials, grab the right DIY replacement tools—pliers and patience work wonders.
Snap off the damaged teeth with care, and remember, each set of zipper slider types might need a different touch.
If it all feels too tricky, explore zipper repair shops for expert help.
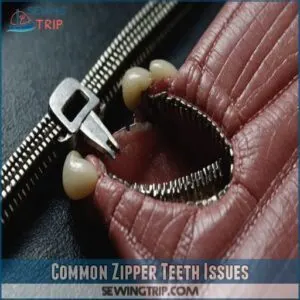
Common Zipper Teeth Issues
Dealing with pesky zipper problems is easier than you think.
Common issues include zipper teeth sticking, a frustrating experience many know.
Sometimes, teeth fall out, leaving you with a gaping hole.
Teeth fraying or breaking are also frequent culprits, often due to wear and tear.
For tougher repairs, consider investing in a zipper teeth replacement kit, which can be found online at places like zipper teeth parts.
Have you noticed your zipper teeth misaligned?
This often leads to the slider getting stuck.
These problems stem from various causes, including age, rough use, or simply a lack of proper care.
Understanding these common zipper ailments is the first step to mastering zipper repair.
Knowing what to expect helps you tackle the fix with confidence.
Fixing Zipper Teeth at Home
Fixing zipper teeth at home is easier than you’d think, and it doesn’t require a sewing kit.
With just a pair of pliers to straighten the metal teeth and a little candle wax for lubrication, you’ll have those zippers working smoothly again.
Using Pliers to Straighten Metal Teeth
Grab your pliers and tackle those bent zipper teeth with confidence!
Gently straighten each tooth, keeping a firm but careful grip to avoid breakage.
It’s like coaxing a rebellious zipper back into line.
A steady hand makes for smooth operation, and soon, your zipper’ll zip like new.
Remember, patience is key, and each tooth counts in this zipper repair mission.
Using Candle Wax to Lubricate The Teeth
Once you’ve straightened the metal teeth, let’s smooth things out with some candle wax.
It’s a handy DIY lubricant for your zipper.
Here’s how to do it:
- Rub the candle wax gently along the zipper teeth to reduce friction.
- Move the zipper pull up and down for a smooth glide.
- Repeat if necessary for alternative methods.
When to Replace The Zipper
Knowing when to replace a zipper is important to saving frustration and fabric.
If your zipper resembles a stubborn teenager with uncooperative teeth or a slider that’s been through one too many battles, it might be time to swap it out for a fresh start.
Signs of a Damaged Zipper
Imagine this: a zipper slider stuck so firmly it feels welded shut.
Teeth misaligned or outright broken throw your plans into disarray.
An uneven slider opening, often caused by a damaged slider opening size, suggests disaster, while fabric fraying hints at deeper issues lurking beneath the surface.
If your zipper’s more rebellious than a teenager, it might be time to swap it out entirely.
Benefits of Replacing The Zipper
Seeing those broken zipper teeth?
Replacing the zipper offers a longer lifespan and improved aesthetics.
You can easily find all the necessary products for the job at a zipper replacement store.
You’ll enjoy enhanced functionality—a smoother operation and increased durability.
It’s like getting a brand-new garment!
A small investment for a big upgrade.
No more frustrating snags or repairs, just smooth sailing.
Frequently Asked Questions (FAQs)
How to fix a zipper with missing teeth?
Fixing a zipper with missing teeth needs creativity.
Sew or glue a patch to bridge the gap, use a zipper stop above the missing area, then attach a new slider.
It’s a DIY adventure in patience!
What can be done to prevent a loose tooth from falling out?
Keep the loose tooth clean, avoid wiggling it excessively, and eat soft foods to reduce pressure.
A saltwater rinse can soothe gums.
If it persists, consult a dentist to assess the tooth and surrounding structures.
How do you remove teeth from a zipper?
To remove zipper teeth, first take off the top stops with pliers.
Slide off the slider, then gently pull off the teeth with pliers.
Be careful not to damage the zipper fabric while doing this.
How do you fix a molded tooth zipper?
Picture your zipper slider as the sherpa guiding hikers (the teeth) up a mountain.
Squeeze the sides gently with pliers, ensuring they grip the teeth securely.
Then run the slider up and down to test.
Can you replace broken teeth on a zipper?
No, you can’t replace individual zipper teeth.
If teeth are broken, your best bet is replacing the whole slider or even the entire zipper.
It’s often easier than trying to fix single teeth!
How do you tighten a zipper if your teeth are weak?
Gently use pliers to pinch the slider slightly, ensuring the teeth mesh properly as you zip.
Be cautious not to squeeze too hard, or you might make the slider harder to move.
A little patience goes a long way!
How to get zipper teeth back together?
Align the zipper teeth using your fingers, ensuring they alternate correctly.
Reinsert the slider gently from the top, checking that it’s seated properly.
Wiggle it a bit; think of it as persuading a stubborn zipper back on track!
How to fix a zipper teeth misaligned?
Start by checking the slider’s alignment.
If it’s stretched or bent, use pliers to adjust.
Make sure teeth interlock properly before moving the slider again.
Reinstall stoppers after confirming smooth operation.
Use patience—you’re mastering a zipper lock!
How do you fix a missing tooth with a zip?
When a tooth’s missing on a zipper, slide the pull down.
Carefully sew both sides together above the gap, or use a sturdy thread to fill the void.
Not perfect, but it’ll hold until you replace it.
Why are my teeth not closing on my zipper?
Your zipper teeth mightn’t close due to bent or misaligned teeth or a worn-out slider.
Try gently realigning the teeth with pliers, check for debris, and make sure the slider’s tight enough to grip.
How do I fix a zipper pull tab?
Is your zipper pull broken? Try replacing it! Many craft stores sell replacement pulls. Simply unhook the old one and clip on the new. It’s a quick fix!
Can rusted zipper teeth be repaired?
Rusted zipper teeth are like a stubborn door that needs oiling.
Use a vinegar soak to dissolve rust, then scrub gently with a brush.
Dry thoroughly and lubricate with candle wax to keep them sliding smoothly.
What materials help unstick stubborn zippers?
To unstick stubborn zippers, use household items like candle wax, petroleum jelly, or liquid laundry detergent.
Apply a small amount along the zipper teeth, then gently work the slider back and forth to loosen it up.
How to sew a new zipper onto fabric?
Sewing a new zipper onto fabric might feel like an epic saga, but you’ll start by pinning the zipper in place.
You’ll then stitch it carefully with a sewing machine.
And finally, you’ll relish the triumph when the fabric aligns perfectly, effortlessly zipping.
Are zipper repair kits worth buying?
Zipper repair kits can be a real lifesaver, letting you fix broken sliders and teeth without sewing.
They’re handy if you frequently deal with stubborn zippers.
However, if your repairs are rare, a DIY solution might suffice.
Conclusion
Fixing zipper teeth might seem tricky, but with practice, you’ll handle it like a pro!
Investigate whether a misaligned zipper can be repaired at home—often, it can.
By using simple tools like pliers, you can realign or replace teeth, tighten a slider, or even mend fabric.
These quick fixes show how to fix zipper teeth without breaking a sweat.
So next time your zipper misbehaves, jump in and sort it out confidently, saving both time and money.

