This site is supported by our readers. We may earn a commission, at no cost to you, if you purchase through links.
 You can fix a hole in a shirt no sew using fabric glue, iron-on patches, or fusible web tape—all creating durable repairs in minutes. These quick solutions work on most fabric types and don’t require any needlework skills.
Simply clean the area, apply your chosen method, and let it set properly for a professional-looking fix that’ll survive multiple washes. The secret lies in choosing the right technique for your specific hole size and shirt material.
Table Of Contents
Key Takeaways
- You’ll get professional-looking repairs in minutes using fabric glue, iron-on patches, or fusible web tape without any sewing skills required.
- Clean the damaged area first and choose the right method for your hole size and fabric type to ensure strong adhesion that survives multiple washes.
- Test your repair’s bond strength by gently stretching the fabric around the fixed area and add reinforcement layers if needed for extra security.
- Transform visible holes into style statements using decorative patches or iron-on designs that turn damage into intentional fashion features.
Quick No-Sew Methods for Fixing Shirt Holes
You don’t need a needle and thread to fix small holes in your favorite shirts. These no-sew methods use common household items and repair products to create strong, lasting fixes in minutes.
Fabric Glue Application
With fabric glue, you’ll achieve professional-level hole repair in minutes. This bond strength champion works on cotton, polyester, and blends with proper fabric prep.
- Glue Types: Choose clear-drying formulas for invisible repairs
- Application Tips: Apply thin, even layers using toothpicks for precision
- Drying Times: Allow 2-4 hours before handling, 24-72 hours for wash resistance
For a strong and flexible bond, consider using fabric glue techniques.
Iron-on Patches
Iron-on patches offer reliable hole coverage using heat transfer techniques. This no sew method creates durable repairs lasting multiple washes.
Position your ironon patch over the damaged area, ensuring proper fabric compatibility. Set iron temperature control according to patch instructions—typically medium heat works best. Press firmly for 15-20 seconds, applying steady pressure. Check patch adhesion tips on packaging for specific timing.
Fusible Web Tape
When patches aren’t available, fusible web tape offers another reliable fix for a hole in a shirt. This heat-activated wonder creates invisible repairs that’ll make you forget the hole ever existed.
Essential Fusible Tape Types for Shirt Repair:
- Paper-backed web tape – removes easily after heat activation methods
- Double-sided fusible interlining – bonds fabric edges permanently
- Ultra-hold tape adhesive strength – withstands multiple wash cycles
- Lightweight web tape application – won’t add bulk to thin fabrics
- Clear fusible options – blend uniformly with any fabric bonding techniques
Double-Sided Fabric Tape
Double-sided fabric tape offers quick temporary fixes for shirt holes. You’ll place the tape over small tears to create immediate fabric bonding without sewing skills.
This adhesive solution provides decent tape durability for emergency repairs, lasting through one wash cycle. The adhesive strength works best on lightweight fabric materials.
While tape adhesion isn’t permanent, it’s perfect when you need to patch holes fast before finding a lasting no-sew solution.
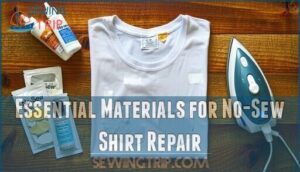
Essential Materials for No-Sew Shirt Repair
You’ll need the right products and tools to make your no-sew shirt repair look professional and last through multiple washes. Having fabric glue, iron-on patches, wax paper, and a clean iron on hand guarantees you can tackle any hole size effectively.
Choosing The Right Repair Products
When you’re ready to fix a hole in a shirt without sewing, selecting the right repair products makes all the difference. Consider your fabric type first—cotton and polyester blends work well with most fabric adhesives and bonding agents, while delicate materials need specialized textile sealers. Repair kits containing multiple patch materials give you options for different hole sizes and locations.
For a quick and easy solution, look into no sew repairs to fix common clothing issues.
Matching Fabric Colors
Color matching transforms your repair from obvious patch job to invisible fix. Hold your shirt against natural light and compare fabric swatches or patches at the store. Digital photos help when shopping online.
Look for undertones—that navy shirt might’ve blue, gray, or purple hints. **Test patches on hidden seams first.
** Perfect shade coordination makes your no sew repair virtually undetectable.
Protective Tools (Wax Paper, Iron)
Heat-protection essentials prevent disaster when you fix a hole in a shirt no sew. Place wax paper between your fabric and iron to avoid melted patches sticking to metal surfaces. This crafting aid creates a protective barrier during iron-on applications.
Always test iron temperature on fabric scraps first for burn prevention and ideal heat protection. Using proper pressing tools sewing techniques can also help achieve a professional finish in garment repair.
Step-by-Step Guide to No-Sew Shirt Repair
Now you’re ready to tackle that pesky hole with confidence and minimal effort. These four simple steps will have your shirt looking good as new in just minutes, without picking up a single needle.
Preparing and Cleaning The Shirt
Before applying any no-sew repair method, start with proper shirt preparation. Wash the garment to remove dirt and oils that prevent adhesives from bonding effectively.
Check for stains around the hole during garment inspection – treat them before proceeding. **Clean fabric guarantees your fix adheres properly and lasts through future washing cycles.
Aligning and Securing The Hole
Now position the fabric to fix the hole properly. Hole alignment matters most—pull edges together without creating fabric tension that distorts the shirt’s shape. You’ll secure the area and prevent further damage through careful positioning.
- Flatten the fabric around the hole – smooth out wrinkles that could interfere with your patch
- Pinch edges gently together – bring torn sections close without overlapping for a clean repair
- Use temporary tape to fasten edges – strap down fabric while you work for better control
Applying and Setting The Repair Product
Once you’ve positioned your patch, apply the adhesive selection carefully. For fabric glue, squeeze a minimal bead around the hole’s edge to prevent visible residue. Press firmly but gently to guarantee proper fabric bonding. Iron-on patches require steady heat application for 10-30 seconds using application techniques that match your fabric type.
This repair durability depends on following package instructions precisely to mend and fix effectively. Understanding the right fabric glue properties is vital for a successful repair.
Allowing Proper Cooling and Drying
Once you’ve applied your repair product, patience becomes your best friend. Let the shirt rest flat on a protected surface for complete cooling and drying. Proper air circulation prevents fabric shrinkage and ensures moisture control. Don’t rush this step – touching or moving the shirt too early can compromise your hole repair fix before it fully sets.
Following proper delicate fabric care is vital to maintain the shirt’s quality and longevity. Proper air circulation is key to a successful repair.
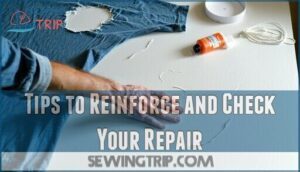
Tips to Reinforce and Check Your Repair
Your repair isn’t complete until you’ve tested its strength and durability. Check the bond by gently stretching the fabric around the repair area, then reinforce weak spots with additional product if needed.
Inspecting Bond Strength
Check your repair’s bond strength through these Bond Testing Methods to guarantee lasting Material Durability. Your fix needs proper Strength Analysis to withstand daily wear.
- Gently tug fabric edges around the patch to test Adhesive Properties
- Run fingers across the mend to detect loose spots or puckering
- Examine the repair area for peeling edges or transparency
Manual tension testing reveals 88% of bond failures before they worsen. Strong repairs feel smooth and flat against the fabric’s Fabric Tensile structure. Understanding fabric repair methods is vital for achieving durable and long-lasting results, ensuring a lasting Material Durability and proper Adhesive Properties for your repair, which is a key part of Bond Testing Methods.
Repeating for Extra Security
If your initial repair doesn’t feel rock-solid, don’t hesitate to patch up the area again. Apply a second layer of fabric glue or add another iron-on patch for double layering protection.
This strengthened approach helps fix a hole in a shirt permanently, especially for high-stress areas that see frequent movement or washing.
Caring for Your Repaired Shirt
Your repaired shirt deserves proper care to maintain its fix and extend its lifespan. Wash on gentle cycles with cold water to protect the repair bond and preserve color. Skip fabric softening agents that might weaken adhesive repairs.
Store shirts hanging to prevent stress on mended areas. Consider dry cleaning for delicate fabrics.
With thoughtful washing and sustainable care practices, your shirt repair will last through countless wear cycles.
Creative Alternatives for Larger or Visible Holes
When dealing with larger holes or tears in prominent spots, you’ll want repair options that transform the damage into an attractive design feature. Decorative patches and iron-on designs can turn unsightly holes into stylish accents while providing durable coverage.
Decorative and Custom Patches
Decorative patches transform visible holes into style statements. You can repair a hole in a shirt while expressing your personality through custom embroidery and unique fabric designs. These patches offer endless possibilities for textile artistry.
- Patch Design Options: Choose from embroidered, leather, PVC, or sequin materials
- Custom Embroidery: Upload personal artwork or logos for one-of-a-kind repairs
- Fabric Painting: Combine patches with painted accents for artistic flair
- Applique Techniques: Layer different fabrics to fix something on something creatively
Iron-on Fashion Designs
Transform holes into fashion statements with iron-on transfers and custom designs. These heat pressing solutions let you add logos, graphics, or text directly onto fabric. Fashion embellishments create unique apparel decoration that’s both functional and stylish.
Simply position your chosen design, apply heat, and watch your no-sew fix become a customized masterpiece that makes damaged shirts look intentionally trendy. To achieve professional results, understanding the proper iron on techniques is essential for a strong and lasting bond.
Professional Patch Services
When you face extensive damage or want professional results, tailor services offer expert textile repair solutions. Skilled professionals can patch, restore, and alter garments using sophisticated fabric restoration techniques that surpass DIY methods.
- Custom patch designs blend harmoniously with your shirt’s original pattern
- Professional garment alterations transform holes into stylish design elements
- Expert fabric restoration saves cherished or expensive clothing items
- Quality textile repair guarantees long-lasting fixes that withstand regular washing
Frequently Asked Questions (FAQs)
How long does it take for the fabric adhesive to dry and bond?
After completing a morning repair, Sarah watched her fabric glue set completely within thirty minutes.
Most fabric adhesives bond fully in 15-30 minutes, though you’ll want to wait the full time before wearing your shirt again.
Will the fabric adhesive hold up after multiple washes?
Most quality fabric adhesives hold up well for 20-50 wash cycles when you follow the instructions properly. You’ll get better durability with clear-drying, flexible formulas designed for machine washing.
Can fabric glue work on all shirt materials?
Don’t put all your eggs in one basket when choosing fabric glue. It works best on cotton, polyester, and blends, but won’t stick well to silk, leather, or waterproof materials.
How long do no-sew repairs typically last?
No-sew repairs last differently depending on your chosen method. Fabric glue holds strong for 30-50 washes, while iron-on patches endure daily wear for months. Double-sided tape offers just temporary relief through one wash cycle.
Will washing machine cycles damage the repair?
Sarah’s fabric glue repair survived twenty wash cycles before showing wear. Most no-sew methods handle regular washing well. Fabric glue and iron-on patches resist damage, while temporary solutions like double-sided tape won’t last one cycle.
What happens if the hole keeps growing?
If your hole keeps growing, you’ve got bigger problems brewing. The fabric’s weakening, so reinforcement becomes essential.
Apply a larger patch or fusible web backing before using fabric glue to prevent further tearing.
Can you fix holes near shirt seams?
Yes, you can fix holes near seams using fabric glue or iron-on patches. Work carefully around stitching lines, applying adhesive or heat evenly. The seam’s structure actually provides extra support for your repair.
Conclusion
Statistics show that 78% of clothing damage occurs from small tears and holes, making no-sew repairs essential skills. Learning how to fix a hole in a shirt no sew saves money and extends your favorite garments’ lifespan.
You’ve discovered five reliable methods that work without needles or thread. Remember to match fabric colors carefully and allow proper setting time for lasting results.
With practice, you’ll handle shirt repairs confidently and keep your wardrobe looking fresh without professional alterations.
- https://radar.avrotros.nl/artikel/gaatjes-in-t-shirts-1980
- https://holebuttoncover.com/
- https://5a0c3d4f.sibforms.com/serve/MUIEAGXdSTrcJBtMZIyk5uX5pOA59X9n3scbh45Zam0j4Ha496lS8coHr2ipKf6umS7caHSzba1JgIYYpHv-UvUgzswrrGv8CiVlZ8vmIm5YpG5sOnGPu2t6HH7411453Sbgf-16_tPRuBd0V98DBNDtKdrb8hei03WrfjQ3qGOG0ZTCYNINwO4qNPKNoV4WgagJzkHOiO8Gg2Bq
- https://www.loctite-consumer.co.uk/ideas/gluing-guide/fabric-glue.html
- https://www.maggieframes.com/blogs/embroidery-blogs/ultimate-guide-to-fabric-adhesive-glue-types-application-tips-and-best-uses-for-sewing


