This site is supported by our readers. We may earn a commission, at no cost to you, if you purchase through links.
A small hole in leggings has a way of growing into something far worse the moment you ignore it. One snag, one wash cycle, one long run—and suddenly you’re looking at a tear that’s crossed the line from fixable to frustrating.
The good news: leggings are actually one of the more forgiving garments to repair. Their knit construction means the fabric is designed to flex and recover, which works in your favor when stitching things back together. You don’t need a sewing background or a full craft room to get results that last.
Whether you’re reaching for a needle and thread, a sewing machine, or just a roll of garment repair tape, there’s a method here that fits your skill level and how much time you’ve got.
Table Of Contents
Key Takeaways
- Using a ballpoint needle with polyester thread is the foundation of any lasting leggings repair, because both are designed to move with stretchy knit fabric without snapping or tearing fibers.
- Catching a hole early and stitching it closed with short, tight stitches (1.0–2.0 mm) keeps the repair flexible and prevents a small snag from becoming a much harder fix.
- High-wear zones like knees and inner thighs need more than a simple stitch—an inside fabric patch extended at least 2 cm beyond the hole spreads stress and stops the damage from coming back.
- If you don’t sew, fabric glue, garment repair tape, or fusible web can all buy you time, but they’re short-term solutions best followed by a permanent fix within a day or two.
Gather Leggings Repair Supplies
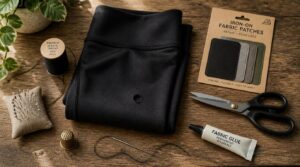
Before you start any repair, having the right tools on hand makes all the difference. Most of what you need is simple and easy to find at any fabric or craft store. Here’s what to grab before you get started:
If you’re new to fabric projects altogether, walking through something like this beginner bucket hat tutorial is a great way to get comfortable with the basic tools before diving into repairs.
Ballpoint Needle
Pick up a ballpoint needle before anything else. Its rounded tip slides between knit fibers rather than piercing them, which keeps your leggings from laddering or thinning around the repair.
Understanding ballpoint needle usage is essential for maintaining the integrity of stretchy fabrics.
For most legging fabrics, a size 75/11 or 90/13 works well. Replace the needle if it skips stitches — a dull tip tears fibers instead of parting them.
Polyester Thread
Once you’ve got the right needle, the thread matters just as much. Polyester thread stretches slightly and snaps back, which makes it the right choice for leggings. Cotton can’t do that — it’ll snap under tension.
Go for a mid-weight polyester, around 150–300 denier. It holds its color through washing, so your repair won’t fade before the fabric does.
Small Sharp Scissors
Good scissors make the trimming step much easier. You want a pair with stainless steel blades — they stay sharp longer and won’t corrode after repeated use.
Look for pointed precision tips that let you snip right up to the hole edge without cutting fabric you don’t mean to. Ergonomic grips reduce hand strain during detailed work.
Matching Stretch Fabric
Scissors get you through the prep work, but the fabric you choose for patching decides how long your fix actually lasts.
Match the stretch direction of your patch to the leggings. Knit blends with spandex — ideally 20 to 40 percent — give you the recovery you need so the repair moves with you and doesn’t pull or gap.
Fabric Glue or Tape
Fabric glue and repair tape are both worth keeping on hand.
Fabric glue seeps into fibers and cures flexibly — ideal for patches or small holes that need a durable fix. Let it cure several hours to overnight before washing.
Repair tape bonds instantly and skips that wait, though it won’t survive repeated machine washes as reliably.
Sew The Hole Closed
Hand sewing a hole closed is one of the most reliable ways to get your leggings back in shape. You don’t need much—just the right technique and a little patience. Here’s how to do it step by step.
Turn Leggings Inside Out
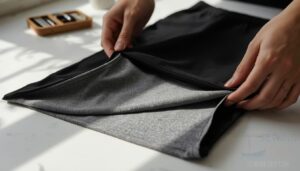
Flip your leggings inside out before you make a single stitch. This keeps the repair hidden from view on the outside, but it also does something most people overlook — it reduces washing friction on the outer surface, which helps preserve color and decorative finishes over time.
Once your leggings are flipped, follow the same inside-out approach for any tears using these step-by-step hand-sewing and patching techniques to keep every fix invisible and clean.
It’s a small step that protects both your mend and the fabric around it.
Trim Loose Threads
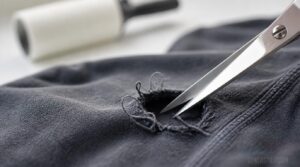
Before you sew a single stitch, take a moment to clean up the hole’s edges. Trim loose threads with fine-point scissors or micro snips, cutting close to the fabric at a 45-degree angle to reduce snagging.
This quick fix-up step gives your repair a clean base to work from. Follow with a lint roller to catch any remaining fiber.
Knot The Thread Securely

A good knot is the foundation of any lasting repair. Before you start stitching, thread your needle with polyester thread and tie a small, symmetrical knot at the end — one that lies flat against the fabric without bunching.
- Keep the tail short to avoid snagging
- Control tension so the knot cinches evenly
- Add a locking stitch for extra hold
- Tug gently to test knot security before sewing
Use Short Tight Stitches
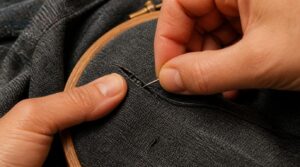
Short stitches — around 1.0 to 2.0 mm — pack densely without creating micro-punctures that weaken the knit. Place each stitch close to the hole’s edge to minimize seam gaps and keep tension well distributed. Stay relaxed as you work. Uniform tension control is exactly what makes the mend flexible instead of stiff, so your leggings can stretch naturally with every move.
Short, dense stitches with uniform tension keep your repair flexible, not stiff
| Stitch Length | Knit Effect | Best Application |
|---|---|---|
| 0.5–1.0 mm | Risk of micro-punctures | Avoid on stretch fabrics |
| 1.0–1.5 mm | Tight, strong seam | Small holes, stress points |
| 1.5–2.0 mm | Balanced elasticity and strength | Standard legging repairs |
| 2.0–2.5 mm | More flex, moderate hold | Light repairs, thin knits |
| 2.5+ mm | Gaps form under strain | Not recommended |
Tie Off The Repair
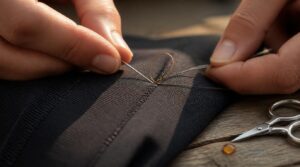
Once your stitches circle the hole, secure a stopping knot by looping the thread twice and pulling tight — snug, not strangling. Clip the tail close to minimize bulk.
- Bury the knot inside a fabric fold
- Keep tension light to preserve stretch
- Add a dab of fabric glue to lock it
- Backstitch twice before knotting for longevity
That hidden knot is what keeps the whole repair from unraveling through every wash.
Fix Holes by Machine
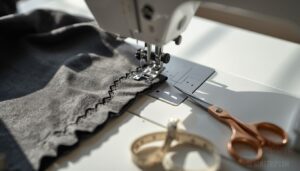
A sewing machine makes fixing leggings faster and more reliable than hand stitching, especially for longer tears. But you can’t just use any stitch setting and hope for the best — leggings stretch, and your repair needs to stretch with them. Here’s how to get it right.
Choose Stretch Stitch
Your machine’s stretch stitch setting is what keeps a repaired seam from snapping the moment you move. Unlike a straight stitch, it’s designed for elasticity recovery — the seam stretches with you, then springs back.
Set your stitch width to match your fabric weight, and loosen the tension slightly. That small adjustment prevents puckering and stops popped seams before they start.
Use Zigzag Stitching
Zigzag stitching is your best ally for repairing knit fabric. A stitch width of 3–5 mm gives the seam room to flex and recover without snapping. It spreads tension across a wider line than a straight stitch, so the repair holds through real movement.
Run it close to the edge to fix up fraying before it spreads.
Keep Seam Allowance Narrow
Keep your seam allowance between 1/8 and 1/4 inch. That narrow margin reduces bulk at the repair site and helps the fabric lay flat without puckering or pulling.
On stretchy knits, extra seam width can restrict natural movement and cause the repaired area to bag. A tight margin lets the legging drape and flex the way it should.
Stitch Past Hole Edges
Once you’ve nailed a narrow seam allowance, where you start and stop your stitching matters just as much. Begin 1/4 inch before the hole and end the same distance past it.
That extra margin captures loose fibers and spreads stress across sound fabric rather than concentrating it at the damaged edge, which keeps the repair from tearing open again.
Avoid Pulling Fabric
Letting the fabric feed through on its own terms is the key to a clean repair. Don’t tug or guide aggressively — that introduces pull lines and distortion that no stitch can undo.
- Stop if you feel resistance
- Use smooth, even pressure
- Work with the fabric grain
- Keep hands relaxed
- Let the feed dogs do the work
Patch, Darn, or Reinforce
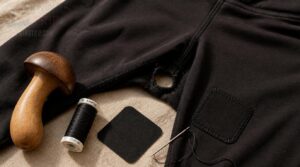
Sometimes stitching alone isn’t enough — a hole in a high-wear spot needs more than just a closed seam. That’s where patching, darning, and reinforcing come in, giving you stronger, longer-lasting results. Here’s how to tackle each approach:
Add Inside Fabric Patch
A fabric patch on the inside acts like a hidden foundation — it spreads stress across a wider area so one weak thread line doesn’t keep ripping open.
Cut a piece of stretch fabric slightly larger than the hole. Press it flat against the inside, then stitch around the edges using small, even running stitches to fix it firmly in place.
Use Fusible Interfacing
Fusible interfacing works like a hidden anchor beneath your repair. Press the adhesive side against the wrong side of the fabric, then apply heat with a pressing cloth until it bonds firmly.
For leggings, always choose lightweight knit interfacing — heavier weights kill the stretch. Test a scrap first to confirm the fabric won’t stiffen or warp before committing.
Darn Tiny Worn Spots
Worn spots under 1 centimeter are easy to miss — until they split open. Fiber thinning happens in high-stress zones like the thighs and knees, where repeated stretching breaks down knit threads over time.
To mend them invisibly:
- Stretch the spot taut over a jar lid
- Weave thread across, then through, creating a grid
- Match thread weight to avoid puckering
Keep tension even throughout.
Reinforce High-stress Areas
Knees and inner thighs take the most punishment. Before you patch up these zones, identify the exact stress points by holding the leggings up to light.
Patch Material Selection matters most here — choose stretch fabric that matches your legging’s recovery.
| Strategy | Benefit |
|---|---|
| Extend patch 2 cm beyond hole | Distributes load evenly |
| Double-layer reinforcement | Prevents rip propagation |
Secure each patch with tight zigzag stitching to maintain elasticity. Test repair durability by gently bending the knee after mending.
Secure Fraying Edges
Loose threads around a mended hole can undo your repair faster than the original damage. Dab fray sealant directly on cut edges — it dries clear in 10 to 15 minutes and flexes with the fabric.
For knit edges, a zigzag stitch (3–5 mm wide) locks threads reliably. A serger offers the cleanest finish, enclosing raw edges in multiple threads at once.
Use No-Sew Quick Fixes
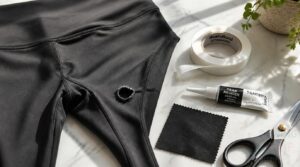
Not every hole needs a needle and thread to fix. If you’re short on time or just want a quick solution, no-sew options can get your leggings back in rotation fast. Here’s what you can reach for when sewing isn’t on the table.
Apply Fabric Glue
Fabric glue can mend a small hole without touching a needle. Clean both surfaces with a damp cloth first, then let them dry completely.
- Apply a thin, even layer directly over the hole
- Use the nozzle tip for precision
- Press firmly for 30–60 seconds
- Wipe excess glue immediately
- Wait 24 hours before washing
Keep the fabric still while the glue cures fully.
Use Garment Repair Tape
Garment repair tape works faster than glue and holds up through washing. Peel, press, and secure — that’s the whole process. Cut your tape slightly larger than the hole, place it on the inside, and press firmly for 30 to 60 seconds. The adhesive stays flexible, so it won’t crack when your leggings stretch.
Try Fusible Web
Fusible web is a step up from tape — it bonds fabric using heat instead of pressure alone. Cut the web slightly larger than the hole, peel the paper backing, and press with an iron. For lightweight leggings, choose a lite-strength web to avoid stiffness.
- Peel the paper backing away
- Position the web over the hole
- Apply medium heat evenly
- Move the iron in small circles
- Let it cool before stretching
Match Heat to Fabric
Getting the heat right matters as much as the repair itself.
| Fabric Type | Safe Iron Temp |
|---|---|
| Spandex/Lycra mix | Low (under 270°C) |
| Polyester leggings | Medium (~270°C) |
| Cotton-poly mix | Medium-high (~300°C) |
Spandex shrinks and warps easily, so always test on a scrap first. Even 20°C too high can scorch delicate knits permanently — a small swatch saves your leggings.
Choose Temporary Repairs
No-sew fixes are best for minor holes only — think pinhole runs or small snags, not gaping tears. They’re designed to get you through the day, not last forever. Plan a permanent repair within a day or two.
Check that any adhesive you use won’t irritate your skin during wear, and remove the fix if you notice redness or chafing.
Frequently Asked Questions (FAQs)
How do I choose the right fabric patch for my leggings?
Match the patch fabric’s stretch to your leggings. Spandex or knit jersey blends work best. Choose a color close to the original, and cut the patch slightly larger than the hole.
Is fashion tape the same as garment tape?
No, they’re not the same. Fashion tape bonds skin to fabric; garment tape bonds fabric to fabric. One prioritizes gentle, residue-free removal; the other focuses on a stronger, longer-lasting hold between textiles.
What is the most durable method for repairing a hole in leggings?
A sewn patch on the inside wins for durability. Cut your patch from matching stretch fabric, size it at least 5 times the hole’s diameter, then secure it with a narrow zigzag stitch.
Does garment tape irritate the skin?
Yes, garment tape can irritate skin. Adhesive chemicals may trigger contact dermatitis, causing redness, itching, or burning. Sensitive skin is especially vulnerable. Remove tape gently and stop use immediately if irritation appears.
Are there any other creative ways to fix a hole in leggings?
Absolutely — a hole can become a feature. Try a lace insert, embroidered motif, or upcycled patch from old fabric. A keyhole cutout or distressed patchwork turns damage into deliberate, wearable style.
Can I repair leggings without any sewing skills?
The best repairs don’t always need a needle. Iron-on patches, fabric glue, and fusible web let you fix up leggings fast. Always test glue on a hidden area first to confirm it stays flexible.
How do I hide repairs on patterned or printed leggings?
Match thread color to the exact local motif shade. Stitch along natural pattern breaks, not across bold motifs. Align patches with surrounding pattern density to camouflage the repair visually.
Will repaired leggings hold up during intense workouts?
Repaired leggings can hold up well during intense workouts. Use polyester thread and tight stitches to keep seams flexible. Strengthen stress points like knees and inner thighs for lasting durability through squats, lunges, and HIIT sessions.
How do I prevent holes from forming in the first place?
Treat your leggings with a little extra care and they’ll last far longer. Choose nylon or polyester blends, wash inside out on a gentle cycle, air dry, store them folded, and rotate pairs to spread the wear.
Can stretched-out leggings be restored to their original fit?
Sometimes, yes — but only to a point. Leggings with high spandex content can regain some shape with gentle heat or a warm soak, but severe or repeated overstretching causes permanent fiber damage that no fix can reverse.
Conclusion
A single needle and thread can save a pair of leggings from a landfill a thousand times over. Knowing how to fix holes in leggings—whether by hand, machine, or a strip of repair tape—means nothing in your drawer has to be a lost cause.
Small holes fixed early stay small. Let them go, and you’re patching something twice as difficult later. Pick your method, start now, and keep what already works.
- https://www.ifixit.com/Guide/How+to+Fix+a+Hole+in+Leggings+by+Hand+Sewing/138397
- https://bymakai.com/blogs/style-sip-celebrate-lifestyle-blog/how-to-fix-a-hole-in-leggings
- https://madamsew.com/blogs/sewing-blog/how-to-sew-a-hole
- https://guliwerkids.com/blogs/blog/jak-naprawic-rozdarte-leginsy-sportowe-skuteczne-i-szybkie-metody
- https://happiestcamper.com/how-to-sew-a-hole-in-leggings