This site is supported by our readers. We may earn a commission, at no cost to you, if you purchase through links.
 Fixing an unraveling seam is simple if you’ve got the right tools. Start by snipping any loose threads to keep things tidy.
If you’re sewing by hand, use a backstitch for sturdy results—just make small overlapping stitches along the torn seam. For quick repairs, a whip stitch works well on delicate fabrics.
Using a sewing machine? Reinforce the seam with a straight or zigzag stitch, depending on the fabric type. Always match your thread color and strength to your garment.
Want to avoid future issues? Reinforce high-stress seams or use seam tape for extra durability. Little tricks go a long way!
Table Of Contents
Key Takeaways
- Use a matching thread and backstitch by hand or a straight stitch with a sewing machine for strong and durable seam repairs.
- Trim loose threads, test fabric tension, and secure ends with knots to prevent future unraveling.
- Reinforce high-stress areas like underarms or knees with double stitching or iron-on patches for added durability.
- Regularly inspect clothes for weak spots and use proper washing, storing, and repairing methods to extend their lifespan.
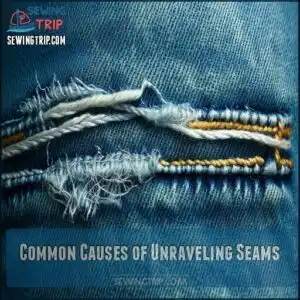
Common Causes of Unraveling Seams
You’ll find that most seams unravel due to poor-quality thread, improper stitching techniques, or excessive stress on high-movement areas like underarms and thighs.
Understanding these common causes helps you both fix current problems and prevent future clothing damage with proper care and reinforcement techniques.
Wear and Tear on Clothing
Daily wear and tear is the silent enemy of your favorite clothes, gradually breaking down fabric and threads until seams give way.
The slow grind of daily wear silently weakens your clothes, breaking threads and leading seams to unravel over time.
Your clothing endures continuous stress during normal activities, creating the perfect conditions for unraveling seams and fabric degradation.
- Friction between thighs, arms, and surfaces wears down thread integrity with each movement
- Repeated bending at elbows, knees, and seat areas stretches fibers beyond their recovery point
- Sun exposure fades and weakens fabric over time, making threads more brittle and prone to breaking
- Improper washing effects including hot water, harsh detergents, and aggressive machine cycles accelerate deterioration
- Body oils, perspiration, and residual stain removal products can gradually degrade thread quality
Regular inspection helps you catch minor issues before they become major clothing repair projects.
Proper storage methods also matter—hanging heavy garments can stretch seams, while cramming clothes into drawers creates stress points.
Early intervention with seam repair techniques saves your wardrobe from premature retirement.
Improper Stitching Techniques
While wear gradually weakens garments, improper stitching techniques cause immediate seam failures.
Your sewing method directly impacts how well clothes hold together.
When you skip backstitching at seam ends or choose the wrong needle for your fabric, you’re setting yourself up for unraveling seams.
| Sewing Mistake | Consequence | How to Fix |
|---|---|---|
| Tension Problems | Puckered fabric or loose threads | Adjust machine tension dial |
| Uneven Stitches | Weak spots in seam | Maintain steady sewing speed |
| Skipped Stitches | Gaps in seam strength | Replace dull needle |
| Wrong Needle Size | Fabric damage or thread breaks | Match needle to fabric weight |
Fix these common errors, and your seam repairs will last substantially longer, which is crucial for seam strength and overall garment durability, ensuring a longer lifespan of your clothes with proper sewing method.
Loose Threads and Fabric Tension
While proper stitching forms the foundation of durable seams, loose threads and unbalanced fabric tension often cause those frustrating unraveling issues in your clothes.
When thread tension isn’t properly balanced, weak spots form that give way during normal movement. You’ll notice those tiny thread wisps first—they seem harmless until they catch on something and start unraveling.
- Thread Tension: Uneven pressure creates weak spots that fail under stress
- Fabric Stretch: Overstretched material pulls stitches apart gradually
- Loose Weave: Spaces between fibers allow threads to work free
- Seam Slippage: Dense fabrics can push threads out of position
- Stitch Length: Too long or short affects how threads lock together
Don’t ignore those tiny thread ends! Clip them carefully with sharp scissors and check tension when you fix unraveling seams. The right tension balance for your fabric type is your best defense against future seam failures.
Poor Quality Thread or Fabric
Beyond loose threads lies another culprit: poor quality materials that doom your seams from the start.
Poor quality materials are the silent saboteurs, setting your seams up for failure from the very start.
When your thread breaks during everyday movements, you’re dealing with inadequate Thread Composition. Quality matters—bargain threads snap easily while premium options hold firm.
Fabric quality equally impacts seam longevity. Here’s how materials affect durability:
| Material Factor | Impact on Seams | Prevention Tip |
|---|---|---|
| Fiber Strength | Weak fibers tear at stress points | Choose natural or synthetic blends with high tensile strength |
| Fabric Weave | Loose weaves separate at seams | Select tighter weave patterns for durability |
| Dye Quality | Over-processed fabrics become brittle | Look for colorfast labels on garments |
You can spot potential problems before purchase—examine thread thickness and fabric density by holding material up to light. Remember: saving a few dollars on cheap materials often costs more in repairs later. Material Durability determines how long your fix unravelled seam efforts will last, considering the importance of Quality Matters and the impact of Fiber Strength on the overall longevity of the seam, which can be affected by Poor Quality Materials and Inadequate Thread Composition.
Excessive Stress on Seam Areas
Your clothes endure constant stress at key seam points like underarms, crotch seams, and knee bends during everyday movements.
When this tension exceeds thread strength, unraveling seams become inevitable. Watch for warning signs: stretched stitches, puckering fabric, or tiny thread breaks signal potential seam failures.
To prevent problems, analyze stress points and reinforce high-stress areas with double stitching or iron-on patches.
Activity impact varies—active lifestyles demand stronger seam reinforcement.
Don’t forget about fit issues—too-tight clothing puts extra pressure on seams.
For backpacks and workwear, focus on straps and pocket corners where fabric choice and proper reinforcement make all the difference, considering the key seam points and the need for proper reinforcement to ensure durability.
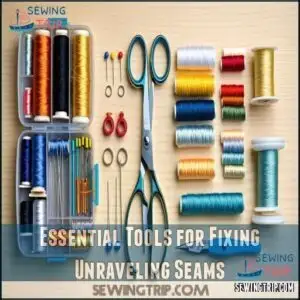
Essential Tools for Fixing Unraveling Seams
You’ll need several basic tools on hand before tackling that annoying unraveled seam that’s threatening your favorite shirt.
A good repair kit includes matching thread, appropriate needles, sharp scissors, pins for securing fabric, and a seam ripper to remove damaged stitches without harming the material, which is a crucial part of the process to avoid further damage.
Sewing Machine Options and Settings
After identifying what causes seams to unravel, you’ll need the right sewing machine setup to make lasting repairs.
The stitch selector dial is your first ally in seam repair. Choose straight stitch for sturdy repairs or zigzag for stretchy fabrics.
- Set stitch length to 2.5mm (about 10 stitches per inch) for standard seam repairs – shorter for delicate fabrics, longer for temporary basting
- Adjust thread tension wheel to 4-5, the "middle number" that works for most fabrics – watch for balanced stitches with no puckering
- Position the needle correctly using L/R settings (0-5) for precise stitch alignment with your seam
Don’t forget the often-overlooked bobbins case tension screw, which controls underside stitching. Well-maintained feed dogs guarantee smooth fabric movement during repair.
Regular sewing machine maintenance keeps your seam repair work professional and prevents additional fabric damage.
Hand-sewing Needles and Thread Selection
While machines offer speed, hand sewing gives you precise control for seam repair.
Select the right needle size based on your fabric type: sharps (sizes 10-11) for silk, darning needles (sizes 14-16) for denim. Remember that larger numbers mean finer needles.
For best results, consider matching needle to fabric. Choose thread material that matches both color and weight—polyester for stretch, cotton for natural fibers.
For invisible repairs, exact color matching is key. Use ballpoint needles for knits to prevent snags.
Your stitch strength improves when needle and thread work together properly for the specific unraveling seam you’re fixing.
Seam Rippers and Fabric Scissors
Now that you’ve selected your thread and needle, let’s talk about cutting tools that make seam repair work easier.
A quality seam ripper is essential for removing damaged stitches. Different seam ripper types offer various benefits—standard ones work for most fabrics, while precision rippers help with delicate materials. When using one, slide the pointed end under stitches and cut carefully to avoid fabric damage.
You can find a seam ripper tool online.
For fabric scissors, sharpness matters most. Dull blades fray fabric edges, making repairs harder. Ergonomic scissors reduce hand strain during longer repair sessions.
Maintain your scissors by wiping blades after each use and storing them closed. For specialty scissors, like pinking shears that prevent fraying, clean regularly and avoid paper cutting to preserve their edge.
Pins, Clips, and Fabric Markers
After cutting comes securing. Holding your fabric steady is essential for successful seam repair.
When fixing unraveling seams, you’ll need reliable holding tools. The right tools can make a significant difference in the quality of your work, ensuring a long-lasting and professional finish.
- T-pins offer superior grip on thicker fabrics, while pin alternatives like wonder clips prevent holes in delicate materials
- Flat-head pins lie smoothly against fabric edges for precise seam alignment
- Water-soluble fabric markers create temporary guidelines that disappear after washing
- Metal hair clips work in a pinch when you’re short on proper sewing clips
For long-lasting tool longevity, store pins in magnetic holders and keep markers capped tightly. You can find a wide variety of T-pins for fabric online. With slippery fabrics, clip types with rubber grips prevent shifting while you focus on your stitches.
Iron and Pressing Tools
Why is an iron often overlooked in seam repair? A quality iron transforms your sewing results instantly.
When fixing unraveling seams, proper pressing creates smooth fabric that’s easier to work with and guarantees your repairs last longer. Your iron should have adjustable temperature settings for different fabric types.
Before pressing any seam repair:
- Use pressing cloths (thin cotton fabric) to prevent shine or scorching
- Set steam settings appropriately – more for cotton, less for synthetics
- Press seams open first, then closed for a flat finish
- Allow fabric to cool completely before handling to set the repair
Iron maintenance is essential – clean the plate regularly and empty water after use to prevent mineral buildup. For delicate fabrics or tight spaces, consider specialty irons like mini travel models or seam rolls that focus heat exactly where needed. For achieving crisp edges, consider using a wooden tool called clapper. Proper pressing isn’t just finishing – it’s fundamental to successful seam repair.
Hand-Sewing Techniques to Repair Unraveling Seams
You’ll need just a needle and thread to fix those frustrating seams that threaten your favorite clothes.
With these basic hand-sewing techniques, you can quickly repair unraveling seams and extend your garment’s life without spending money on replacements.
This approach allows you to preserve your clothes and save money by avoiding the need for replacements.
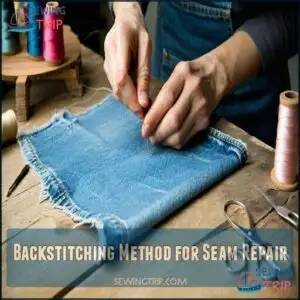
Backstitching Method for Seam Repair
With your tools in hand, let’s move on to the strongest hand-sewing technique for fixing unraveling seams. The backstitch technique offers unmatched repair durability for all fabric types.
The key components of backstitching are outlined in the following table:
| Backstitching Component | Proper Technique | Purpose |
|---|---|---|
| Stitch Length | 1/8 inch | Guarantees seam strength |
| Thread Type | Match fabric color & weight | Creates invisible repair |
| Seam Placement | Start 1 inch before damage | Prevents future tearing |
To fix your unraveling seam, insert the needle through the fabric from back to front, then a stitch ahead, and back through your first entry point. This creates a continuous line of overlapping stitches. Finish with secure knots on the wrong side for maximum knot security.
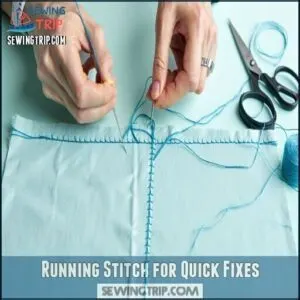
Running Stitch for Quick Fixes
The running stitch offers a speedy solution when you need to fix an unraveling seam quickly. This simple technique works well for temporary seam repairs across various fabric types.
- Thread your needle with 18 inches of matching thread and secure with a double knot for proper knot security.
- Begin stitching one inch before the damaged area, ensuring even stitch length.
- Create uniform 1/4-inch stitches by weaving in and out of the fabric in a straight line.
- Finish with three small backstitches and trim excess thread close to the knot.
Maintain moderate tension to prevent puckering while sewing. Mastering this technique requires consistent needle movement for best results. Though not as durable as other methods, this quick fix provides sufficient repair durability until you can address it permanently.
Whip Stitch for Delicate Fabrics
Dealing with an unraveling seam on delicate fabrics like silk or chiffon? A whip stitch is your go-to method for seamless, gentle repairs.
It’s a straightforward sewing repair technique that prioritizes Fabric Considerations and Repair Durability.
To get started:
- Choose a thin needle (sizes 9-10) to avoid damaging the weave
- Select matching or slightly lighter thread for an invisible finish
- Work with even stitches about 1/8 inch apart to secure edges
Wrap the thread diagonally over the fabric edge, keeping Stitch Tension firm but not tight.
Finish by Securing Ends with a neat knot on the fabric’s underside. Done right, the whip stitch restores delicate seams with ease!
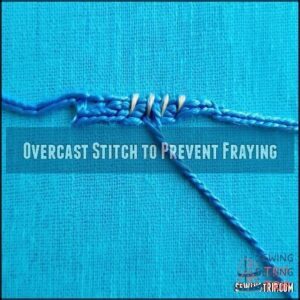
Overcast Stitch to Prevent Fraying
The overcast stitch is a go-to for seam repair and fray prevention, especially when dealing with fabrics prone to unraveling.
Start by trimming any loose threads and selecting a matching thread for fabric compatibility. Take your needle and work in small loops over the edge of the unraveling seam, spacing them about 1/8-inch apart.
This creates a stitch variation that wraps around the raw edge, acting like a shield against future fraying. Keep thread tension even for clean, professional results.
This sewing technique secures the seam and also guarantees durability. Try it for a reliable and straightforward finish on your next project.
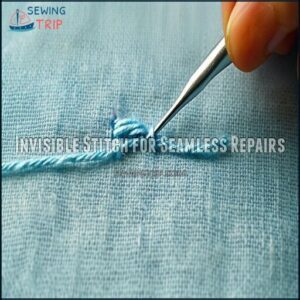
Invisible Stitch for Seamless Repairs
If you’ve ever wanted to fix a seam so seamlessly that no one notices, the invisible stitch is your go-to technique.
Start with careful fabric matching—choose thread that blends perfectly with your material. Test it under different lights to confirm accuracy.
Work from the wrong side by taking small, even stitches that barely catch the fabric edges.
- Remember: Balanced tension is key. Pull too tight? The seam puckers. Too loose? The repair won’t last.
Move steadily along the unraveling seam, keeping your needlework consistent. For knot security, tie off firmly to finish your repair.
When done right, the invisible stitch offers exceptional stitch concealment and long-lasting repair durability for your clothing.
Machine-Sewing Methods for Unraveling Seam Repair
When repairing a seam with a sewing machine, you’ll need to focus on accuracy and the right technique.
Mastering stitches like straight, zigzag, and overlock can make your repairs stronger and prevent further damage.
Straight Stitch and Zigzag Techniques
A sewing machine makes fixing an unraveling seam quick and effective.
Start with a straight stitch for most fabrics—set a medium stitch length, adjust tension carefully, and use the proper needle for better Seam Durability.
If working with stretchy fabrics or edges prone to fraying, try a zigzag stitch for added strength.
Overlap stitches slightly for secure Seam Repair.
| Stitch Type | Best For | Tips |
|---|---|---|
| Straight Stitch | Non-stretch fabrics | Medium length, balanced tension |
| Zigzag Stitch | Stretchy fabrics | Slight overlap for strength |
| Triple Straight | Reinforcement areas | Add extra strength |
| Narrow Zigzag | Light fabrics | Prevents puckering |
| Wide Zigzag | Heavy fabrics | Covers frayed edges |
Lockstitching for Sheer Materials
Sheer fabric types require special sewing techniques, and lockstitching guarantees your seams stay intact without puckering.
For a professional seam repair, follow these steps:
- Choose the Right Needle: Use a fine needle sized for delicate materials—it matters more than you think.
- Adjust Tension Settings: Lower the tension on your machine to avoid stretching or damaging the fabric.
- Stitch Length Guide: Set a short stitch (1.0-1.5 mm) for strong, invisible seams.
- Preventing Puckering: Sandwich the sheer fabric between tissue paper to stabilize it during sewing.
Reinforced Seams With Triple Straight Stitch
The triple straight stitch is your secret weapon for seam reinforcement.
It adds durability, especially to areas prone to stress.
Start by setting your machine’s stitch length to medium; this balances flexibility and strength.
Keep thread tension in check to avoid puckering and guarantee smooth stitching.
Use a thread weight that matches the fabric for stability.
As you sew, maintain a steady pace and align the fabric carefully to prevent gaps.
This method is perfect for heavy materials that demand extra support, making it ideal for seam repair.
It’s a reliable way to fix an unraveling seam with lasting results.
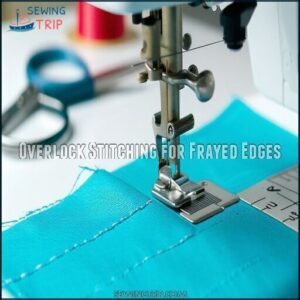
Overlock Stitching for Frayed Edges
Overlock stitching is your go-to method for tackling frayed edges and achieving durable, polished seam finishes.
If you’ve noticed fabric unraveling, using an overlocker (serger) prevents further damage by trimming and stitching edges simultaneously. No overlocker? Your regular machine’s zigzag or overcast stitch works too.
Start by ensuring proper overlock tension adjustments and using the right serger thread types. Adjust the differential feed settings to keep the fabric from puckering or stretching.
For light fabrics, try rolled hem finishes for a clean edge.
- Key steps for effective overlock stitching:
- Select the right stitch width for fabric thickness.
- Keep the seam aligned with the blade for precision.
- Adjust the feed settings based on fabric behavior.
- Practice on scraps to perfect your technique.
Decorative Stitches for Visible Repairs
Transform an unraveling seam into a stylish upgrade with decorative stitches. Your sewing machine likely has Embroidery Options like Herringbone, Cable, or Cross Stitch—perfect for seam repair with flair.
Consider your Color Choices: a bold contrast adds personality, while matching tones keep it subtle. Stitch Placement matters; use patterns like Sashiko or Creative Embellishments along seams for strength and interest.
For a traditional and durable option, consider using Sashiko thread options. These sewing techniques don’t just mend seams—they also let you experiment with Pattern Design while making your garment uniquely yours.
Preventive Measures Against Future Seam Unraveling
Preventing seams from unraveling starts with simple care and attention. By using the right techniques and regularly checking your garments, you can save yourself time and future repairs.
Proper Garment Care and Maintenance
Keeping your repaired seams intact starts with smart garment care. Treat your clothes like an investment!
- Follow care labels: They’re not suggestions—they’re precise instructions for washing techniques, drying methods, and ironing practices.
- Store items thoughtfully: Hang structured garments, fold delicate knits, and avoid cramming everything into one closet.
- Wash with care: Turn items inside out, use mesh bags for delicates, and skip heavy loads.
Proper clothing maintenance prevents unnecessary wear and tear. These habits protect repaired seams, reduce the need for frequent seam repair, and keep your favorite outfits looking sharp longer!
Reinforcing High-stress Seam Areas
Around high-stress areas like underarms, knees, and elbows, taking simple steps now saves trouble later.
For better seam security, use heavyweight thread and sew double rows of stitches.
Pocket stress points, crotch seam repairs, and zipper seam reinforcements benefit from these techniques too.
Adding a fabric patch to worn spots acts as extra armor against friction.
This type of seam reinforcement strengthens high-stress areas, boosting clothing durability and keeping your garments ready for anything, with the goal of achieving better seam security.
Choosing Appropriate Thread and Fabric Combinations
Finding the right thread-fabric combo is key to strong, long-lasting seams.
Let thread weight match fabric type for smooth stitching. Pay close attention to fiber content—choose cotton thread for natural fabrics and polyester for stretchy ones.
Stick with color matching to keep repairs invisible and polished. When selecting, focus on fabric weave; thread types should match the thickness and density.
- Thread weight affects durability—heavier threads for heavy fabrics.
- Fabric weave determines thread compatibility.
- Fiber content keeps fabrics and threads in sync.
- Color matching guarantees seamless repairs.
Regular Inspection and Early Intervention
Taking a few moments to check your clothes goes a long way in preventing an unraveling seam. Regular inspection helps you catch issues before they spiral out of control.
Once a month, scan your garments for loose threads, weak spots, or areas under extra stress. Gently stretch seams on jeans, activewear, or fitted pieces to test their fabric integrity. This early detection can stop a minor problem from becoming a major headache.
Make it a habit to inspect the stitch condition of frequently worn items, especially after heavy use. If your favorite sweatshirt starts showing seam weakness, addressing it now saves you from repair clothing emergencies later. Even a quick check every six months on the thread quality of your wardrobe can reduce future repairs.
A little preventative care guarantees seam reinforcement where it’s most needed, keeping your clothes in top shape and your confidence intact.
Professional Alterations for Complex Repairs
When DIY fixes don’t cut it, professional alterations are your best bet for complex seamwork.
Tailoring expertise guarantees durable, precise results through advanced techniques that go beyond home sewing.
Here’s what to expect:
- Seam Reinforcement: Professionals use stronger stitches and custom solutions to keep seams intact for years.
- Repair Clothing: Experts handle intricate garments, from wedding dresses to business suits, with perfection.
- Advanced Techniques: Tailors skillfully blend fabric restoration and garment reconstruction, ensuring flawless results.
Champs Cleaners provides specialized wedding dress alterations to guarantee a perfect fit.
For tough repairs, trust the pros to save your favorite clothes and keep them looking like new.
Frequently Asked Questions (FAQs)
How to fix unraveling seams by hand?
Did you know 60% of clothes are discarded due to small damages?
Thread a needle with matching thread, tie a knot, and use small, even stitches to resew the seam.
Finish with secure knots.
How to fix a unraveled seam using a sewing machine?
Use matching thread and a straight stitch to resew the seam, starting slightly before the damaged area.
Backstitch to secure ends, then trim excess threads.
Test by gently pulling the fabric to verify durability.
How do you fix a torn seam?
Turn the garment inside out, align the torn seam edges, and pin them in place.
Sew along the original seam line using a straight stitch, backstitching at both ends.
Trim loose threads for a clean finish.
How do you reinforce a seam?
Start by stitching another line of strong, matching thread parallel to the original seam.
Use small, even stitches and end with a secure knot.
For extra strength, try backstitching or a double seam stitch.
How do you fix a frayed seam?
When your seam’s gone rogue with fraying edges, trim loose threads neatly, fold raw fabric inward, and secure with small, even stitches.
Reinforce with backstitching for strength and finish with an iron press to smooth.
How do you fix a snagging seam?
Check the snagged thread first—don’t pull it.
Gently trim loose ends or pull them inside the fabric.
Rethread with matching thread and neatly stitch to secure the seam.
Verify that stitches are tight but smooth.
How do you fix an Unravelling seam?
When your fabric’s secret falls apart, grab a needle, matching thread, and scissors.
Anchor with knots, using small, even stitches.
Secure and reinforce the seam for strength.
Trim loose threads, then test its durability.
How to fix unraveling seam by hand?
Thread a needle with matching thread.
Tie a knot at the end, and sew small, even stitches along the seam’s gap.
Backstitch for extra strength, trim excess thread, and press the seam flat with even stitches.
How do you fix a fraying seam?
Start by trimming loose threads.
Fold the frayed edge inward about 1/4 inch, then sew using a whip stitch or zigzag stitch.
Use matching thread and secure knots to prevent further fraying and strengthen the seam.
How do you fix a seam that is coming apart?
Turn the garment inside out, pin the fabric flat, and pick matching thread.
Use small, even stitches to re-sew the seam, overlapping an inch past the damage.
Secure the thread tightly and trim excess.
Conclusion
Fixing an unraveling seam isn’t rocket science, even if it feels like it when your favorite shirt’s falling apart.
With the right tools and techniques—like backstitching, whip stitches, or a trusty sewing machine—you can tackle repairs confidently.
Pay attention to thread choice, fabric type, and seam placement to keep your clothes in great shape.
Reinforce high-stress seams and practice good garment care to prevent future issues.
Master these tips and you’ll handle any unraveling seam with ease.

