This site is supported by our readers. We may earn a commission, at no cost to you, if you purchase through links.
 Getting a bumpy sew-in to lay flat doesn’t require a complete do-over. You can smooth those raised tracks by gently applying heat with a flat iron on low temperature, using a silk scarf to press down overnight, or massaging lightweight oil into the tracks.
If your braids underneath are too tight or thick, carefully loosening them helps reduce the bumps. Sometimes adding a bit of leave-in conditioner and wrapping your hair with a silk scarf creates that sleek finish you’re after.
The key is working with what you’ve got rather than against it. But there’s actually a whole science to preventing these issues from happening in the first place, by understanding how to work with what you have and applying the right techniques to achieve a smooth look.
Table Of Contents
Key Takeaways
- Fix the foundation first – You can’t smooth bumpy tracks if your braids underneath are too tight or thick, so gently loosen them and ensure they’re lying flat against your scalp
- Use gentle heat and pressure – Apply a flat iron on a low temperature with a silk scarf as protection, then press down overnight with the scarf to train your tracks to lay flat
- Apply lightweight oils strategically – Massage a small amount of lightweight oil directly into the bumpy tracks to add flexibility and help them settle closer to your scalp
- Prevent future bumps with proper installation – Choose medium-sized cornrows that hug your head’s natural curve and ensure even tension throughout to create a smooth foundation from the start
Common Issues With Bumpy Sew-Ins
A bumpy sew-in can turn your dream hairstyle into a nightmare, creating visible tracks and an uneven appearance that screams "fake hair."
Don’t worry though – these common issues are totally fixable with the right techniques and a little know-how.
Tracks Becoming Visible
Visibility is the enemy of flawless Track Concealment.
When your weft placement lacks precision, those telltale lines scream "fake hair alert!" Poor stitching security creates gaps where tracks peek through your natural hair.
Foundation integrity matters—loose braids can’t support proper hair density.
One key to success is choosing the right thread to match the hair extensions.
Fix sew in problems by adjusting track placement closer to your scalp.
Secure each weft tightly against the braid, ensuring your sew in solutions create seamless blending that keeps your bumpy sew in secret safe.
Excessive Shedding
Nothing’s worse than finding hair strands scattered around your bathroom like confetti after a party gone wrong. Excessive shedding from your sew-in isn’t just annoying—it’s a red flag that something’s off with your install.
Here’s what’s causing your hair to jump ship:
- Poor weft sealing allows loose threads to escape
- Low hair quality extensions break down faster
- Improper installation creates weak attachment points
- Rough maintenance routine damages weft integrity
The good news? Most shedding solutions are straightforward. Quality extension type matters—human hair sheds less than synthetic. Fix sew in problems by addressing shedding causes early, before your gorgeous style turns into a daily cleanup mission.
Uneven Appearance
Your sew in weave might look like a mountain range instead of silk-smooth perfection.
Poor weft spacing creates gaps while inconsistent tension makes some areas tight, others loose.
Wrong track placement throws off your entire look.
The fix? Adjust spacing between wefts, guarantee even tension throughout, and reposition tracks strategically.
These blending techniques will flatten bumpy sewin issues fast, ensuring silk-smooth perfection.
Headaches and Discomfort
When tension headaches kick in from your bumpy sewin, it’s your scalp’s way of waving a red flag.
Excessive tension creates scalp sensitivity that can ruin your day and disturb sleep discomfort nightly.
During the adjustment period, peppermint oil helps soothe irritation while loosening overly tight tracks.
Don’t tough it out – weave problems like constant throbbing signal the need for immediate weave solutions before permanent damage occurs.
Hairline Damage
Protecting your hairline starts with understanding how weave tension wreaks havoc on delicate edges. Excessive tension from tight sew-ins causes traction alopecia and edge thinning, threatening your hairline recovery.
- Permanent bald spots that destroy your confidence and self-image
- Irreversible damage requiring expensive treatments or transplants
- Years of regrowth with no guarantee your edges will return
Prioritize scalp health by loosening overly tight tracks immediately. Check your sewin weekly for excessive pulling around the hairline. Quality hair protection means choosing gentle installation over dramatic tension that promises damage.
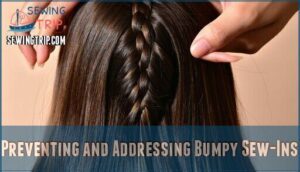
Preventing and Addressing Bumpy Sew-Ins
The key to preventing bumpy sew-ins lies in mastering your foundation work before you even think about installing those tracks.
You’ll want to focus on creating the smoothest possible base with proper braiding techniques, securing your stitching just right, and managing tension so your scalp stays comfortable.
While your sew-in looks flawless, it is crucial that you have managed the foundation work correctly to achieve the desired outcome.
Proper Braiding Techniques
Your foundation determines everything – a bumpy braiding pattern leads to visible tracks and frustration.
Start with medium-sized cornrows that hug your head’s natural curve, creating that sleek base you’re after.
Braiding patterns matter more than you think.
The zig-zag method distributes tension evenly while lying flatter than traditional straight-back styles.
For seamless blending, consider a sew-in with strategic leave-out sections.
Keep your braids close to the scalp – this prevents that dreaded "lumpy sewin" look that screams amateur hour.
| Technique | Benefit |
|---|---|
| Small, neat braids | Creates flat, smooth foundation |
| Circular patterns | Matches head shape seamlessly |
| Even hair distribution | Prevents tension spots |
| Proper braid size | Supports weft placement |
| Close-to-scalp braiding | Eliminates visible bumps |
Your scalp health depends on consistent braid size and proper hair distribution across each section.
This weft support system keeps your hair extensions looking natural while protecting your edges.
Choosing The Right Foundation
Your braiding patterns make or break your sewin’s flatness. Choose small, uniform cornrows that hug your scalp without crushing it—think snug sweater, not straightjacket.
Match your hair type with the right foundation stability: fine hair needs extra support, thick hair requires precise spacing. Smart braiding creates the perfect canvas for a weave flat finish.
A proper base guarantees maximum wear and easier upkeep, which is crucial for perfect canvas and easier upkeep.
Ensuring Secure Stitching
Solid stitching techniques make all the difference between a bumpy mess and a flat sewin masterpiece.
Choose strong thread and tie secure knots at strategic spots for weft security.
Reinforce your stitches by going through each braid twice, creating an invisible anchor system. These stitching fundamentals prevent lumps and keep your sew in flat for weeks.
Managing Tension and Tightness
Finding the right balance feels like tuning a guitar—too tight and everything snaps, too loose and you lose control. Your sewin shouldn’t feel like a medieval torture device squeezing your scalp.
Managing tension effectively:
- Scalp Massage before braiding increases blood flow and reduces pain
- Braid Size matters—medium braids distribute tension better than tiny ones
- Adjusting Braids immediately prevents long-term hairline protection issues
Check tension by sliding your finger under each braid. If it’s stuck tighter than a pickle jar, loosen up before continuing your bumpy sewin transformation. Using specialized massage products can further enhance scalp health.
Maintaining a Healthy Hairline
Your hairline deserves attention beyond just achieving tension control.
Regular scalp health checks prevent edge damage that creates those unwanted bumps.
Gentle scalp massages boost circulation and support edge regrowth while you’re rocking your protective styles.
Smart product selection matters – lightweight oils nourish without weighing down your sew in maintenance routine.
Monitor hairline protection by loosening tracks if they’re pulling too tight.
Remember, healthy edges mean better sew in care overall, and prioritizing hairline health over temporary style convenience is crucial for long-term benefits.
Your future self will thank you for taking care of your scalp health and ensuring edge regrowth by following these simple tips.
Quick Fixes for a Flatter Sew-In
When your sew-in starts looking more like a mountain range than sleek hair, don’t panic.
There are quick fixes that’ll get you back to looking smooth.
You can adjust tracks, seal those pesky shedding wefts, apply gentle heat, or use the right products to tame those bumps without starting from scratch.
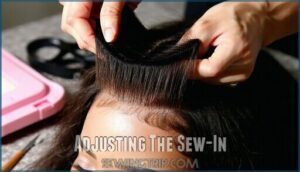
Adjusting The Sew-In
Sometimes your sew-in needs a little adjustment after installation.
Start by rearranging tracks that create bumps—gently lift sections and reposition them closer to your scalp.
Managing tension is key for uniformity adjustments. If tracks feel too tight, loosen the stitching slightly.
For persistent bumpy areas, professional assistance guarantees proper flattening without damaging your hair or scalp, ensuring uniformity and proper care.
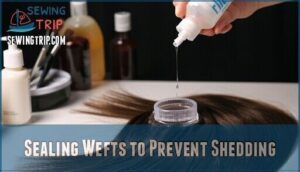
Sealing Wefts to Prevent Shedding
Weft Sealing Methods protect your hair weave investment from frustrating shedding disasters. Smart Sealant Application Tips make all the difference in maintaining gorgeous wefts that won’t betray you mid-style.
- Apply Shedding Prevention Products one inch from weft tops—coating threads, not hair strands
- Choose alcohol-free formulas that won’t dry out your precious locks like desert sand
- Let sealant cure completely before styling—patience pays off with lasting Weft Quality Impact
For the best results, consider using a quality weft sealant.
- Reapply every 2-3 washes for consistent Long-Term Weft Care and weave tips success
- Focus sealing on high-stress areas where your sew in tips need extra protection
Applying Heat to Flatten Tracks
After sealing your wefts, you’ll want to tackle those pesky bumps with strategic heat application. Think of your flat iron as a magic wand that transforms lumpy tracks into sleek perfection.
Start with temperature control – set your flat iron around 375°F. Too hot and you’ll fry your investment; too cool and you’re wasting time. Apply heat protectant first because nobody wants crispy hair weave disasters.
Use the "comb and chase" method: glide your comb right behind the flat iron for even heat distribution. Work in small sections and keep that iron moving – parking it in one spot is asking for trouble.
For extra protective barriers, place a thin cloth between the iron and your tracks. To prevent damage, remember to use heat protectant on both your natural hair and the extensions.
Your flat sew in will thank you for this gentle smoothing approach. Remember, slow and steady wins the race in the process of weave maintenance and heat styling.
- Set flat iron to 375°F for ideal results
- Apply lightweight heat protectant before styling
- Use protective barriers like thin cloth when needed
- Work in small 1-2 inch sections for control
- Keep iron moving to prevent heat damage
- Try the comb and chase technique
- Start with low settings if hair is fragile
- Let each section cool before moving on
- Press tracks gently with consistent pressure
- Focus on problem areas with extra bumps
- Avoid excessive heat on scalp areas
- Use ceramic flat iron for even heat distribution
- Check for smoothness after each pass
- Practice gentle smoothing motions throughout
Using Products to Smooth Out Bumps
Beyond heat application, the right products can work magic on stubborn bumps. Smoothing Serums and lightweight Creams Application target problem areas without weighing down your hair extensions.
Here’s your game plan:
- Apply Heat Protectants before using any thermal tools on bumpy sections
- Choose Professional Products specifically designed for weave maintenance and styling
- Focus product application directly on raised tracks, not your entire head
- Avoid heavy formulations that cause Product Buildup and make bumps more obvious
Consider using products for optimal hair smoothing. Smart weave care means less is more – you’re smoothing imperfections, not drowning them in product.
Long-Term Solutions for a Flatter Sew-In
While quick fixes can provide temporary relief, building lasting solutions requires consistent maintenance and strategic planning.
You’ll need to establish proper care routines and make smart choices about hair quality to keep your sew-in looking smooth and natural for weeks to come.
Proper Maintenance and Care
Proper scalp care becomes your secret weapon for maintaining that smooth, bump-free look.
Daily scalp hydration with lightweight oils prevents dryness and irritation that can create unwanted lumps. Gentle tension relief through scalp massages keeps your foundation comfortable.
Weft care with moisturizing products maintains flexibility. Style variation prevents stress on single areas, and scheduling a professional refresh every 6-8 weeks helps your weave care routine stay on track for flawless hair extensions.
By following these steps, you can ensure that your scalp and weave care routine is comprehensive and effective, leading to a bump-free look and a comfortable foundation.
Regularly Refreshing The Sew-In
Smart timing keeps your sew-in looking fresh longer.
You’ll want to switch up your styling routine every few weeks – varying styles prevents tracks from becoming too obvious.
Don’t forget to re-braid edges when they start loosening and make checking tension part of your regular maintenance schedule.
Moisturizing regularly supports scalp health while keeping your hair extensions hydrated and manageable.
Choosing High-Quality Hair Extensions
Investment in premium extensions is your foundation for lasting smoothness.
Quality hair prevents most bumping issues from day one, making your styling journey infinitely easier.
Here’s what separates extension royalty from cheap knockoffs:
- Hair Texture – Match your natural pattern perfectly; mismatched textures create visible bumps and awkward blending
- Weft Construction – Double-drawn strands with reinforced stitching won’t shed or create thickness variations
- Extension Density – Proper thickness distribution eliminates lumpy spots and uneven weight distribution
- Color Matching – Seamless blending requires exact shade coordination; close enough isn’t good enough
- Ethical Sourcing – Virgin human hair from reputable suppliers maintains hair integrity longer than processed alternatives
Quality extensions cost more upfront but save money long-term.
Remy human hair with intact cuticles lasts 9-12 months versus synthetic options lasting weeks.
Proper hair preparation before installation maximizes your investment’s lifespan.
Seeking Professional Help if Needed
When severe discomfort persists despite DIY fixes, expert consultation becomes your best friend for lasting solutions.
Professional adjustments can address scalp damage while properly managing tension to flatten sew in installations without compromising your hair’s health.
| When to Seek Help | What Professionals Offer | Expected Outcomes |
|---|---|---|
| Persistent headaches | Tension adjustment techniques | Immediate pain relief |
| Visible track bumps | Proper re-stitching methods | Smoother, flatter appearance |
| Scalp irritation | Safe removal/reinstallation | Avoiding damage to natural hair |
| Excessive shedding | Quality weft sealing | Reduced hair loss |
| Uneven appearance | Expert track repositioning | Professional-grade results |
Tips for Achieving a Flatter Sew-In
You’ll want to master these five essential areas to transform your bumpy sew-in into a sleek, professional-looking style that lasts.
Getting these fundamentals right from the start saves you hours of frustration and keeps your hair looking fresh for weeks.
Preparing The Hair and Scalp
Getting your hair ready beforehand sets you up for success – think of it as laying the perfect groundwork.
Start with clean, conditioned hair that’s ready for braiding without buildup weighing it down.
- Cleanse Scalp thoroughly with clarifying shampoo to remove product buildup
- Deep Condition hair 24-48 hours before installation for ideal moisture balance
- Scalp Massage with lightweight oils to improve circulation and flexibility
- Oil Treatment on ends only – avoid oversaturating the scalp area
- Protective Barrier spray helps shield hairline from tension during braiding process
Proper Installation Techniques
Your braiding patterns create the blueprint for a flat weave. Choose horizontal foundations that hug your scalp’s natural curves.
Secure stitching keeps hair weft alignment tight without creating tension hotspots. Perfect hair track placement means each weft sits flush against your cornrows.
Proper braiding techniques are essential for a flat foundation. Master your sewing technique by checking that tracks move naturally with your head movements during weave installation to achieve a natural look.
Post-Installation Styling and Maintenance
Once your installation’s complete, your styling game needs to stay sharp.
Use proper Styling Techniques like alternating parting patterns to prevent track exposure along your hairline.
Your Night Routine should include loosely wrapping extensions with silk scarves while applying light oils for Scalp Health.
Smart Product Recommendations include leave-in conditioners and heat protectants. These habits maximize Sew-In Longevity by keeping wefts secure and your styling fresh.
Addressing Any Issues Promptly
The moment you spot early discomfort, shedding, or visible tracks, don’t wait—take action immediately. Swift intervention prevents minor issues from becoming major headaches.
Check for tight braids or sewing pulling at the hairline. Feel along tracks and wefts for uneven lumps. Look for falling threads, roots showing, or visible tracks. Monitor shedding and uneven appearance daily.
- **Your scalp screaming for tension relief?
** Listen to those warning signs before damage sets in.
- **Wefts dropping hair like autumn leaves?
** Early shedding control saves your investment and sanity.
- **Tracks playing peek-a-boo through your hair?
** Catch visibility issues before they embarrass you.
- **Professional adjustments feeling intimidating?
** Remember, experts exist to perfect what went wrong—don’t suffer in silence.
Embracing Protective Styling for Hair Health
Protective styling isn’t just about looking good—it’s your hair’s best friend for long-term health.
When you embrace protective styles like sew-ins, braids, and twists, you’re giving your natural hair a break from daily manipulation while promoting Growth Stimulation and Moisture Retention.
Think of it as putting your hair in a cozy cocoon where it can thrive without constant styling stress.
Style Versatility becomes your superpower when you rotate between different protective options.
Your scalp stays healthier when you avoid tight installations that compromise Scalp Health.
Quality wefts and properly placed tracks in your sew-in work together for Damage Prevention.
Remember, healthy hair grows from a happy scalp—so keep things loose enough to breathe!
Frequently Asked Questions (FAQs)
Why is my sew in not flat?
Like a wrinkled shirt fresh from the dryer, your sew-in’s bumpy because your braids aren’t tight enough, tracks are placed unevenly, or you’re using too much hair per weft section.
How long does it take for a sew in to settle?
Your sew-in typically settles within 3-5 days as your scalp adjusts to the tension. You’ll notice less tightness and discomfort as the braids naturally loosen slightly from daily movement.
How to flatten a sewing pattern?
Iron your sewing pattern pieces on low heat, using a pressing cloth to prevent scorching.
Store patterns flat between uses, or carefully fold along original creases.
Smooth wrinkles gently with your hands before cutting, to ensure complete concepts are preserved and to facilitate the sewing process.
Can you straighten sew in extensions?
Wonder why your sew-in won’t lay flat?
You can’t completely straighten naturally curly extensions, but you can smooth them using gentle heat styling, smoothing serums, and proper installation techniques to minimize bumps and achieve a flatter appearance.
Can you wash a sew-in weekly?
You can wash your sew-in weekly, but it’s not ideal.
Frequent washing strips natural oils and loosens tracks.
Aim for every 10-14 days instead—your scalp and style will thank you for the breathing room.
What hair texture works best for sewing?
Coarser hair textures like 4a-4c work best because they grip the thread better and create stronger anchors.
Your natural texture provides the foundation, so you’ll get a more secure, longer-lasting install.
How long do sew-ins typically last?
Sure, your sew-in’s basically on borrowed time – typically lasting 6-8 weeks with proper care. You’ll want to remove it before your natural hair starts protesting with breakage or matting.
Should you sleep with a silk pillowcase?
Yes, you should sleep with a silk pillowcase.
It reduces friction on your hair and skin, preventing frizz and tangles while you toss and turn.
It’s like giving your hair a gentle hug all night long.
Can you color hair extensions after installation?
You can’t dye synthetic extensions after installation, but human hair extensions take color beautifully.
Check your extension type first—synthetics will melt under chemical processing, while human hair handles bleach and dye like your natural strands.
Conclusion
Rome wasn’t built in a day, and neither is a perfect sew-in.
Now that you know how to flatten a bumpy sew in, you’ve got the tools to transform your tracks from raised ridges to smooth perfection.
Whether you’re using heat, oils, or adjusting those tight braids underneath, remember that patience is key.
Don’t rush the process – your hair will thank you for the gentle approach, and you’ll love the sleek results.
- https://xrsbeautyhair.com/blogs/hair-blog/sew-in-braid-pattern
- https://wigsedythecoug.jimdofree.com/2018/06/19/methods-to-sew-in-weave-yourself-with-out-lumps-or-bumps/
- https://www.youtube.com/watch?v=4NkHQiX8eck
- https://www.privatelabelextensions.com/blogs/bundles/sew-in-pain
- https://www.usa.gov/features/five-tips-for-reporting-a-scam

