This site is supported by our readers. We may earn a commission, at no cost to you, if you purchase through links.

To fray the bottom of jeans, start by marking your desired length with chalk, then make a clean cut across.
Rough up the edges using sandpaper or a razor blade – work in small sections for that authentic, uneven texture.
Don’t go overboard; the best frays develop naturally with wear.
Pop them in the wash to soften those edges, and you’ll have that coveted raw hem that makes every outfit look effortlessly cool.
There’s actually a secret trick that professional stylists use to get that perfectly distressed look without damaging the denim’s structure.
Table Of Contents
- Key Takeaways
- How to Fray The Bottom of Jeans
- What is Fraying in Jeans
- Choosing The Right Tools for Fraying
- Step-by-Step Guide to Fraying Jeans
- Advanced Fraying Techniques for a Personalized Look
- Common Mistakes to Avoid When Fraying Jeans
- Styling and Caring for Frayed Jeans
- Frequently Asked Questions (FAQs)
- Conclusion
Key Takeaways
- Mark your desired length with chalk and cut straight across, keeping it slightly longer than your target length to allow for fraying.
- Rough up the edges using sandpaper, a razor blade, or slam the jeans against the ground several times to kickstart the fraying process.
- Wash your jeans inside out with cold water and air dry them to protect the frays while maintaining your desired distressed look.
- Control excessive fraying by applying clear nail polish or fabric glue to the edges, or add a line of stitching above where you want the fraying to stop.
How to Fray The Bottom of Jeans
Want to give your jeans that perfect lived-in look? Fraying the bottom of your jeans is a quick DIY project that’ll transform your denim from basic to trendsetting. You don’t need fancy tools – just grab a pair of sharp scissors and your favorite jeans.
First, mark your desired length by folding the hem and marking with chalk. To prevent excessive fraying after cutting, you can apply a fabric seam sealant like Fray Check liquid. Then, make a clean cut straight across, keeping it slightly longer than you want the final result to be.
Here’s a cool trick: slam your jeans against the ground a few times to kickstart the fraying process. It might sound weird, but trust me, it works like magic. You can also rough up the edges with sandpaper for extra texture. For an even fray, gently pull out the white threads along the cut edge.
This DIY approach saves money and lets you customize your style exactly how you want it.
What is Fraying in Jeans
You’ll love how fraying creates that perfectly lived-in look by deliberately unraveling the bottom edges of your jeans.
Fraying your jeans is basically letting those horizontal threads come loose in a controlled way, giving your denim that cool, casual vibe that looks totally natural.
Benefits of Fraying Jeans
Looking to breathe new life into your old jeans? Fraying the bottom edges isn’t just a trend – it’s a game-changer for your wardrobe.
Beyond just updating your look, fraying offers some seriously cool perks:
- Creates a unique, can’t-buy-it-in-stores style that’s totally yours
- Additionally, learning to repair small tears and holes with techniques like how to patch a knee hole in pants can breathe new life into your favorite jeans. Saves money by transforming too-long jeans into perfect-length pairs
- Lets you experiment with different lengths without hitting the mall
- Adds an effortlessly cool, lived-in vibe to any outfit
Types of Fraying Techniques
Now that you know the perks of frayed jeans, let’s explore different ways to achieve that perfectly worn look, which you can also enhance with the right tools and supplies from a distressed jeans DIY kit online (Distressed Jeans DIY).
You’ve got several fraying techniques at your disposal – each with its own unique vibe.
| Technique | Difficulty | Time Required | Result |
|---|---|---|---|
| Hand-fraying | Easy | 15-20 mins | Natural, uneven look |
| Machine-fraying | Medium | 5-10 mins | Uniform distress |
| Sandpaper method | Easy | 10-15 mins | Subtle wear |
| Chemical distressing | Advanced | 30+ mins | Extreme breakdown |
Choosing The Right Tools for Fraying
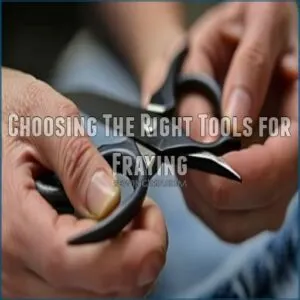
You’ll need sharp scissors that can cut through denim like butter, and while fancy fraying tools are nice to have, your trusty kitchen scissors can totally do the job.
Using fabric shears specifically designed for cutting fabric, such as types of fabric scissors, can make all the difference in achieving a professional finish. Premium tailor scissors will give you clean cuts and help you nail that perfectly imperfect look.
Using Premium Tailor Scissors
Premium tailor scissors are your secret weapon for achieving those perfectly frayed jeans.
Unlike regular scissors that can leave jagged edges, professional-grade scissors give you clean, precise cuts every time.
You can find these high-quality scissors at online stores like Tailor Scissors online.
You’ll want to invest in a pair of 8-10 inch scissors with stainless steel blades and ergonomic handles.
Keep them sharp and dedicated solely to fabric – this isn’t the time to share with your paper-cutting tools.
Alternative Tools for Fraying
While premium scissors work great, don’t feel limited – your kitchen and bathroom might hide perfect fraying tools.
A cheese grater’s rough edge creates an authentic worn look, while a pumice stone gives you controlled distressing.
Even a nail file works wonders for detailed fraying.
My personal favorite? A regular sandpaper block – it’s cheap, easy to handle, and gives you total control over the distressing process.
Step-by-Step Guide to Fraying Jeans
You’re about to learn how to transform your too-long jeans into the perfect frayed pair with just a pair of scissors and some creative moves.
Get ready to channel your inner fashion designer as we show you a simple trick that’ll save you money and give your denim that trendy, lived-in look you’ve been wanting.
Tracing Your Cutting Line
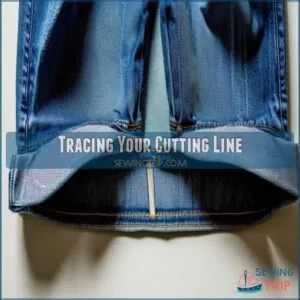
After picking your tools, let’s mark that perfect cutting line. Grab your measuring tape and make this moment count – it’s like drawing the map to your jean’s new destiny. You’ll want a straight, clean line that follows your style vision.
- Stand in front of a full-length mirror, wearing the jeans
- Place pins at your desired length, checking both legs match
- Draw your line with tailor’s chalk or a washable pencil
- Double-check measurements from each side seam
Cutting The Inseam
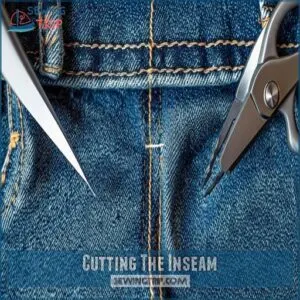
Sharp scissors in hand, you’re ready to tackle the inseam – this is where the magic happens.
If you don’t already have a good pair, consider investing in a dedicated fraying jeans scissors.
Start by laying your jeans flat on a clean surface, making sure both legs are perfectly aligned.
Measure twice, cut once – it’s essential for that perfect hem length.
Use your scissors to cut straight across, keeping steady pressure for a clean edge.
Remember to cut slightly longer than your target length.
Fraying The Edges
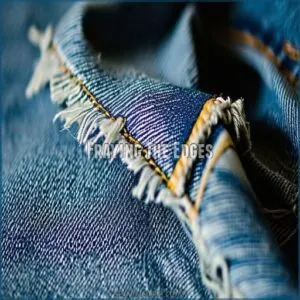
Now that you’ve got your cut line perfectly aligned, let’s create that signature frayed look.
To prevent the fraying from getting out of control, you can use techniques like using pinking shears on other fabric projects.
Take your jeans and slam them hard against the ground – trust me, this old-school trick works wonders! Keep slamming until you see those threads starting to loosen up.
Want more distressing? Try rubbing the edges with sandpaper or a pumice stone for that perfectly worn-in vibe.
Advanced Fraying Techniques for a Personalized Look
You’re ready to take your jean-fraying game to the next level with these cool tricks that’ll make your denim uniquely yours.
From using everyday items like loofahs to adding fun embellishments, you’ll learn how to create those perfectly distressed edges that’ll make your friends think you spent big bucks at a boutique.
Using a Loofah or Razor for Fraying
Looking to level up your fraying game? While scissors get the job done, loofahs and razors can create uniquely textured edges that’ll make your jeans stand out.
Different fabrics fray at varying rates, and loosely woven fabrics like cotton or denim are more prone to fraying than tightly woven ones.
Here’s why these tools rock:
- Loofahs create a soft, wispy fray that looks naturally worn-in
- Razors offer precise control for detailed distressing
- Both tools let you build texture gradually, so you won’t overdo it
Try running your tool along the cut edge in short, gentle strokes for that perfect lived-in look.
Adding Embellishments to Frayed Jeans
Ready to take your frayed jeans to the next level?
While a loofah creates texture, embellishments add that perfect personal touch.
To achieve a unique look, consider choosing a patch that matches the jacket’s style and mood, such as a vintage or bold patch to express personal flair by following how to sew a patch onto a jacket. Try sewing vintage patches along the frayed edge, weaving colorful threads through the loose fibers, or adding studs and rhinestones for extra sparkle.
You can even attach delicate lace trim or denim fringe details.
These DIY touches transform basic frayed jeans into your own wearable masterpiece.
Common Mistakes to Avoid When Fraying Jeans
You’ve got your scissors ready and you’re excited to start fraying, but hold up – there are some classic DIY mistakes that can turn your trendy jeans project into a fashion fail.
Whether you’re a first-timer or you’ve frayed before, knowing these common pitfalls will help you nail that perfect distressed look you’re going for.
Uneven Cuts and How to Fix Them
Ending up with uneven cuts isn’t the end of your DIY journey.
The fix is simpler than you’d think – grab your scissors and create a gentle slope between the highest and lowest points.
If you’ve got major differences, try the "fold and match" technique: fold your jeans in half lengthwise, align the legs, and trim along the longer side to match the shorter one.
Over-Fraying and How to Prevent It
Now that you’ve fixed those uneven cuts, let’s tackle over-fraying – the denim equivalent of a bad haircut that won’t stop.
Too much fraying can transform your trendy DIY project into a messy disaster.
Here’s how to keep your frays in check:
- Stop washing after achieving your desired fray level
- Apply clear nail polish to the edges to prevent further unraveling
- Use fabric glue on the inside seam for extra control
Styling and Caring for Frayed Jeans
You’ll love how your frayed jeans can take you from casual coffee runs to night-out vibes with just a few styling tricks.
Frayed jeans can be versatile and stylish.
With the right care routine and some creative cuffing techniques, you can keep your DIY frayed edges looking fresh and fabulous for months to come.
Creating a Skinny Cuff With Frayed Jeans
Looking to level up your frayed jeans game? A skinny cuff adds that perfect finishing touch.
Start by folding the hem up about 1-2 inches, then roll it once more for a sleek double cuff. Keep it snug but not too tight – you want that effortless vibe.
For an extra edge, let a bit of fraying peek out from the cuff. It’s your style, so play around until it feels right.
Washing and Drying Frayed Jeans
After rocking those frayed edges, you’ll want to keep them looking fresh.
Wash your jeans inside out on cold to protect the frays and prevent excessive unraveling.
Skip the dryer – air drying helps maintain that perfect fray level you worked so hard to achieve.
If you’re in a rush, a quick tumble on low heat won’t hurt, but remember: less heat means longer-lasting frays.
Frequently Asked Questions (FAQs)
How to fray the bottom of jeans?
Transform your tired jeans into trendy statement pieces.
Cut straight across the hem, rough up the edges with scissors, then wash and dry.
For extra fraying, run the cut edges through the washer multiple times.
How to cut off jeans?
Measure where you want to cut, then mark a line with chalk.
Roll up the jeans to check length.
Use sharp scissors to cut straight across.
Pro tip: cut slightly longer for hem adjustments.
How to make a pair of jeans look frayed?
Want to give your jeans that perfectly worn-in look?
Just cut them to length, then slam them hard against the ground several times.
You’ll get that natural, effortlessly frayed edge you’re after.
How do you Fray jeans if they are too long?
Cut your jeans to your desired length, then rough up the edges using scissors.
Fraying
Toss them in the wash or slam them against the ground repeatedly.
You’ll get that perfectly frayed, lived-in look.
What is fraying in jeans?
Fraying happens when you let those perfect denim threads come undone at the edges, creating that perfectly imperfect, lived-in look you’ll love.
It’s like giving your jeans a personality makeover with a rebellious twist.
Can you fray denim yourself?
You can create unique looks like a bleached denim jacket by following a simple process, including a crucial step of mixing the right bleach solution ratio. You can easily create distressed denim at home!
Just grab scissors, mark your desired length, cut straight across, and rough up the edges by rubbing them together or using sandpaper for that perfectly worn look.
How do you fray the bottom of jeans fast?
Just like weathered stones shape themselves, your jeans can transform quickly.
Take scissors, snip the hem, then slam them against the ground repeatedly.
For faster results, rough up the edges with sandpaper.
How do you make a fringe at the bottom of jeans?
Creating a fringe on jeans is super easy – cut small vertical slits along the hem, then wash and dry them.
You’ll get that perfectly frayed look you’re after.
Don’t forget to measure twice!
What can I use to fray jeans?
With over 80% of DIY enthusiasts preferring basic tools, scissors are your best friend for fraying jeans.
Scissors are your best friend for fraying jeans.
Grab heavy-duty scissors, sandpaper, or a pumice stone to distress the denim’s edges for that perfect worn look.
How to distress jeans bottom?
Cut your jeans to the desired length and slam them into the ground repeatedly.
You can also rub the edges with sandpaper or scissors for extra distressing.
Wash them afterward to soften the frays.
Does washing make frayed jeans fall apart?
Like a loyal friend, your frayed jeans won’t bail on you in the wash.
Just turn them inside out and use cold water – they’ll stay intact while keeping that perfectly worn-in look you love.
Can you fray pre-distressed or vintage jeans?
Yes, you can totally distress vintage or pre-worn jeans. When working with denim, it’s essential to choose the right fabric weight, such as medium weight denim, and adjust your sewing machine tension accordingly to achieve a perfect DIY look!
The existing wear adds character to your new fraying.
Just follow the same cutting and distressing techniques, but be extra gentle with delicate vintage denim.
How long does it take jeans to fray naturally?
Natural fraying typically takes 3-6 months of regular wear.
You’ll notice the threads starting to loosen after about a month, but for that perfectly worn-in look, you’ll need some patience and consistent movement.
Will fraying work on stretch denim materials?
Stretch denim will fray, but you’ll get a softer, less dramatic effect than with traditional denim.
Fraying is more delicate with stretch denim, creating a subtle, feathered look that’s equally stylish.
Can you stop fraying once it starts spreading?
You can easily control fraying by adding a line of stitching above where you want it to stop.
This creates a barrier that prevents further unraveling while keeping your distressed look exactly how you want it.
Conclusion
Gone are the days of paying premium prices for perfectly distressed denim!
Now that you know how to fray the bottom of jeans like a pro, you can create that coveted lived-in look right at home.
Whether you’re giving new life to old favorites or customizing recent purchases, these techniques will help you achieve that effortlessly cool vibe.
Remember to take it slow, be patient with your cuts, and let some of that fraying happen naturally.
Your personal style journey just got a whole lot more interesting!


