This site is supported by our readers. We may earn a commission, at no cost to you, if you purchase through links.
That beloved vintage band tee doesn’t fit your style anymore, but the iron-on design seems permanently welded to the fabric. You’ve tried picking at the edges, maybe even attempted to wash it into oblivion, but the transfer clings stubbornly while the shirt itself remains perfectly wearable.
The adhesive bond between heat-activated transfers and fabric fibers creates a chemical grip that resists casual removal attempts, which explains why your fingernails and wishful thinking haven’t worked.
Fortunately, you can break down this bond using strategic heat application, targeted solvents, and careful lifting techniques that separate the design without destroying the shirt underneath. The key lies in understanding which removal method matches your specific transfer type, then executing each step with patience to avoid scorching, stretching, or staining the fabric you’re trying to save.
Table Of Contents
Key Takeaways
- Heat-activated adhesives bond iron-on transfers to fabric through chemical fusion that requires strategic heat application, targeted solvents, or careful lifting techniques to reverse without damaging the shirt underneath.
- You’ll need to identify your specific transfer type (vinyl, inkjet, screen-printed, or sublimation) because each bonds differently to fabric and responds to different removal methods involving heat, solvents like rubbing alcohol or acetone, and gentle scraping tools.
- The removal process works in stages—first soften the adhesive with heat or solvents, then physically lift the transfer at a 45-degree angle, and finally dissolve any leftover sticky residue using fabric-safe chemicals and gentle scrubbing techniques.
- Always test your chosen removal method on a hidden fabric area first, work in well-ventilated spaces when using solvents, and avoid excessive heat or aggressive scrubbing that can cause permanent scorch marks, fabric thinning, or color damage.
What Are Iron-on Transfers on Shirts?
Iron-on transfers are decorative designs you press onto fabric using heat, bonding a printed image to your shirt through a special adhesive layer. They’re everywhere in DIY clothing projects and custom apparel, but they’re also built to last, which makes removal tricky.
The same heat-activated adhesive technology is used in hemming pants without sewing, where removal similarly requires careful techniques to avoid damaging the fabric.
To tackle removal effectively, you need to understand what you’re working with, how the bond forms, and why getting it off isn’t always straightforward.
Common Types of Iron-on Transfers
You’ll encounter three main types of iron-on transfers when customizing shirts: vinyl heat transfers, inkjet printable transfers, and screen-printed heat-applied designs. You can learn more about common types of heat transfer printing and their unique applications.
Each type bonds differently to fabric, which affects how you’ll tackle removing iron-on transfers from clothing:
Before you start peeling, check out how to get iron marks out of clothes to avoid accidentally damaging the fabric with too much heat or pressure.
- Vinyl transfers use a heat press or household iron to melt adhesive backing onto cotton or polyester
- Inkjet transfers print mirror images that iron directly onto light-colored fabrics
- Screen-printed designs apply thick ink layers through mesh screens with heat activation
- Sublimation transfers dye polyester fibers permanently using heat and pressure
- Plastisol transfers create raised, rubber-like designs that require specific adhesive removal techniques
Understanding your transfer type gives you control over the heat transfer removal process ahead.
How Iron-on Adhesive Works
The secret behind those custom designs sticking to your shirt lies in heat-activated adhesive, which transforms from solid to molten and back again during the ironing process. For more information on choosing and applying adhesives, see these . When you apply heat, the adhesive chemistry melts into fabric fibers, creating transfer bonding through molecular fabric interaction. As it cools, the polymer chains harden and lock the design in place, which is exactly why removing iron on transfers from clothing requires reversing this process with strategic heat transfer removal or adhesive removal techniques.
Why Removal Can Be Challenging
Once that adhesive has fused into your fabric’s fibers, breaking those bonds without damaging the shirt itself becomes a delicate balancing act. Adhesive strength varies by transfer type, and aggressive removal techniques risk fabric damage, iron marks, or scorch marks.
Material limitations also play a role—delicate fabrics can’t handle high heat or harsh solvents, making removal difficulty a real concern when removing unwanted iron-on transfers.
Supplies Needed to Remove Iron-on Transfers
Before you start peeling that transfer off your shirt, you’ll need to round up a few basic supplies.
Most of these items are probably sitting in your laundry room or bathroom cabinet right now.
Here’s what to grab so you can tackle the removal safely and effectively.
Recommended Household Solvents
You don’t need harsh industrial products when household solvents can break down that stubborn adhesive. Start with gentler options, then escalate only if needed—always prioritizing fabric safety and solvent safety:
If you’re dealing with wrinkles instead, you can try steaming your shirt in the shower using moisture and heat to relax fibers without direct contact.
- Rubbing alcohol (70-91% isopropyl): Affordable, widely available, and effective on cotton and cotton-polyester blends
- Acetone or nail polish remover: Fast-acting but risky on delicate fibers
- Goo Gone or similar adhesive removers: Petroleum-based formulas for stubborn residue
- Hydrogen peroxide: Gentle chemical alternative for sensitive fabrics
- Dish soap with hot water: Auxiliary cleaning after removal techniques
Always perform fabric testing on a hidden area first.
Essential Tools and Materials
Grab a few common items from around your home, and you’ll have everything required to tackle that iron-on transfer with confidence. You’ll need an iron, ironing board, and a clean towel or damp cloth for heat application.
Gather tweezers, a butter knife or credit card for scraping, and your chosen solvent options like rubbing alcohol, acetone, or adhesive remover. Keep paper towels handy for cleanup.
Safety Precautions Before Starting
Before removing iron-on transfers from clothing, protect yourself from chemical hazards and heat safety risks. Set up proper ventilation control by opening windows, wear chemical-resistant gloves for solvent handling, and keep adhesive remover away from flames. You’ll also avoid scorch marks and iron marks by:
- Testing solvents on hidden fabric areas first
- Wearing safety goggles when using acetone
- Working on heat-resistant surfaces only
- Keeping good airflow throughout
- Washing hands after personal protection use
Preparing Your Shirt for Transfer Removal
Before you start pulling at that stubborn iron-on, you need to set yourself up for success. A little prep work now saves you from ruining your favorite shirt later.
Here’s what you need to do to protect your fabric and get the transfer ready to come off cleanly.
Protecting Fabric and Work Surfaces
Before you start peeling away that iron-on transfer, you’ll want to set up a safe workspace that won’t leave you with new stains or damage to worry about.
Place an old towel or parchment paper between your ironing board and the shirt to catch any adhesive residue. This simple step protects both surfaces during removal, preventing transfer of chemicals or melted adhesive onto your work area.
Pre-Treatment Steps for Best Results
Think of pre-treatment as insurance for your shirt—it means you won’t ruin fabric while removing iron-on transfers from clothing. Fabric inspection comes first, so check care labels to confirm safe heat application and solvent testing zones.
- Inspect fiber content labels, especially for polyester or delicate blends vulnerable to heat damage
- Test solvents on hidden seams to check for discoloration before wider use
- Set up ventilation preparation by opening windows when using adhesive removers
- Pre-cleaning with hot water and detergent softens adhesive layers
- Preheat transfer areas at fabric-safe temperatures for easier removal
These adhesive removal methods and ironing techniques protect fabric care throughout heat removal.
Step-by-Step Methods to Remove Iron-Ons
You’ve got your shirt ready, now it’s time to actually get that iron-on off. The method you choose depends on what works best for your fabric and how stubborn the transfer is.
Below, you’ll find three proven techniques that tackle the job from different angles.
Heat and Steam Removal Technique
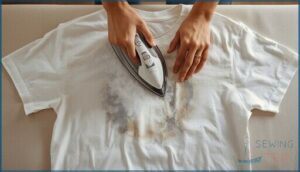
Heat transfer removal starts with your iron set to medium, never maxed out. Turn your shirt inside out, lay it flat, and place a cotton pressing cloth over the design area.
Apply short steam bursts—ten seconds max—directly to the transfer from the back. This adhesive softening technique protects fabric while loosening the bond.
Gently lift one corner with your fingernail between heating cycles, checking for movement before continuing.
Solvent Application and Adhesive Breakdown
When heat alone won’t budge that stubborn transfer, rubbing alcohol or acetone-based nail polish remover becomes your secret weapon. These chemical solvents trigger adhesive breakdown through targeted chemical reactions, loosening bonds without brute force.
Solvent application for safe transfer removal:
- Test your chosen adhesive dissolver on a hidden seam first, checking for color bleeding or fabric damage.
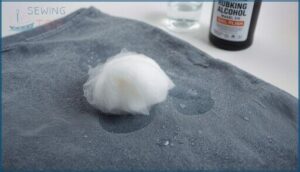
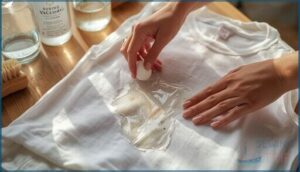
- Saturate a cotton ball with rubbing alcohol or acetone, then press it firmly against the transfer’s back for 30-60 seconds.
- Let the chemical solvents penetrate the adhesive for two minutes before attempting removal.
- Reapply adhesive remover to resistant spots, working in small sections for better fabric protection.
- Ventilate your workspace well—solvent safety matters as much as results.
Peeling, Scraping, and Lifting Techniques
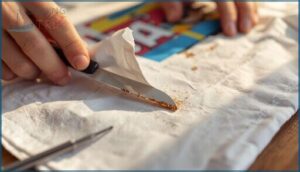
Once the adhesive softens from heat or solvent treatment, you’ll need steady hands and the right tools to physically separate that transfer from your fabric. Start edge lifting with your fingernail or tweezers at a corner, peeling slowly at a 45-degree angle for fabric safety.
For stubborn vinyl removal, slide a dull butter knife under raised sections, using gentle residue scraping motions that won’t snag fibers.
How to Remove Leftover Adhesive Residue
After you’ve peeled off the transfer, you’ll likely find sticky residue clinging to your shirt. This leftover adhesive won’t wash out on its own, so you need a targeted approach to break it down.
The following methods show you how to dissolve, scrub, and lift that stubborn residue without harming your fabric.
Using Solvents to Dissolve Residue
After you’ve peeled away the transfer, stubborn sticky patches often cling to your fabric—but the right chemical solvents can break down that adhesive layer completely. Choose your weapon based on fabric type and residue severity:
- Rubbing alcohol (70–91%) works gently on most fabrics and softens many adhesives without harsh damage
- Goo Gone penetrates petroleum-based residues, lifting sticky spots after a 30-minute dwell time
- Acetone or nail polish remover dissolves tough thermoplastic glues fast—but skip it on cotton, wool, or silk
- Adhesive remover sprays target vinyl residues from the shirt’s reverse side for deeper chemical dissolution
Gentle Scrubbing and Fabric-Safe Methods
Now that solvents have softened the gunk, you’re ready for gentle physical coaxing. Use a soft-bristled brush in light circular motions—think fabric care, not steel-wool warfare. Apply a dab of mild detergent directly onto the adhesive patch, then scrub with controlled pressure to avoid pilling or thinning delicate weaves. This soft brushing approach honors textile restoration principles while removing iron-on transfers from clothing without scarring your favorite shirt.
| Tool | Pressure Level | Best For |
|---|---|---|
| Soft brush | Light, circular | Cotton, polyester blends |
| Microfiber cloth | Gentle dabbing | Silk, rayon, delicates |
| Old toothbrush | Controlled, minimal | Stubborn residue spots |
| Fingertip rubbing | Very light | Testing fabric response |
Avoiding Fabric Damage During Cleanup
Your shirt’s already been through enough—scrubbing too hard, using the wrong chemicals, or cranking up the heat without thinking can turn a simple cleanup into permanent fabric carnage.
Always test your adhesive remover on a hidden seam first, work in short intervals to monitor fabric response, and skip harsh scrubbing on delicate weaves.
Fabric protection means knowing when to stop—damage prevention trumps flawlessness every time.
Knowing when to stop protects your fabric better than chasing perfect results ever will
Caring for Your Shirt After Transfer Removal
You’ve successfully removed the iron-on transfer, but your work isn’t quite finished yet.
Now you need to restore your shirt to its original condition, check for any damage, and make sure no chemicals or residue remain in the fabric.
The following steps will help you properly care for your garment after the removal process.
Post-Removal Washing and Drying Tips
After you’ve removed the transfer, proper laundry and cleaning will protect your work. Cold water rinsing from the back flushes out loose adhesive particles before they resettle.
Follow these fabric care and maintenance steps:
- Use fabric safe detergents without bleach on the treated area
- Select gentle cycle washing with the shirt turned inside out
- Choose air drying methods over high heat to avoid setting residue
- Perform residue inspection after drying to check for remaining stickiness
This clothing maintenance and repair approach prevents further damage while ensuring complete stain removal.
Checking for Stains or Scorch Marks
Every removal leaves a trail, so inspect your fabric closely under bright light for discoloration, shine, or rough patches. Look for scorch marks around the transfer area, especially on cotton.
Check for color fading or permanent stain removal challenges. This damage assessment helps you decide whether additional laundry and fabric care is needed, or if removing scorch marks requires specialized treatment before wearing the shirt again.
Restoring Fabric Texture and Appearance
Bringing fabric back to life after transfer removal isn’t about flawlessness, it’s about patience and the right finishing touches. Wash the shirt with fabric softener to encourage texture restoration and color preservation.
For stubborn stiffness from adhesive removal, soak the area in warm water mixed with a tablespoon of white vinegar. Air dry flat to prevent shrinkage, completing your fabric revival without harsh chemicals or additional clothing repair needs.
Frequently Asked Questions (FAQs)
How to get iron-on adhesive off of a shirt?
To break down iron-on adhesive, apply rubbing alcohol or acetone-free nail polish remover with a clean cloth, then gently lift residue using a plastic scraper while protecting your fabric.
How to remove ironed on branding?
To remove ironed on branding, apply heat with an iron over a pressing cloth for 15–30 seconds, then lift the softened transfer using tweezers while stretching the fabric gently.
What types of fabric are best for iron-on transfers?
Cotton, cotton-polyester blends, and denim offer the best bonding for iron-on transfers because their weaves tolerate heat without melting.
Polyester works well with lower temperatures, while stretchy fabrics like spandex often crack transfers.
Can I use an iron-on transfer on any type of clothing?
Not every piece of clothing can handle iron-on transfers. Heat resistance, fabric compatibility, and material limitations determine success—cotton and polyester blends work best, while delicate fabrics risk permanent damage.
What temperature should I set my iron to for iron-on transfers?
Set your iron between 305°F and 330°F for most iron-on transfers.
Cotton fabrics tolerate higher heat settings up to 375°F, while polyester requires lower temperatures around 270°F to 300°F to prevent melting or damage.
Is it safe to use an iron-on transfer on delicate fabrics?
Most delicate materials like silk and rayon can’t safely handle iron-on transfers because heat sensitivity causes scorching or melting. You risk permanent fabric damage unless you use protective barriers and dramatically lower temperatures.
How long can an iron-on transfer last?
Like a tattoo on fabric, iron-on transfers cling tight—most surviving 50 to 100 washes.
Transfer lifespan depends on adhesive longevity, fabric durability, and care practices, making removal challenges inevitable as wash resistance weakens over time.
Can iron-on transfers be removed from delicate fabrics?
Yes, but proceed cautiously. Silk and lightweight blends respond best to low heat, mild solvents like isopropyl alcohol, and gentle lifting.
Always test hidden areas first—adhesive type and fabric finish determine removal success rates without permanent fabric damage.
Will removal methods work on old or faded transfers?
Old or faded transfers resist removal more stubbornly because aged adhesive becomes deeply embedded in fibers.
Specialized vinyl removers and heat techniques offer better success rates than household solvents for older iron-on designs.
How long does the removal process typically take?
Most iron-on transfers take 15 to 45 minutes to remove, depending on transfer age, adhesive strength, and your chosen removal methods.
Small decals lift faster, while older transfers on delicate fabric types require extended work.
Conclusion
Your shirt’s second life starts the moment you decide that old design doesn’t deserve its spot anymore. Now you’ve got the tools, techniques, and confidence to reclaim that fabric without compromise.
Heat softens the bond, solvents dissolve what remains, and patience protects what you’re working to save. Learning how to get iron-on off a shirt transforms frustration into control, turning a cluttered closet into possibility.
That perfectly good shirt? It’s yours again.
- https://www.wikihow.com/Remove-an-Iron-on-Transfer-From-Clothes
- https://www.hooptalent.com/blogs/news/how-to-remove-iron-on-transfers-from-shirts-safe-methods-without-damage
- https://www.veetrends.com/blog/how-to-remove-vinyl-from-a-shirt
- https://www.dtlaprint.com/finishing-services/
- https://www.cdc.gov/niosh/topics/hydrogen-peroxide/default.html

