This site is supported by our readers. We may earn a commission, at no cost to you, if you purchase through links.
 Ironing a patch onto your backpack is a breeze when you know the right steps!
First, check your backpack material – is it cotton, denim, or a synthetic blend?
Test a small area to make sure the fabric can handle the heat.
Then, give your backpack a quick clean and let it dry completely.
Choose a patch that fits the size and style of your bag, and pick a sturdy adhesive.
Set up your work station with a heat-resistant surface, pressing cloth, and a hot iron.
Carefully position the patch, apply firm pressure, and run the iron around the edges to seal it in.
With a little TLC, your patched-up backpack will look fresh as new!
Get ready for tons of compliments.
Table Of Contents
Key Takeaways
- First, identify your backpack material – whether it’s cotton, denim, or synthetic – and give it a quick heat test to make sure the fabric can handle the iron. No one wants a melted mess, am I right?
- Before applying the patch, give your backpack a gentle clean and let it dry completely. That way, the adhesive will bond well, making your patch last for the long haul. Trust me, a little prep work goes a long way.
- When choosing your iron-on patch, pay attention to the size, adhesive strength, and fabric compatibility. You want a durable design that complements your backpack’s style, not a patch that’s going to peel off in a week. Test it out first to get the perfect match.
- Set up your workspace with a heat-resistant surface, a pressing cloth, and a nice and toasty iron. Position the patch, apply firm pressure, and seal those edges – your backpack is about to get a serious style upgrade, my friend!
Preparing the Backpack for Iron-on Patch Application
Before you can iron on a patch, you’ll need to prep your backpack.
First, identify the material — is it cotton, denim, or synthetic?
Then, give the area a quick wipe to make sure it’s nice and clean. This will help the patch stick like a dream.
Identify the Backpack Material
First things first – what’s your backpack made of?
Knowing the fabric composition is key when selecting the right patch.
Is it a rugged denim, a breezy cotton, or a synthetic blend?
Take a close look and give it a gentle tug to get a feel for the material.
This will help you choose the perfect iron-on patch for the job.
Checking Heat Resistance
Before applying that sweet iron-on patch, give your backpack a quick heat check.
Not all fabrics can handle the scorching iron – trust me, I learned that the hard way.
Look for heat-resistant materials like denim, cotton, or polyester.
Give a small, inconspicuous area a quick iron test to be safe.
Cleaning and Drying the Backpack Surface
Before you iron on a patch, give your backpack a quick clean.
Spot-treat any stains with a dab of mild detergent and warm water.
Let the backpack air dry completely.
This will ensure the adhesive bonds firmly to the fabric, no matter if it’s denim, cotton, or a synthetic blend.
A pre-washed, dry surface is key for a smooth, long-lasting patch.
Selecting the Appropriate Iron-on Patch
Once you’ve identified your backpack material and confirmed it’s heat-resistant, it’s time to select the perfect iron-on patch.
You want this patch to last as long as your trusty backpack, so the size, adhesive, and fabric compatibility are key factors to keep in mind.
Choosing the Right Size Patch
When choosing the right size patch, consider the scale of your backpack.
A larger patch may overwhelm a small bag, while a tiny patch may get lost on a big backpack.
Opt for a patch size that complements your backpack’s dimensions and design.
Considering Patch Adhesive and Durability
When choosing an iron-on patch, consider the adhesive strength and durability.
Strong adhesives can withstand constant flexing and frequent washing, perfect for backpacks that see heavy use.
However, softer, more flexible adhesives may be better for occasional use on delicate fabrics.
Test on a small area first to make sure you get the perfect balance of hold and stretch.
Compatibility With Backpack Fabric
To make sure your iron-on patch sticks like a dream, you’ll want to think about your backpack’s fabric type.
Cotton, denim, and polyester blends typically work well.
Avoid slippery synthetic fabrics.
Run a quick patch test on a discreet area to check for color transfer or adhesion issues.
The last thing you want is a peeling patch ruining your travel memories!
Setting Up the Work Area
Before you can iron on a patch to your backpack, you’ll need to set up your work area properly.
First, choose a heat-resistant surface like an ironing board or a thick towel.
Then, gather your tools – you’ll need the iron-on patch, a hot iron, and potentially a pressing cloth.
Selecting a Heat-Resistant Surface
Select a flat, heat-resistant surface for your iron-on patch project.
An ironing board is perfect – just make sure the fabric cover can withstand high temperatures.
Kitchen counters or sturdy tables also work well, but lay down a protective layer like a thick towel or heat-proof mat to shield the surface.
Gathering the Necessary Tools
With the backpack prepped, you’ll want to gather a few key tools.
Start by grabbing a heat-resistant pressing cloth – think of it as your trusty sidekick during the ironing process.
Next, measure the patch size with a tape measure to make sure it fits right.
Don’t forget a thick, heat-resistant surface to place the backpack on – a sturdy table or counter will do the trick.
Preheating the Iron
Next, you’ll want to preheat that iron to the right temperature.
Check the manufacturer’s instructions for the ideal heat setting.
You don’t want to scorch that backpack fabric!
Give the iron a few minutes to warm up, then do a quick test on a scrap piece of the same material to make sure it’s not too hot.
Once it’s ready, you’re all set to get ironing!
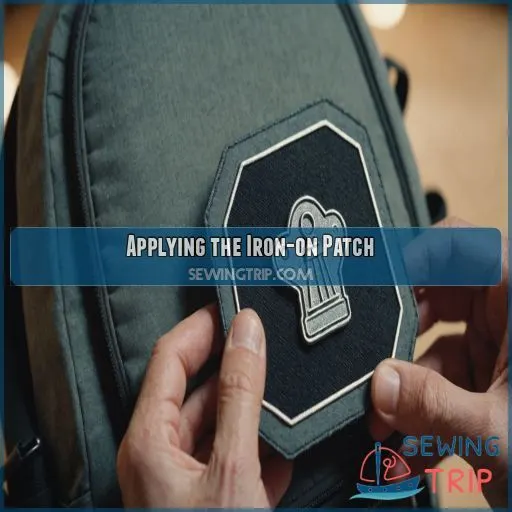
Applying the Iron-on Patch
Now that you’ve got your backpack and iron-on patch ready, it’s time to get to the fun part – actually applying the patch!
Follow these simple steps to get a professional-looking result that’ll have your backpack looking brand new.
Positioning the Patch
Lay the patch out on your backpack, positioning it just where you want it to land.
Take a moment to make sure it’s centered and aligned properly – you don’t want any crooked or off-kilter patches!
The size and design of your patch should complement the backpack’s features too.
With the patch laid out, you’re ready to start pressing.
Applying Heat and Pressure
Preheat your iron to the suitable temperature for the backpack material, typically around 300°F (150°C).
Carefully place the patch adhesive-side down onto the prepared area.
Apply firm, even pressure as you slowly move the iron across the surface, distributing the heat evenly.
Hold the iron in place for 30 seconds to set the patch.
Sealing the Patch Edges
Once the patch is perfectly placed, it’s time to seal the edges for lasting durability.
Run the hot iron slowly along the outer rim of the patch, applying firm pressure.
This heat sealing technique will fuse the edges to the fabric, preventing fraying or peeling down the line.
A tidy, reinforced finish is the key to a patch that stays put.
Securing the Patch and Preventing Detachment
After carefully applying your iron-on patch, it’s time to make sure it sticks around for the long haul.
Give the patch a good once-over to check that it’s properly attached.
Follow a few simple tips to prevent it from peeling off down the road.
With a little extra attention, you can keep your backpack looking fresh and personalized for years to come.
Checking for Proper Adhesion
After applying the iron-on patch, give it a gentle tug to make sure it’s securely bonded.
Run your fingers along the edges, feeling for any loose spots.
If the patch feels sturdy and flush against the backpack fabric, you’re good to go.
Celebrate your handiwork with a high-five – your patch is now ready to withstand daily wear and tear!
Tips for Long-
Avoid exposing your iron-on patch to excessive heat, moisture, or friction.
These elements can compromise the adhesive over time.
Be gentle when washing your backpack.
Use a soft brush and mild detergent to gently clean around the patch.
With a little TLC, that patch will stay put for ages.
Frequently Asked Questions (FAQs)
Can you iron on a patch to a backpack?
Iron-on patches are a cinch to attach to backpacks.
Just give your pack a good cleaning.
Then, preheat your iron.
Place the patch on the backpack.
Press firmly for 30 seconds.
Easy peasy lemon squeezy!
How to put a patch on your backpack?
First, clean the area you want to patch.
Then, warm up your iron.
Place the patch on the cleaned area.
Cover the patch with a cloth.
Press the iron on the cloth for 30 seconds.
Voilà! Your backpack has a stylish new look.
Do iron-on patches work on bags?
Heck yeah, iron-on patches work like a dream on backpacks!
Just make sure your pack’s fabric is heat-friendly.
Then simply press that patch on and voila – instant personalization, no sewing required.
It’s a cinch, my friend!
Can I put an iron on patch on a nylon bag?
You can definitely iron on a patch to a nylon bag!
Just be sure to use a low heat setting and a pressing cloth to avoid scorching or melting the fabric.
It’s a quick and easy way to personalize your gear.
Can I use the iron-on patch on a zipper?
Iron-on patches can absolutely be used on zippers.
It may take a bit more care and precision.
Just make sure to clean the zipper area thoroughly and apply the patch firmly with even heat.
Easy-peasy!
Do I need to wash the backpack before applying the patch?
Don’t sweat it – washing the backpack isn’t mandatory, but a quick once-over with a damp cloth can help the iron-on patch stick like a charm.
Just be sure to dry it thoroughly before applying the patch.
How do I remove an iron-on patch if I make a mistake?
Oops, made a boo-boo with that iron-on patch?
Don’t fret – just grab a pair of sharp scissors.
Carefully snip around the edges to remove it.
The key is working slowly and steadily to avoid damaging the backpack fabric.
Can I use the iron-on patch on a leather backpack?
You can use iron-on patches on a leather backpack, but it’s a tricky process.
The heat from the iron can damage the leather, so you’ll need to take extra care.
Why not explore sew-on or bonding patch options instead?
How long does the iron-on patch last on the backpack?
Iron-on patches can last for years if you apply them correctly and take care of your backpack.
You’ll enjoy your customized look for the long haul if you are gentle when handling the patched area.
Conclusion
With your patched-up backpack, you’ll turn heads wherever you go.
Embrace the character and individuality of your one-of-a-kind carry-all, and get ready for compliments galore.
By mastering the art of how to iron on a patch to a backpack, you’ve discovered a simple yet effective way to breathe new life into your trusty sidekick.
Time to show off your handiwork and strut your stuff in style!


