This site is supported by our readers. We may earn a commission, at no cost to you, if you purchase through links.
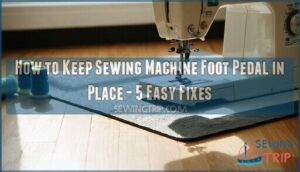 You can stop your sewing machine foot pedal from sliding by placing it on a rubber drawer liner, yoga mat, or carpet pad.
These materials grip both your floor and the pedal’s bottom, creating a stable foundation that won’t budge during stitching.
For smooth floors like hardwood or tile, try double-sided carpet tape under the pedal or invest in a purpose-made pedal pad with grippy material.
Even a simple towel can work in a pinch.
The key is creating friction between surfaces so you can maintain consistent speed control without chasing your pedal across the room.
Smart positioning and the right grip material transform frustrating sewing sessions into smooth, controlled stitching experiences where precision meets comfort.
Table Of Contents
Key Takeaways
- You’ll get instant grip by placing your pedal on rubber drawer liner, a mousepad, or yoga mat – these materials create friction between your pedal and floor to stop sliding completely.
- Double-sided carpet tape or Velcro strips underneath your pedal provide removable securing options that work on any surface without permanent changes to your workspace.
- DIY solutions like wrapping your pedal area with non-slip shelf liner or creating fabric bumpers cost less than commercial pads while delivering the same stability results.
- Commercial pedal pads like Pedal Sta II or Martelli No Slip offer professional-grade stability with cushioning that reduces foot fatigue during long sewing sessions.
Non-Slip Foot Pedal Mats
You can transform any ordinary mousepad or drawer liner into an effective non-slip solution for your sewing machine foot pedal.
These simple materials create the grip you need to keep your pedal exactly where you want it during long sewing sessions, utilizing a non-slip solution.
Slip-a-Grip Drawer Liner Roll
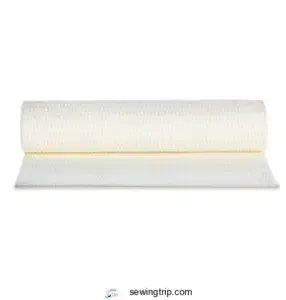
Drawer liner transforms your slippery pedal situation into a rock-solid foundation. You’ll find that Slip-a-Grip Drawer Liner Roll delivers exceptional grip enhancement through its rubberized polymer construction.
Transform slippery pedals into rock-solid control with rubberized polymer grip enhancement.
This nonslip mat creates superior surface friction between your pedal and floor, eliminating those frustrating mid-project slides. Cut the liner to match your pedal’s footprint, then position it underneath for instant pedal stabilization**.
The material’s textured surface provides excellent floor adhesion on hardwood, tile, and laminate surfaces. Its cushioning effect reduces foot fatigue during marathon sewing sessions.
The liner’s flexibility allows you to customize the size perfectly, ensuring your sewing machine pedal stability remains consistent. This pedal non slip solution requires zero installation skills – just unroll, cut, and place.
The nonslip surface technology grips firmly without leaving residue, making it removable when needed. Your pedal grip becomes effortlessly reliable. Proper pedal pressure control is also essential for smooth sewing operations.
Black Gel Mouse Pad by Belkin
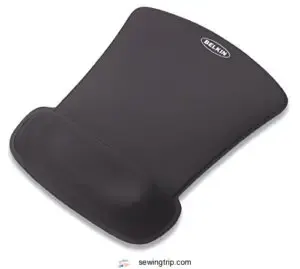
Your foot pedal doesn’t have to wander across the floor like a restless cat. The Belkin Black Gel Mouse Pad transforms into a surprisingly effective pedal stability device that’ll keep your sewing machine’s foot controller exactly where you need it.
This ergonomic design features gel pad benefits that extend beyond computer work. The cushioned surface provides comfortable foot support while the advanced grip technology locks your pedal in place.
Unlike traditional nonslip mat options, this mouse pad alternative delivers consistent pedal grip without bulky materials. The polyurethane surface allows smooth pedal non slip control, letting you apply precise pressure for delicate stitching.
Meanwhile, the rubber base creates superior pedal stability through reliable floor adhesion. This Belkin product proves that sometimes the best foot pedal control solutions come from unexpected sources.
It is lightweight yet durable, and withstands constant pressure while maintaining its grip properties, making it a smart investment for serious sewists. The Belkin Black Gel Mouse Pad offers a surprisingly effective solution with its advanced grip technology and cushioned surface, providing comfortable foot support and superior pedal stability.
ErgoComfort Memory Foam Mousepad
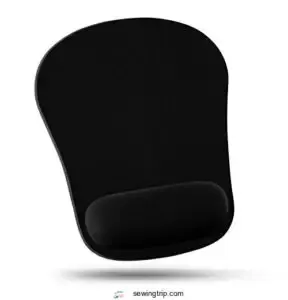
Memory foam technology transforms your sewing experience when foot pedal control matters most.
Memory foam technology delivers unmatched comfort when precision matters most.
This ErgoComfort Memory Foam Mousepad delivers exceptional ergonomic support** through its contoured wrist rest design.
The foam materials conform to your foot’s natural shape, providing wrist comfort during extended sewing sessions.
Its mousepad design features advanced grip technology that prevents sliding on any surface.
You’ll appreciate how the nonslip mats function keeps your pedal exactly where you place it.
The rubber base creates superior pedal stability, eliminating frustrating movements that disrupt your workflow.
Unlike basic solutions, this pad offers genuine pedal grip through its textured surface.
The memory foam cushioning reduces pressure points while maintaining sewing machine pedal control.
Your foot pedal rest becomes more comfortable, reducing fatigue during long projects.
The anatomical design encourages proper posture while the smooth fabric cover feels pleasant against your foot.
This investment pays dividends through improved comfort, enhanced performance, and reliable pedal stability that transforms how you approach detailed sewing work.
DIY Solutions for Foot Pedal Slippage
Creating your own foot pedal pad is easier than you might think and costs far less than buying a commercial solution.
You’ll need just a few common materials and about 30 minutes to make a custom pad that keeps your pedal exactly where you want it, which is a relatively simple process.
Materials and Supplies Needed
Why struggle with a pedal that slides around when you’re trying to focus on perfect stitches? Creating your own non-slip solution requires just a few key materials that you probably have lying around your house.
Start gathering these essential supplies for your DIY pedal pad project:
- Non Slip Mats and rubber materials like shelf liner or gripper pads
- Adhesive Strips including double-sided tape or adhesive hook and loop tape
- Fabric materials such as quilter’s cotton for binding and decorative touches
- Basic tools like scissors, hot glue gun, and measuring tape
These nonslip materials form the foundation of effective Pedal Pads. Rubberized polymer shelf liner provides the grip, while fabric creates comfort and style. Grip Liners work best when combined with proper adhesive hook and loop tape for secure attachment. The beauty of this approach lies in customization – you control the pedal grip strength and appearance to match your sewing space perfectly.
Step-by-Step Instructions for Making a Foot Pedal Pad
Creating your own pedal pad gives you complete control over materials and design.
Start by cutting your nonslip materials to size—typically 12×8 inches works well for most pedals.
Layer grip enhancement components like shelf liner or rubber padding as your base.
Next, wrap these pad materials in durable fabric, securing edges with hot glue or basic sewing techniques.
Add a fabric bumper along one edge to prevent forward movement—this pedal stabilization feature stops annoying sliding during use.
Your DIY sewing solutions approach lets you customize colors and thickness.
Mat crafting becomes simple when you focus on antislip techniques that match your specific pedal dimensions and workspace needs.
Tips for Keeping Your Sewing Machine Foot Pedal in Place
When your sewing machine pedal won’t stay put, these quick fixes will save your sanity and your stitches.
Smart pedal placement tips can transform your sewing ergonomics from frustrating to flawless.
Here are four proven nonslip solutions for better pedal stability:
- Mouse pad magic – Place a gel mouse pad with wrist support under your pedal for instant pedal anchors that work on any floor surfaces
- Hook and loop power – Attach strong Velcro strips between your pedal and a rubber drawer liner for removable pedal stabilizers
- Rubber drawer liner hack – Cut drawer liner to match your pedal’s size for custom foot pedal grip that prevents sliding
- Clamp stopper trick – Wrap a tap clamp around your pedal and table leg to create an effective barrier against forward movement
These pedal slippage prevention methods work on hardwood, tile, and carpet, giving you the sewing machine pedal grip you need for smooth, uninterrupted stitching sessions.
Understanding presser foot issues is also essential for overall sewing machine maintenance and performance.
Benefits of Using Non-Slip Mats and Custom Pads
Using non-slip mats and custom pads transforms your sewing experience by keeping your foot pedal exactly where you put it.
You’ll enjoy better control and comfort while your pedal stays put on any floor surface, from slippery hardwood to plush carpet, providing a more stable and comfortable sewing environment.
Improved Stability and Comfort During Sewing Sessions
Now you can step back and relax knowing your foot pedal won’t wander during those marathon quilting sessions. A secure pedal transforms your entire sewing experience through enhanced control and comfort.
- Foot Pedal Grip stays locked in position
- Sewing Session Ease flows without interruption
- Pedal Control Tips deliver precise speed adjustments
- Comfort Features reduce leg and back strain
Quality Stability Solutions provide the foundation for sewing machine pedal stability you need. Smart pedal placement tips and reliable sewing pedal grip eliminate frustrating mid-project disruptions.
Professional pedal securing methods and proven pedal stability devices keep everything exactly where it belongs.
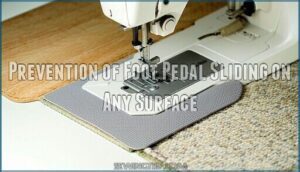
Prevention of Foot Pedal Sliding on Any Surface
Annoying pedal slides can derail your sewing flow in seconds.
Anti-slip mats with surface adhesion technology solve this problem across hardwood, tile, and carpet surfaces.
Friction control materials like rubber backing provide slip resistance that keeps your pedal exactly where you place it.
Nonslip pedal pad solutions with foot restraint features prevent movement in all directions.
These pedal stability devices use advanced pedal grip technology, ensuring your pedal securing methods work reliably every time you sew.
To prevent damage from voltage spikes, consider using a surge protector device when operating your sewing machine, utilizing surge protector and voltage spikes prevention methods for reliable operation.
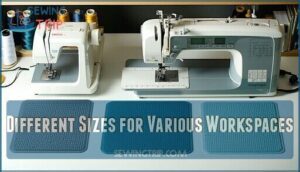
Different Sizes for Various Workspaces
When choosing the right mat size for your sewing machine foot pedal, you’ll want to take into account your workspace layout and floor types.
Every sewing room is different, and what works on hardwood won’t necessarily work on carpet.
Your pedal placement depends on several factors that affect both comfort and functionality:
- Small mats (8×9 inches) work best for compact sewing tables and limited floor space
- Medium mats (11×18 inches) provide extra room for foot movement during long quilting sessions
- Large mats (18×24 inches) accommodate multiple pedals or serve as general workspace protection
- Custom sizes let you match your specific room design and furniture arrangement
The key is finding a pedal positioning aid that gives your sewing machine pedal stay power without overwhelming your workspace.
A good sewing machine foot pedal mat should complement your room’s flow, not fight against it.
Consider your typical pedal stability needs when selecting dimensions.
Enhancing Your Sewing Experience
You can take your sewing to the next level with commercial non-slip pedal pads that stay put no matter what surface you’re working on.
These specialized mats won’t just stop the sliding—they’ll make every stitch smoother and more comfortable than you thought possible.
Pedal Sta II Sewing Machine Pedal Pad
The Pedal Sta II transforms your sewing machine foot pedal into a rock-solid foundation.
This 11-1/4" x 17-3/4" vinyl mat features cushioned padding and a 4" x 4" rubber grip pad underneath for pedal stability on any surface.
The durable construction guarantees mat durability through countless projects while providing sewing comfort and a stable foot rest for your sewing pedal stay.
For enhanced stability, consider using a non slip foot control pad designed for sewing machines.
Martelli No Slip Pad for Machine Foot Pedal
The Martelli No Slip Pad delivers serious pedal stability with its double-sided non slip grip liner design.
This 9×9-inch pad features pad materials that anchor your sewing machine foot pedal firmly to any surface. Its hard core sandwiched between rubber layers prevents sewing machine pedal stay issues on hardwood, tile, and carpet.
The superior pedal grip eliminates creeping while providing foot comfort during long sessions. Mat designs like this transform your workspace control.
For enhanced sewing precision, consider using non slip materials to stabilize your machine and achieve enhanced sewing precision with superior pedal grip.
Pedal Sewing Machine Pedal Pad
You’ll find this sewing machine pedal pad delivers exceptional pedal stability with its carpeted interior and rubber sponge backing.
The 11×18-inch design offers generous foot rest space while Velcro strips guarantee your pedal won’t budge during intricate stitching sessions.
Here’s what makes this pedal pad construction standout for machine control:
- Nonslip grip liner sewn into the base prevents sliding on hardwood floors
- Cushioned surface transforms your foot pedal into a comfortable workspace
- Adjustable Velcro positioning lets you customize pedal grip for different machines
- Antislip mat technology works on carpets, tiles, and smooth surfaces alike
- Generous sizing accommodates various sewing machine pedal stability needs without cramping your workspace
Splinova Sewing Sewing Foot Pedal Stay in Place Mat
When your foot pedal feels like it’s doing the cha-cha across your floor, the Sphinova Sewing Foot Pedal Stay-in-Place Mat becomes your dance floor bouncer.
This anti slip mat’s rubber back and top grip create rock-solid pedal stability, transforming your sewing machine foot pedal into an immovable force.
The mat materials include four-inch Velcro pieces that lock your pedal placement in stone. Your foot support improves dramatically while pedal grip eliminates those annoying mid-seam slides.
Enhanced sewing comfort means your sewing pedal support actually works. The use of a Sewing Pedal Mat can greatly improve overall sewing machine stability.
Maintenance and Cleaning Tips
Your non-slip mats and pads won’t stay effective without regular cleaning and proper care.
Dust, lint, and sewing room debris can turn your grippy solution into a slippery mess faster than you’d expect.
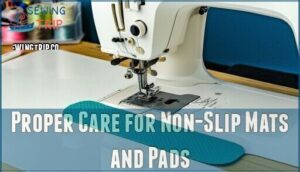
Proper Care for Non-Slip Mats and Pads
Looking at your non-slip mats and pads as investments in your sewing experience means proper mat cleaning and pad maintenance become priorities.
Regular surface preparation keeps grip enhancement working effectively. Wipe rubber mats weekly with mild soap, removing thread bits and lint that reduce traction.
Memory foam pads need gentle cleaning—no harsh chemicals that break down materials. Test durability by checking grip strength monthly.
Dust buildup kills non-slip solutions faster than wear, so antislip solutions require consistent care. Keep pedal pad customization looking fresh by addressing stains immediately.
Your sewing machine pedal stability depends on clean surfaces, while proper sewing pedal support comes from well-maintained equipment that won’t let you down mid-project. Proper thread care techniques are also essential for maintaining overall sewing machine performance and preventing damage.
Cleaning Instructions for Various Materials
Maintaining your anti-slip solutions keeps your sewing machine pedal firmly planted where you need it.
Different materials require specific material care approaches to preserve their grip and longevity.
Here’s your cleaning roadmap for various non-slip surfaces:
- Foam and PVC mats: Wipe with soft cloth and mild soap solution, avoiding abrasive brushes that scratch surfaces
- Cloth pedal pads: Clean with warm water and gentle dish soap using circular motions, then rinse thoroughly to prevent sticky residue
- Self-healing cutting mats: Use room temperature water with mild detergent and soft bristle brush, avoiding hot water that causes warping
- High-tack specialty mats: Apply approved cleaning solution with spray bottle, agitate with squeegee, then air dry completely
Regular dust removal maintains perfect grip for your foot pedal placement.
Surface sanitizing every few months prevents buildup that compromises sewing machine stability.
Proper fabric maintenance guarantees your pedal pad continues delivering reliable anti-slip solutions, giving you confidence during those marathon sewing sessions.
Addressing Specific Issues With Foot Pedal Slippage
When your foot pedal keeps creeping forward or sliding sideways during long sewing sessions, you need targeted solutions that address the root cause.
Here’s how to create effective stoppers and secure your pedal with the right non-slip materials for permanent positioning.
Creating a Stopper to Prevent Forward Sliding
Beyond the traditional non-slip pad, you’ll want to create a physical barrier that stops your sewing machine foot pedal from creeping forward during those marathon stitching sessions. Stopper Design involves crafting a simple fabric roll that acts as your pedal’s best friend.
Cut a fabric strip about 2.5 inches wide, then layer it with felt or batting for extra cushioning. Roll everything up tightly and hand-stitch the ends to create a sturdy bumper.
Position this stopper mechanism at the front edge of your pedal pad, ensuring it’s centered where your foot pedal holder naturally rests.
This sliding prevention technique transforms any surface into a stable workspace. Your foot rest stays put, giving you complete pedal grip control whether you’re working on hardwood, tile, or carpet.
The roll should be slightly wider than your mat for complete coverage, creating reliable stability solutions that keep your sewing machine pedal placement exactly where you need it.
Using Non-Slip Materials to Secure Foot Pedal
Non-slip materials work wonders when your foot pedal won’t cooperate. You’ll find plenty of options to anchor that wandering pedal and regain control of your sewing sessions.
Here are three reliable non-slip solutions:
- Rubberized Polymer Mats: Place a non slip pad with a grippy base under your pedal. These pedal stabilizers grip floors like glue while cushioning your feet. The textured surface prevents sliding on hardwood, tile, or carpet.
- Adhesive Hook and Loop Tape: Attach strong strips to your pedal’s bottom and corresponding floor spots. This creates an instant bond that’s removable yet secure. Perfect for pedal grip without permanent changes.
- DIY Foot Rests: Combine non slip mats with batting and fabric to create custom pedal pads. These slip prevention solutions offer comfort and stability while matching your sewing room’s style.
Clean surfaces before applying any solution for maximum effectiveness.
Frequently Asked Questions (FAQs)
How to stop foot pedals from moving?
When your foot pedal becomes a runaway train, you’ll need to anchor it down. Use non-slip mats, rubber pads, or double-sided tape underneath. Clean surfaces first for better grip.
Why does my sewing machine foot keep falling off?
Your sewing machine foot keeps falling off because it’s not properly secured to the ankle or presser bar.
Check that you’re pushing the foot firmly upward until it clicks into place, ensuring the groove on the foot’s shank aligns with the presser bar’s screw mechanism completely, which helps to secure the foot properly.
How to fix wobbly foot pedal connections?
Like a shaky handshake that undermines confidence, wobbly pedal connections need attention.
Check your pedal’s cord where it plugs into the machine—loose connections create instability.
Tighten the connection, inspect for bent pins, and verify it’s fully seated.
What causes intermittent foot pedal power loss?
Loose electrical connections, worn cord insulation, faulty internal wiring, or debris interfering with contact points typically cause intermittent power loss.
Check your cord for damage and make certain all connections are tight and clean, to prevent issues like loose electrical connections.
Why does my foot pedal overheat during use?
Your foot pedal’s overheating because you’re pushing it too hard for too long.
Heavy use creates friction and heat buildup.
Take breaks, clean dust from vents, and check if the motor’s working harder than it should.
How often should foot pedal cords be replaced?
Like a faithful companion that quietly wears down over time, your foot pedal cord deserves attention.
Replace it every 2-3 years with regular use, or immediately if you notice fraying, exposed wires, or intermittent power issues that could cause safety hazards.
It is crucial to address these issues promptly to prevent safety hazards.
Conclusion
Permanently solving how to keep sewing machine foot pedal in place transforms your stitching experience from chaotic to controlled.
You’ve got multiple options, from commercial pedal pads to simple DIY solutions using household items, and you should choose what works best for your floor type and workspace setup.
Test different materials until you find the perfect grip that matches your sewing style and prevents sliding, which will give you consistent speed control and allow you to achieve better project results every time, making your pedal stay exactly where you need it with controlled stitching.

