This site is supported by our readers. We may earn a commission, at no cost to you, if you purchase through links.
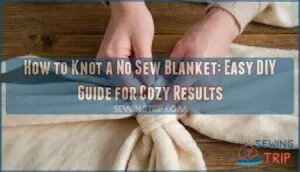
Layer them together with right sides facing out, then cut 4-inch strips around all edges, about 1 inch apart. Make sure both fabric pieces match up perfectly.
Next, tie each corresponding pair of strips together using basic overhand knots, pulling them snug but not too tight. Start at one corner and work your way around the entire perimeter.
The knots create both the seam and decorative fringe simultaneously. This technique works because fleece doesn’t fray, making it perfect for beginners who want professional-looking results. The secret lies in consistent spacing and tension.
Table Of Contents
Key Takeaways
- You’ll need two pieces of fleece fabric cut to the same size, then layer them with right sides facing out and cut 4-inch strips around all edges about 1 inch apart
- Choose anti-pill polar fleece in medium weight (200-300gsm) for the best results – it won’t fray and provides ideal softness for comfortable knotting without bulk
- Tie each pair of corresponding strips together using simple overhand knots, maintaining consistent tension that’s snug but not overly tight to prevent puckering
- Work systematically around the entire perimeter starting at one corner, and you’ll complete a standard throw-sized blanket in about 1-2 hours with professional-looking results
No Sew Blanket Basics
Creating a no-sew blanket starts with choosing the right materials and understanding your project basics.
You’ll need two pieces of fleece fabric, basic cutting tools, and about an hour to complete your cozy creation.
This task is complete, and the reward is acknowledged.
Fleece Material Selection
Choosing the right fleece transforms your no sew blanket project from mediocre to magnificent.
Anti-pill polar fleece remains the gold standard for fleece blanket knot projects, offering superior material softness and edge finishing capabilities.
Anti-pill fleece: your gateway to blanket-making success without the frustration.
Medium-weight options (200-300gsm) provide ideal fabric weight for comfortable knotting without bulk.
Blizzard fleece delivers budget-friendly yarn quality, while premium varieties guarantee lasting durability for your no sew fleece creation.
For the best results, consider using fleece fabric types that suit your project needs, ensuring a superior and comfortable final product.
Blanket Size Options
Your no sew blanket can range from cozy baby blankets at 30"x40" to spacious king sizes.
Baby blankets work perfectly for little ones, while throw sizes (50"x60") suit snuggling on couches.
Twin options measure 66"x90", ideal for beds or larger coverage. Queen blankets and king sizes require more fleece but create luxurious results.
Consider your intended use when selecting dimensions for your fleece blanket knot project—smaller sizes tie faster and make great beginner practice for blanket tying techniques. The standard baby blanket size is essential to know for gifting or personal use.
Essential Tools Needed
Your toolkit for mastering the fleece knot tutorial starts with sharp fabric scissors or a rotary cutter for clean edges. A cutting mat protects surfaces while you work, and measuring tape guarantees accurate sizing for your no sew throw.
The right tools turn fleece into comfort—sharp scissors and measuring tape are your path to cozy success.
Having the right fabric cutting tools is vital for a successful project.
Here’s what you’ll need to tie blanket knots like a pro:
- Cutting tools – Sharp fabric scissors or rotary cutter with fresh blades
- Measuring essentials – Measuring tape and ruler for precise fringe strips
- Work surface – Self-healing cutting mat to protect tables when knotting a blanket
Knotting No Sew Blanket
When you’re ready to knot a blanket, you’ll transform two pieces of fleece into a cozy no sew throw through simple tying techniques.
The basic process involves creating fringe strips around your blanket’s perimeter, then systematically tying these strips together to form secure bonds along the edges.
Here’s your essential knotting reference guide:
| Knot Type | Best For | Technique |
|---|---|---|
| Single Knot | Quick projects | One simple tie per strip pair |
| Double Knot | Extra durability | Two knots per strip for strength |
| Square Knot | Professional finish | Right over left, left over right |
| Loop Knot | Decorative edge | Create loops before tying |
Your fleece selection directly impacts blanket texture – anti-pill fleece maintains softness longer.
When knotting a blanket, work systematically around the perimeter, maintaining consistent tension. Each tie blanket knot should feel snug but not overly tight.
This fleece knot tutorial approach guarantees even edge finishing throughout your project. To achieve a professional-looking no-sew throw, consider the fabric selection process to guarantee the best results.
Remember, yarn alternatives like ribbon or fabric strips can create unique textures, though fleece remains the most forgiving material for beginners learning these essential knotting patterns.
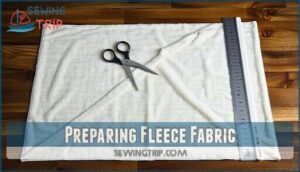
Preparing Fleece Fabric
Proper preparation sets the foundation for a professional-looking no-sew blanket that will last for years.
You’ll need to identify fabric sides, cut pieces to match, and trim edges evenly before you start knotting.
Identifying Right and Wrong Sides
Most fleece fabrics look nearly identical on both sides, making fabric orientation straightforward for blanket knotting.
You’ll find the "right" side slightly smoother with tighter fibers, while the "wrong" side feels marginally fluffier.
For edge alignment and fringe preparation, this difference won’t affect your knot placement or seam direction when you tie knot blanket layers together.
Simply choose one side consistently for both fleece pieces to knot a fleece blanket properly.
Cutting Fabric to Size
After positioning your fleece layers together, accurate Fabric Measurement becomes vital for creating a professional-looking no sew blanket tutorial.
Use a measuring tape to mark your desired dimensions, typically 60×45 inches for standard throws.
Sharp Cutting Tools like fabric scissors or rotary cutters guarantee clean edges that won’t fray during blanket knotting later.
To achieve a polished finish, consider following a fleece tie guide for precise cutting and knotting techniques.
Trimming Fabric Edges
Proper edge trimming transforms uneven fleece pieces into a professional-looking no sew blanket tutorial foundation. Clean cuts prevent puckering and maintain your DIY no sew project’s consistent fringe length throughout the blanket making process.
- Align both fleece layers – Stack pieces with right sides facing out for accurate cutting
- Use sharp fabric scissors – Clean cuts prevent fraying and maintain straight edges for your fleece tie blanket
- Trim uneven selvage edges – Remove factory edges to create uniform blanket dimensions
- Cut 4×4 inch corner squares – This corner squaring technique allows knots to lay flat without bunching
- Measure fringe strips consistently – Mark 4-5 inch sections along all edges for even knotting spacing
Tying Knots on Blanket
Now you’re ready to transform your prepared fleece pieces into a cozy blanket through strategic knotting.
The key lies in creating consistent, secure knots that will hold up to regular use while maintaining an attractive finish.
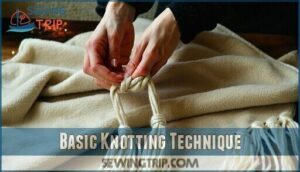
Basic Knotting Technique
The balloon-knot method transforms your DIY no sew project into a professional-looking fleece tie blanket.
Hold two fringe strips together, wrap them around your finger, then pull the ends through the loop you’ve created.
This knot blanket tutorial technique guarantees proper knot tension while maintaining consistent fabric texture throughout your edge finishing process.
Tightening Knots for Durability
You’ve mastered the basic technique, now focus on knot security to prevent unraveling.
Pull each knot firmly but not excessively tight – think "snug handshake" rather than death grip.
Consistent knot tension across your fleece blanket crafts guarantees even durability.
Test knots by gently tugging fringe length strips after tying.
Well-secured knots withstand regular washing while maintaining your no sew projects’ cozy appeal.
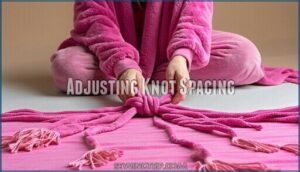
Adjusting Knot Spacing
Consistent knot density creates professional-looking fleece blanket crafts.
Space your knots evenly by measuring every 1-2 inches along the fringe length after edge trimming. This maintains proper knot tension and guarantees uniform blanket texture.
When you knot a fleece project, consistent spacing prevents bunching and creates that satisfying rhythm crafters love in no sew projects. Mastering tying techniques is essential for a polished finish.
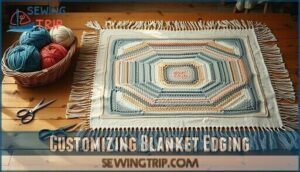
Customizing Blanket Edging
Once you’ve mastered the basic knotting technique, you can explore different edging styles to give your blanket a unique look.
These three popular variations—overhand knotted fringe, square knotted edge, and double looped fringe—will transform your simple no-sew blanket into a customized creation.
Overhand Knotted Fringe
Overhand knotted fringe creates the most streamlined edge finishing for your no-sew blanket.
Simply tie one strip from each fleece layer together, forming a basic loop near the fabric edge.
This knot pattern reduces bulk while providing secure attachment. Pull firmly but avoid overtightening to prevent puckering.
These fringe styles work beautifully for cozy wedding planning gifts or personalized blanket textures.
Square Knotted Edge
Square knotting creates a refined edge that resembles wedding knot elegance. This Edge Finishing technique produces distinct Blanket Textures through structured Fringe Styles.
Your Corner Details will showcase professional-looking Knot Patterns. The process involves creating knots with fringe strips, which is a straightforward technique.
- Take four fringe strips and create two separate knots
- Position the middle strips over outer strips before tying
- Pull tight to form square pattern along blanket edge
This knot tying method delivers clean, geometric borders perfect for gifting, making it a great choice for those looking to create a beautiful and professional-looking blanket.
Double Looped Fringe
Want more decorative edge finishing? Double looped fringe creates elegant depth through layered knot patterns.
Pull each fringe strip through itself twice before tying with its partner, forming distinctive loops. This wedding knot-inspired technique adds sophistication to basic tie blankets.
Adjust fringe lengths between 4-6 inches for ideal loop formation. The knot secures beautifully while maintaining blanket durability and visual appeal.
Finishing and Caring Blanket
Once you’ve finished knotting your no-sew blanket, proper care will keep it looking fresh and cozy for years to come.
Understanding how to wash, dry, and maintain your handmade creation guarantees it stays soft and avoids common problems like shrinkage or puckering.
Washing and Drying Instructions
Wash your finished blanket separately in cold water using a gentle cycle for ideal fabric care.
Choose mild, bleach-free detergent to maintain softness and prevent fiber damage.
Air dry by laying flat or use low heat with dryer balls for extra fluff.
This proper drying methods approach prevents pilling and extends your cozy creation’s lifespan, making it perfect for wedding gifts or personal use, ensuring a long life for your blanket.
Preventing Shrinkage and Puckering
Your fleece blanket’s longevity depends on smart fabric prep and proper care techniques.
Since fleece resists shrinkage naturally, focus on preventing puckering during construction and maintenance.
Follow these shrinkage control and puckering fixes:
- Edge Trimming: Cut fabric edges evenly before knotting to prevent uneven stretching
- Fringe Management: Maintain consistent 1-2 inch strip widths for uniform tension
- Wedding Knot Technique: Tie snug but not overly tight to avoid fabric bunching
- Layer Alignment: Match fleece stretch directions between top and bottom pieces
- Temperature Control: Use cold/warm water washing and low-heat drying only
These wedding planning tools principles apply to craft projects too—proper preparation prevents problems later.
Maintaining Blanket Softness
Beyond gentle washing cycles, keeping your fleece blanket luxuriously soft requires strategic fabric care choices. Use fabric softener sparingly to prevent buildup that stiffens fibers. Air-dry when possible instead of high heat settings.
Properly handling delicate fabrics with delicate care techniques is essential for maintaining their softness and longevity.
| Softness Tips | Material Choice |
|---|---|
| Skip fabric softener every third wash | Choose anti-pill fleece varieties |
| Use dryer balls for natural fluffiness | Avoid polyester blends under 80% |
| Wash in cool water only | Select medium-weight options |
| Store folded, not compressed | Consider microfleece for ultimate softness |
These blanket maintenance practices work whether you’re crafting for your wedding registry or using wedding planning tools to organize DIY projects.
Frequently Asked Questions (FAQs)
How to make a tie-knot blanket without sewing?
Fleece blankets account for 60% of DIY craft projects due to their forgiving nature.
Cut two fleece pieces, trim edges evenly, then tie matching strips together using simple knots for a cozy result.
How long does it take to tie a no-sew blanket?
You’ll need approximately 1-2 hours to tie a throw-sized blanket, depending on your speed and experience.
The actual knotting goes faster than you’d expect—it’s quite meditative once you find your rhythm.
How much fabric do I need for a no-sew tie blanket?
You’ll need 4 yards of fleece total—that’s 2 yards each of two coordinating fabrics. This gives you enough material for a standard throw blanket measuring approximately 50×60 inches when finished.
Can different fleece patterns be mixed together?
Like mixing paint on an artist’s palette, you can absolutely combine different fleece patterns to create a unique blanket masterpiece.
Contrasting colors, complementary prints, or solid-with-pattern combinations work beautifully together, giving you creative control over your cozy creation.
How do you fix uneven or crooked knots?
Gently untie crooked knots and retie them, ensuring you’re pulling each fringe strip evenly.
Check your tension—consistent pressure creates uniform knots.
If blanket edges pucker, loosen tight knots slightly for better alignment.
What happens if fleece pieces arent identical sizes?
Don’t panic if your fleece pieces aren’t perfectly matched – you’ve got this.
Trim the larger piece to match the smaller one using sharp scissors, then proceed with your fringe cuts normally.
Can you add decorative elements during knotting process?
You can weave in ribbons, beads, or fabric strips while tying knots, but they’ll add bulk and complexity.
Consider threading thin ribbon through finished knots or attaching small decorative elements afterward for cleaner results.
How long does a typical blanket take to complete?
Most no-sew blankets require approximately 2-3 hours to complete.
You’ll spend about 30 minutes cutting fringe strips, then 5-2 hours tying knots around the entire perimeter, depending on your blanket size and knotting speed.
Conclusion
Doesn’t creating something beautiful with your own hands feel incredibly rewarding?
Now you know exactly how to knot a no sew blanket that’ll keep you cozy for years.
Your finished blanket proves that simple techniques create stunning results.
The knotting method you’ve mastered works perfectly for gifts, personal projects, or charity donations.
Remember to check your knot tension regularly and maintain consistent spacing throughout.
With practice, you’ll complete future blankets even faster while achieving professional-quality results every time.

