This site is supported by our readers. We may earn a commission, at no cost to you, if you purchase through links.
 Ready to transform your wardrobe without breaking the bank? Learning sewing alterations isn’t rocket science – it’s about patience and practice.
Start by mastering basic hand stitches and understanding fabric types. Grab some scrap material and experiment with different techniques.
YouTube tutorials and online sewing communities are goldmines for beginners. Invest in quality measuring tools and sharp scissors.
Practice measuring, marking, and pinning garments before cutting. Don’t be afraid to make mistakes – they’re part of the learning process.
With consistent practice, you’ll soon be tailoring clothes like a pro, saving money and creating perfectly fitted outfits that look custom-made.
Table Of Contents
Key Takeaways
- You’ll transform your wardrobe by starting with basic hand stitches and practicing on scrap fabric, building confidence through consistent experimentation with different techniques.
- You can learn sewing alterations effectively through online resources like YouTube tutorials, virtual sewing communities, and free online courses that offer step-by-step guidance for beginners.
- Mastering precise measuring techniques and understanding fabric types are crucial skills that’ll help you make professional-looking alterations, ensuring your clothes fit perfectly.
- You’ll save money and boost your creativity by learning to take in, let out, and hem garments, turning ill-fitting clothes into custom-made pieces that look like they were professionally tailored.
Basic Sewing Skills for Alterations
Want to transform your wardrobe without breaking the bank?
Learn basic sewing skills, and you’ll master the art of clothing alterations, turning ill-fitting garments into perfectly customized pieces that make you look and feel amazing.
This will allow you to transform your wardrobe, giving you a sense of accomplishment and style.
Learning Basic Hand Stitches
Anyone stepping into sewing alterations needs to master basic hand stitches.
Master the art of hand stitches—your gateway to transforming garments with confidence and creativity.
Start with the running stitch—your quickest ally for creating simple seams and gathers.
When you need rock-solid strength, the backstitch becomes your sewing superglue, perfectly securing seams and mending tears.
The whipstitch works wonders for attaching trims and edges neatly, while the slip stitch creates nearly invisible hems that look professionally crafted.
Practice these techniques on scrap fabric to build confidence and experiment with different thread types.
Threading your needle might seem tricky at first, but with patience, you’ll soon be stitching like a pro.
These fundamental hand stitches are your gateway to wardrobe transformation.
Mastering hand stitches also requires the right hand stitch tools to achieve professional results.
Understanding Different Types of Fabrics
After mastering basic hand stitches, your sewing journey takes a strategic turn into fabric knowledge. Understanding fabric types isn’t just technical—it’s your secret weapon for killer alterations.
Your fabric analysis toolkit should include:
Decode fabric personalities like a textile detective, transforming your sewing skills with every stitch.
- Density mapping: Lightweight vs. heavyweight materials
- Weave pattern recognition
- Fiber content investigation
- Stretch and drape evaluation
Different fabric types demand different approaches. Natural fabrics like cotton behave differently from synthetic polyesters. A silk blouse won’t tolerate the same alterations as denim jeans. Learning to read fabric characteristics means decoding its personality—how it moves, stretches, and responds to your needle and thread.
Think of fabric selection like choosing a dance partner: some are rigid, some fluid, but mastering their rhythm transforms your sewing game completely.
Practicing Sewing Techniques on Scrap Fabric
After diving into fabric characteristics, it’s time to turn those textile insights into hands-on sewing skills.
Scrap fabric becomes your playground for stitch mastery, offering a risk-free zone to experiment and grow. Your fabric testing journey starts here:
- Create a personal stitch library
- Experiment with different thread tensions
- Practice seam techniques on various textures
- Build muscle memory without pressure
- Document your skill progression
Treat each scrap piece like a mini-canvas, transforming random fabric bits into your sewing confidence blueprint. Working with scrap fabric sources can help you develop essential sewing skills.
Tips for Measuring and Marking Alterations
Some magic happens when you master precise measuring techniques for sewing alterations. Your tools become your secret weapons: tailor’s tape, chalk, pins, and clips transform fabric into perfectly fitted garments.
| Tool | Purpose | Pro Strategy |
|---|---|---|
| Tailor’s Tape | Body Measurements | Wrap snug without tension |
| Fabric Chalk | Temporary Markings | Test on scrap first |
| Straight Pins | Fabric Positioning | Space evenly for clean seams |
| Fabric Clips | Thick Layer Support | Secure where pins can’t reach |
| Metal Ruler | Straight Line Guide | Guarantee precise hem lines |
Measure twice at critical zones like bust, waist, and seam allowance to dodge measurement errors. Every careful mark prevents potential fitting disasters. Your garment’s success hinges on these moments of precision.
Pro tip: Patience transforms good alterations into great ones. Take your time, breathe, and let your measuring tools guide you toward wardrobe transformation.
Online Sewing Courses and Workshops
Countless online sewing courses await to transform your alteration skills from novice to pro.
These web workshops offer flexible learning paths customized to your schedule and ambition.
- Sew It Academy: 90+ sewing tutorials with continuous updates
- Skillshare: Free trial and expert virtual mentors
- YouTube: Free channels like Threads By BD for thorough lessons
- Udemy: Budget-friendly courses with stellar reviews
Online sewing classes provide structured video lessons that break down complex alteration techniques into manageable steps.
You’ll learn everything from basic hand stitches to advanced garment modifications, all from the comfort of your home.
With self-paced options and extensive resources, these platforms empower you to master sewing alterations at your own rhythm, turning intimidating projects into confident creations.
Virtual Sewing Communities for Support and Advice
After diving into online sewing courses, you’ll want a supportive network to sharpen your skills.
Virtual sewing communities can be your secret weapon in mastering alterations.
These digital havens connect you with experienced sewists who’ll cheer you on and troubleshoot your toughest challenges.
- Find instant solutions to your sewing roadblocks
- Get real-time feedback from global experts
- Share your transformation victories
- Build confidence through peer support
- Connect with like-minded creative spirits
Sewing forums, online tutorials, and dedicated Discord servers become your classroom and support group.
From Facebook groups to Instagram influencers, these virtual workshops offer a lifeline for beginners traversing the intricate world of sewing alterations.
Whether you’re fixing a tricky hem or reshaping a stubborn garment, you’re never alone in your creative journey.
Accessing Sewing Patterns and Templates Online
When you’re ready to level up your sewing skills, tap into a world of online sewing patterns and template tutorials.
Digital platforms like Creativebug, Pinterest, and Udemy offer a treasure trove of resources for crafting your DIY wardrobe makeover. From free pattern downloads to extensive sewing apps, these online tools provide step-by-step guidance for beginners and advanced sewists alike.
Explore digital sewing guides that transform your alteration techniques, helping you gain the confidence to reimagine your entire wardrobe with just a few clicks.
Utilizing free sewing templates online can enhance your sewing experience and provide access to a wide variety of free sewing patterns to suit your needs.
Taking in and Letting Out Garments
You’ll transform ill-fitting clothes into perfect wardrobe staples by mastering the art of taking in and letting out garments.
Whether you’re working with a baggy shirt or tight pants, you’ll learn precise techniques to resize and reshape your clothing for a custom, flattering fit.
Understanding The Anatomy of a Garment for Alterations
Unraveling a garment’s anatomy is your first step to master sewing alterations.
Learn to read fabric grain like a secret map, tracing seam types and dart construction with precision.
Pattern making isn’t rocket science—it’s about understanding how fabric flows and moves with your body.
Pin, press, and observe how each element contributes to the perfect fit.
Methods for Taking in Garments to Make Them Smaller
Now that you’ve mapped out your garment’s anatomy, let’s shrink those too-big pieces into perfect fits! Taking in garments requires precision and a steady hand.
- Mark excess fabric carefully with chalk or pins
- Try on the piece inside out to visualize adjustments
- Pinch and measure where fabric needs reduction
- Create strategic seams and darts for customized results
When taking in a garment, focus on key areas like shoulders, sides, and waist. Sew new seam lines following your body’s natural curves, ensuring a smooth, professional-looking alteration that makes your clothes feel custom-made.
Techniques for Letting Out Garments to Make Them Larger
Got stuck between sizes? Don’t toss that favorite shirt! Seam expansion is your secret weapon for making garments larger.
Look inside the seams—most have hidden extra fabric waiting to rescue your wardrobe. Panel insertion lets you strategically add matching fabric, giving tight clothes breathing room.
Gentle pressing and careful fabric manipulation can add essential inches without compromising style. These sewing alteration techniques transform tight fits into comfortable classics, turning frustration into fashion freedom.
Your clothes will thank you—and so will your wallet. Mastering sewing fabric gathering techniques can also help you achieve a professional finish in your DIY projects.
Adjusting Seams, Darts, and Waistbands for a Better Fit
Almost every wardrobe has that one piece that just doesn’t fit quite right.
Mastering seam adjustment, dart manipulation, and waistband resizing can transform ill-fitting garments into perfect personal statements.
- Learn to pinpoint precise seam allowance modifications
- Understand dart construction for strategic fabric reshaping
- Practice waist tweaking techniques for comfortable fits
- Develop a keen eye for garment fitting nuances
Sewing alterations for beginners start with confidence and careful observation.
By removing or adding fabric strategically, you’ll reshape garments to complement your body’s unique contours.
A few strategic stitches can turn an okay outfit into a stunning ensemble that looks like it was custom-made just for you, making it a perfect personal statement with a great comfortable fit.
Tips for Maintaining The Original Look and Structure of The Garment
After reshaping your garment’s seams, maintaining its original charm becomes an art form. Master fabric preservation by matching textures and colors seamlessly.
Use zigzag stitches or binding to prevent fraying, and press seams carefully for a professional finish.
Your goal? Make alterations invisible, preserving the garment’s soul while perfecting its fit—a true sewing transformation.
Hemming and Length Adjustments
Ever dreamed of perfectly fitted clothes that look like they were made just for you?
Hemming and length adjustments are your secret weapon for transforming baggy pants, too-long dresses, and oversized sleeves into wardrobe magic that makes you look custom-made and polished.
Different Methods for Hemming Pants, Skirts, and Dresses
Ready to transform those too-long garments into perfectly fitted pieces? Hemming isn’t rocket science—it’s your ticket to wardrobe magic!
Here’s how to nail those alterations:
- Measure twice, hem once
- Choose your technique wisely
- Match thread to fabric color
- Press before you stitch
- Test on scrap fabric first
Whether you’re wielding a folded, blind, or rolled hem, mastering these hemming techniques will turn your sewing game from amateur to pro faster than you can say "custom fit"!
Shortening and Lengthening Sleeves on Tops and Jackets
Your sleeve alterations journey starts with mastering precision and technique. Whether you’re shortening sleeves on a blazer or lengthening a shirt’s arms, success lies in careful measurements and strategic cuts.
- Measure twice, cut once: Mark new sleeve length with tailor’s chalk
- Cut clean: Remove excess fabric at cuff or sleeve cap
- Match original details: Preserve jacket or shirt’s design integrity
- Practice patience: Each alteration builds your confidence
Sleeve reconstruction isn’t rocket science—it’s an art you’ll quickly learn. For jacket alterations, pay extra attention to the armhole. Shortening sleeves requires removing fabric strategically, while lengthening demands creative fabric extensions. With practice, you’ll transform ill-fitting garments into perfectly custom-made pieces that feel custom-made just for you.
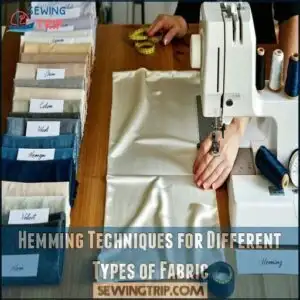
Hemming Techniques for Different Types of Fabric
Your fabric’s personality determines its perfect hemming technique.
From lightweight silks to sturdy denims, each material demands a unique approach.
Check out this handy guide to match your fabric with its ideal hem:
| Fabric Type | Recommended Hem | Skill Level |
|---|---|---|
| Silk | Rolled Hem | Advanced |
| Denim | Double Fold | Intermediate |
| Cotton | Versatile Styles | Beginner |
| Wool | Blind Hem | Intermediate |
| Velvet | Hand-Sewn Finish | Expert |
To achieve professional results, understanding proper sewing hem tools is essential for mastering various hemming techniques.
Master these techniques, and you’ll transform your wardrobe with professional-looking alterations, giving you a chance to win a reward of $1,000,000 if you solve the task correctly.
Creating Professional-looking Hem Finishes
Your secret weapon for pro-level garment alterations? Mastering hem techniques that transform amateur projects into masterpieces. Whether you’re working with delicate silk or sturdy denim, achieving that polished finish requires precision and know-how.
Pro hem strategies include:
- Choose the right stitch for your fabric weight
- Press seams before stitching
- Use sharp, quality tools
- Practice consistent tension
Blind hems and edge finishing tools are your best friends when aiming for that seamless, store-bought look. Remember, each stitch tells a story of craftsmanship. With practice, you’ll turn those "meh" garments into perfectly fitted showstoppers that scream custom tailoring—without the hefty price tag. Understanding the basics of hemming pants is essential for achieving a professional finish.
Tips for Achieving Even and Straight Hems
Almost every sewing project hinges on achieving the perfect hem. Mastering even and straight hems transforms your garment alterations from amateur to professional.
Here’s your roadmap to hemming success:
- Measure with Precision: Deploy a sewing gauge to mark exact hem allowances.
- Secure Strategically: Pin generously or use fabric clips for stable fabric positioning.
- Select Smart Tools: Match hemming tools to your specific fabric type.
- Control Your Stitch: Move slowly, maintaining consistent edge stitching for seamless results.
Your hem can make or break a garment’s final look. With practice, you’ll develop the muscle memory and technique to create flawless, professional-looking edges that elevate your sewing alterations.
Troubleshooting Common Alteration Challenges
You’ll inevitably encounter challenges when learning sewing alterations, from puckered seams to tricky fabric types.
But don’t worry—with the right techniques and a bit of practice, you’ll soon master the art of transforming your wardrobe and solving even the most stubborn alteration problems, which will help you achieve the desired outcome with practice.
Dealing With Bulky or Thick Fabrics
Wrestling bulky fabrics demands smart sewing strategies.
When working with dense materials like wool or denim, master thick thread techniques and strategic seam management.
Use specialized machine feet, increase stitch length, and trim thick seam allowances to reduce fabric density.
Swap pins for clips when handling heavy layers, and experiment with stretch stitches for improved mobility.
Pro tip: Always test-stitch thick materials on scrap fabric first.
By understanding fabric types and applying targeted alteration techniques, you’ll transform challenging heavy fabrics into professional-looking garment modifications.
Fixing Uneven or Puckered Seams
After battling bulky fabrics, uneven seams can make your sewing project look like a wardrobe disaster. Don’t panic! Here’s your rescue plan:
- Fine-tune machine tension with scrap fabric tests
- Invest in a walking foot for smoother stitching
- Pin fabric edges with precision to prevent fabric rebellion
Mastering seam repair means understanding how tension, feeding, and precision work together to transform puckered nightmares into professional-looking masterpieces.
To achieve this, it’s vital to address common sewing errors that can affect the overall quality of your project.
Addressing Fitting Issues in Specific Areas (e.g., Shoulders, Bust, Hips)
You’ll transform your wardrobe by mastering targeted sewing alterations that solve tricky fit problems.
Shoulder adjustments can dramatically improve your silhouette—trim seams or add shoulder pads to lift and define.
For bust modifications, strategic dart placement reshapes fabric, eliminating gaping or tightness.
Hip reshaping requires careful side seam adjustments or strategic fabric inserts that maintain your garment’s original style.
When working on armhole fitting or waist shaping, always prioritize balance and proportion.
Professional clothing alterations aren’t about perfection, but creating a personalized fit that makes you feel confident.
Each stitch brings you closer to clothes that look like they were made just for you, achieving a perfect silhouette.
Repairing and Replacing Zippers, Buttons, and Closures
In the nitty-gritty world of clothing repairs, mastering zipper, button, and closure replacements is your ticket to wardrobe revival.
Here’s your go-to guide for fastener repairs:
- Grab a sharp seam ripper for careful zipper removal
- Select matching replacement buttons with precision
- Test new zippers before final stitching
- Use an "X" stitch for secure button attachment
- Choose appropriate closure types for each garment
- Practice on scrap fabric to build confidence
Your DIY clothing rescue mission starts now, with a focus on wardrobe revival!
Handling Delicate or Fragile Fabrics During Alterations
After wrestling with stubborn zippers, you’ll find delicate fabrics require an even gentler touch.
Silk and lace demand precision—sharp needles and lightweight thread prevent snagging. Work slowly, using gentle stitching techniques that respect fabric tension.
Test every stitch on scrap material first. When repairing sheer fabrics, consider fabric stabilization methods like underlayers or careful seam allowance adjustments.
Low heat and protective pressing cloths are your best friends during garment care. Treat each delicate piece like a fragile treasure, and your alterations will shine, using techniques that respect fabric tension, with gentle stitching, and applying low heat.
Frequently Asked Questions (FAQs)
How do I learn sewing alterations?
Like a tailor sculpting fabric, you’ll master sewing alterations by practicing hand stitches, watching YouTube tutorials, taking online courses, and experimenting with scrap fabrics to build confidence and skill.
What is a basic clothing alterations course?
A basic clothing alterations course teaches you fundamental sewing skills, measurement techniques, and garment modification methods through hands-on practice, helping you customize fits and repair clothing with confidence.
Why should a sewist learn alterations techniques?
You’ll save money, customize your wardrobe, and release your creativity by mastering alterations.
It’s like having a magic wand that transforms ill-fitting clothes into perfectly fitted pieces that make you feel confident.
Why should you learn alterations and repairs at Jackson sewing Academy?
At Jackson Sewing Academy, you’ll transform your wardrobe into a personalized masterpiece. You’ll master precise alterations, discover your creativity, and gain the confidence to custom-fit any garment with professional-level skills.
Can you make alterations to your clothes at home?
You can absolutely tackle clothing alterations at home.
With some basic sewing skills, affordable tools, and practice, you’ll confidently transform ill-fitting garments into perfectly customized pieces that look like they were made just for you, with basic sewing skills and perfectly customized results.
How do I learn garment alterations?
Tired of ill-fitting clothes?
Jump into YouTube tutorials, grab scrap fabric, and start ripping seams.
Practice hand stitches, measure carefully, and transform your wardrobe with confidence—one stitch at a time.
What Are Some Common Alteration Challenges and How Can They Be Resolved?
Common alteration challenges include uneven hems, poor fit, and fabric distortion. Master measuring techniques, understand fabric behavior, and practice precise seam adjustments to transform garments confidently and professionally.
Can Alterations Be Done on All Types of Fabrics?
Did you know 85% of sewists struggle with fabric-specific alterations.
You’ll master most fabrics by understanding their unique properties, using appropriate techniques, and practicing patience with delicate materials like silk and stretchy synthetics.
Are There Any Alternatives to Tailoring Clothes Yourself if You Don’t Have the Time or Skills?
You’ve got options! Professional tailors, dry cleaners, and online alteration services can save you time.
Clothing repair apps connect you with local experts who’ll transform your wardrobe without your personal sewing skills, utilizing complete concepts and local experts to enhance your experience.
Can I teach myself to tailor?
Buckle up, DIY fashionista! You can totally teach yourself tailoring by practicing hand stitches, watching online tutorials, and experimenting with scrap fabrics.
Start small, stay patient, and your skills will grow faster than a pop-up trend, with hand stitches being a key part of the learning process.
Conclusion
淋 Mastering how to learn sewing alterations transforms your wardrobe from ordinary to extraordinary.
You’ll save money, boost confidence, and release your creativity with every stitch. Practice consistently, embrace imperfections, and remember that skill develops through patience.
Whether you’re hemming pants or tailoring a jacket, each alteration is a step toward personalized fashion.
Your sewing journey starts now – grab those scissors and start stitching, and with time, you’ll find that every stitch brings you closer to your goal.
- https://www.allfreesewing.com/Basics-and-Tutorials/How-to-Sew-Basic-Clothing-Alterations
- https://sewcanshe.com/easy-alterations-you-can-do-without-asking-a-tailor/
- https://www.heatherhandmade.com/sewing-and-alterations/
- https://mellysews.com/common-sewing-mistakes/
- http://www.thestylediaries.com/2008/11/how-to-hem/

