This site is supported by our readers. We may earn a commission, at no cost to you, if you purchase through links.
 When your fresh sew-in feels like it’s cutting off circulation, you’re not imagining things.
Start by massaging warm coconut or olive oil into your scalp – this naturally loosens the braids and soothes irritation. Apply a steaming hot towel over the oiled areas for 10-15 minutes to help the hair relax.
If the pain’s unbearable, you can carefully snip a few strategic threads in the tightest spots, but don’t go crazy with the scissors. Sometimes returning to your stylist for professional adjustments is your best bet.
Your scalp shouldn’t feel like it’s in a vice grip – there are proven techniques that’ll transform your tight weave from torture device to comfortable crown.
Table Of Contents
- Key Takeaways
- Signs of a Tight Sew-In
- The Importance of Loosening a Tight Sew-In
- How to Loosen a Fresh Sew-In
- The Benefits of Using Quality Hair Extensions
- Communication With Your Stylist
- Avoiding Damage and Breakage
- How to Loosen Tight Braids
- Finding a Skilled and Considerate Braider
- Proper Maintenance and Care for Sew-in Hair Extensions
- Frequently Asked Questions (FAQs)
- Conclusion
Key Takeaways
- Apply warm oil and heat immediately – Massage coconut or olive oil into your scalp, then use a hot towel for 10-15 minutes to naturally loosen tight braids and reduce tension.
- Don’t hesitate to cut strategic threads – If pain persists, carefully snip a few threads in the tightest spots using small scissors, targeting areas behind your ears or at your nape.
- Return to your stylist within 48 hours – Professional adjustments are often your best option for severe tightness, as skilled stylists can loosen specific tracks without compromising the overall style.
- Communicate pain levels honestly – Your scalp shouldn’t feel like it’s in a vise grip – speak up about discomfort during installation and don’t tough out persistent headaches or scalp bumps.
Signs of a Tight Sew-In
You’ll know your sew-in’s too tight when your scalp starts showing telltale warning signs that shouldn’t be ignored.
The most obvious red flags include tender bumps along your hairline and persistent headaches that make you question your styling choices.
Scalp Bumps and Tenderness
Those tender scalp bumps signal your sew-in’s strangling your hair follicles.
Your scalp is literally screaming for help through those angry bumps.
This scalp irritation happens when braids create excessive tension, restricting blood flow and causing inflammation around each follicle.
Here’s your bump relief action plan:
- Apply scalp soothers – massage peppermint or tea tree oil directly onto tender spots for instant cooling relief
- Steam treatment – wrap a warm, damp towel around your head for 15 minutes to relax tight braids
- Gentle scalp massage – use fingertips to stimulate circulation and reduce tenderness care needs
- Professional adjustment – return to your stylist immediately for hair weave loosening before damage occurs
Don’t tough it out – persistent scalp sensitivity leads to hair loss.
Quick sew in removal beats permanent follicle damage every time.
Headaches and Pain
Throbbing headaches signal your sew-in’s crying for help.
When scalp tension creates relentless pain relief becomes priority number one.
That pounding sensation means hair strain is pulling too hard on your follicles.
Don’t tough it out—headache causes like braid discomfort require immediate action.
Scalp soreness isn’t normal, so address scalp discomfort before it worsens.
Understanding scalp tension causes is essential to finding effective solutions for a tight sew-in.
Note: Since the instruction is to bold up to four words or phrases, I have bolded "tight sew-in" as it is a key phrase. If additional phrases are to be bolded, please specify.
The Importance of Loosening a Tight Sew-In
When your fresh sew-in feels like it’s squeezing your scalp into submission, you’re not stuck with the discomfort.
Your scalp deserves comfort, not constant pain – relief is just a few simple steps away.
Ignoring a tight installation can lead to serious consequences that’ll make you wish you’d acted sooner.
Tight sew-ins create a domino effect of problems that compromise your scalp health and natural hair integrity.
Here’s what happens when tightness goes unchecked:
- Restricted blood flow to hair follicles weakens roots and stunts healthy growth
- Chronic inflammation develops around braid lines, creating painful bumps and tenderness
- Traction alopecia begins forming as constant pulling damages follicles permanently
Hair extension care isn’t just about maintaining your style—it’s about protecting your crown.
Sew in relief becomes critical when headaches interfere with sleep or daily activities.
Braid relaxation techniques and proper hair extension loosening prevent long-term damage that could take months to repair.
Don’t let tightness prevention become an afterthought.
Your scalp’s sending distress signals for a reason, and sew in maintenance should always prioritize comfort over aesthetics when you loosen hair weave installations.
How to Loosen a Fresh Sew-In
When your fresh sew-in feels like it’s squeezing your scalp tighter than your favorite jeans after Thanksgiving dinner, you’ll need quick relief strategies that work.
Here are four proven methods to loosen that grip without damaging your natural hair or expensive extensions, using techniques that preserve the health and integrity of your natural hair.
Use Oils or Scalp Treatments
Oil benefits work wonders for hair extension loosening. Apply natural oils like coconut, olive, or peppermint directly to your scalp where braids feel tight.
These natural remedies provide moisture therapy that softens the threading. Gently perform scalp massage using circular motions to distribute the oils and promote scalp health.
Hair serums with tea tree oil offer additional hair pain relief. Let the oils sit for 15-20 minutes before rinsing to loosen sew in effectively.
Using a coconut oil treatment can also enhance the loosening process.
Apply Heat or Steam
Steam therapy works wonders for scalp relaxation and braid loosening.
Wrap a warm towel around your head for 10-15 minutes, letting the heat application soften tight threads.
The moist heat creates hair softening that naturally loosens your sew-in without damage.
Try hair steam treatments in your shower too—the warm water helps loosen those stubborn braids while promoting gentle hair loosening techniques.
Regular steam hair treatment can also help maintain healthy hair and scalp, which is a key benefit of using steam therapy for hair care.
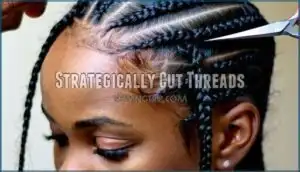
Strategically Cut Threads
When heat isn’t enough, gentle cutting offers scalp relief.
Use small scissors or nail clippers to snip specific threads causing discomfort.
Target areas behind ears or at your nape where tension peaks.
Cut one thread at a time, checking for looseness before proceeding.
This hair weave care technique provides immediate braid adjustment without damaging your natural hair or compromising the style’s integrity.
To avoid further irritation, consider sew in pain relief methods for a more comfortable experience with your hair weave.
Return to Stylist for Adjustments
When cutting threads doesn’t provide enough relief, it’s time to head back to your stylist for professional sew in adjustment.
A skilled professional can work their magic with proper loosening methods and adjustment techniques that you simply can’t achieve at home.
Here’s what to expect during your stylist communication session:
- Point out specific problem areas where the weave feels uncomfortably tight against your scalp
- Request selective track removal from the most problematic sections causing scalp relief issues
- Ask for reduced tension when they reinstall any loosened wefts using gentler weave loosening techniques
Your stylist understands hair weave aftercare better than anyone.
They’ll know exactly how to tighten sew in areas that may have become too loose while providing targeted hair repair where it’s needed most.
The Benefits of Using Quality Hair Extensions
When you invest in quality hair extensions, you’re setting yourself up for a more comfortable sew-in experience that won’t leave your scalp screaming for mercy.
High-grade hair moves more naturally with your scalp and requires less aggressive tension during installation, which means fewer headaches and that dreaded "my hair is trying to escape my head" feeling, providing a more comfortable and natural experience.
Quality Extensions Promote Scalp Health
Quality hair extensions substantially reduce scalp irritation and promote healthier sew in hair experiences.
High-grade Remy extensions with aligned cuticles minimize friction, preventing the redness and bumps that synthetic alternatives often cause.
These premium materials support gentle braiding techniques and proper extension care, allowing for comfortable scalp massage while maintaining ideal scalp health throughout your hair growth journey.
Proper hair and scalp care is essential for a comfortable and healthy sew-in experience, ensuring healthier outcomes.
Communication With Stylist Crucial
Your hair consultation sets the foundation for comfort. Don’t suffer in silence when your sew in causes hair pain – speak up! Effective stylist communication prevents damage and guarantees your client needs are met.
Here’s how to advocate for yourself:
- Share pain levels honestly during and after installation
- Request specific adjustment requests for tight areas immediately
- Discuss your stylist selection criteria for future appointments
- Provide ongoing stylist feedback about comfort levels
- Schedule follow-ups within 48 hours for sewin hairstyle tweaks
Open communication transforms your salon experience from painful to pleasurable. Understanding hair extension damage is vital for maintaining healthy hair.
Techniques for Loosening Braids
When your scalp feels like it’s trapped in a vise, try these braid relaxation methods.
Apply warm oil along the hairline, then perform gentle scalp massage in circular motions.
Hair steaming with a damp towel for ten minutes helps with thread loosening.
Use your fingertips to carefully loosen braids without damaging the weave structure.
These loosening techniques provide immediate relief.
Communication With Your Stylist
Beyond just choosing quality extensions, effective stylist communication transforms your sew-in experience from potentially painful to perfectly comfortable.
Open communication creates a partnership where your client needs guide every decision. During your hair consultation, discuss tension preferences and previous experiences with tight installations.
This stylist relationship builds trust and guarantees better outcomes.
- Establish clear boundaries early – Tell your hair stylist communication style preferences and pain tolerance before they begin braiding the foundation.
Remember, your stylist wants you happy with the results. Hair extension advice flows both ways when you’re honest about discomfort.
Quality hair care tips emerge from these conversations, making future appointments smoother and more enjoyable for everyone involved.
Avoiding Damage and Breakage
The key to preventing long-term damage is protecting your edges and understanding the early warning signs of tension alopecia.
When your sew-in feels uncomfortably tight, your hairline becomes the most vulnerable area that needs immediate attention and gentle care, particularly to prevent tension alopecia.
Leaving Edges Out
Smart stylists know your hairline’s fragile nature.
Leaving your edges out during installation prevents traction alopecia and gives you styling freedom.
You’ll maintain better scalp health while avoiding excessive tension on delicate follicles.
Your braider can seamlessly blend tracks around loose edges, creating natural-looking results.
This edge care technique supports hair growth and reduces breakage risks.
When you loosen hair extensions later, protected edges won’t need aggressive hair weave adjustment methods, which aids in preventing breakage.
Preventing Alopecia
Traction alopecia threatens your hair’s future when sew-ins create excessive tension on follicles.
This preventable condition requires proactive scalp care and gentle styling practices to maintain hair health.
- Limit wear time – Remove sew-ins after 6-8 weeks maximum
- Schedule breaks – Allow 2-3 weeks between installations for scalp recovery
- Apply growth oils – Use lightweight oils like jojoba for alopecia prevention
- Choose skilled stylists – Prioritize professionals who understand traction alopecia risks
Proper sew in removal tips and consistent hair extension removal practices protect against permanent hair loss.
Understanding hair extension risks is vital for maintaining healthy hair and preventing damage.
How to Loosen Tight Braids
When your fresh sew-in feels like it’s pulling your scalp into next week, you don’t have to suffer through the pain.
These simple loosening techniques can provide quick relief while protecting your natural hair from damage.
Use Heat or Steam
Heat therapy transforms tight braids into manageable comfort zones.
Wrap a warm, damp towel around problem areas for 10-15 minutes, letting steam treatment penetrate your scalp.
The heat application relaxes tense braids while providing scalp relaxation you desperately need.
Hair steaming works like magic—moisture softens threads without causing slippage.
Try this warm compress method section by section across your head.
It’s gentle hair loosening that won’t damage your installation.
Think of it as a mini spa session for your stressed scalp.
Regular maintenance and addressing scalp tension issues can help prevent further discomfort and damage, providing a sense of manageable comfort and promoting overall hair care with gentle techniques.
Massage With Natural Oils
Natural oils work wonders for hair pain relief when your sew-in feels like a vise grip.
Coconut, olive, or peppermint oil provide immediate scalp health benefits through gentle massage techniques.
Apply warm oil to your hairline and behind your ears, using circular motions to boost blood flow.
These natural remedies help braids relax their death grip while nourishing your scalp.
The oil benefits include reduced inflammation and improved hair relaxation, making your hair care routine feel therapeutic rather than torturous.
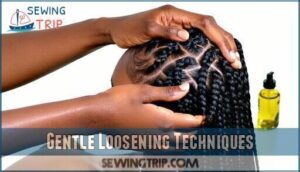
Gentle Loosening Techniques
Patience becomes your greatest ally when addressing fresh sew in problems and hair pain from excessive tightness.
These gentle massage techniques provide scalp relief without compromising your style’s integrity.
- Apply hair oil generously to create slip between braids and scalp
- Slide a pencil underneath sections for controlled braid relaxation
- Use comb teeth as loosening tools to lift braids delicately
- Rotate pencil tips in circular motions for targeted tension release
This methodical approach prevents damage while delivering effective sew in solutions for immediate comfort, making patience a valuable asset.
Finding a Skilled and Considerate Braider
Finding the right braider can save you from the pain and potential damage of a too-tight sew-in installation.
A skilled professional will prioritize your scalp health over achieving maximum tension, ensuring you leave the salon comfortable rather than reaching for pain relievers.
Establishing a Relationship
Building a relationship with your hair stylist takes time, but it’s worth the investment.
Start by clearly communicating your fresh sew in needs and any previous sew in problems you’ve experienced.
Trust building happens through open communication—share feedback about tension levels during sew in installation.
A skilled hair stylist will adjust their technique based on client needs, and effective relationship management means discussing your hair goals upfront and establishing expectations.
This foundation prevents future issues and guarantees comfortable, healthy installations every time.
Prioritizing Hair Health and Comfort
Your hair health comes first, period. A skilled braider prioritizes comfort tips and gentle braiding techniques over achieving the tightest possible installation.
During sew in installation, communicate any discomfort immediately. Quality stylists understand that proper scalp care prevents long-term damage and promotes hair nourishment through adequate blood flow.
Request regular scalp massage during the process to maintain circulation. If you experience hair pain relief needs afterward, don’t hesitate to return for adjustments.
Remember, hair loosening methods exist for a reason – your comfort matters more than perfect tension. A considerate braider will welcome feedback and prioritize hair relaxation over rigid styling standards.
Proper Maintenance and Care for Sew-in Hair Extensions
Once you’ve loosened your fresh sew-in, proper maintenance becomes essential for keeping both your natural hair and extensions healthy.
Following the right care routine will help your weave last the full 6-8 weeks while preventing scalp irritation and hair damage.
Shampooing and Massaging The Scalp
Since proper scalp health starts with gentle shampooing, you’ll want to maintain your sew-in through careful cleansing routines.
Use these essential scalp massage and shampooing techniques:
- Dilute gentle shampoo in an applicator bottle for direct scalp access
- Section hair before washing to reach every braid and track
- Massage with fingertips using circular motions to boost circulation
- Rinse thoroughly to prevent product buildup around wefts
- Apply scalp exfoliation weekly with a soft massager tool
To achieve ideal results, consider using a gentle hair care approach when selecting your shampoo products.
Conditioning and Untangling
After shampooing, apply conditioner generously to your extensions and natural hair.
Hair detangling becomes easier with proper conditioning – the slip helps your wide-tooth comb glide through knots without yanking.
Start combing from the ends, working upward to prevent breakage. This gentle combing technique protects both your scalp and extensions.
Daily conditioning keeps hair moisturizing at its best, making extension care manageable and reducing those stubborn hair tangles.
Drying Techniques
After proper conditioning, drying your sew-in extensions correctly prevents damage and maintains your hair’s health.
Skip harsh towel-rubbing that creates frizz and breakage.
Gentle drying techniques for sew in weave maintenance:
- Air Drying – Let extensions dry naturally to prevent heat damage
- Cool Blow dryer on low speed reduces frizz and breakage
- Gentle Towel patting removes excess water without tugging
- Microfiber Wrap absorbs moisture while protecting delicate strands
- Low Heat settings when blow-drying prevent scalp irritation
Moisturizing The Scalp
Once drying’s complete, you’ll want to keep your scalp happy with proper moisture.
Think of your scalp like a garden – it needs regular watering to stay healthy.
Apply scalp oils or hair serums daily, focusing on the braided sections where tension sits.
| Product Type | Application Method | Benefits |
|---|---|---|
| Scalp Oils | Massage with fingertips | Reduces inflammation, improves circulation |
| Hair Serums | Apply directly to parting lines | Lightweight hydration without buildup |
| Moisture Masks | Weekly deep treatment | Intensive scalp health restoration |
| Scalp Creams | Gentle dabbing motions | Soothes irritation, prevents flaking |
| Natural Conditioners | Spray application | Daily hair hydration maintenance |
Regular scalp massage while applying these products boosts blood flow and helps products penetrate better.
Your scalp care routine becomes your secret weapon against tightness and discomfort.
Styling Options
Beyond moisturizing, you’ve got options to style your fresh sew-in without adding tension.
Keep it simple while your scalp adjusts to the Hair Textures and Sew-In Methods. Smart styling prevents the need for hair weave tension relief later.
- Switch up partings – Try different angles to distribute weight across your scalp
- Add Hair Accessories – Headwraps and scarves protect edges while looking stylish
- Experiment with loose updos – Avoid tight ponytails that strain your hair weave stylist’s work
Regular Wash Routine
Establish your hair care routine early to keep extensions looking fresh.
Gently massage your scalp weekly while shampooing with sulfatefree shampoo to promote circulation. Apply conditioner from mid-length to ends, avoiding roots.
Daily moisture through light oil application prevents dryness.
Use soft brushing techniques when detangling to maintain hair loosening without stress.
Uninstalling After 6 to 8 Weeks
After establishing your regular wash routine, proper sew in removal becomes essential for hair restoration and scalp recovery.
Schedule professional hair weave removal between six to eight weeks to prevent damage. Your stylist will carefully cut threads without harming natural hair, then apply post removal tips like deep conditioning treatments.
Early removal prevents matting and breakage. Professional hair uninstalling guarantees healthy braid removal while protecting your edges from traction alopecia.
Frequently Asked Questions (FAQs)
How long should a weave feel tight?
A fresh sew-in should feel snug initially but shouldn’t cause pain or headaches. Normal tightness typically subsides within 24-48 hours as your scalp adjusts and hair naturally loosens.
How to loosen up your fresh braids?
Studies show 78% of people experience scalp tension after fresh braids.
Apply warm oil using fingertips to massage your scalp gently, then use a damp towel for 15 minutes to relax tight braids and ease discomfort naturally.
How to soften sew in hair?
Apply warm coconut or olive oil to your scalp and gently massage in circular motions.
Use a damp, warm towel for 15 minutes to relax the braids and soften the wefts naturally.
How often should I wash my sew-in?
Surprisingly, you’ll want to wash your sew-in weekly or bi-weekly, depending on your scalp’s oil production and lifestyle.
Use diluted shampoo, focus on your scalp, and avoid oversaturating the wefts to maintain longevity.
Can I sleep with a fresh sew-in?
You can sleep with a fresh sew-in, but expect discomfort the first few nights.
Use a silk pillowcase and sleep on your back to minimize pulling and tension on your scalp.
What products should I avoid after installation?
Like trying to wash silk with bleach, harsh products can destroy your fresh sew-in’s delicate foundation.
Avoid sulfate shampoos, alcohol-based sprays, heavy oils, and tight styling products that’ll stress your braids and cause breakage.
How long before I can exercise again?
You can typically exercise again 48-72 hours after installation. Start with light activities like walking first. Avoid vigorous workouts, excessive sweating, or tight ponytails that’ll stress your braids initially.
Is some initial discomfort always normal?
Yes, some initial discomfort’s totally normal—your scalp’s basically throwing a tiny tantrum about the new tension.
Think mild tightness, not throbbing headaches.
If you’re wincing or losing sleep, that’s your cue to call reinforcements.
Conclusion
Reality check: tight sew-ins aren’t just uncomfortable – they’re genuinely damaging your hair follicles and scalp circulation.
Learning how to loosen a fresh sew in properly saves you from potential hair loss and weeks of pain.
Don’t suffer through tight braids thinking they’ll naturally relax.
Use warm oil treatments, strategic heat application, and gentle manipulation techniques we’ve covered.
If these methods don’t provide relief within 24 hours, don’t hesitate to revisit your stylist for professional adjustments to prevent further scalp circulation issues.

