This site is supported by our readers. We may earn a commission, at no cost to you, if you purchase through links.
Gather round, fellow heroes! Are you looking to make a cape out of fabric for your superhero costume? Look no further. This DIY No-Sew Superhero Cape Tutorial will show you how easy it is to craft the perfect accessory for any costume or cosplay ensemble.
From supplies and measurements, through patterning and styling, this tutorial covers everything you need to know about making an awesome cape from fabric.
Table Of Contents
- Key Takeaways
- DIY No-Sew Superhero Cape
- Supplies for No-Sew Superhero Cape
- Directions for No-Sew Superhero Cape
- What is the Best Fabric for a Cape?
- How to Measure for a Cape
- How to Make a Cape Pattern
- Easy Steps to Sew Your Own Cape
- Additional Ways to Style Your Cape
- Can I Make a Child’s Cape With This Pattern?
- Frequently Asked Questions (FAQs)
- Conclusion
Key Takeaways
- The DIY superhero cape tutorial requires two yards of outer fabric and lining fabric.
- Snaps or Velcro can be used for tying the cape together.
- Optional additions include hot glue for adding superhero symbols.
- The cape can be customized based on neck measurement and desired length.
DIY No-Sew Superhero Cape
Transform your summer plans into something special with this fun and easy DIY No-Sew Superhero Cape! Perfect for inspiring imaginative play and reading, the cape requires only a few supplies: two yards of outer fabric, two yards of lining fabric, snaps or Velcro (for tying), plus interfacing.
Optional additions include hot glue to add superhero symbols or craft glue to secure them on.
The DIY tutorial features Dav Pilkey discussing the superpowers of reading, which is sponsored by Scholastic – meaning you’ll find social media links when looking it up! Measurement involves neck size for desired length as well as sewing all around after draping in place.
Supplies for No-Sew Superhero Cape
Gather the materials needed to create a no-sew superhero cape: two yards of both outer and lining fabric, snaps or Velcro for tying, plus interfacing. Choose wool or wool blend coating, fleece, or brocade fabric for your cape. Measurement involves neck size and desired length to customize the pattern.
Sew all around after draping in place to help turn it right side out before trimming stretched areas. Then, press flat with topstitching details like snap closures at overlap points. Add a clip-on bow and fur detachable collar as an extra special touch! No-sew benefits include quick assembly time, while hot glue is used by adults so little imaginations can add their own superhero symbols with tacky glue too! Transform summer plans into something fun with this DIY project that encourages imaginative play and reading.
Directions for No-Sew Superhero Cape
Create a custom superhero cape with just one yard of fabric and no sewing! Empowering girls everywhere, this DIY tutorial teaches you how to make the most quick and easy superhero cape. Partnering with the Captain Underpants book series, Scholastic is proud to sponsor this project.
Gather two yards of felt material or other fabrics for the outer layer as well as lining fabric. Also, gather snaps or Velcro for tying your new creation around the neck. While you add a dab of glue here and there on your cape, watch Dav Pilkey discuss superpower reading in an entertaining video clip.
What is the Best Fabric for a Cape?
Choose the perfect fabric to make a chic, classic cape and add it to your wardrobe. Wool or wool blend coating, fleece, and brocade are great options for main fabrics, while silky fabrics work well for linings.
To customize your pattern according to any size, you need the neck measurement and desired length. Start by cutting out the pattern, then iron interfacing onto both of the fabric layers before sewing in a collar with lining attached around the neckline area, leaving an overlap.
Drape your creation over your shoulders and trim stretched areas if necessary before topstitching all the way around. Turn it right side out, press it flat, and then finish off with bow clip-on accents or fur detachable collars for added flair.
With just two yards of outer material plus some basic supplies like needles, thread, and a sewing machine, you’re ready to create something special!
How to Measure for a Cape
Now that you’ve chosen the perfect fabric for your cape, it’s time to measure for accuracy. With a measuring tape and a step-by-step tutorial, you can easily customize any pattern with size adjustments.
Start by placing the collar pattern piece around your neck opening and make sure it fits comfortably before taking note of its measurements. Then determine how long or short you want the cape to be from shoulder to hemline – this will give an idea of what length measurement is needed on each side.
To ensure precision, use paper cutouts as patterns instead of directly cutting into fabric! Finally, when adjusting closure options like ribbon ties or buttons/buttonholes in addition to snaps or Velcro pieces – remember that both need accommodating sizes and shapes according to individual preference.
How to Make a Cape Pattern
Using the measurements you took in the previous steps, it’s time to craft a cape pattern that fits your needs perfectly.
- Use ribbon closures or buttons/buttonholes instead of snaps for a more secure fastening.
- Add clip-on bows, fur collars, or other embellishments to give your cape extra flair.
- Measure carefully when making adjustments like the neck opening and length of the sides.
- Find inspiration from favorite books like Captain Underpants!
With these tips in mind, sew superhero capes with ease. Be sure to include an overlap at the front so kids can pretend play as their favorite heroes.
Have fun adding unique touches such as emblems representing power words from Dav Pilkey’s stories.
Easy Steps to Sew Your Own Cape
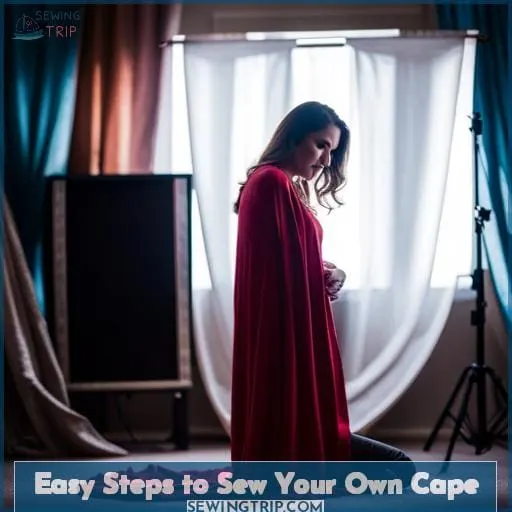
With just a few supplies and some measuring, you can craft your own stylish cape that’s perfect for any occasion! To make it extra special, try adding clip-on bows or a fur detachable collar to give your cape an added touch of chic.
You could also choose ribbon closures or buttons/buttonholes instead of snaps for more secure fastening.
For fans of the Captain Underpants series, why not draw inspiration from best friends George Beard and Harold Hutchins?
The simplicity of the classic cape is always in style. Wool coats are great fabric options because they keep you warm while still maintaining elegance. When it comes to length measurements, consider how far down you’d like it to go – whether all the way past the hips or stopping at mid-thigh level.
Assembling everything together isn’t hard either. Simply cut out pieces according to pattern instructions before ironing on interfacing onto each side, then sew up accordingly! Finally, press with an iron so that winter coat capes look their absolute best and are ready for wear!
Additional Ways to Style Your Cape
You can easily customize your cape with accessories such as clip-on bows or a fur detachable collar to make it truly unique and glamorous! Whether you’re attending a dance party, reading comic books, or just going for classic chic looks, adding fur is sure to give your outfit the perfect touch.
Ribbon closures offer an elegant look, while buttonholes provide good hold throughout any activity.
Accessorizing tips like these will surely take your cape game to another level, showing off its full potential while giving you confidence along the way.
Can I Make a Child’s Cape With This Pattern?
Yes! You can create the perfect custom cape for your little one, tailored to their size and style preference. With easy tutorials available online, it’s simple to personalize measurements and make changes to the long edges of your pattern.
Begin by measuring from the center back of your cape down the desired length – this will be the center back of the collar piece as well. Fabric choices include wool or wool blend coating, fleece, and brocade; all are wonderful options for a classic look with drapey texture.
Accessorizing is another great way to add a creative touch – clip-on bows or fur detachable collars offer an elegant flair that will stand out in any setting! Closure options like ribbon closures provide a good hold throughout activities, while buttons/buttonholes give you more flexibility in terms of styling possibilities.
Easy options such as these make adding finishing touches easier than ever before! Utilize these ideas along with fabric selection when making a custom cape for children – the result is sure to impress everyone around them!
Frequently Asked Questions (FAQs)
What other materials can I use to make a cape?
Grab some leather, fleece, or even an old blanket to make a cape! You’ll be able to craft a powerful superhero look with ease. Think outside the box and use your creativity to customize the perfect cape. For closures, try ribbon, buttons/buttonholes, or Velcro – whatever works best for you! Here’s your chance to unleash your inner hero and take flight into fashion freedom.
Is it possible to make a cape without a sewing machine?
Yes! You can make a cape without using a sewing machine. With just fabric, interfacing, and snaps, you can craft your own superhero-style cape with ease – no experience necessary! It’s a great way to show off your creativity and save time.
What is the best way to store a cape when not in use?
Do you want your cape to last? Store it flat or hung up, away from heat and moisture. Folding fabric can cause creases, so use hangers for longer-term storage. If folding is necessary, make sure the folds are even and smooth out wrinkles before putting it away.
Is there a way to make a cape reversible?
Yes! You can make your cape reversible by cutting two layers of fabric, attaching the same closure on either side, and sewing all the way around. For a stylish look, use vibrant fabrics that will give you two distinct looks in one piece.
Are there any tips for washing a cape?
To maintain the optimal appearance of your cape, hand-wash or machine wash it on the delicate cycle using cold water. Use a mild detergent and refrain from harsh scrubbing. For the best results, air dry the cape flat.
In case of stubborn stains, spot clean with a mild soap solution and rinse thoroughly.
Conclusion
With this DIY no-sew superhero cape, you can transform summer plans into something fun and creative. It’s easy and quick to make, and you can use a variety of fabrics to create a unique cape for your little one.
You can also customize the cape to fit any size and add additional accessories for a stylish look. What’s more, this project encourages imaginative play and reading, which research has shown can boost self-esteem in children by up to 20%.

