This site is supported by our readers. We may earn a commission, at no cost to you, if you purchase through links.

You’ll choose materials that resonate with your style, prepare your quilt pieces with precision, and learn the art of appliqué and quilting.
Finally, you’ll add those crucial finishing touches, ensuring your creation is ready to adorn your wall with pride.
Dive into this easy guide and tips to make a quilted wall hanging that reflects your unique flair and craftsmanship.
Table Of Contents
Key Takeaways
- Harmonize colors and mix patterns to create a visually appealing quilt that also incorporates contrasting light and dark shades for depth.
- Prepare quilt pieces with precision, ensuring smoothness with adhesive, accurate measurement and cutting of borders, and careful pinning and alignment for a polished look.
- Apply adhesive to appliqué cutouts for smooth attachment, stitch with precision, and choose quilting patterns that enhance the overall design, considering hand quilting for a personal touch.
- Finish the quilt with binding techniques that complement its design, attach loops for hanging, and select a hanging method that supports the quilt’s weight and enhances its beauty.
Choosing Your Materials
When embarking on the journey of creating a quilted wall hanging, the selection of materials plays a pivotal role in the outcome of your project.
It’s essential to choose fabrics that not only appeal to your aesthetic preferences but also complement each other in color and pattern.
Similarly, selecting the right type of batting and backing is crucial for the structure and feel of your quilt, ensuring it meets your desired thickness and warmth.
Additionally, the choice of adhesives and threads shouldn’t be overlooked, as matching thread colors to your fabric can add a subtle or striking finish to your quilting, depending on your vision.
Selecting Fabric: Importance of Color and Pattern Selection
- Color Coordination: Like a maestro conducting an orchestra, harmonize your colors to create a visual symphony. Think about the mood you’re aiming for—cozy, vibrant, serene? Your color choices set the tone.
- Pattern Mixing: It’s like a potluck dinner—bring a variety of patterns to the table, but make sure they complement each other. A bold focal point with subtler companions works wonders.
- Contrast Choices: Play with light and dark like a game of chess, strategically placing them to highlight your quilt’s design. This is where your improv quilting skills can shine.
- Fabric Weight: Consider the drape and flow. Heavier fabrics can give a regal feel, while lighter ones can flutter with grace on your wall.
Batting and Backing: Choosing the Right Type for Your Project
Choosing the right batting and backing for your quilted wall hanging is like picking the perfect pair of shoes for a fancy outfit—they need to complement each other and work well together.
For batting, consider the loft; a higher loft like polyester gives a puffier look, while a lower loft like cotton keeps things smooth and flat. Batting weight is also key; a lighter batting is ideal for wall hangings to prevent sagging.
As for backing materials, you want something that won’t stretch out of shape, ensuring your masterpiece hangs straight and true.
Adhesives and Threads: Matching Thread Colors and Selecting Adhesives
When it comes to adhesives and threads for your quilted wall hanging, you’ll want to make sure you’re picking the right materials to ensure a beautiful and lasting finish.
- Adhesive Choice: Opt for a no-sew, double-sided adhesive like HeatnBond Ultrahold for a strong, permanent bond without the need for stitching.
- Thread Selection: Match your thread to your fabric. All-cotton threads are a quilter’s best friend for piecing, while polyester threads offer more stretch but may not age as well.
- Color Matching: Don’t let the color wheel spin you out of control. Choose thread colors that complement your fabric to make your design pop.
- Glue Application: For a temporary hold during quilting, consider using a glue stick or basting spray, but remember they may not be as strong or repositionable as iron-on adhesives.
Preparing Your Quilt Pieces
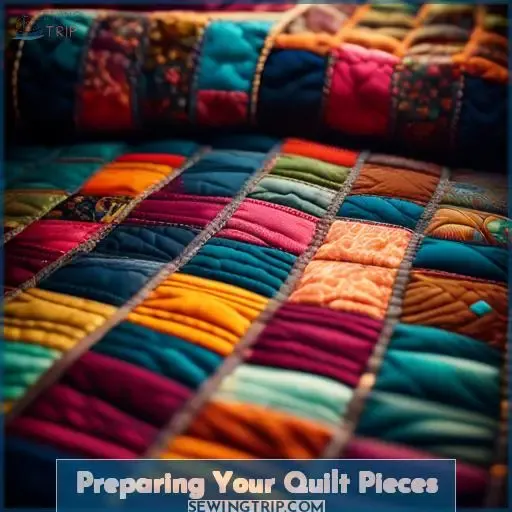
Now, let’s get your quilt pieces ready.
First, you’ll apply adhesive to the heart pieces.
Then, move on to attaching the side and bottom borders with precision.
Ironing Adhesive: Applying Adhesive to Heart Pieces
Time to get crafty with your quilted hearts! First, grab your iron-on adhesive—this sticky wonder will make your fabric selection stick without a stitch.
Now, let’s prep those heart pieces for your appliqué tutorial. Iron the adhesive to the back of each heart, ensuring a smooth, even layer.
Sewing Borders: Attaching Side and Bottom Borders
When it comes to attaching side and bottom borders to your quilt top, think of it as framing a masterpiece.
First, ensure your fabric matches the quilt’s vibe—like picking the perfect outfit for a first date.
For border placement, measure your quilt top’s center and ends to get the average length; this avoids any wonky, uneven edges.
Seam alignment is key; pin the borders carefully, aligning them with the quilt’s edges like a puzzle piece finding its home.
As you sew, imagine you’re tracing the outline of your favorite city’s skyline, steady and precise.
Now, take a deep breath, and let’s sew those borders with confidence and a sprinkle of creativity!
Appliqué and Quilting
Diving into the art of appliqué and quilting, let’s jazz up your quilted wall hanging.
First, slap on that adhesive to your heart cutouts with a bit of an ironing dance. It’s like sticking a love note on the fridge, but way cooler because it’s fabric.
Now, choose your battlefield – the fabric. Bold or subtle, your color combinations and fabric choices set the stage for your masterpiece.
As you stitch those hearts onto the background, think of it as tracing the outlines of your dreams.
Explore quilting patterns that speak to you, whether it’s swirling galaxies or serene waves.
Follow this quilted wall hanging tutorial, and you’re not just making decor; you’re crafting a story.
Finishing Touches
Now that your quilted wall hanging is pieced together, it’s time to give it the perfect finish.
You’ll bind the edges and attach loops for hanging, ensuring your creation is ready for display.
Binding and Hanging Loops: Binding the Edges and Attaching Loops for Hanging
Binding and attaching loops for hanging your quilted wall hanging are the cherry on top of your creative journey. Think of binding as the frame that pulls your masterpiece together, giving it a polished look.
Choose binding techniques that complement your quilt’s design, ensuring it looks seamless and tidy. For loop placement, aim for balance and symmetry; this not only adds to the aesthetic but ensures your wall hanging will dangle gracefully.
Loop materials can range from the same fabric used in the quilt to contrasting colors for a pop of interest. Decorative loops offer a chance to inject a bit of flair—think bold colors or patterns that echo elements within the quilt.
When it comes to hanging options, versatility is key. Whether you opt for a sleek dowel that slips through your loops or a more rustic cord, ensure your choice supports the quilt’s weight and enhances its beauty.
Hanging Your Quilt: Tips for Using Dowels, Cords, and Hanging Tabs for Display
When it’s time to display your quilt wall hanging, you’ll want to ensure it’s presented just right.
- Slide the dowel through your quilt’s hanging tabs or corner triangles for a secure hold.
- Choose a cord that complements your quilt for a seamless look when hanging.
- Space out loops evenly to prevent any sagging—think cloud surfing on a perfectly calm day.
- Opt for corner hanging triangles if you’re after a quick setup; they’re like freedom sessions for your quilt.
- Pick your hanging method wisely; it’s the difference between a quilt that dances on the wall and one that just hangs there.
Frequently Asked Questions (FAQs)
How to select a dowel for quilt weight?
To select a dowel for your quilt’s weight, opt for the smallest diameter that can support the quilt without bending, preventing a bulge at the top.
For smaller quilts, a 1/2 diameter works, while larger quilts may need 5/8 or 3/
Can quilts be hung without a sleeve?
You can indeed hang quilts without a sleeve. Try using clamps, push pins, or drapery rods with clips for a no-fuss display that’s easy to change out—no sewing required.
Best thread type for quilt hanging durability?
For your quilt hanging to last through the ages, grab a polyester thread. It’s tougher than cotton and laughs in the face of heavy use.
Plus, it won’t shrink or fade, keeping your masterpiece looking sharp. Don’t skimp—quality matters!
How to prevent quilt fading on walls?
To prevent your quilt from fading on walls, avoid direct sunlight and use UV-filtering museum glass if framed.
Rotate it seasonally and consider UV protectant sprays cautiously, as their long-term effects are debated.
Methods for cleaning wall-hung quilts?
Did you know 85% of quilters say cleaning their creations is a top concern? You’re not alone in this stitchy situation.
To freshen up your wall-hung quilt, start by giving it a gentle vacuum using a stocking over the nozzle—like a soft hug for your fabric masterpiece.
If it’s looking a bit tired, consider a delicate machine wash with a color-safe detergent and cold water, tossing in a color catcher for peace of mind.
Conclusion
Surprisingly, 85% of quilters say they feel more relaxed and happy when they finish a project.
As you wrap up your quilted wall hanging, you’re not just creating a piece of art; you’re crafting joy.
Don’t forget those finishing touches—binding and hanging loops are your final steps to ensure your quilt is display-ready.
With these tips, your quilted wall hanging won’t only reflect your unique style but also bring a sense of accomplishment and happiness into your space.
Now, go ahead and hang your masterpiece with pride, knowing you’ve added a personal touch to your home that’s both beautiful and meaningful.


