This site is supported by our readers. We may earn a commission, at no cost to you, if you purchase through links.
Making your own swimsuit lets you choose exactly how much coverage you want, which colors flatter your skin tone, and whether you need extra support in specific places. The process demands precision—a quarter-inch error throws off the entire fit—but the payoff is a suit that moves with your body instead of against it.
Once you understand how swimwear fabric behaves under tension and which stitches prevent seams from popping during a dive, you’ll wonder why you ever settled for off-the-rack options that never quite fit right.
Table Of Contents
- Key Takeaways
- Getting Started
- Choosing The Right Fabric
- Selecting a Swimsuit Pattern
- Taking Accurate Measurements
- Cutting Out The Pattern Pieces
- Sewing The Seams
- Adding Elastic to The Leg Openings
- Attaching The Straps or Halter
- Finishing The Edges
- Final Touches and Adjustments
- Frequently Asked Questions (FAQs)
- Conclusion
Key Takeaways
- Accurate measurements and pattern adjustments are critical—even quarter-inch errors destroy fit in stretch fabrics, so measure twice and compare your body to the pattern’s size chart before cutting.
- Fabric choice makes or breaks your swimsuit; polyester-spandex blends resist chlorine 50% better than nylon and require you to reduce measurements by 10-15% because of their 40-60% stretch.
- Proper sewing technique prevents seams from popping—use zigzag or triple-stretch stitches with ballpoint needles, and apply 8mm seam allowances with an extra 2mm where elastic attaches.
- Quality finishing with Fold Over Elastic on edges and bar-tack reinforcement at high-stress zones like the crotch keeps your homemade swimsuit durable through repeated pool use and chlorine exposure.
Getting Started
With the right skills and a modest initial investment, you can create custom swimwear from home. Start by setting up a dedicated workspace with enough room to lay out fabrics and patterns flat. Essential tools include a sewing machine with zigzag capability, stretch needles, fabric scissors, and rubber elastic.
You’ll also need swimwear fabric—usually nylon or polyester spandex—plus a swimsuit pattern that matches your skill level. Before cutting, take accurate measurements of your body and adjust the pattern accordingly. Understanding fabric knowledge, especially stretch percentage, guarantees your finished piece fits like a dream.
You’ll also need to learn about swimwear fabric options like Econyl and Lycra.
Choosing The Right Fabric
The fabric you choose will make or break your swimsuit’s fit, comfort, and durability. You’ll need to think about stretch, recovery, and how well it holds up against chlorine and sun.
Let’s walk through the key considerations that’ll help you pick the perfect material for your project.
Fabric Selection Tips
When choosing swimwear fabric, think of it as picking armor for underwater adventures. Fabric durability matters most—polyester-spandex blends resist chlorine up to 50% better than nylon options.
Color coordination depends on skin tone and style goals. Texture choices like ribbed or smooth knits affect compression and comfort. Stretch evaluation is critical; you’ll need four-way stretch with at least 50% give. Lining options add support where you need it most.
The swimwear fabric market is seeing significant market growth due to the increasing popularity of water sports.
Adjusting Pattern Measurements
Your torso length holds the secret to pattern success. A three-inch difference between your body and the pattern can make a swimsuit unbearably tight or sloppy. Here’s how to nail pattern adjustments:
- Measure your torso from mid-shoulder, through the crotch, back to mid-shoulder—compare it to the pattern’s torso metric
- Address size variance by pinching and marking loose areas at bust, waist, and hips for precise tightening
- Apply grading techniques manually, increasing chest width and leg points by 1.25 cm per size while extending gusset points 1 cm
Bust adjustments and comfort considerations require measurement-based pattern modifications before you cut fabric.
Working With Slippery Fabric
Once your measurements and pattern sync up, the real challenge starts—slippery swimwear fabric. Nylon-spandex blends have a super low friction coefficient, making them shift and slide constantly under your hands.
Stabilizing methods like lightweight spray or pattern weights prevent frustrating misalignment during cutting techniques.
Switch to a Microtex needle and adjust your tension for cleaner seam finishes—these sewing swimwear techniques tame even the most stubborn swimwear fabric characteristics.
Selecting a Swimsuit Pattern
Before you cut a single piece of fabric, you need a solid pattern that matches your vision and fits your body. The right pattern becomes your blueprint for success, guiding every stitch from start to finish.
The right pattern becomes your blueprint for success, guiding every stitch from start to finish
Here’s what you need to think about when choosing your swimsuit pattern.
RTW Swimsuit Analysis
Ready-to-wear swimsuits are like master classes in pattern design—studying them reveals proven techniques you can apply to your own projects. When you analyze a well-constructed piece, focus on these details:
- Fit Analysis: Check how seams shape curves and where elastic creates support without pinching
- Construction Quality: Examine stitch types, seam finishes, and how lining attaches to outer fabric
- Material Composition: Note fabric weight, stretch direction, and recovery—nylon blends (37.60% market share in 2024) offer excellent elasticity
- Trend Integration: Women’s swimwear accounts for 46.30% of revenue, with black, blue, and green dominating color preferences
Turn your favorite suit inside-out to decode how professionals approach tricky areas like bust support and leg openings.
Adjustments and Measurements
Why do pattern adjustments make or break your finished suit? Measurement errors as small as 0.25 inches distort fit dramatically in stretch fabrics. Body measurement accuracy starts with taking at least 10 measurements—bust measurement, underbust, waist, hip, and torso length matter most.
Pattern grading techniques shift seams by 0.5 to 2.5 cm between sizes. Fabric type adjustments require reducing measurements by 10–15% for spandex that stretches 40–60%. Elastic stretch ratios commonly fall between 75–90% of fabric circumference.
Fitting verification testing through stretch muslins improves accuracy by 50%.
Selecting Swimsuit Fabric
Fiber properties determine how your suit performs underwater and in sunshine. Polyester-spandex blends deliver over 200 hours of chlorine resistance and UPF ratings starting at 15, while nylon-spandex offers enhanced softness but fades faster under UV exposure.
- Chlorine resistance: Polyester holds up 2× longer than nylon in pool testing
- UV protection: Tight weaves block harmful rays with UPF 50+ ratings
- Fabric weight: Medium-weight polyester dries 12% faster than pure nylon
- Stretch direction: 20–25% spandex content provides ideal recovery and comfort
Taking Accurate Measurements
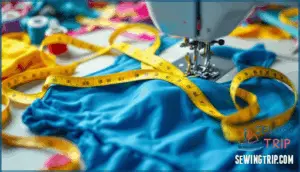
Think of your body measurements as the foundation of your entire project. Without them, even the best pattern won’t give you the fit you’re after. Start by gathering a flexible measuring tape and asking a friend to help—you’ll get better accuracy when someone else performs the tricky angles.
Stand up straight and measure over bare skin or form-fitting undergarments, since a clothing allowance of 1–1.5 inches can throw off your sizing entirely. You’ll need four reference points: bust at the fullest part, waist at its natural curve about 1–2 inches above your navel, hips at the widest point, and torso length from shoulder through crotch and back. Tape tension matters—keep it snug but not tight to avoid undersizing by nearly an inch.
Posture effects are real, so don’t slouch or lean. Repeat measurements twice to catch any errors, since consistency reduces sizing mistakes by about 10%. Compare your numbers to your pattern’s size chart and adjust accordingly for swimsuit pattern adjustments that give you a custom fit.
Cutting Out The Pattern Pieces
Cutting fabric for swimwear is like drawing a map—precision now means fewer detours later. Lay your swimsuit fabric on a flat surface and smooth it carefully. Use pattern weights to prevent slippage, which can improve accuracy by up to 40% compared to pinning alone.
Check the fabric grain first. Most swim fabrics stretch more from selvage to selvage, so align your pattern pieces accordingly. Cutting on the correct grainline improves fit in nearly 87% of finished swimsuits.
Rotary cutters work better than fabric scissors for these slippery materials, giving you 30% more cutting precision. Cut one layer at a time to avoid distortion. Include seam allowances of 0.5 to 1.5 centimeters—skipping them causes fit errors in about 25% of projects.
Mark your notches and reference points with tailor’s chalk or permanent ink. Marking notches reduces assembly mistakes by roughly 33%, making your next steps smoother.
Sewing The Seams
Sewing swimwear seams demands flexibility that stretches as much as you do. Start with side seams, crotch seams, and shoulder seams—this sequence optimizes fit and keeps your garment sturdy. Use a zigzag stitch for extensibility or a triple-stretch stitch for durability. Ballpoint or stretch needles prevent fabric runs, while polyester thread offers high tensile strength and abrasion resistance.
The standard seam allowance for swimwear patterns is 8mm, wider than lingerie’s 6mm, to accommodate elastic. Add 2mm wherever elastic will be applied—leg openings, armholes, necklines. Four-thread overlock seams deliver up to 71.78% seam efficiency at stress points. Test your stitches on scrap fabric first. Proper needle selection and allowance adjustments mean fewer popped seams and better longevity when your swimsuit hits the water.
Adding Elastic to The Leg Openings
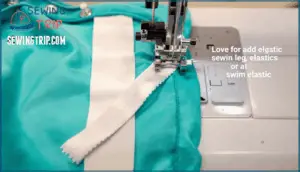
With seams secured, swimwear elastic transforms a flat pattern into a wearable garment that stays put. Leg openings demand rubber swim elastic, the workhorse resistant to chlorine, salt, and sun. You’ll need 6mm to 10mm widths—narrow enough to feel invisible but strong enough to keep everything in place.
Cut elastic to 80-90% of the leg opening’s length. The quartering technique prevents puckering: divide both elastic and fabric into quarters, pin at each mark, then stitch while stretching evenly. Apply minimal stretch across the front, more along the back curves. A three-step zigzag stitch (5.0 width, 1.5 length) delivers flexibility and strength. Stretch needles prevent skipped stitches.
Uneven elastic tension creates wavy edges. Marked quarter points keep distribution smooth. Topstitch the inner edge flat for comfort. Practice reveals the ideal balance—tight enough for security, relaxed enough for movement.
Attaching The Straps or Halter
Straps anchor your swimsuit and define its silhouette. Position attachment points 4 to 5 inches from side seams for balanced support—mark them with the wearer present if possible. Cut fabric or elastic straps around 12 inches long, fold edges inward by 1/8 inch, then topstitch to prevent fraying.
For halter-style straps, fold fabric over braided swimwear elastic and sew down the length with a zigzag stitch to preserve stretch. Braided elastic resists chlorine and UV better than clear elastic, which yellows and breaks down fast. Adjustable straps with sliders reduce fit complaints by 35% and accommodate size variation easily.
Secure straps with straight or zigzag stitches at marked points. Test placement with safety pins first—move through full range of motion before final sewing. Reinforce attachment areas with double stitching for durability. Symmetrical positioning prevents uneven pull and keeps everything comfortable during wear.
Finishing The Edges
Once straps are secure, edge finishing transforms raw fabric into professional swimwear. Fold Over Elastic (FOE) gives you clean edges that stretch and recover without puckering—use 3/8 inch to 1/2 inch widths for legs, arms, and necklines. Stretch the elastic while you sew, but don’t pull the fabric underneath. This prevents wavy edges and keeps everything flat.
A zigzag or triple stretch stitch keeps seams flexible under tension. For needle selection, always choose ballpoint or stretch types—they prevent snags and skipped stitches on spandex. Woolly nylon thread in the looper adds softness against skin and improves seam stretch along finished edges.
Seam finishing with a 3-thread overlock stops fraying and boosts chlorine resistance. Edge reinforcement at high-stress zones like crotch seams prevents failure during active wear. Bar-tack stitching adds durability where you need it most.
Final Touches and Adjustments
After edge finishing locks in your seams, it’s time for a thorough Fit Assessment. Slip the swimsuit on and check for fabric pooling across the buttocks or sagging in the bust—these signal areas needing Adjustments. If you spot wrinkles, take in side seams or shorten straps.
Strap Corrections often mean removing and reattaching at a better height so they support without digging in. For droopy bottoms, try choosing a smaller back size next time or add a dart now.
Seam Reinforcement with bar-tack stitching at high-stress zones like the crotch prevents failure during active wear. Hardware Adjustments—swapping out corroded clasps or adding non-slip waistbands—boost durability and Comfort Testing results.
Stretch each seam gently to confirm it recovers without puckering. Your swimsuit should hug smoothly, move with you, and feel secure in water.
Frequently Asked Questions (FAQs)
How do I make adjustments if the swimsuit doesn’t fit properly after sewing it?
Like a vintage pattern from decades past, fit troubleshooting requires patience. Start by seam ripping problem areas—side seams or elastic adjustments are your first targets. Try the swimsuit on, mark tight spots, then carefully unpick and restitch with adjusted seam allowances.
For pattern alterations, consider making a muslin fitting first next time. Small tweaks to your swimsuit refashion efforts compound into perfect fit.
How do you prevent chlorine damage to swimsuit fabric?
Chlorine resistance depends on your fabric choice—polyester spandex outperforms nylon for pool wear. Fabric treatments and proper care extend your swimwear’s durability considerably.
Rinse your swimsuit immediately after swimming to remove chlorine. Air-dry away from direct sunlight to preserve colorfastness and fabric integrity.
What thread type works best for swimwear construction?
Polyester thread is your best choice for swimwear construction. It offers excellent chlorine resistance and maintains its strength when wet, unlike cotton.
Polyester provides excellent stretch compatibility with spandex fabrics and delivers strong colorfastness, preventing color bleeding. Its UV resistance protects against sun damage, making sure your swimsuit stays vibrant longer.
Always use polyester thread specifically designed for stretch fabrics to heighten durability in your finished swimsuit.
How do you line a swimsuit for coverage and support?
Swimsuit lining fabrics like mesh or cotton provide coverage and support where you need it most.
Attach lining to the main fabric using a zigzag stitch, securing it along seams and openings. This construction technique distributes stress evenly, reducing transparency while enhancing comfort during wear.
How do you care for and maintain homemade swimsuits?
To keep your homemade swimwear in top shape, hand wash it in cool water with mild soap after each use to remove chlorine and sunscreen stains. Skip the dryer—lay it flat or hang it to air dry away from direct UV rays. Store it in a cool, dry place to maintain durability and elasticity.
Conclusion
You’ve just made a splash in the custom swimwear scene—now you’re not just swimming in fabric anymore, you’re swimming in possibilities. Making your own swimsuit gives you complete control over fit, style, and quality. This skill transforms how you approach getting dressed for the water.
You’ll save money on future suits and gain the confidence that comes with wearing something you built yourself. The precision you’ve learned applies to any garment. Keep your notes on measurements and fabric properties. Your next swimsuit will be even better than your first.
- https://www.ashleymcpherson.com/blog/the-complete-180-step-swimwear-manufacturing-process-from-a-global-sourcing-expert
- https://us.lyramodest.com/blogs/official/these-8-swimwear-trends-will-be-everywhere-in-2024
- https://www.grandviewresearch.com/industry-analysis/swimwear-market
- https://journals.sagepub.com/doi/10.1177/00405175241245123?icid=int.sj-abstract.citing-articles.3
- https://www.swimwearmanufacturers.co.uk/post/the-swimwear-manufacturing-process-a-behind-the-scenes-look

