This site is supported by our readers. We may earn a commission, at no cost to you, if you purchase through links.

First, pick a pair of jeans that fit well and aren’t too stretchy. Mark where you want to cut them, maybe just above the knee or mid-thigh if you’re feeling daring.
Use sharp scissors for a clean slice, then roll the hems for a casual cuff.
If you’re in the mood, add a bit of distress for that lived-in look. Remember, wash them inside out with cold water to keep them looking fresh.
Adding patches or funky shoes can take your DIY shorts to the next level. Curious about experimentation? There’s so much more to discover!
Table Of Contents
Key Takeaways
- Start with straight-leg, non-stretch denim jeans for the best results when making cut-offs.
- Mark your desired length with chalk, use sharp scissors for a clean cut, and roll the hems for a casual cuff.
- Customize your shorts with distressing techniques like fraying edges or adding bleach splatters for a unique style.
- Wash your shorts inside out on a gentle cycle with cold water to maintain their look and avoid shrinkage.
Choosing The Right Pair of Jeans
Choosing the right pair of jeans is the first step to crafting the perfect cut-off shorts.
You’ll want straight-leg jeans.
With a non-stretch fabric and the right inseam length to match your style.
Tip 1: Look for Straight-leg Jeans
To explore DIY cut off jeans, start by finding straight-leg jeans. They offer the perfect base compared to alternatives like bootcut or wide-leg styles.
Aim for a comfy fit—neither too snug nor too loose.
From light to dark denim, you’ve got color options galore.
Embrace versatility and explore stylish opportunities with straight-leg benefits. DIY cut off jeans are easy to make.
Tip 2: Check The Inseam Length
Inseam variations can make or break your DIY jean shorts.
When checking the length, think about the final hem and how much ankle you’d like to show.
- Measure twice to avoid cutting too short.
- Consider cuff options to personalize style.
- Use a well-loved pair as a guide.
- Remember, jorts should celebrate summer freedom!
Tip 3: Avoid Jeans With Stretch
When crafting perfect cut-offs, steer clear of stretchy denim. This fabric can throw off your desired shape and length, making the process tricky.
Non-stretch jeans, with their sturdy fabric, offer smoother cuts and fraying benefits.
Embrace the DIY spirit over store-bought options.
Choose your fabric wisely to nail that jeans modification with a liberated, effortless style.
Cutting Your Jeans
Now that you’ve picked the perfect jeans, it’s time to mark that final cut line with precision.
Get your scissors ready.
Cut along the line to start transforming your pants into stylish shorts.
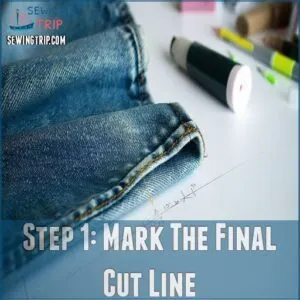
Step 1: Mark The Final Cut Line
Finding the perfect length is key.
Stand tall, decide where you want your jeans to end, and grab some chalk or a fabric markers for jeans. This is your best friend for marking techniques.
Trust your measuring tape; it’s essential for accuracy. Consider length variations—always double-check while seated.
Making jorts? Avoid mistakes by marking both legs evenly.
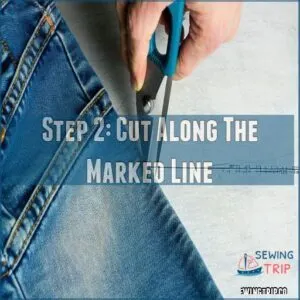
Step 2: Cut Along The Marked Line
Once you’ve marked your desired length, grab your fabric shears.
Cutting jeans might seem intimidating, but with a few precision tips, it’s a breeze!
Use slow, even cuts to create perfectly straight lines. Follow the chalk line closely for the best results.
Remember, sharp scissors make all the difference—trust me, I’ve learned this the hard way!
Now you’re ready to express your inner designer. These cutting techniques will make your DIY jean shorts seriously awesome.
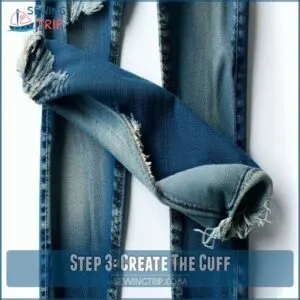
Step 3: Create The Cuff
You’ve made the cut, and now it’s time to play with the cuffs.
Roll up your hems to the desired cuff width, whether it’s a playful skinny roll or something bolder.
Keep both sides even for a clean look.
Remember, the fabric cuffing technique is flexible—adjust as needed for the perfect style that transforms your jeans into fresh DIY cutoffs. Choosing non-stretch denim will help achieve better fraying results with sharp scissors.
Step 4: Distress Your Shorts (optional)
Start by giving your shorts an edgy vibe using these simple steps. It’s an exciting way to breathe new life into your denim:
- Fray those edges using scissors for that coveted worn-in look.
- Add bleach splatters for a unique distressing effect.
- Use fabric paint to customize your style.
- Create ripped details with tweezers for extra flair.
Happy distressing!
Washing Your Shorts
After turning your fabulous new shorts inside out, it’s time to give them a wash to start the fraying process.
With a gentle cycle and cold water, you’ll guarantee your DIY masterpiece stays in tip-top shape.
Step 1: Turn Your Shorts Inside Out
To set the stage for perfect DIY jeans cutoffs, flip your shorts inside out. This simple trick helps spot any uneven hem and keeps fabric fraying in check.
If you’re starting from scratch, you can find a wide variety of denim shorts styles to transform into your perfect cutoffs.
Secure the seams with a quick stitch to avoid damage.
Non-stretch denim holds up best for that effortless, cool vibe.
Now, you’re primed for the next stylish step in your jean shorts tutorial.
Step 2: Wash Your Shorts
Wash your denim cut-off shorts to maintain their edgy look.
Toss them inside-out into the machine and opt for cold water—it’s key to preventing shrinkage. To learn more about preventing shrinkage, check out tips on how to wash jeans without shrinking.
Skip the fabric softener to keep things sharp.
Use a gentle cycle to protect against fraying.
While giving your DIY jorts a fresh spin, remember a little care goes a long way!
Step 3: Dry Your Shorts
Your DIY denim cut-off shorts are almost ready to rock, but let’s dry them just right.
Opt for low heat drying in a tumble dryer to prevent shrinkage, or go for air drying for a natural touch.
Keep an eye on the drying time to maintain their perfect fit.
Now, you’re all set to strut your style!
Styling Your New Shorts
Now that you’ve got your awesome new cutoff jeans, it’s time to style them! Let’s explore some simple yet stylish ways to rock your DIY creation.
Tip 1: Pair Them With a Simple Top
With denim shorts in hand, top styles make all the difference.
Go simple: tuck in a blouse or tank for added shape.
If layering’s your jam, stack shirts for eye-catching flair.
Add patches for personality; find them at craft stores.
Remember, in the realm of cutoff jeans, a little creativity goes a long way in showing off your DIY fashion chops.
Tip 2: Choose The Right Shoes
What shoes are best for showing off your new jorts? Choose wisely to balance comfort and style.
- Sneakers: Great for a casual look and all-day comfort.
- Sandals: Ideal for warm days, giving a breezy vibe.
- Ankle boots: Add some edge and are perfect for fall.
- Heels: Elevate the outfit for a night out, ensuring color coordination.
Tip 3: Experiment With Accessories
Don’t just stop at shoes; let your style loose with accessories. Think of bold jewelry, fun belts, or even a quirky hat to turn heads when you’re out and about in your DIY jeans cutoffs. You can find unique options like funky belts online to add a personalized touch to your outfit.
| Accessory | Style |
|---|---|
| Jewelry | Bold, Layered |
| Belt | Funky Buckles |
| Hat | Wide Brim |
| Bag | Crossbody |
Experiment with each to create a fresh look every time.
Frequently Asked Questions (FAQs)
How to make the perfect cut off jeans?
Ever wonder if the perfect cut-off jeans really exist?
Grab some well-fitting, straight-leg denim, mark your length, cut carefully, and cuff or hem.
Customize with bleach or fabric accents for a unique style that’s all yours.
How do you make cuts in your jeans?
Grab some sharp scissors and your favorite jeans. Mark your desired length. Cut along the line, then wash for that perfect frayed edge. Easy peasy!
Can I cut off my own jeans?
Absolutely, you can cut off your own jeans!
Grab some chalk, a good pair of scissors, and go for it.
You’ll have a pair of custom shorts that reflect your style and creativity. Enjoy the transformation!
How do you fray the end of cut off jeans?
To fray cut-off jeans, start by washing them to loosen the fibers.
Then, use scissors or tweezers to gently pull threads along the edge for a casual, rugged look.
Repeat after each wash for more fraying.
What type of jeans should I use?
Pick straight-leg jeans in sturdy, non-stretch denim.
Aim for a comfy fit, neither too tight nor loose.
Favor those with minimal damage and choose a color you like, ranging from light washes to darker shades.
How do I make sure the shorts are the same length?
Fold your jeans in half, aligning the hems.
Mark and cut one leg.
Use the first leg as a guide for cutting the second to guarantee even length. Double-check alignment before making the final cut.
Do I need to use a sewing machine?
Nope, you don’t need a sewing machine for cut-offs.
Just grab a good pair of sharp scissors.
You can rely on scissors and tweezers for a clean cut and stylish, frayed edges.
Keep it simple!
Is it better to cut the shorts on my body or off it?
Cutoffs are like jeans taking a leap into summer.
but do it off your body.
This prevents accidents and guarantees a straight line, making the process easier and giving you shorts that fit just right.
How do I make sure the shorts don’t look too tight?
Choose non-stretch denim; it prevents that sausage-casing look. Snip the outside seams if they’re too snug. A little looseness lets your legs breathe, and you’ll feel amazing!
How to prevent jeans from shrinking post-cutting?
A stitch in time saves nine.
Wash your jeans inside out on a gentle cycle, using cold water.
Avoid over-drying by air-fluffing them or using low heat. This helps keep your jeans from shrinking after cutting.
Conclusion
Transforming jeans into cut-offs is easier than you might think, and it’s a fun way to express your style.
Whether you’re opting for a neat finish or a distressed look, knowing how to make cut off jeans gives you the creative control.
From choosing the right pair to styling them with the right shoes and accessories, you’ve got the tools to make fantastic wardrobe staples.
Embrace the process, and let your creativity shine through your new DIY adventure!


