This site is supported by our readers. We may earn a commission, at no cost to you, if you purchase through links.
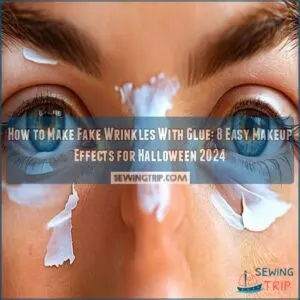
Start by applying a thin layer of Elmer’s Glue to the areas you want wrinkles. Let it dry a bit—feel free to make funny faces to enhance the effect.
Once it’s dry, gently apply foundation to blend the glue with your skin. For a more realistic touch, use a brush to add some shadows.
Be careful not to touch any fabric—glue doesn’t get along with costumes! Now, your timeless look is almost ready.
Curious about more tricks? Stay tuned!
Table Of Contents
- Key Takeaways
- Getting Started With Fake Wrinkles
- How to Make Fake Wrinkles With Glue
- Using Liquid Latex for Realistic Wrinkles
- Creating Realistic Wrinkle Patterns
- Adding Texture and Depth to Fake Wrinkles
- Blending Fake Wrinkles With Makeup
- Removing Fake Wrinkles Safely
- Tips and Tricks for Realistic Fake Wrinkles
- Enhancing Your Halloween Costume With Fake Wrinkles
- Frequently Asked Questions (FAQs)
- Conclusion
Key Takeaways
- Clean and prepare your skin by washing it thoroughly and skipping moisturizer so the glue adheres better, then patch test your chosen adhesive.
- Apply a thin layer of Elmer’s Glue or liquid latex to create wrinkles, pulling your skin gently to form natural-looking creases as the glue dries.
- Enhance wrinkle realism with makeup by adding shadows in crease lines and blending foundation to match your skin tone, setting everything with translucent powder.
- Remove glue-based wrinkles safely by soaking your face with warm water and using gentle circular motions; never rush the process to avoid skin irritation.
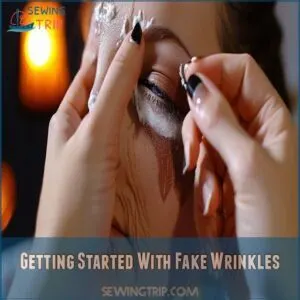
Getting Started With Fake Wrinkles
You’ll need to clean your face with mild soap and gather your supplies including non-toxic glue, makeup sponges, and setting powder before creating those spooky wrinkles for Halloween.
Creating realistic wrinkles isn’t hard when you’ve got the right materials and a clean canvas to work with.
Preparing Your Skin
Getting your skin ready for fake wrinkles is like prepping a canvas for a masterpiece.
Start with a thorough face wash using a gentle cleanser to remove oils and dirt.
Pat your face dry, then follow up with a light exfoliation to create a smooth surface.
Skip your usual moisturizer—you’ll want your skin slightly dry so the adhesive sticks better.
Avoid using any serums or oils beforehand.
Choosing The Right Glue
Now that your skin’s prepped, let’s talk glue – your ticket to wrinkle wizardry.
Spirit gum offers pro-level adhesion but comes with a higher price tag.
Liquid latex creates flexible, realistic effects but watch out for allergies.
For beginners, Elmer’s Glue-All works in a pinch, though it’s trickier to remove.
Just remember: always patch test first and avoid anything near your eyes or mouth.
Gathering Additional Materials
Beyond glue, you’ll need a few essential tools to create convincing wrinkles.
Here’s your must-have materials list, similar to the must-have tools in a beginner sewing kit, which includes cutting tools like good fabric shears dedicated to only cutting fabric and thread sewing tools and supplies.
- Clean makeup brushes or sponges for blending
- Translucent setting powder to prevent stickiness
- Cream-based foundation matching your skin tone
- Alcohol-based makeup remover for cleanup
Pro tip: When working with fabric to create realistic and long-lasting costume effects like fake wrinkles, consider using adhesive methods without an iron. Keep baby wipes handy – they’re lifesavers when you need to start over or make quick fixes during application.
How to Make Fake Wrinkles With Glue
You’ll discover how a simple layer of glue can transform your smooth skin into convincing wrinkles for your Halloween costume this year.
With just a bottle of Elmer’s Glue and a few basic techniques, you can create realistic aging effects that’ll make your friends wonder if you’ve time-traveled from the future.
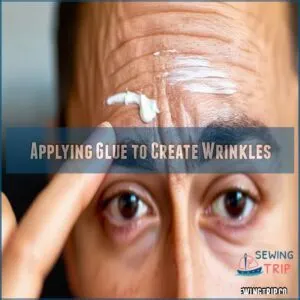
Applying Glue to Create Wrinkles
Start with small sections when applying glue to create wrinkles.
Put a thin layer of Elmer’s Glue or liquid latex on your skin using your fingertip or a makeup sponge.
Similar to using fabric glue for small repairs, a small amount of glue can go a long way in creating realistic effects.
Pull the skin gently in the direction you want the wrinkles to form, then release.
For deeper wrinkles, add a second layer once the first is tacky.
Remember to follow your natural expression lines for the most realistic effect.
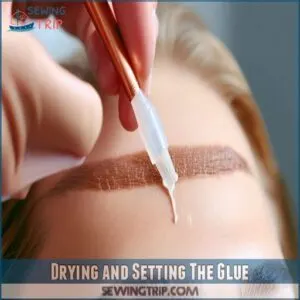
Drying and Setting The Glue
After applying glue to create your wrinkles, proper drying is key to achieving a realistic effect.
Let the glue dry completely using one of these proven methods:
- Natural air drying takes about 5-7 minutes – perfect for checking social media while you wait
- Speed things up with a small fan on low setting (3-4 minutes)
- Use your hairdryer on cool setting from 6 inches away (2-3 minutes)
Remember, rushing the drying process might ruin your wrinkles.
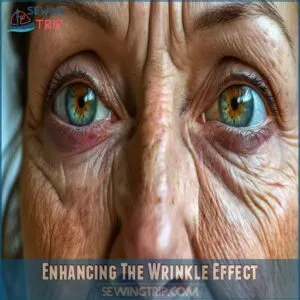
Enhancing The Wrinkle Effect
Three key techniques can transform basic glue wrinkles into Hollywood-worthy effects. Dust setting powder over partially dried glue to create realistic skin texture, then use cream makeup to match your natural skin tone.
For a more convincing look, you can find the right products for your glue wrinkle makeup needs at Glue Wrinkle Makeup.
Here’s a quick guide to perfecting your wrinkle effects:
| Technique | Purpose | Effect | Pro Tip |
|---|---|---|---|
| Stippling | Texture | Aged look | Use latex sponge |
| Shadowing | Depth | Realism | Dark brown cream |
| Powdering | Set makeup | Long-lasting | Translucent powder |
| Highlighting | Dimension | Natural aging | Peach concealer |
Using Liquid Latex for Realistic Wrinkles
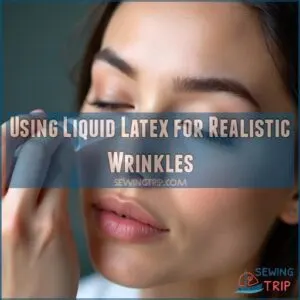
You’ll be amazed at how liquid latex can transform your face into a masterpiece of wrinkles and age lines using just a few simple steps.
Whether you’re planning to be a wise wizard or a creepy witch this Halloween, you can create realistic-looking wrinkles by applying thin layers of liquid latex and gently pulling the skin while it’s semi-dry.
Making Liquid Latex at Home
Making liquid latex at home is easier than you’d think.
Mix 1 cup of Elmer’s Glue-All with 1/4 cup water in a clean bowl.
Gradually stir in 1/4 cup of clear household ammonia until smooth.
Store your creation in an airtight container somewhere cool and dry.
Just remember to do a patch test first – nobody wants an allergic reaction ruining their Halloween transformation!
Applying Liquid Latex for Wrinkles
Through careful application, liquid latex can create stunningly realistic wrinkles.
Start by applying a thin layer to your clean skin using a makeup sponge.
As it begins to dry, gently pull and fold the skin to create natural-looking creases.
For deeper wrinkles, add a second layer and repeat the process.
Remember to avoid areas with hair and always test for latex allergies beforehand.
Removing Liquid Latex Safely
Once you’re ready to shed those spooky wrinkles, start by gently peeling the edges of the latex with clean fingers.
If it’s stubborn, apply baby oil or a specialized latex remover around the edges – never pull forcefully.
Work slowly in sections, keeping the skin taut.
For any leftover residue, dab with oil-based makeup remover.
Remember to moisturize afterward to soothe your skin.
Creating Realistic Wrinkle Patterns
You’ll want to study the natural creases and lines that form when you make different facial expressions, as these will guide you in placing the glue for the most convincing wrinkles.
Once you’ve mapped out your wrinkle zones, you can create realistic aging effects by applying thin layers of glue to these areas while holding the expressions that naturally create those wrinkles.
Using Facial Expressions to Create Wrinkles
Your natural facial expressions are the perfect guide for creating believable wrinkles.
Start by looking in the mirror and pulling different faces – scrunch your forehead, squint your eyes, and smile broadly.
Notice where your real wrinkles form naturally.
These movement patterns, called expression lines, will help you map out exactly where to place your fake wrinkles for the most realistic aging effect.
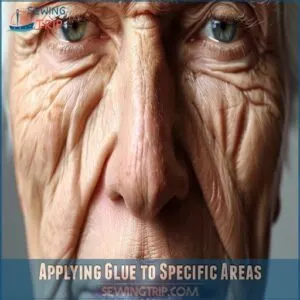
Applying Glue to Specific Areas
Applying glue strategically to specific facial zones creates realistic wrinkle patterns that’ll have everyone doing double-takes at your Halloween party.
Here’s where to focus your attention.
For an easier and less messy approach, consider using specialized wrinkle glue products available at halloween stores online wrinkle glue products.
- Apply thin layers along your forehead’s natural movement lines
- Create smile lines by following the creases from your nose to mouth corners
- Add crow’s feet by dabbing small amounts at eye corners
Remember to work in thin layers, letting each one dry before adding more.
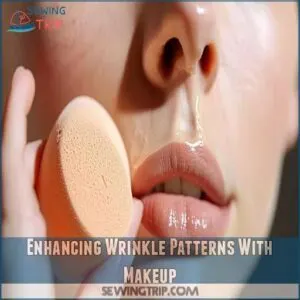
Enhancing Wrinkle Patterns With Makeup
Now that your wrinkle patterns are set, grab your makeup kit for the real magic.
Start by dusting a matte bronzer into the deepened creases, then sweep highlighting powder along the raised edges to create depth.
For ultra-realism, dab concealer around the wrinkles’ edges, blending outward with a damp beauty sponge.
Don’t forget to set everything with translucent powder to prevent smudging.
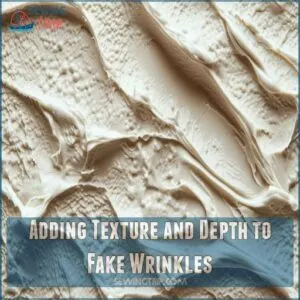
Adding Texture and Depth to Fake Wrinkles
You’ll need to master a few key techniques to transform your basic wrinkles into deeply textured, realistic creases that’ll make people wonder if you’ve aged decades overnight.
By combining cornstarch for texture and strategic makeup application, you can create convincing wrinkles that look natural from every angle.
Using Cornstarch to Add Texture
Cornstarch transforms your basic fake wrinkles into lifelike textures that capture every crease and fold.
Mix a pinch of cornstarch with your glue to create a thicker consistency that’s perfect for skin texture.
You’ll want to dust the dried glue gently with additional cornstarch using a fluffy makeup brush – this creates a matte, skin-like finish that looks surprisingly realistic under stage lights.
Creating Deep Wrinkles With Glue
For deep, dramatic wrinkles, you’ll want to build up layers of glue gradually.
Start with a thin base layer, let it dry until tacky, then gently pinch the skin to create natural-looking creases.
Add a second layer into these creases, focusing on areas where deep wrinkles naturally occur, like around the mouth and eyes.
Experiment with Elmer’s Glue thickness – thinner layers work better than one thick application.
Enhancing Texture With Makeup
After you’ve built up those impressive wrinkles with glue, it’s time to make them pop with makeup magic.
Think of your face as a canvas where shadows and highlights create depth, much like how carefully storing satin garments flat or hung loosely can prevent deep wrinkles and encourage a smooth texture, as seen in wrinkle-free satin fabrics like polyester satin blends.
Here’s what you’ll need:
- Dark matte eyeshadow for contouring the creases
- Light highlighting powder to catch the raised areas
- Translucent powder for setting everything in place
- Color-correcting concealer to match your skin tone
Blend these products gradually, working from dark to light.
Layer them carefully – you’re not painting a masterpiece, you’re aging gracefully (temporarily, that is!).
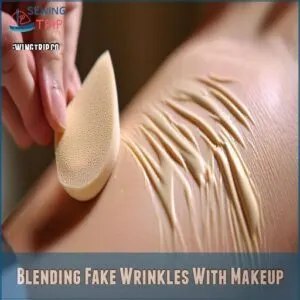
Blending Fake Wrinkles With Makeup
You’ll need to master the art of blending your fake wrinkles with makeup to create a seamless, aged appearance that doesn’t look obviously fake.
After you’ve created your base wrinkles with glue, you can use foundation and setting powder to blend them naturally into your skin tone and create a realistic aging effect that’ll wow everyone at your Halloween party.
Choosing The Right Foundation
The right foundation can make or break your fake wrinkle effects.
Pick a matte foundation that’s 1-2 shades darker than your natural skin tone to create depth.
Water-based foundations work best with glue and latex, while cream foundations can cause the effects to break down.
Look for long-wearing formulas from brands like Mehron or Ben Nye that won’t budge during your Halloween festivities.
Applying Foundation to Blend Wrinkles
Start blending your foundation at the outer edges of your fake wrinkles, working inward with gentle dabbing motions.
Use a damp makeup sponge to create seamless blending between the wrinkled and smooth areas.
Pat, don’t swipe, to avoid disturbing the glue underneath.
Build coverage gradually using thin layers until the edges disappear naturally into your skin tone.
Enhancing The Makeup Effect
Now that you’ve got your foundation set, let’s make those wrinkles pop with some makeup magic.
To give your fake wrinkles a more realistic look, consider the way aged skin can sometimes be loose-fitting, similar to how wedding dress alterations might require letting out seams to achieve a better fit.
Dust translucent powder over the wrinkles to set your foundation and prevent smudging.
Use a brown eyeshadow to contour along each wrinkle, creating natural shadows.
Highlight the raised areas between wrinkles with a slightly lighter shade of foundation.
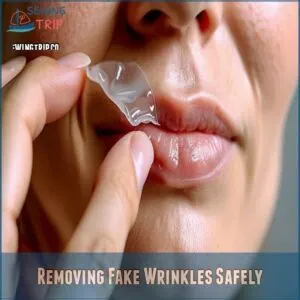
Removing Fake Wrinkles Safely
You’ll want to remove your fake wrinkles carefully using warm water and gentle soap to protect your skin from irritation and residue.
When you’re ready to take off those spooky aging effects, don’t rush the process – instead use small, circular motions while washing to make sure all adhesive comes off without pulling or tugging at your skin.
Removing Glue-Based Wrinkles
When you’re ready to bid farewell to those glue-based wrinkles, grab some warm water and a gentle cleanser.
Soak your face for about 30 seconds to loosen the adhesive, then use circular motions to softly massage the glue away.
Don’t rush the process – aggressive scrubbing can irritate your skin.
For stubborn spots, try applying a bit more warm water rather than pulling or scratching.
Removing Liquid Latex Wrinkles
Getting rid of liquid latex wrinkles takes a bit more finesse than standard glue removal.
You’ll want to tackle this carefully to protect your skin and get every bit of latex off.
Here’s your game plan for latex removal success:
- Apply a specialized latex remover or mineral oil along the edges
- Gently peel back the latex, working from the outside in
- Roll the latex off with your fingertips, never pulling forcefully
Preventing Skin Irritation
Protecting your skin should be a top priority after removing those spooky latex wrinkles.
Apply a gentle, alcohol-free cleanser to wash away any remaining adhesive.
Don’t skip patch testing new products on your inner arm first – nobody wants a Halloween look that lasts until Thanksgiving!
Follow up with a soothing aloe vera gel or fragrance-free moisturizer to keep your skin happy and irritation-free.
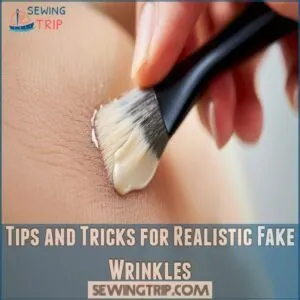
Tips and Tricks for Realistic Fake Wrinkles
You’ll need real wrinkles as references to create believable fake ones, so spend time studying photos of elderly faces or your grandparents’ smile lines and forehead creases.
Wrinkle patterns can be perfected by practicing on your arm first, paying special attention to natural creasing patterns.
Whether you’re using liquid latex or Elmer’s glue, you can perfect your technique by practicing different wrinkle patterns on your arm first, paying special attention to natural creasing patterns.
Using Reference Images for Realism
Now that you know how to remove fake wrinkles safely, let’s make them look more convincing in the first place.
Pull up photos of elderly faces and study where wrinkles naturally appear.
Look for crow’s feet around the eyes, forehead lines, and smile creases.
Notice how wrinkles deepen in certain expressions.
Save these reference images on your phone for quick comparison while you work.
Practicing Different Wrinkle Patterns
After studying those reference photos, let’s put that knowledge into action. You’ll want to practice creating different wrinkle patterns to nail that perfect aged look. Think of your face as a canvas where each expression tells its own story.
Consider investing in a wrinkle glue kit online (wrinkle glue products) to help you achieve a more realistic effect.
- Map out forehead lines by raising your eyebrows and following natural creases
- Practice crow’s feet by squinting in front of a mirror
- Create laugh lines by exaggerating your smile
- Study elderly relatives’ faces for authentic wrinkle placement
- Experiment with various depths by layering the glue
Enhancing The Overall Effect
To bring your fake wrinkles to life, layer different shades of foundation and powder to create natural-looking depth.
Start with a slightly darker shade in the wrinkle grooves, then blend outward with your regular foundation.
Don’t forget to add subtle age spots with brown cream makeup, and dust translucent powder over everything to set.
For extra realism, highlight the raised areas between wrinkles with a touch of shimmer.
Enhancing Your Halloween Costume With Fake Wrinkles
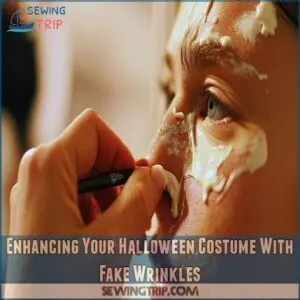
You’ll transform your Halloween costume from basic to extraordinary by adding realistic wrinkles with simple glue techniques that create an aging effect in minutes.
Whether you’re dressing up as a wise wizard or a creepy witch, these fake wrinkles will give your costume the authentic aged look you’re going for.
Creating a Creepy Old Age Effect
Transforming into a creepy elderly character starts with strategic wrinkle placement around your eyes and forehead.
Pull your skin taut while applying liquid latex in thin layers, creating deep creases that’ll make people do a double-take.
Add horizontal lines across your forehead and crow’s feet near your eyes.
Don’t forget those distinctive marionette lines from your nose to your mouth for that haunting aged appearance.
Enhancing Your Costume With Makeup
Your costume’s success hinges on makeup that ties everything together.
Start with a cream foundation that matches your chosen character’s age and complexion.
Blend darker shades into your glue-created wrinkles, using stippling motions to create realistic skin texture.
Add age spots with brown cream makeup, and don’t forget to extend the aging effect down your neck for a seamless look.
Adding Other Special Effects
Once you’ve perfected your aged appearance, level up your costume with fake scars, blood effects, or body paint.
Mix liquid latex with cotton balls to create textured wounds, or layer face paint to transform into mythical creatures.
Don’t forget to experiment with aging makeup techniques on your hands and neck – nothing ruins the illusion faster than young-looking hands paired with an aged face!
Frequently Asked Questions (FAQs)
How do you make fake wrinkles easy?
Want fake wrinkles that look real?
Apply liquid latex thinly, let it dry slightly, then gently pull the skin to create creases.
It’s like sculpting on your face!
Add more layers for deeper wrinkles.
How to make your skin look wrinkled for Halloween?
To create wrinkled skin for Halloween, apply a thin layer of liquid latex on your face.
Gently pinch and pull as it dries.
This creates realistic creases perfect for an aged look, ideal for spooky transformations.
How to use liquid latex to make wrinkles?
Imagine your face as a canvas.
Spread liquid latex thinly where you want wrinkles, then gently pinch and pull your skin as it dries.
This technique mimics natural creases, perfect for dramatic Halloween transformations or aging effects.
How to glue paper down without wrinkles?
Apply glue evenly, smoothing the paper with a credit card or similar tool, working from the center outwards to prevent wrinkles, and gently peel off any air bubbles that form.
How long does it take to make wrinkles?
Creating fake wrinkles with glue takes about 10 to 15 minutes.
You’ll mix the glue, apply it thinly, and as it dries, gently manipulate the skin to form wrinkles.
Adding realism with makeup if desired.
Can glue cause skin irritation or allergies?
Back in the day, people didn’t worry so much, but now Elmer’s Glue, while generally safe, can cause skin irritation or allergies, especially on sensitive skin.
Always do a patch test first to avoid surprises.
What type of glue is best for skin?
Don’t use glue on your skin!
Seriously, it’s not meant for that.
For fake wrinkles, try liquid latex; it’s designed for skin and creates awesome effects.
It’s safer and easier to remove.
How do I prevent wrinkles from peeling?
To keep wrinkles from peeling, apply a thin layer of light moisturizer under your anti-wrinkle patches.
This “suit of armor” helps them stay in place without sticking too much, reducing peeling and increasing comfort.
Are there alternatives to using glue for wrinkles?
You can create fake wrinkles without glue by using liquid latex or makeup techniques.
Try layering liquid latex and pinching the skin as it dries.
Or use contouring makeup to simulate depth and shadow for a wrinkled appearance.
Conclusion
Transform your Halloween look with fake wrinkles made from glue—it’s simple, surprising, and sure to spook!
By following these steps, you can master how to make fake wrinkles with glue, adding an eerie elegance to your ensemble.
Remember, preparation and precision are key.
Don’t just settle for spooky; make it stunning.
With your newfound skills, you can craft impressive costumes that leave a lasting impression.
Experiment, enjoy, and embrace the art of this age-old illusion!

