This site is supported by our readers. We may earn a commission, at no cost to you, if you purchase through links.
That dress hanging in your closet? The one you love but can’t fully zip up — or worse, can zip, but then you breathe and the whole bodice turns into a battle zone? You’re not alone. Bust fit is one of the most common reasons beautiful dresses get abandoned to the back of the wardrobe.
The good news: a tight bust is one of the easier alterations to fix at home, even if you’ve never touched a seam ripper. Dresses have more hidden room than you’d think, tucked inside seam allowances and darts just waiting to be released.
Whether you’re working with a thrifted find or a dress that fit two years ago, knowing how to make a dress bigger in the bust puts you back in control — and back in that dress.
Table Of Contents
Key Takeaways
- Before altering anything, measure both your body bust and the dress flat, then divide the difference evenly across both side seams to avoid lopsided fit.
- Letting out existing seams and releasing darts is always the first fix to try, since most dresses already hide extra room in their seam allowances.
- When seams alone aren’t enough, adding fabric panels or underarm gussets gives you 2–3 inches of extra room without disrupting the waist or overall shape.
- New fabric must match the weight, drape, and stretch of the original — a mismatch makes the alteration look and feel like a completely different garment.
Assess The Bust Fit
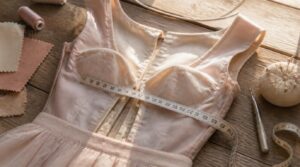
Before you pick up a seam ripper or cut a single piece of fabric, you need to know exactly what you’re working with. Getting the numbers right upfront saves you from guessing — and from fixing mistakes later. Here’s how to size up the situation:
If you’re new to this, it’s worth brushing up on choosing the right seam ripper for beginners before you dive in — the wrong tool can cause more damage than the original mistake.
Measure Body Bust
Grab your measuring tape before touching the dress. Wear your most supportive bra — the one you’d actually wear with the outfit — since your bra wearing consistency directly affects your results.
- Stand tall, arms relaxed at your sides
- Wrap the tape around the fullest part of your bust
- Keep it parallel to the floor — no tilting
- Note the number in inches
To guarantee accuracy, you must follow proper taking body measurement techniques.
That’s your body measurement baseline.
Measure Dress Bust Flat
Now lay the dress flat on a table — buttoned up, no folded darts — and press out any creases first.
Place your tape at one armpit seam, stretch it straight across to the other. Don’t pull the fabric taut. Record to the nearest 1/8 inch.
That number is your flat bust value. Double it to estimate the full bust area of the bodice.
Calculate Total Increase
With both numbers in hand, the math is simple. Subtract your doubled flat measurement from your actual body bust measurement — that gap is your circumference discrepancy, the exact amount the bodice needs to grow.
Here’s what that looks like in practice:
- Body bust: 38 inches
- Doubled flat value: 35 inches
- Total increase needed: 3 inches
That 3-inch absolute increase is your baseline for every cut ahead.
Divide Increase Per Side
That 3-inch total doesn’t go in one place. Split it straight down the middle — 1.5 inches per side — so both side seams get equal fabric when you let out the seams or insert fabric panels.
Skipping this step causes lateral drift, where the bodice pulls left or right. Mark the bust point on both sides first, then distribute fullness evenly across each seam.
Check Zipper and Movement
Pull the zipper closed and watch carefully. If the zipper pull sits exposed below the closure, the bodice is already too snug.
Try sitting down and bending forward — restricted movement or tooth misalignment under tension means the dress needs more room. That stress on the seams tells you exactly where the fit needs to change.
Prepare Fabric and Dress

Before you touch a single seam, getting your fabric situation sorted makes everything easier. The right prep work now saves you from a frustrating do-over later. Here’s what to take care of before you start altering:
If you’re new to taking apart garments, brushing up on hand sewing basics and seam techniques will help you work more confidently before you start unpicking anything.
Match Weight and Drape
Think of your new fabric as a dance partner — it needs to move the same way as the original.
Your new fabric must move like the original — choose a dance partner, not a stranger
Fabric weight and drape must match closely, because heavier fabrics form crisper, angular folds while lighter ones flow softly. Silk and rayon drape more fluidly than cotton, so check how your original fabric falls before shopping. A quick hand drape test tells you everything.
Consider Stretch Compatibility
Stretch matters more than most sewists expect. If your dress has spandex or elastane, your new fabric needs a similar stretch profile — otherwise you’ll get pulling at the bust and sagging everywhere else.
Knits with generous spandex content handle up to two inches of expansion beautifully. Wovens need at least some elastane to play along. Mesh or power mesh linings? Excellent stabilizers — they give slightly without distorting the outer fabric.
Pre-wash New Fabric
Skipping this step is how a perfect alteration unravels at the first wash. Pre-wash all new fabric before cutting a single piece.
This removes manufacturing residues like starch, reveals the fabric’s true drape, and — most critically — triggers any shrinkage before construction, not after. Run a small swatch first to test for color bleeding, especially with dark fabrics.
Choose Matching or Contrast
Here’s a decision that shapes the entire look of your alteration. When you insert fabric panels to increase the size of the bodice, you’re also choosing how visible that change becomes.
- Match for a smooth dress silhouette that reads as one garment
- Contrast to turn the panel into an intentional design accent
- Complement for color palette balance without full blending
Similar textures keep the eye moving past the seam. Contrast needs a repeated element — trim, accessories — to look deliberate, not patched.
Remove Nearby Embellishments
Before you sew a single seam, clear the field. Any embellishments within two inches of your alteration zone need to come off first. A fine-gauge seam ripper lets you detach delicate beads without nicking the fabric. Do this before laundering — it prevents dye bleed. Press the trimmed edges flat, then you’re set to increase the size of the bodice cleanly.
| Action | Purpose |
|---|---|
| Remove embellishments first | Prevents dye bleed during washing |
| Press trimmed edges flat | Reduces bulk before paneling |
| Store recovered trims | Repurpose for future alterations |
Top 3 Bust Alteration Tools
Before you touch a single seam, make sure you’ve got the right tools in your kit. The wrong scissors or a clumsy seam ripper can damage your fabric fast. Here are three tried-and-true tools that’ll make this whole process a lot smoother.
1. Multipurpose Stainless Steel PVD Scissors
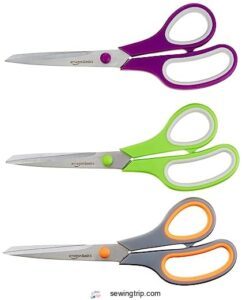
A good pair of scissors is half the battle. These Multipurpose Stainless Steel PVD Scissors come in a 3-pack — grey, green, and purple — so you can keep one at your cutting table and never hunt for them mid-project.
The PVD-coated blades slice cleanly through lightweight dress fabric, lining, and interfacing without snagging. Rated for over 100,000 cuts, they won’t quit on you. The ergonomic, ambidextrous grips mean less hand fatigue during longer alteration sessions.
| Best For | Crafters, sewers, and home users who want durable, versatile scissors they can station in multiple rooms without constantly tracking a single pair down. |
|---|---|
| Blade Material | Stainless Steel |
| Handle Type | Soft Grip |
| Rust Protection | PVD Coating |
| Primary Use | Multipurpose Cutting |
| Set Type | 3-Pack |
| Sewing Suitable | Yes |
| Additional Features |
|
- PVD-coated blades stay sharp through 100,000 cuts and resist rust, making them a long-term investment
- Ambidextrous ergonomic handles reduce hand fatigue for both lefties and righties during extended use
- The 3-pack (grey, green, purple) lets you keep scissors in the craft room, kitchen, and office all at once
- At 8.4 inches, they’re on the larger side — not ideal if you prefer compact 5-inch scissors for detail work
- Designed for general multipurpose cutting, so they won’t replace specialized precision or embroidery scissors
- No mention of a protective case or blade cover, which could be a concern for safe storage
2. Livingo Titanium Coated Tailor Scissors
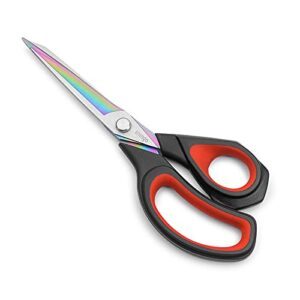
If the PVD scissors are your everyday workhorse, think of the Livingo Titanium Coated Tailor Scissors as your heavy-duty backup.
The 9.5-inch titanium-coated blades power through denim, canvas, and up to 16 fabric layers without dulling. That coating also resists rust and stops adhesive from gumming up the edge. The ergonomic grip reduces wrist strain during long cutting sessions. One heads-up — the handle runs large, so smaller hands may tire faster.
| Best For | Sewers, tailors, and crafters who regularly cut through thick or heavy-duty materials like denim, leather, and canvas. |
|---|---|
| Blade Material | Stainless Steel |
| Handle Type | Comfort Grip |
| Rust Protection | Titanium Coating |
| Primary Use | Heavy-Duty Fabric |
| Set Type | Single Pair |
| Sewing Suitable | Yes |
| Additional Features |
|
- Titanium-coated blades cut through up to 16 layers of fabric and resist rust and adhesive buildup
- Forged stainless steel construction holds an edge well through heavy-duty use
- Ergonomic grip helps reduce hand fatigue during long cutting sessions
- Large handle design can feel bulky and tiring for users with smaller hands
- Tension runs tight, which may slow you down during extended cutting tasks
- Falls short of high-end Japanese shears in overall precision and performance
3. Sewing Seam Ripper Stitch Remover and Scissor Set
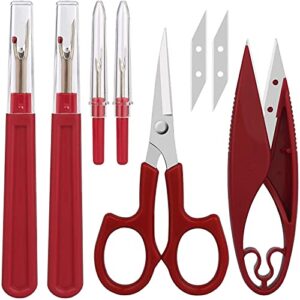
Scissors handle the cutting — but seam rippers do the real prep work.
This set gives you four rippers in two sizes, plus 5-inch curved embroidery scissors and thread snips with replaceable blades. The large ripper (5.5 inches) tears through thick seams fast. The small one (3.5 inches) fits tight spots like darts and buttonholes without shredding the fabric around them. 3Cr13 stainless steel blades mean they won’t rust on you mid-project.
| Best For | Sewists of all skill levels who need a reliable, all-in-one ripping and cutting kit — especially those doing detailed embroidery, buttonhole work, or frequent seam corrections. |
|---|---|
| Blade Material | 3Cr13 Stainless Steel |
| Handle Type | ABS Ergonomic |
| Rust Protection | Heat-Treated Blades |
| Primary Use | Precision Sewing |
| Set Type | Multi-Tool Set |
| Sewing Suitable | Yes |
| Additional Features |
|
- Four rippers in two sizes cover everything from delicate embroidery to thick multi-layer seams
- Replaceable blades on the thread snips save money and reduce waste over time
- 3Cr13 stainless steel holds up to regular use without rusting
- Small rippers can be tricky to grip comfortably if you have arthritis or joint pain
- The design is pretty no-frills — nothing fancy if aesthetics matter to you
- Thread snips need consistent upkeep to stay sharp and perform well
Let Out Existing Seams
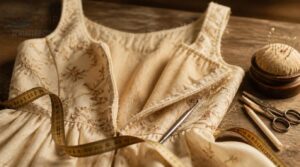
Before buying new fabric or adding panels, check if your dress already has extra room hiding in its seams. Letting out existing seams is the simplest fix — and often all you need. Here’s how to do it step by step.
Open Side Seams Carefully
Start at a clean fabric edge and slide your seam ripper along the stitching line — not through it. Rushing here causes fraying that’s hard to fix. Mark your path first with tailor chalk so you open only what’s needed.
Press the seam allowances flat with a pressing cloth once opened to keep everything smooth and manageable before you continue.
Reduce Seam Allowances
Trimming down your seam allowances is one of the quickest ways to let out the seams and increase the size of the bodice without adding new fabric. Narrowing from the standard ½ inch to ⅜ inch can free up real room.
- Re-stitch just inside the original seam line
- Trim excess fabric evenly on both sides
- Clip curves so seams lie flat
- Finish raw edges with a zigzag stitch
Watch your grainline shift risks — reduced allowances can pull fabric off-grain, throwing off garment fit entirely.
Release Darts or Pleats
Hidden inside your bodice are darts — tiny stitched folds holding back fabric you actually need. Releasing them can increase the size of the bodice without cutting a single new piece.
| Action | Purpose | Result |
|---|---|---|
| Unpick dart stitching | Frees folded fabric | Adds bust room |
| Align to bust point | Accurate dart repositioning | Prevents armhole gaping |
| Preserve pattern markings | Guides re-stitching | Keeps fabric grain true |
Don’t skip bust point alignment — fullness redistribution in the wrong spot creates awkward bulges, not curves.
Press Fabric Flat
Once you’ve released those seams, pressing them flat is what separates amateur work from solid garment construction. Skip this step and your fabric bunches — making it harder to increase the size of the bodice cleanly.
Use these essential pressing tools:
- A press cloth to protect against fabric scorch
- Right heat settings matched to your fabric weight
- A pressing mat for maintaining fabric shape
Let everything cool flat before touching it again.
Test Fit Before Finishing
Don’t sew a single permanent stitch yet. Baste the seams first, then try the dress on.
Check peak alignment, shoulder placement, and closure tension — does the zipper lie flat without pulling? Raise your arms to test movement range. Watch the silhouette balance from waist to hip. Mark any fitting adjustments with chalk before you commit to finishing.
Add Bust Expansion Panels
Sometimes letting out seams just isn’t enough, and that’s where panels come in. Adding fabric to the bust area sounds intimidating, but these four approaches make it totally doable. Here’s what your options look like.
Cut Gussets or Panels

Before cutting anything, decide on your gusset shape. Triangular pieces add pointed volume at stress zones; rectangular panels spread ease evenly along the side seam; curved-edge gussets follow the bust contour and reduce bunching.
Cut each piece on the bias — that 45-degree angle gives natural flex. Always match fabric weight, or your new panel will drape like a different dress entirely.
Add Underarm Gussets
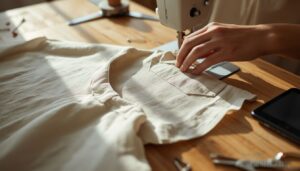
Underarm gussets are your secret weapon for bust expansion without touching the center front seam. Place the diamond’s inner point at the armpit peak — that’s where tension lives.
Stitch with a smooth, curved seam to avoid puckering. Match your fabric weight closely, or the gusset will droop differently than the dress. Finish edges with a narrow zigzag to stop fraying.
Insert Side Panels
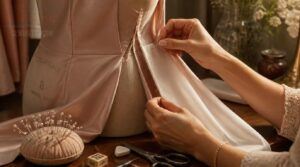
Side panels take things a step further than gussets. They stitch directly into the side seams, adding 2–3 inches of width where the bust needs it most.
Always align them with the garment’s grain line — off-grain panels twist and pull when you move. Strengthen corner points near the bust with backstitches, and press seams flat for a clean, smooth finish.
Try Lace-up Back
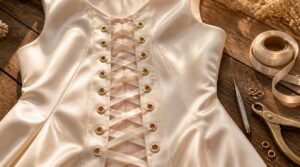
A lace-up back is a clever workaround when panels alone aren’t enough. You remove a section of the center back seam, install reinforced eyelets, then thread lacing through in a crisscross or corset-style pattern.
The lacing distributes bust tension evenly across both back panels, so no single seam takes all the strain. Stitch a small modesty panel behind the gap to keep things polished.
Press and Finish Seams
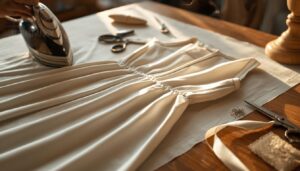
Once your panels are in, finishing is what separates a polished alteration from a rough fix.
- Set stitches by pressing the seam flat before opening.
- Open seam allowances flat with a pressing cloth.
- Reduce bulk by trimming allowances to 1/4 inch.
- Bind raw edges with bias tape on delicate fabric.
- Cool completely before moving on.
Don’t rush the iron.
Frequently Asked Questions (FAQs)
How to increase bust size on dress pattern?
Think of your bodice like a map — slashed pattern methods let you pivot and spread at the central reference points, adding room exactly where needed. A muslin mockup confirms fit before cutting the real thing.
How do you make a dress bust bigger?
You’ve got a few solid options: let out the seams, release darts or pleats, add diamond gussets, or insert side panels. Each method opens up the bodice without wrecking the overall shape.
Why does my dress look bigger than my bust area?
It’s not you — it’s the fit. Incorrect pattern grading, fabric drape issues, or even your bra’s projection can push extra fabric into the bust, making the dress look larger than your actual size.
How do you make a dress waist bigger?
To make a dress waist bigger, let out the side seams, release any waist darts, or add small fabric panels. Even a half-inch per seam adds up fast across the full circumference.
How do you adjust a dress if it is too big?
Say you bought a vintage dress that fits your hips perfectly but swims at the waist. Take in the side seams gradually, release the darts, and reposition them to reshape the bodice until the silhouette hugs your frame.
What to do when the bust of a dress is too small?
A too-tight bust shows itself fast — think exposed zipper pull, fabric pulling across the chest, or that stiff, can’t-quite-breathe feeling. When that happens, your dress needs extra room, and you’ve got options.
Can the bust of a dress be altered?
Yes, the bust can be altered — but how much depends on your fabric and construction. Knit fabrics stretch more easily, while woven ones need new seams or panels to gain real room.
How to make chest bigger in dress?
Let out the side seams, release any darts, or insert expansion panels for more room. Adding underarm gussets keeps the waist intact while broadening the chest exactly where you need it.
How to fix a dress that is too big in the bust without sewing?
Removable bra cups can fill extra space instantly. Fashion tape tames gaping fabric. A decorative knot or strategic sash draws the eye inward. Temporary fabric clips tailor it to fit — no needle needed.
Can I alter a vintage dress bust?
Absolutely — a vintage dress can be altered at the bust, but success depends on seam allowance depth and fabric integrity. Always assess the grain and structure before cutting into irreplaceable material.
Conclusion
Funny how it works — you pull out a seam ripper on a Tuesday afternoon, and by evening, a dress you’d mentally donated is hanging beautifully in your wardrobe again.
That’s exactly what knowing how to make a dress bigger in the bust gives you: not just a better-fitting dress, but proof that you can fix what feels broken. Trust the process. A little patience, the right technique, and that zipper glides up like it was always meant to.
- https://seamwhisperer.com/make-dress-bigger
- https://mellysews.com/how-make-a-dress-bigger
- https://www.sussexseamstress.com/sewing-tips-blog/full-bust-adjustment-tutorial
- https://curvysewingcollective.com/the-beginners-guide-full-bust-adjustment
- https://inthefolds.com/q-a-series/2022/how-to-full-bust-adjustment