This site is supported by our readers. We may earn a commission, at no cost to you, if you purchase through links.
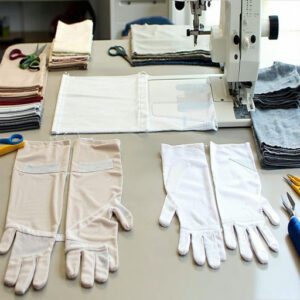
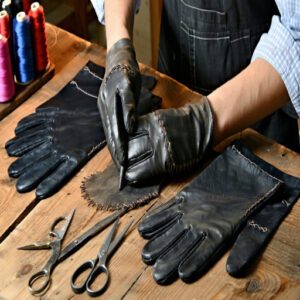
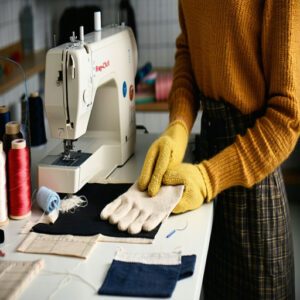
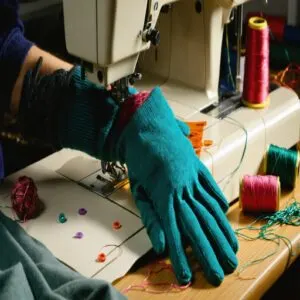 Making gloves might sound tricky, but it’s easier than you’d think—and kind of fun!
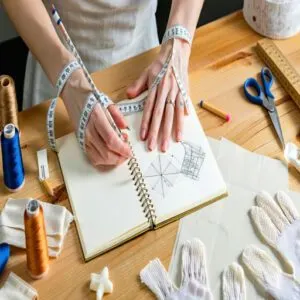
First, measure your hand carefully, noting finger lengths and widths (yes, each one).
Pick a stretchy fabric, like jersey or 4-way stretch knit, for comfort and flexibility.
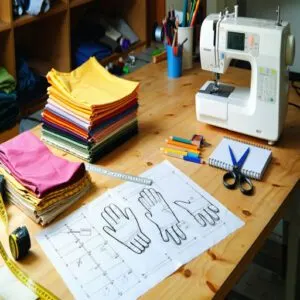
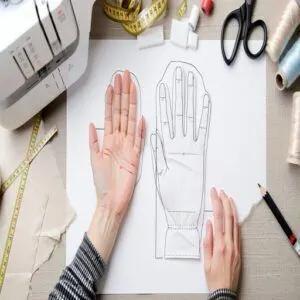
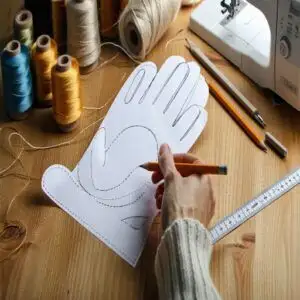
Trace your hand onto paper, adding space for seams, and cut out your pattern.
Don’t forget the fourchettes (those handy fabric strips between the fingers).
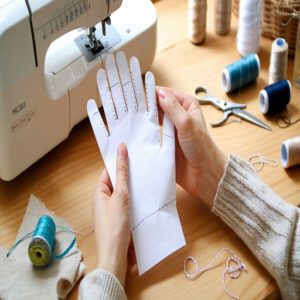
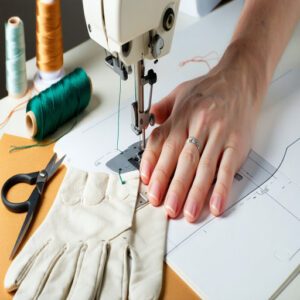
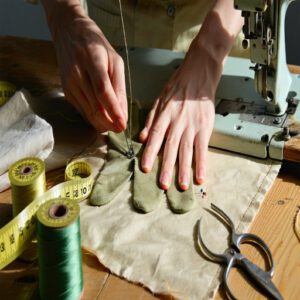
Cut the fabric pieces, sew the thumb and fingers with precision, and assemble everything like a hand-shaped puzzle.
Finish with neat hems or decorations for extra flair.
The perfect fit? Definitely in your hands!
Table Of Contents
Key Takeaways
- Measure your hand accurately, including individual finger lengths, widths, and thumb depth, to ensure a perfect fit.
- Use stretchy fabrics like jersey or 4-way stretch knit for comfort and flexibility. Don’t forget to include fourchettes for finger mobility.
- Sew with precision, starting with the thumb, then fourchettes, and finally the fingers, ensuring proper alignment and snug seams.
- Add thoughtful finishing touches like neat hems, decorative elements, and reinforced areas for durability and style.
The Importance of Fit and Comfort
Ever tried wearing ill-fitting gloves? It’s like trying to text with boxing mitts on.
Getting your glove sizing right is the cornerstone of crafting comfortable handwear that you’ll actually want to use.
For perfect hand mobility, you’ll need to get cozy with your tape measure.
Wrap it around your palm (not too tight!) and jot down your hand’s circumference.
Then measure from your wrist crease to your middle fingertip for length.
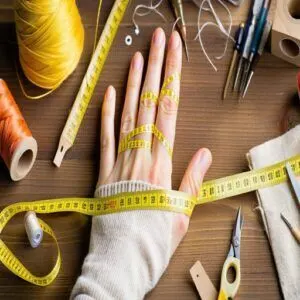
Don’t forget to measure each finger individually – they’re not all created equal!
When picking materials, think about what you’ll use the gloves for.
Need finger dexterity for typing?
Go with lightweight, stretchy fabrics.
Planning on winter gardening?
Choose something sturdy with good wrist support.
The secret to glove comfort isn’t just in the numbers – it’s about understanding how your hands move and giving them room to breathe while staying snug.
This is key to creating glove comfort that lasts.
Supplies and Measurements
You’ll need to round up some basic supplies like a measuring tape, paper, pencil, and your choice of fabric before you start your glove-making adventure.
Before cutting into your precious materials, you’ll want to grab those key measurements of your hand (trust me, no one wants a thumb where their pinky should be), which is crucial for a successful glove-making adventure.
Key Measurements
Getting your hand measurements right can mean the difference between a glove that fits like a dream and one that feels like a torture device.
Here’s what you’ll need to measure:
- Hand circumference (wrap measuring tape around knuckles)
- Finger length (from knuckle to tip for each digit)
- Wrist size (where your palm meets your arm)
- Palm width (across the widest part)
Don’t forget the thumb depth – it’s often overlooked but makes all the difference.
Accurate measurements are essential for achieving a perfect fit, requiring careful consideration of basic body measurements.
Gathering Supplies
Now that you’ve got your measurements down, let’s talk supplies! Here’s what you’ll need for your glove-making adventure: Start with basic sewing tools like sharp craft scissors, measuring tape, and plenty of pins.
For glove materials, consider stretchy fabrics like jersey knit or leather – they’ll give you that perfect fit. Don’t forget thread that matches your fabric, a sturdy needle (or sewing machine if you’ve got one), and some paper for pattern-making.
Want to add flair? Grab some decorative elements like beads or embroidery thread to make your gloves uniquely yours. Having the right sewing scissors is essential for accurately cutting out your glove patterns and achieving a professional finish.
Creating a Glove Pattern
You’ll discover that creating your own glove pattern isn’t as tricky as solving a Rubik’s cube, especially when you’ve got your trusty hand measurements ready to go.
With your measurements in hand, you’ll draft a pattern that fits like a second skin, starting with a simple rectangle that you’ll transform into a custom-fitted masterpiece.
Using Antonio Donnanno’s Instructions
Antonio Donnanno’s glove-making instructions work like magic for that ideal fit! Start by nailing your hand measurements (circumference, finger lengths).
Then:
- Sketch vertical/horizontal guides.
- Add finger shapes and fourchettes.
- Draft the thumb separately—precision’s key here.
- Adjust until snug.
Forget oversized gloves; this glove pattern guarantees a custom fit, blending fabric choice and sewing tips for perfection!
To achieve the perfect fit, understanding the glove making process is essential for creating comfortable and well-fitting gloves.
Calculating Finger Widths
Let’s talk fingers—they’re not all the same width, so pay attention!
Measure each finger’s circumference on the palm and back to nail those digit proportions.
A snug fit is everything when building a glove pattern!
Use a tape measure for accurate finger measurement—precision makes neat glove seams and comfort.
Trust us, glove sizing can be fussy, but these measurements make glove-making tutorials way easier.
Think of it as hand anatomy meets tailoring!
To achieve a perfect fit, understanding body measurement techniques is vital for any sewing project, including gloves.
Adding Finger Placement Lines
To nail finger alignment in your glove pattern, you’ll add vertical and horizontal lines to mark each finger.
These guide finger spacing and guarantee accurate seam guidance.
Precision is key, so:
- Use hand measurements to plot finger placement.
- Consider variations in finger length and shape.
- Double-check pattern marking for smooth glove seams when sewing.
Perfect placement avoids awkward finger gloves later, ensuring precision is maintained throughout the process.
Developing Thumb Pattern
The thumb’s design is where glove pattern drafting gets creative! Here’s your plan:
- Measure thumb length/circumference. Accuracy here = perfect fit.
- Draw thumb outline. Include the natural curve to match flexibility.
- Add seam allowance (3mm). Don’t skip it!
- Test, tweak, repeat. Thumb drafting involves adjustments—like tailoring, just smaller!
For a detailed guide, explore detailed glove pattern creation.
A refined thumb pattern guarantees comfort and movement.
Checking Measurements and Making Adjustments
If the glove pattern feels off, grab your measurement tools and revisit your numbers.
Double-check hand circumference and finger length—precision works wonders here.
Use sizing charts or adjustment techniques to tweak areas that are too snug or loose.
Don’t trust guesses; accurate measurements required for making gloves guarantee glove fit.
Small glove pattern modifications make big differences, and using sizing charts can be particularly helpful in this process.
Finalizing The Glove Pattern
Finish up your glove pattern by double-checking the fit—small tweaks now save headaches later.
Adjust seam allowances, fine-tune finger lengths, and make certain thumb placement feels right.
Add notches for easier sewing and remember, your glove design should match your fabric’s stretch.
This final glove template sets the stage for flawless stitching in your glove-making tutorial or sewing machine project, ensuring a flawless outcome.
Fabric Selection and Cutting
Choosing the right fabric is like picking the perfect teammate—it has to stretch and flex, and work with your design.
Once you’ve got your material, it’s time to cut with care so every piece fits together like a glove—literally!
Sourcing Suitable Fabric
Picking the right glove fabric feels like choosing a dance partner—you need stretch, comfort, and reliability.
Favor 4-way stretch knits or jersey blends for snug, flexible fits.
Felt or fleece works wonders for mess-free edges.
For specific project needs, explore various stretch knit fabric options.
Want durability? Order samples first to feel the texture, analyze weave patterns, or check color options.
Test material selection like a pro!
Cutting Out Glove Pieces
Precision is key when cutting glove pieces.
Carefully trace your glove pattern onto the fabric’s wrong side, marking every finger and seam with exactness.
These cutting instructions aren’t just guidelines—they’re how you get a glove that feels like a second skin.
Use the best cutting tools you’ve got (sharp scissors or rotary cutters) and cut slowly to maintain pattern accuracy.
For a snug fit, factor in seam allowances, about 1/8".
Think of your scissors as an artist’s brush, shaping each piece.
Before you know it, you’ve crafted the perfect glove template for sewing machine magic!
Sewing The Gloves
Now it’s time to bring those fabric pieces to life by stitching them together into actual gloves.
Don’t worry—it’s not as tricky as it sounds, and with a little patience (and maybe a good cup of tea), you’ll be sewing like a pro in no time!
Sewing The Thumb Piece
Once you’ve cut the thumb piece from your glove pattern, it’s time to bring it to life.
Begin by matching the thumb’s edges, pinning as you go for solid alignment.
Use either a sewing machine or precise hand stitches to follow the outline, and remember to secure those seams with small stitches—no one wants a wobbly thumb, so consider this a pro tip.
Sewing The Fourchette Pieces and Fingers
Sewing gloves feels like a mini puzzle, especially with fourchette construction.
These thin strips connect finger joints for mobility.
Start by aligning the fourchettes to each finger’s sides, right sides together.
Sew carefully—those small pieces need precision.
- Finger sewing tips: Use a 1/8" finger seam allowance for neat stitches.
- Glove pattern advice: Pin between each finger to prevent shifting.
- Sewing techniques: Go slow to avoid fabric bunching.
Reducing Excess Volume at The Back
Those pesky hand balloons at the back? Say goodbye by using tuck techniques or dart methods to sculpt a snug, sleek fit.
Crease the fabric to flatten bulk, then add gentle darts for volume minimization.
Seam optimization keeps things polished—imagine a glove pattern hugging the back perfectly.
This glove sewing tutorial guarantees your handmade gloves look pro-level!
Adding a Facing to The Hemline
Once that pesky back volume is fixed, it’s time to tackle the hem of gloves with a facing.
This step keeps raw edges neat and polished.
- Fold the fabric’s edge inward.
- Pin facing to glove hem, right sides together.
- Sew along the edge.
- Flip facing inside and topstitch.
- Press seams for a crisp finish.
Voilà—clean Hemline Finishing!
Adding Decorative Bow
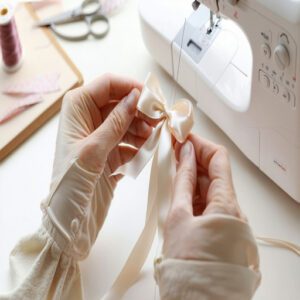
Add a splash of personality with a decorative bow, try a satin ribbon in a bold color or fabric that contrasts your glove.
Focus on bow placement—near the hem is stylish and practical, secure it with decorative stitching for an artsy touch.
Embellishment ideas like this add flair without fuss, making your glove embellishments truly stand out.
Hand-Sewing Bows and Securing The Facing
Now that your decorative bows are prepped, it’s time to hand-stitch them in place.
Use small, even stitches to secure each bow firmly—no loose threads invited!
Focus on clean facing methods by stitching carefully along the hemline for a polished look.
This step keeps things tidy and adds that finishing touch every glove embellishment demands as well, ensuring a polished look.
Finishing The Gloves Without Lining
Wrapping things up is like the final chapter of a good book—it’s satisfying when done right.
For glove hemming without lining:
- Fold the raw edge inward and stitch close to the fold for clean edge finishing.
- Use hand stitches to secure loose seams for durability.
- Press the entire glove to smooth creases and perfect the glove fit adjustments.
This approach ensures a clean finish and durability, making the final product more satisfying.
Simple Glove Making Method
You don’t need fancy tools or expert skills to make a custom pair of gloves that actually fit.
With just some paper, fabric, and a bit of patience, you’ll be stitching up cozy, hand-hugging creations in no time.
Tracing Hand on Paper
Creating a glove pattern starts with tracing your hand on paper—don’t overthink it.
Keep your hand natural, not stiff like you’re ready to box.
Trace from the wrist to fingertips for a clear outline.
Use a smooth, firm grip on the pencil for sharp edges.
- Hand Tracing Tips: Relax your hand before tracing.
- Paper Patterns: Use sturdy paper for better handling.
- Finger Alignment: Don’t skip finger details.
- Hand Measurement: Mark the wrist length clearly.
Extending Glove Sleeve
How far up your arm do you want those gloves? Extend the sleeve length to fit your style—wrist, forearm, or dramatic shoulder-high.
Play with embellishments like ruffles, beads, or even a classic glove cuff.
Here’s a quick guide to sleeve options:
| Sleeve Length | Design Option | Best Use |
|---|---|---|
| Wrist-Length | Button Closure | Everyday wear |
| Forearm-Length | Lace or Ruffles | Fancy outfits |
| Shoulder-Length | Smooth, Seamless Finish | Elegance or costumes |
To achieve a perfect fit, consider following a glove making tutorial to guarantee your homemade gloves are both comfortable and stylish.
Dream big—your homemade sleeve glove can say a lot!
Cutting Fabric and Folding
Start by folding your fabric neatly; it keeps everything steady when you’re cutting.
Use sharp scissors to trace and cut along your glove template pattern, letting the fabric cutting go smoothly, and leave extra seam allowance for adjustments.
Relax—crooked lines aren’t the end of the world, because a solid folding technique and proper fabric tracing make this step painless.
Pinning Paper Pattern Onto Fabric
Before grabbing scissors, pin your paper glove pattern securely onto the fabric’s wrong side.
Keep it neat with these tips:
- Use sharp pins—no one likes a wobbly pattern.
- Flatten your fabric like a pro.
- Align perfectly with the fabric fold for balance.
- Trace smartly using tailor’s chalk.
- Remove pins gently while admiring your Seam Accuracy masterpiece.
The instructions provided are designed to help you achieve a neat and accurate outcome for your project.
Tracing Pattern Onto Fabric
When tracing your glove pattern onto fabric, pay attention to fabric alignment—it’s like setting the stage for seam accuracy.
Use chalk or a fabric pencil to transfer your glove drawing template, including notches and details.
A steady hand with sharp eyes guarantees your template of glove construction stands proud.
Think of this step as drafting your design masterpiece for cutting!
Sewing and Hemming
When sewing a glove, precision is key to a snug fit and smooth finish.
Use these steps:
- Stitch carefully along the traced lines, leaving the opening undone.
- Trim excess fabric close to the seams with sharp scissors.
- Fold and press edges neatly for the opening.
- Hemming techniques: Hand-stitch or machine-sew for durability.
- Don’t overthink thread selection—a sturdy, matching thread works wonders!
Step-by-Step Glove-Making Guide
Let’s break glove-making into simple, manageable steps so you can create a comfortable, custom fit without breaking a sweat.
With a bit of patience (and maybe some coffee), you’ll assemble a pair that’s both stylish and practical.
Understanding Glove Terminology
Understanding glove anatomy makes creating the perfect fit easier.
Fourchettes, those slim strips of fabric running between fingers, give gloves flexibility and feel like a second skin.
The thumb gets its own curved piece for natural grip, while tranks shape the palm and back for comfort.
Knowing glove terminology like seam types and fabric weights keeps you in control of the glove-making process.
Creating Hand Mold With Tape Method
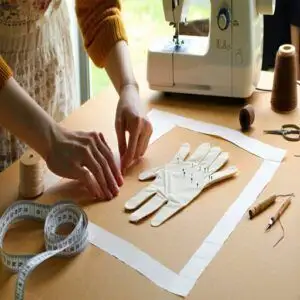
Creating a hand mold with tape? It’s easier than it sounds and pretty fun too! Wrap your hand snugly with tape, one strip at a time, focusing on finger mapping for detailed shaping.
- Use durable masking tape and smooth out wrinkles.
- Define seam lines with a marker.
- Align tape edges carefully between fingers.
- Remove gently for mold creation perfection!
Drafting Fourchettes and Thumb
Nailing the perfect fourchette design is tricky but key for comfort.
Slide folded paper between your fingers, tracing along each side to match their unique curves.
Do the same for thumb drafting—trace around the knuckle and refine.
Understand hand anatomy to tweak seam allowances for glove fitting.
It’s glove drafting magic that transforms rough sketches into a refined glove pattern masterpiece!
Cutting Tape Pattern and Tracing Onto Paper
Once your taped hand mold is ready, it’s time to transfer it to paper.
Lay the pattern flat, smoothing edges carefully, and trace it with a pencil.
Add seam allowances for assembly wiggle-room.
- Trace slowly to avoid distortion.
- Use consistent pressure with your pencil for clean lines.
- Label each piece to avoid confusion later.
- Double-check your tape measurement accuracy before cutting.
Sewing Thumb and Trank Together
When stitching the thumb to the trank, precision is your best friend!
Keep seams aligned and sew carefully, especially around those tricky curves we all love.
Here’s how:
- Pin thumb and trank together for perfect seam alignment.
- Sew slowly along curves near finger joints.
- Turn the thumb right side out.
- Flatten seams with an iron.
- Test-fit often for glove assembly success!
The provided instructions aim to enhance the readability of the text by logically grouping complete concepts into separate lines, with double new lines to visually separate each group.
Attaching Fourchettes Between Fingers
Slide that fourchette strip between the fingers like a pro—it’s the secret sauce for glove flexibility.
Pin each carefully for precise fourchette placement, ensuring even finger spacing.
Sew slowly, reinforcing seams with steady interfinger stitching to avoid bunching.
Don’t stress; it’s glove making for beginners approved.
Those pesky fourchettes? Mastering them guarantees a perfect fit.
Here’s a quick placement guide:
| Finger | Fourchette Length | Tip Width | Seam Width | Notes |
|---|---|---|---|---|
| Index-Middle | Medium | Slim | 3mm | Reinforce edges. |
| Middle-Ring | Long | Medium | 3mm | Stretch fabric lightly. |
| Ring-Pinky | Short | Slim | 3mm | Adjust for fit. |
| Thumb Base | Medium | Wide | 3mm | Needs extra sewing. |
| Palm Gaps | Custom fit | N/A | 3mm | Align carefully. |
Sewing Side Seam and Hem
Once the fourchettes are secure, stitch up the glove’s side seam to bring the shape together.
Then, tackle the hem with care—it’s all about those polished details. Fold the hem twice and follow chalk marks like a treasure map. Mastering the glove sewing pattern is vital for a perfect fit and comfort.
- Feel the power of precision.
- Rock a straight stitch with your sewing machine.
- Nail the thread tension.
- Achieve smooth fabric stretch.
- Celebrate seamless glove construction and the perfect fit.
Improving Glove Pattern
Once your gloves are stitched, don’t stop there—good fit takes tweaking.
Maybe the thumb feels off-center, or the pinky’s swimming in fabric.
Adjust seam allowances, finger lengths, or wrist snugness for a polished glove pattern.
Glove fitting is like fine-tuning an instrument—small changes make a big difference.
Keep experimenting; custom gloves are all about personal comfort and style!
Additional Tips and Considerations
When making gloves, it’s the little details that make a big difference, like knowing which side of the fabric is "right".
They’ll save you headaches and keep your gloves looking polished by taming fraying edges with Fray-Check.
Don’t skip these smart tricks—they’ll save you headaches and keep your gloves looking polished!
Differentiating Right Side and Wrong Side of Fabric
Spotting the right side and wrong side of fabric is like figuring out puzzles—it’s all in the details.
Feel the texture: smooth usually means the right side.
For fabric gloves, check for visible prints or sheen.
Stretch it lightly to reveal the grain.
Use a washable pen to mark the right side while your glove pattern stays flawless.
Using Disposable Glove as Base for Tape Method
Using a disposable glove as a base makes tape application easy and stress-free.
- Slide on the glove for protection. 2. Secure layers of tape snugly for a perfect glove molding.
- Trace a line along the pinkie to wrist for hand tracing. 4. Carefully peel off the form.
- Transfer this mold for pattern drafting success.
Applying Fray-Check to Prevent Fraying
Fraying edges can really ruin your glove-making groove.
To keep things tidy, grab some Fray Check and apply it lightly along the fabric’s raw edges—this little trick is a lifesaver for woven fabrics with high fray potential.
Got fleece? A dab on the edges works magic.
Working with knits? Use it sparingly (they’re naturally low-maintenance).
Remember, less is often more here.
Always test on a scrap first—better safe than sorry!
Adding this simple step to your glove sewing instructions guarantees your hard work stays intact.
Fray prevention methods = sewing success!
For superior results, consider using Fray Check products to minimize fraying issues.
Sewing and Turning The Thumb
Thumb sewing can feel tricky, but it’s totally doable with these steps.
After stitching the curved seam of your thumb piece, carefully flip it right-side out.
Use a pencil’s dull end – not the sharp one (your glove deserves better!).
- Check for puckered stitches.
- Trim excess fabric cautiously.
- Gently press seams with your fingers.
Breathe—you’re mastering Glove Thumb Construction!
You have now completed the basic steps for thumb sewing, and with practice, it will become easier to achieve a professional finish, making your glove look perfect, and ensuring you’re happy with your sewing.
Pinning and Sewing Fourchettes
Fourchette placement is where sewing gloves gets tricky, but don’t rush it—precision’s your best friend here.
Pin those narrow strips snugly between each finger on the trank, like puzzle pieces, and double-check alignments often; wonky seams scream discomfort later.
Use steady sewing techniques for clean edges and proper glove fitting, it’s tedious, sure, but a well-sewn fourchette guarantees comfort and smooth seam finishing in your glove making tutorial.
Creating Cuff and Seam Allowances
Don’t overlook seam margins and fabric tolerance—it’s where many beginners slip up.
Add at least 1/2-inch allowances to your glove seams; they’re like insurance for a stress-free fit.
For cuff creation, draft a 2-inch cuff onto your glove pattern for style and durability.
Think of it as giving your gloves a firm handshake with flair!
Dealing With Multiple Fourchettes
Tackling fourchettes means patience.
Proper fourchette placement is key to finger spacing and glove flexibility.
Pin carefully between the inside fingers—precision matters!
Try hand-basting first to check the fit, avoiding awkward seams or restricted hand mobility.
Think of it like threading a tricky needle; slow and steady wins.
Master seam management here, and your glove pattern will shine.
Frequently Asked Questions (FAQs)
How hard is it to make gloves?
It’s funny how something as simple as covering your hands can be so tricky.
Making gloves isn’t impossible, but it’s fiddly.
Those tiny finger seams test your patience—think of it as sewing’s ultimate boss level!
Is making gloves difficult?
It’s not too hard, but it takes patience.
You’ll juggle duct tape, fabric, and some trial-and-error.
The trickiest part? Those pesky finger seams!
Stick with it, and you’ll nail a custom fit.
How to make hand gloves easy?
Over 80% of people say DIY projects boost happiness—so grab some duct tape, paper, and fabric.
Trace your hand, tape it up, cut out the shape, and stitch away.
It’s easier than it looks!
How to make a glove out of a sock?
Turn a sock into a glove by cutting finger holes at the toe end.
Slip your hand inside, mark each finger spot, and snip carefully.
Stretchy socks work best, and voilà—DIY warmth on a budget!
How should gloves be stored to maintain shape?
Store gloves smartly to sidestep squishing and stretching.
Slip them on forms, fold gently, or lay flat in a breathable bag.
Avoid drawers crammed tighter than a clown car—no one likes flat-fingered gloves!
What tools simplify sewing leather gloves?
When sewing leather gloves, use a leather needle, heavy-duty thread, and a thimble to save your fingers.
A Teflon presser foot keeps the leather sliding smoothly, while clips replace pins to avoid holes.
Simple, right?
How to repair torn seams in gloves?
A stitch in time saves nine—grab needle, matching thread, and patch those torn seams.
Use tiny, tight stitches to prevent further ripping.
For leather gloves, try waxed thread or leather adhesive for extra durability and style.
Can gloves be reinforced for heavy use?
You can beef up gloves for heavy use by adding reinforcing patches on high-wear areas like palms or fingertips.
Use durable materials like leather or Kevlar, and double-stitch seams to keep them tough and long-lasting.
How to clean gloves made from delicate fabrics?
Treat delicate fabric gloves like royalty—hand wash them in cold water with a mild detergent.
Gently swish, don’t scrub.
Rinse thoroughly, blot dry with a towel, and lay flat to air dry.
They’ll thank you!
Conclusion
Crafting custom gloves combines creativity, comfort, and care.
With patience, precision, and the right materials, you’re mastering how to make gloves that fit perfectly.
From tracing your hand to sewing those tricky fourchettes, it’s all about practice.
Don’t stress over stumbles—small mistakes make big learning moments.
Once finished, you’ll have gloves that are stylish, functional, and uniquely yours, which is the result of perfect fit.
So grab your fabric, thread, and scissors, because the perfect fit is literally in your hands.

