This site is supported by our readers. We may earn a commission, at no cost to you, if you purchase through links.
You’ll want to grab those horizontal bars between stitches—that’s where the magic happens. When you pull them together just right, the seam literally vanishes.
Wet blocking beforehand makes everything line up like it’s supposed to, and keeping your tension steady means your seams won’t pucker or pull.
These techniques work beautifully across different knitting styles—from smooth stockinette to bumpy seed stitch. Once you nail them down, every sweater, scarf, or blanket you make will look like it came from a boutique.
Table Of Contents
Key Takeaways
- Use matching yarn and a blunt tapestry needle for clean, invisible seams that blend with your knitting
- Master the mattress stitch technique by picking up horizontal bars between stitches on alternating sides
- Block your pieces before seaming to ensure proper alignment and prevent puckering or stretching
- Maintain consistent tension throughout your seaming work to create flat, flexible joins that move with the fabric
Essential Tools and Preparation for Seaming
Getting your tools and pieces ready makes all the difference in creating professional-looking seams. You’ll need the right needle, matching yarn, and properly blocked pieces before you start sewing.
Choosing The Right Yarn and Needle
Your yarn choice can make or break a seam—pick the wrong thread and even perfect stitches will look sloppy. Always use the same Yarn Weight and Yarn Fiber as your project.
A blunt darning needle or tapestry needle works best since sharp points can split your yarn. Match your yarn needle size to your yarn thickness.
Perfect Color Matching hides seams completely, while good needle choice prevents Seam Bulk.
Wet Blocking and Measuring Pieces
Wet blocking is basically a reset button for your knitted pieces. It evens out stitches, locks in measurements, and makes everything look professional before you sew it together.
Soak your knitted garments in cool water, then lay them flat on blocking mats. Use measuring tape to check dimensions match your pattern.
Different fiber considerations matter—wool responds well to steam iron finishing, while cotton needs gentle handling when preparing pieces for seaming.
Using Stitch Markers and Pin Basting
Imagine this: you’ve spent hours perfecting your knitting, but without proper pinning, your beautiful pieces can shift and pucker during seaming like puzzle pieces that don’t quite fit.
Without proper pinning, your beautiful knitted pieces can shift and pucker during seaming like puzzle pieces that don’t quite fit
Use locking stitch markers or coiless safety pins for marker placement along edges. Pin with right sides facing out, matching row by row for proper edge alignment.
This pinning technique maintains tension control and prevents stretching during basting alternatives.
How to Align and Pin Knit Pieces Neatly
Getting your alignment right means you’ll end up with invisible, professional seams that won’t pucker or pull.
You’ll match stitch patterns, align shaping details, and secure everything with markers before picking up your needle.
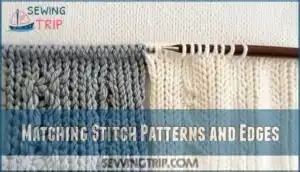
Matching Stitch Patterns and Edges
Lining up your knit pieces perfectly is like solving a puzzle where every stitch counts. Start with Pattern Alignment by matching row heights and stitch counts along both Fabric Edges.
Different Stitch Types create unique textures, so you’ll need proper Edge Preparation to achieve Seam Camouflage.
Consistent Gauge ensures your Seaming Methods create Invisible Joins that disappear into your finished piece.
Aligning Increases, Decreases, and Patterns
When your increases and decreases don’t match up perfectly, your seam can look like a zigzag mess instead of a clean line. Here’s how to align these shaping elements for invisible seam techniques:
- Count rows between increases and decreases on both pieces
- Mark matching shaping points with stitch markers before joining knit pieces
- Check that pattern repeat alignment matches across seam placement
- Confirm consistent row gauge prevents visible joins when assembling knit garments
Securing Pieces With Markers or Pins
Once your pieces line up perfectly, locking stitch markers or safety pins become your best friends for keeping everything in place while you sew. Place coiless safety pins every few inches along edges to prevent slippage during seaming.
Pin basting helps control tension and maintains proper edge alignment. Focus marker placement at pattern changes and shaping areas for accurate assembling of knit garments.
Step-by-Step Mattress Stitch Instructions
The mattress stitch creates nearly invisible seams that look professional on your finished garment.
You’ll work from the right side of your knitting, going back and forth between pieces to join them seamlessly.
Setting Up for Vertical Seams
Vertical seams are the backbone of your knitted garment, so getting the setup right makes all the difference between a wonky sweater and one that looks store-bought.
Start by laying your pieces flat with right sides facing you. Check that your edge stitch count matches on both pieces. Line up your row gauge carefully to prevent seam slant. Hide yarn tails before you begin seaming techniques.
Working The Mattress Stitch for Stockinette
The mattress stitch works like magic on stockinette stitch because it grabs onto those neat horizontal bars between stitches to create an almost invisible seam.
Insert your needle under one horizontal bar on the right piece, then under the corresponding bar on the left piece. Keep switching sides as you work up the vertical seam, maintaining even tension control to prevent puckering while achieving perfect vertical alignment.
Adapting The Mattress Stitch for Garter Stitch
Garter stitch fabric throws a curveball at your seaming game since those bumpy ridges don’t line up like the neat rows of stockinette. For garter ridge alignment, grab the horizontal bars between ridges instead of the vertical strands.
Your tension adjustments need to be gentler here—those textured bumps create natural bulk. Work your mattress stitch by picking up one full stitch from each edge rather than half-stitches, creating an invisible join that matches the fabric’s texture.
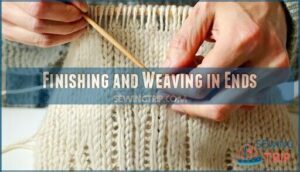
Finishing and Weaving in Ends
After all that careful stitching work, you’re almost at the finish line—but sloppy ends can make even perfect seams look messy. Here’s how to hide those yarn tails like a pro:
- Thread your darning needle with the seaming yarn tail
- Weave through several stitches on the wrong side of your fabric
- Change direction and weave back through different stitches
- Trim excess yarn close to the fabric for invisible finishes
This finishing technique keeps your seams secure and professional-looking.
Alternative Seaming Methods Explained
Mattress stitch handles most seaming jobs beautifully, but some projects call for different approaches.
When you hit those tricky spots or unique fabric combinations, having a few backup techniques in your toolkit makes all the difference.
Whipstitch for Garter and Textured Fabrics
When mattress stitch won’t cut it for your garter stitch or textured knitting, whipstitch becomes your reliable backup plan. This technique works by going over the edge of both pieces, creating visible but sturdy seams.
You’ll want to maintain consistent whipstitch tension control while keeping your seam edge alignment straight for durable whipstitch seams that complement your textured fabric matching needs.
Three-Needle Bind-Off for Shoulder Seams
Shoulder seams carry the weight of your entire garment, so they need a technique that’s both strong and completely flat. The three-needle bind-off creates shoulder seam stability by joining live stitches directly together.
This seaming technique eliminates bulk while providing flat seam benefits that traditional methods can’t match. Hold needles parallel and knit stitches together before binding off for professional neckline considerations.
Kitchener Stitch for Grafting Live Stitches
Grafting live stitches creates invisible connections that feel like magic in your hands. The Kitchener stitch technique joins two sets of active stitches without any visible seam line. This invisible seam technique works perfectly for sock toes and garment underarms without a seam.
You’ll need equal stitch counts on both needles and yarn cut three times the seam width. Maintaining tension matching your original knitting prevents puckering. This method is used to join two sets of live stitches together.
Kitchener variations adapt for grafting garter stitch and other patterns beyond basic stockinette.
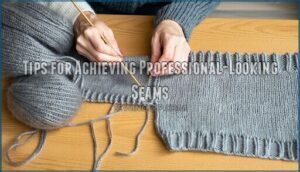
Tips for Achieving Professional-Looking Seams
The way you finish your seams can transform a project from looking obviously handmade to something worthy of a high-end shop.
Master these finishing tricks and you’ll dodge wonky edges, puckered fabric, and all those dead giveaways that mark amateur work.
Maintaining Proper Tension and Even Stitches
Think of your seaming tension like Goldilocks testing porridge—not too tight that it puckers, not too loose that it gaps, but just right to match your knitted fabric’s natural stretch. Here’s how to achieve even tension and stitch consistency:
- Pull your seaming yarn gently after each mattress stitch to test elasticity
- Keep your stitches the same size by picking up identical amounts of fabric
- Stop frequently to check that your invisible seam lies flat without puckering
- Use consistent yarn management by maintaining the same grip throughout
- Remember that blocking impact will even out minor tension variations
Avoiding Common Seaming Mistakes
Don’t let poor seam alignment ruin your hard work. Nearly 42% of knitters struggle with uneven joins that create visible breaks in stitch patterns. Here’s how to sidestep the biggest seaming traps and create invisible seaming methods that look professional.
| Common Mistake | What Happens | Quick Fix |
|---|---|---|
| Mismatched yarn weight | Bulky, raised seams (21% of projects) | Use identical yarn for seaming |
| Wrong needle type | Snagging or yarn splitting (16% failure rate) | Choose blunt tapestry needles only |
| Poor seam alignment | Pattern breaks across joins (37% of cases) | Pin baste before sewing |
The biggest culprit? Tension issues that create gaps or puckered joins in 41% of knits. To avoid skipped stitches and holes, remember to use ballpoint needles designed for knit fabrics. Keep your stitches snug but flexible.
Blocking After Seaming for a Flawless Finish
Your beautifully sewn seams deserve one final step to transform your knitting from homemade to professionally crafted.
Wet blocking after seaming brings amazing Blocking Benefits that smooth out Tension Issues and perfect your Garment Shape:
- Soak your finished knitwear in lukewarm water for 20 minutes
- Gently squeeze out excess water without wringing
- Pin to measurements on blocking mats or towels
- Allow complete air drying for different Fiber Types
- Steam iron lightly if needed for Professional Results
This finishing process evens out your seaming work completely.
Frequently Asked Questions (FAQs)
What is the best way to sew a vertical seam?
The mattress stitch creates the most professional vertical invisible seam by working under horizontal bars between edge stitches.
Keep tension control consistent while aligning edges perfectly for invisible joining of knit pieces using matching yarn.
What is the best way to sew a horizontal seam?
Horizontal seams connect pieces row to row, creating invisible joins when done correctly. Use the mattress stitch by threading yarn under horizontal bars between stitches, alternating sides to match rows perfectly while maintaining seam elasticity.
| Technique | Best For | Key Benefits |
|---|---|---|
| Horizontal mattress stitch | Stockinette pieces | Creates invisible seam, maintains stretch |
| Kitchener stitch | Live stitches | Completely gapless join, no bulk |
| Three-needle bind-off | Shoulders, hems | Strong seam, decorative finish option |
| Whip stitch | Garter stitch | Simple method, good for textured fabrics |
Always block seams after joining to ensure even tension and professional results.
How do I make sure my seams are neat and invisible?
Getting clean seams takes some finesse, but it’s totally worth it. Here’s what actually works for invisible seams that look professional:
- Keep Your Tension Right – Stitches should be snug without being tight so your fabric can still stretch.
- Match Your Yarn – Use the exact same yarn you knitted with for seaming.
- Block First – Wet blocking your pieces before you sew makes everything line up so much easier.
- Go Invisible – Mattress stitch is your friend for stockinette – it literally disappears.
For horizontal seams, just keep your weaving motion steady. Pick joining methods that work with how your fabric behaves.
What type of yarn should I use for sewing knitting together?
Matching yarn fibers ensures your seams blend seamlessly with the original knitting. Use the same yarn weight and color for invisible results.
Test specialty seaming yarns on swatches first to check durability and compatibility with your wool fabric.
What size needle should I use for sewing knitting together?
Use a blunt tapestry needle or darning needle that matches your yarn weight. For worsted weight yarn, choose size 16- The blunt tip prevents splitting stitches while the large eye accommodates thicker yarn easily.
What seaming method works best for ribbed edges?
Ribbing seam options require careful consideration of elasticity to maintain stretch. The mattress stitch works best for joining knit fabrics while preserving the ribbed pattern’s natural give.
- Mattress stitch: Provides invisible seams while maintaining elasticity in ribbed edges
- Modified whipstitch: Creates flexible joints that won’t restrict the rib’s natural stretch
- Pattern matching: Align knit and purl columns precisely for unnoticeable ribbing
- Tension control: Keep seaming techniques loose enough to prevent bulky seams and preserve seam durability
How do you seam curved armhole shapes properly?
Where straight seams meet gentle curves, armhole construction demands careful attention. Pin curved edges in small sections, easing fabric gradually while maintaining consistent tension.
Use blocking methods post-seaming to perfect the shape and prevent puckering through proper garment construction techniques.
Can you use different weight yarn for seaming?
While different weight yarn for seaming is technically possible, it creates problems you’ll want to avoid.
- Seam bulkiness increases dramatically when heavier yarn creates thick, uncomfortable ridges
- Yarn weight impact affects how your seams stretch and move with the garment
- Texture differences become obvious where smooth and textured yarns meet
- Durability concerns arise when mismatched fibers wear at different rates
- Color matching becomes nearly impossible across different yarn weights
Stick with matching yarn weight for professional finishing seams that blend seamlessly into your knitted pieces.
Whats the best way to seam striped patterns?
Ever wondered why stripe seams sometimes look wonky? Seaming striped patterns requires careful Pattern Alignment and Color Matching to maintain the design flow.
Use mattress stitch between horizontal bars on Right Sides, with Jogless Stripes continuing seamlessly across seams. Proper Yarn Management and Seaming Techniques in Knitting minimize Seam Visibility.
How do you fix uneven seams after completing?
Your seam’s imperfections can be corrected through strategic re-seaming and blocking solutions. Tension issues often create seam puckering that affects the garment’s drape.
- Re-seam problem areas – Remove uneven sections and redo using proper mattress stitch technique
- Block the entire garment – Steam or wet block to relax fibers and even out tension
- Adjust seaming techniques – Switch to looser hand tension when sewing knitted pieces together
- Hide minor imperfections – Use duplicate stitch in matching yarn to camouflage small gaps
- Check your seaming yarn – Make sure you’re using the same weight yarn for consistent results
Conclusion
Practice makes perfect when learning how to neatly sew knitting together. These techniques transform your handmade pieces from wobbly beginnings into polished garments.
The mattress stitch creates invisible seams that rival store-bought quality. Proper blocking and tension control make certain your seams lie flat and flexible.
Don’t rush the process. Take time to align your pieces correctly. Master these fundamentals and your finished projects will look professionally made every time.

