This site is supported by our readers. We may earn a commission, at no cost to you, if you purchase through links.
Begin with the continental stitch: bring your needle up through one hole, then down diagonally across the intersection. Work from right to left, keeping consistent tension. Think of it as creating tiny diagonal hugs across your canvas.
The basketweave stitch prevents warping and creates a stronger back. With proper canvas selection and basic stitches under your belt, you’re ready to tackle sophisticated techniques that’ll transform your projects.
Table Of Contents
Key Takeaways
- Pick the right canvas mesh and needle size to make stitching easier and prevent warping.
- Cut yarn strands to about 18 inches to avoid tangles and keep your stitches neat.
- Use basic stitches like continental and basketweave for strong, even coverage on your canvas.
- Keep your workspace organized and block your finished piece for a professional look.
How to Start Needlepoint Sewing
You’ll start your needlepoint journey by gathering a few basic supplies and setting up your workspace properly.
Once you’ve threaded your needle and secured your canvas, you’re ready to make your first stitches and watch your design come to life.
Choosing The Right Canvas and Needle
Canvas selection sets your needlepoint foundation. Choose canvas types with mesh counts between 10-18 for beginners – larger holes make stitching easier. Match needle sizes to your canvas: size 18 needles work with 14-count canvas.
The right pairing prevents canvas stretching and ensures clean needlepoint stitches. Think of it like choosing the perfect dance partner – everything flows smoothly together.
Understanding the needlepoint canvas options is vital for a successful project.
Selecting The Best Yarn or Thread
Thread choices make or break your needlepoint project. Yarn types range from durable wool to lustrous silk, while cotton offers vibrant thread colors perfect for beginners. Consider fiber blends for unique textures, and always check colorfastness to prevent bleeding. Match your thread to canvas count for ideal stitch visibility. Understanding the different yarn types available is essential for selecting the right thread for your project.
- Wool whispers durability – Your heirloom piece will outlast generations with proper wool thread selection
- Silk screams luxury – Transform ordinary needlepoint stitches into gallery-worthy masterpieces
- Cotton delivers confidence – Beginner-friendly threads that forgive mistakes while you learn
- Blends bring magic – Combine different fibers for textures that dance across your canvas
- Quality threads = fewer tears – Invest in good thread preparation to avoid mid-project heartbreak
Preparing and Threading Your Needle
Once you’ve chosen your thread, it’s time to prep your needle. Cut thread from finger to elbow length for easier handling. Thread preparation starts with folding the thread over your needle and pushing through the eye. Tie a waste knot at the end to secure your work.
| Step | Action | Pro Tip |
|---|---|---|
| Cut | Finger to elbow length | Prevents tangling |
| Thread | Fold over needle eye | Use needle threader if needed |
| Secure | Tie waste knot | Gets stitched over later |
Setting Up Your Canvas for Stitching
Now you’ll want to secure your canvas before making your first stitch. Use stretcher bars or a needlepoint frame to keep the fabric taut – this prevents warping and makes stitching smoother. Position your canvas so you can see the painted design clearly. Keep stitch guides handy for reference.
Canvas stretching isn’t just helpful, it’s your ticket to professional-looking needlepoint results. Understanding the heavy duty sewing requirements is essential for working with thick fabrics like canvas.
Step-by-Step Needlepoint Stitching Techniques
Now you’ll learn the actual stitching methods that transform your threaded needle into beautiful needlepoint art.
We’ll walk through each technique step by step, so you can master the basics and feel confident tackling any pattern.
Continental Stitch Instructions
When starting your Continental Stitch, bring your needle up through the canvas from below. Pull the thread through completely, maintaining proper stitch tension. **Move diagonally to create neat stitching techniques.
**
Your thread length should span from fingertip to elbow for comfortable needlepoint stitching. This fundamental needlepoint tutorial stitch works perfectly with most canvas selection and needle sizes for consistent stitch patterns.
Basketweave Stitch Instructions
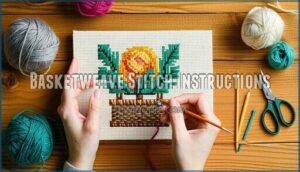
Master the basketweave stitch for exceptional canvas coverage. This needlepoint technique prevents canvas distortion while building a sturdy basketweave pattern on the back.
Create diagonal stitches working up and down rows alternately. Perfect for larger areas, these stitching techniques offer better durability than continental stitches.
Follow this needlepoint tutorial for professional results every time. Understanding basic embroidery stitch techniques can also improve your needlepoint skills.
Using Tent and Decorative Stitches
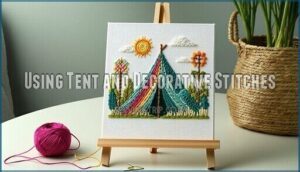
Now you’ll expand beyond Continental Stitch and Basketweave Stitch into the wonderful world of Tent Stitch and Decorative Stitches.
The Tent Stitch forms the foundation of most Needlepoint patterns, creating small diagonal lines across canvas intersections. Here’s how to branch out:
- Master basic Tent Stitch – Practice consistent diagonal coverage
- Experiment with Decorative Stitches – Try Rhodes Circle or Mosaic patterns
- Mix Stitch Techniques – Combine different stitches for texture variety
Managing Thread Tension and Direction
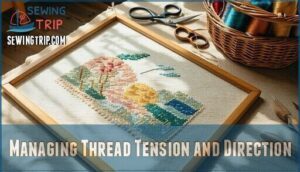
Your thread’s tension determines needlepoint success. Keep consistent pressure while stitching—too tight creates puckering, too loose leaves gaps. Pull thread snugly through canvas without forcing. Change stitch direction systematically to prevent tangling.
| Thread Control Issue | Solution |
|---|---|
| Thread tangles constantly | Shorten working length to 18 inches |
| Stitches appear uneven | Maintain steady pulling pressure |
| Canvas warps or puckers | Loosen thread tension slightly |
| Thread frays or breaks | Use gentler needle angles |
| Work looks messy | Follow consistent stitch direction pattern |
Practice these Needlepoint Techniques with scrap canvas first. Thread Management becomes second nature once you establish rhythm.
Essential Tools and Supplies for Needlepoint
You’ll need just a few basic supplies to get started with needlepoint, and having the right tools makes all the difference between smooth stitching and tangled frustration.
Think of it like cooking – you can’t make a great meal with dull knives, and you can’t create beautiful needlepoint without sharp scissors and the proper needle size for your canvas.
Selecting Needlepoint Canvases
When choosing your needlepoint canvas, you’re setting the foundation for your entire project. Think of it as picking the perfect stage for your stitching performance.
Consider these key canvas factors:
- Mesh sizes determine stitch detail – smaller counts create finer work
- Canvas types range from mono to interlock, affecting durability
- Color choices include white, tan, or painted designs for guidance
Your fabric selection impacts thread counts and final appearance.
Types of Needles and Thread
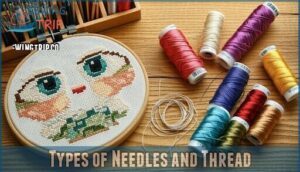
Once you’ve got your canvas sorted, you’ll need the right needle and thread to bring your needlepoint to life. Needlepoint needles have blunt tips and large eyes – they won’t pierce your canvas like sharp sewing needles would. **Pick needle sizes that match your canvas mesh count.
**
For thread materials, you’ve got choices: wool yarn gives rich texture, cotton offers crisp definition, and silk creates elegant shine. Different fiber choices affect stitch tension, so experiment to find what works best for your project. Understanding the proper thread weight systems is essential for achieving the desired texture and durability in your needlepoint work.
Using Stretcher Bars and Scissors
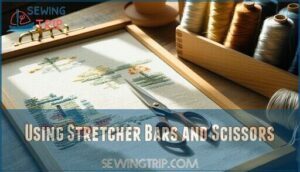
With stretcher bars, you’ll keep your canvas taut for better stitch accuracy. Mount your canvas using canvas tension that’s firm but not overstretched. Using the right stretcher bar frames is essential for maintaining even canvas tension.
Sharp scissors are your best friend for clean cutting techniques – dull blades fray threads and create messy edges. Keep your needlepoint scissors dedicated to thread only. Regular scissor maintenance means wiping blades clean after use.
Organizing Your Needlepoint Kit
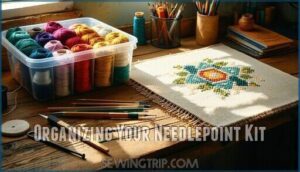
Now you’re ready to organize your supplies like a pro. A well-organized needlepoint kit saves time and prevents frustration during stitching sessions.
Here’s what transforms chaos into crafting bliss:
- Thread Management – Sort yarn by color families in clear containers or thread organizers
- Canvas Storage – Keep canvases flat in protective sleeves to prevent creasing
- Needle Organization – Use a needle minder or magnetic holder to track your tools
- Stitch Guides – Store reference charts in a binder for quick access
- Yarn Sorting – Label thread cards with color numbers and project names
Keep scissors, stretcher bars, and extra needles in designated spots. When everything has a home, you’ll spend more time stitching and less time searching.
Tips for Designing and Personalizing Projects
You’ll transform your needlepoint from basic to exceptional when you start customizing your own designs. Whether you’re working with pre-painted canvases or creating patterns from scratch, personalizing colors and stitches turns every project into something uniquely yours.
Using Pre-Painted Canvases or Charts
Pre-painted canvases take the guesswork out of Canvas Selection and Chart Reading. You’ll find symbols or colors already mapped out for easy stitch guidance. Most canvases from Needlepointcom include color theory suggestions and Design Adaptation tips.
| Canvas Type | Best For | Skill Level |
|---|---|---|
| Painted Canvas | Beginners | Easy |
| Charted Design | Detailed Work | Intermediate |
| Printed Canvas | Quick Projects | Easy |
| Hand-painted | Heirloom Pieces | Expert |
Simply match your thread to the painted areas and follow the needlepoint pattern.
Painting Your Own Needlepoint Design
Creating your own needlepoint design opens endless possibilities for personal expression. You’ll control every Color Selection and artistic choice. Start with Design Software or simple grid paper to map your vision. Custom Charts let you plan stitch placement before touching canvas or thread.
- Sketch your design on graph paper matching your canvas mesh count
- Use acrylic paints or fabric markers to create Painted Canvases
- Choose thread colors that complement your artistic vision
- Plan Artistic Stitches that augment different design elements
- Reference Needlepointcom for design inspiration and technical guidance
Enlarging and Printing Needlepoint Patterns
Enlarging patterns opens up countless needlepoint possibilities for your canvas projects. Use image editing software to adjust Pattern Scaling and maintain crisp details. Set your Printer Settings to high resolution for Canvas Enlargement.
Digital Printing works best on heavyweight paper. Test small sections first before committing to your full-size stitch pattern. This Beginner Tutorial approach prevents costly thread mistakes.
Customizing With Colors and Stitches
Your canvas becomes your personal playground when you master color theory and stitch variations. Thread selection opens endless possibilities for texture effects and visual impact.
- Mix Continental Stitch with Basketweave Stitch for dimensional contrast that makes your needlepoint pop off the canvas
- Layer complementary colors using tent stitch to create stunning visual depth and professional-looking gradients
- Experiment with thread textures – silk adds shimmer while wool provides cozy warmth to transform ordinary patterns
- Change stitch direction within the same color to catch light differently and add subtle pattern design interest
- Create your signature style by combining unexpected color palettes with varied stitch techniques for truly unique pieces
Finishing and Displaying Needlepoint Projects
You’ve completed all your careful stitching, and now it’s time to transform your canvas into something you’ll proudly display or use every day.
This section walks you through blocking your finished piece, choosing the right finishing method, and adding those final touches that make your needlepoint project look professionally done.
Blocking and Shaping The Canvas
Your finished needlepoint canvas needs proper blocking and shaping before it becomes a masterpiece. Remove your canvas from stretcher bars and dampen it lightly with water. Pin the canvas onto blocking tools or a padded board, stretching each corner to restore its original square shape.
This shaping technique corrects any distortion from canvas stitching. Maintain even tension control throughout the blocking process, allowing your needlepoint to dry completely flat.
Framing, Pillows, and Decorative Uses
Once you’ve blocked your needlepoint properly, you’re ready to transform it into beautiful Home Decor pieces. Framing Techniques include pinning your canvas to foam board for professional Wall Hangings, while Pillow Designs require sturdy backing fabric and careful stuffing.
Create Decorative Ornaments, trays, or door stops that showcase your Canvas Stitching skills. The Needlepoint Community loves sharing creative Needlepoint Finishing Projects ideas online.
To further refine your projects, consider exploring needlepoint home decor ideas for inspiration and guidance.
Adding Finishing Touches and Bindings
Your needlepoint project needs proper finishing to truly shine. Clean edges make all the difference between amateur and professional-looking work. Start by trimming excess canvas, leaving about half an inch around your stitched area. The waste knot method helps secure final threads without creating lumps.
- Needlepoint Binding Methods: Use blanket stitch or overcast stitch for clean edges
- Edge Stitching Techniques: Work consistently around perimeter for uniform appearance
- Acrylic Coating Applications: Apply thin layers for waterproof, durable surface protection
- Leather Finishing Options: Attach backing for purses, belts, or book covers
- Final Thread Management: Weave loose ends through back stitches securely
Frequently Asked Questions (FAQs)
What are some common types of yarn and thread used in needlepoint?
You’ll work with wool, cotton, and silk threads most often.
**Wool provides excellent coverage and durability.
Cotton offers crisp definition for detailed work.
**
Silk adds luxurious shine and smooth texture to your finished pieces.
What size needle should I use for my needlepoint project?
Grab a tapestry needle, usually size 18 or 20 for most canvases. If your mesh is finer, like a secret agent’s disguise, go smaller—size Test fit first; no wrestling matches needed!
How can I block my finished needlepoint project to restore its shape?
Lay your project face down on a towel, mist lightly with water, and gently stretch to shape. Pin the edges, let it dry flat overnight. Think of it as coaxing your canvas back in line!
Where can I find free needlepoint charts to download and print?
You’ll find free charts at sites like Pinterest, Cyberstitchers, and Needlepoint.org. Download, print, and stitch away—think of it as a treasure hunt for patterns.
Don’t forget to check community forums for hidden gems!
How do I secure the threads on the back of my needlepoint canvas?
Secure stray strands by stitching over them like tucking secrets under a rug. Snip the tail, slide it under nearby stitches, and let your canvas’s backside look as neat as a librarian’s bookshelf.
How long should needlepoint projects last?
Needlepoint projects can last for decades if you use sturdy threads and finish them well.
Treat them like family heirlooms—keep them away from direct sunlight and moisture, and you’ll enjoy their charm for years.
Can needlepoint canvas get wet or damaged?
If your canvas takes a dip or gets splashed, it can warp, fade, or even unravel. Treat it like a treasured recipe card—keep it dry, and store finished pieces away from damp or sunlight.
How do you fix mistakes in stitching?
Just gently pull out the wrong stitch using your needle tip. **Re-thread if needed, and stitch again.
Think of it as a do-over—like rewinding a movie scene you want to perfect.
What causes thread to tangle while stitching?
Thread tangles when you use too long a strand, rush your stitches, or twist the needle too much.
Try shorter pieces, smooth out knots gently, and let your thread dangle now and then to unwind.
How do you store unfinished needlepoint work?
Like tucking away a half-read book, gently roll your unfinished piece, wrap it in a clean towel, and stash it in a zip-top bag. **Store your threads separately to dodge tangles and dust bunnies.
Conclusion
They say, “Practice makes perfect,” and that’s true for how to needlepoint sew. You’ve learned how to pick your tools, set up your canvas, and master basic stitches.
Now, keep your yarn smooth and tension steady. Don’t worry if your first project isn’t faultless—every stitch builds your skill.
Try new designs and colors as you go. With patience and practice, you’ll create needlepoint pieces you’re proud to show off.
- https://needlepoint.com/blogs/needlepoint-know-how/5-basics-for-beginners-to-learn-about-needlepoint
- https://pennylinn.com/blogs/news/the-basic-stitches
- https://www.youtube.com/watch?v=a3-DZ7VVQEM
- https://lindehobby.com/the-ultimate-guide-to-needlepoint-canvas-1670/
- https://www.unwind.studio/collections/needlepoint-stitching-tools


