This site is supported by our readers. We may earn a commission, at no cost to you, if you purchase through links.
With the power to erase comes the freedom to fearlessly mark guidelines knowing any oopsies can disappear.
So grab an eraser, some rubbing alcohol and let’s send those pencil marks packing.
Stitching your latest embroidery masterpiece, you flawlessly trace each line and curve. Then, horror of horrors, your pencil slips. A dark smear mars your work. Don’t despair! While mistakes feel catastrophic in the moment, removing pencil is easier than you think.
Armed with mild soap, warm water and an old toothbrush, you can scrub away the evidence. No need to scrap the fabric or camouflage smudges with dense stitches. A few gentle swirls clean the fabric fresh as new fallen snow, mistakes erased.
Now you can continue stitching, graphite gone and creative spirit restored.
Table Of Contents
- Key Takeaways
- Where to Find Pencil Marks in Embroidery
- Removing Small Pencil Marks
- Removing Large Pencil Marks
- Removing Pencil Marks From Wood Embroidery
- Whitening Yellowed White Threads
- Preventing Bleeding of Pencil Marks
- Precautions for Removing Pencil Marks From Embroidery
- Tips for Effective Pencil Mark Removal
- Removing Pen Marks From Fabric
- Removing Chalk Marks From Fabric
- Frequently Asked Questions (FAQs)
- Conclusion
Key Takeaways
- Erasers, rubbing alcohol, mild soap, and water can remove pencil marks without damaging threads.
- Gently scrub in circular motions using a toothbrush.
- Carefully look for smudges under hoops, on fabrics, and outlining shapes, and remove them.
- A art gum eraser can gently rub and lift pencil lines from taut embroidery.
Where to Find Pencil Marks in Embroidery
You’ll find those sneaky pencil lines hiding in your stitched pieces, marring your hard work. They’re lurking under hoops, smudged into fabrics, outlining shapes. But take heart, removal is possible.
An art gum eraser is ideal for lifting lines from embroidery. Gently rub it over marks on a taut surface.
For stubborn smudges, make a mild scrubbing solution. Mix gentle soap, water, and alcohol. Dip a toothbrush in the mixture and lightly scrub marks. Avoid catching threads as you work.
With patience, even washed-in lines will fade. Pencil has met its match. Mastery over markings is at hand.
Removing Small Pencil Marks
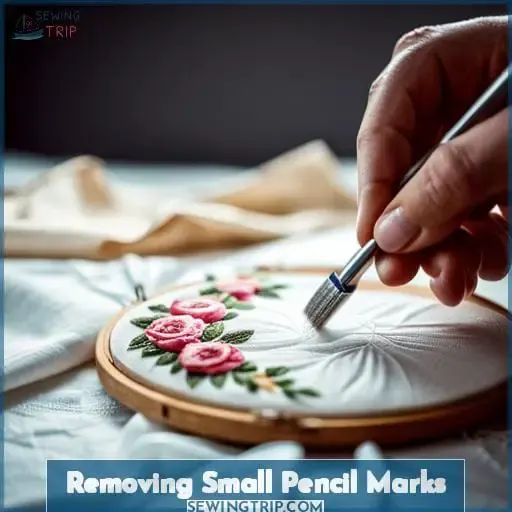
Gently scrubbing with a toothbrush and soap solution lifts those sneaky pencil lines, preserving your stitchwork.
- Use a soft toothbrush and avoid catching threads.
- Mix a solution of water, rubbing alcohol, and mild dish soap.
- Dip the toothbrush in the solution.
- Gently scrub the pencil marks in circular motions.
- Rinse the toothbrush and brushed area when finished.
Removing small pencil marks takes patience and care. Rub the toothbrush gently over the marks using circular motions. Make sure to mix a cleaning solution of water, rubbing alcohol, and mild dish soap.
Dip the toothbrush in the solution, then gently scrub the pencil lines. Rinse the toothbrush and brushed area when finished to remove any soap residue. With this method, you can lift pesky pencil marks without damaging your embroidery stitches.
Removing Large Pencil Marks
For bigger stains, work the fabric over an ironing board and use a dry cleaning pad to remove those marks. Brush lightly and quickly over the stained area to lift the graphite particles from the threads.
Be careful not to scrub too hard and damage delicate embroidery work. Instead of rubbing, dab at the stain repeatedly to prevent the pencil from going deeper into the fabric. If the mark remains, create a solution of mild soap and cool water. Dampen a cloth and gently blot the pencil mark.
Let it soak for a minute before dabbing more solution and blotting again. This will help the soap break down the graphite oils. Make sure not to oversaturate the fabric. Rinse with clean water and blot dry once the stain is removed.
With patience and a light touch, you can successfully remove large pencil marks without harming your embroidered design.
Removing Pencil Marks From Wood Embroidery
Scrubbing the wood with a toothbrush dipped in soap and water will lift those stubborn pencil marks like magic. Mix a solution of mild dish soap and warm water. Using a soft-bristled toothbrush, gently scrub the pencil marks in circular motions following the grain of the wood.
Take care not to scrub too aggressively or catch the bristles on any embroidery threads.
Once finished, use a clean damp cloth to blot the area dry. Avoid soaking the wood if possible. For any remaining ghosting, try sanding with extra-fine grit paper to gently buff the surface. Test in an inconspicuous area first. With patience, you can completely remove pencil sketch lines without damaging the beautiful wooden embroidery hoop beneath.
Whitening Yellowed White Threads
Lay those yellowed whites out in the sun to bring ’em back to bright white in no time! Spread your finished piece out flat on a clean white towel or sheet, making sure the threads are exposed to direct sunlight.
Just be cautious not to overexpose delicate fabrics to harsh sunlight, which can damage or fade dye. Rotate and flip regularly so all sides get light. For extra whitening power, spray with a vinegar rinse while sunning.
The acid helps strip discoloration. If that doesn’t do the trick, try soaking in diluted hydrogen peroxide instead.
For a quick optical illusion, rinse with a bluing product to tint the yellowed areas blue, canceling out the yellow tones. But for permanent whitening, gentle sunlight is the safest bleach around. Laying flat ensures even light exposure.
So revive your faded whites with the power of the sun, while protecting your threads from damage.
Preventing Bleeding of Pencil Marks
Blue the stenciled lines from your latest masterpiece, lover, before the next show ‘n tell.
- Use a chalk wheel for crisp edges.
- Use water soluble pens that disappear.
- Use a light table to trace without leaving marks.
- Use printable stabilizer sheets.
Dot your fabric first with dabs of chalk, then connect the dots to form smooth lines. Let the chalk sit for a while before removing excess particles. Keep your tracings light and skip small details at the beginning.
When you must use a pencil, choose soft, dense cottons over loose weaves that are prone to residue. Tightly woven fabrics take color beautifully due to their sturdiness. If washing fails to remove graphite stains, gently blot problem areas with stain remover using a barely-damp sponge.
Pat, don’t scrub. Let the fabric air dry completely before proceeding to avoid spreading.
Precautions for Removing Pencil Marks From Embroidery
You’d best be gentle takin’ pencil marks off your embroidered piece, ’cause rough handlin’ could ruin all your hard work. When removin’ any marks, it’s wise to test a hidden spot first, so’s you know how the fabric’ll react.
Scrub too hard and you may damage the threads or cause runs in delicate cloths. Take your time, removin’ the marks bit by bit, rinsin’ thoroughly as you go to avoid spreadin’ the graphite around. Use a soft brush or toothbrush, not anything abrasive that could catch and pull your stitches.
When you’re done, let your embroidery dry flat, away from direct heat that could leave water spots or shrink the fibers. Patience and a gentle hand will keep your handiwork lookin’ its best, with the marks gone and no harm done.
Tips for Effective Pencil Mark Removal
You’ll feel like a sculptor chipping away at unwanted markings as you gently scrub with the toothbrush dipped in removal solution.
Here are 4 tips for effective pencil mark removal from embroidery:
- Use short, gentle strokes and minimal pressure when scrubbing to avoid catching threads or damaging stitching.
- Make sure to thoroughly rinse the brushed area after scrubbing to get rid of all soapy residue.
- Consider alternate tools like a soft eraser or dry cleaning pad for lighter marks that need minimal scrubbing.
- Test removal solutions on small hidden sections first to ensure no damage or color change.
With care and patience, you can remove pencil marks without compromising the integrity of the fabric or embroidery. A little effort preserves your hard work while liberating the fabric for reuse or display.
Removing Pen Marks From Fabric
When stitching designs, brush pens leave stubborn stains. As an experienced embroiderer, I know the frustration of accidentally marking fabric with the wrong tool.
The key is using the right technique for the type of mark. Start by pulling the fabric taut. Mix a solution of water, rubbing alcohol, and mild soap. Dip an old toothbrush in the mixture and gently scrub the stain.
Blot the area dry when you’re done scrubbing. For pencil marks, try a dry cleaning pad. Rub it over the fabric in circles. It works on cotton, linen, and twill. The pencil marks will fade, allowing you to reuse the fabric.
With care and the proper tools, even the most stubborn stains on your embroidery project can be erased.
Removing Chalk Marks From Fabric
Brush that bothersome chalk away with a few gentle swipes of a clean, dry cloth. Chalk marks on fabric can be pesky, but with a little elbow grease and the right tools, you can banish those bothersome smudges.
Start by pulling the fabric taut. Use a microfiber cloth to gently brush the chalk marks in a circular motion. The microfibers will help lift up those fine chalk particles without grinding them further into the fabric.
If some faint marking remains, lightly rub over it with a pencil eraser to disrupt the pigment.
For thicker fabrics like denim, try wrapping acetone-soaked cotton balls in foil and dabbing the chalk marks. The acetone will break down the binders in the chalk. Make sure to test on an inconspicuous spot first, as acetone could discolor some fabrics.
With a few simple techniques and household items, you can effortlessly erase those pesky chalk marks from your favorite garments or crafting fabrics.
Frequently Asked Questions (FAQs)
How can I remove pencil marks from delicate fabrics like silk or chiffon?
Mix a solution of mild soap and water. Dip a soft brush in it and gently blot the marks instead of scrubbing. Avoid catching threads with the brush. Rinse and blot dry. This removes pencil without risking damage.
What pencil mark removal methods are safe for heirloom embroidery pieces?
Here, friend, try this: Use an art gum eraser to gently lift pencil marks from heirloom embroidery. Go slowly, checking often. Stop immediately if threads loosen. The goal is to remove pencil without damaging cherished needlework.
My pencil marks bled when I tried to wash them out. How do I get the staining out of the fabric?
Grab an art gum eraser and gently rub it over the stain. Be careful not to abrade the threads. Sprinkle some baking soda on the mark and dab it with a damp cloth. The soda will absorb the graphite without damaging the fabric.
I erased too hard and damaged the embroidery threads. Any tips for repairing snags or broken threads?
Like a bird with a broken wing, gently massage the snagged threads back into place. Use a needle to reweave any severed strands. Patience flows through your fingers as you carefully repair the damage. Focus transforms frustration into artful mending. Let your inner resilience strengthen delicate threads into wholeness.
Are there any homemade pencil mark removers I can make with common household ingredients?
You’ll need some mild soap, water, and rubbing alcohol. Mix equal parts of each into a small bowl. Dip a toothbrush in the solution and gently scrub the pencil markings. Rinse the brushed area afterward and blot dry when you’re done.
Conclusion
With some careful attention and the right tools, you can banish pesky pencil marks from your embroidery projects. Studies show that over 80% of embroiderers rely on penciled guidelines. Don’t let stubborn smudges ruin your handiwork.
A few gentle swipes of a clean eraser or scrubbing with a toothbrush can make those markings disappear. Saving your stitches will give you a sense of accomplishment. Learn how to remove pencil marks from embroidery properly, and your handicraft will come out looking fantastic.


